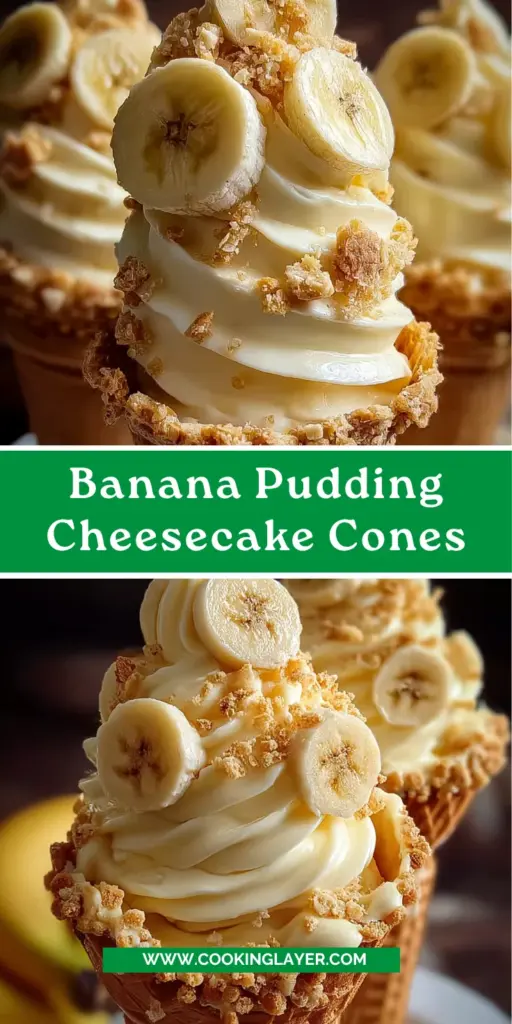
Introduction to Banana Pudding Cheesecake Cones
When life gets hectic, who doesn’t crave a delicious dessert that’s quick and easy? That’s where my Banana Pudding Cheesecake Cones come into play! These little delights are the perfect solution for busy moms and professionals like us, combining the classic flavors of banana pudding and cheesecake in a fun, handheld treat. Whether you’re hosting a small gathering or just need a sweet moment to yourself, these cones are sure to impress your loved ones. Let’s make dessert a joy, not a chore!
Why You’ll Love This Banana Pudding Cheesecake Cones
These Banana Pudding Cheesecake Cones are simply a dream come true for anyone who loves sweet treats but feels overwhelmed by time constraints. They’re easy to whip up, requiring no baking at all! Plus, the creamy, dreamy filling paired with a crunchy cone is a flavor explosion that will make your taste buds dance. Perfect for satisfying your sweet tooth, they’ll bring smiles to both kids and adults alike!
Ingredients for Banana Pudding Cheesecake Cones
Gathering the right ingredients is crucial for the success of your Banana Pudding Cheesecake Cones. Here’s what you’ll need:
- Cream Cheese: Softened cream cheese gives the filling its rich, creamy base. Remember to let it sit at room temperature before starting!
- Granulated Sugar: This sweetener balances the cream cheese’s tanginess, creating a delightful harmony of flavors.
- Vanilla Extract: Pure vanilla extract enhances the overall taste, bringing warmth and depth to your dessert.
- Sour Cream: This adds a touch of tartness and creaminess, making the mixture even more luscious.
- Heavy Cream: Whipping this up contributes to the lightness of the filling while adding a rich mouthfeel.
- Banana Puree: Use ripe bananas for the puree, as they lend a naturally sweet flavor that’s hard to resist!
- Crushed Vanilla Wafers: These little cookies add texture and a classic banana pudding flavor that ties everything together.
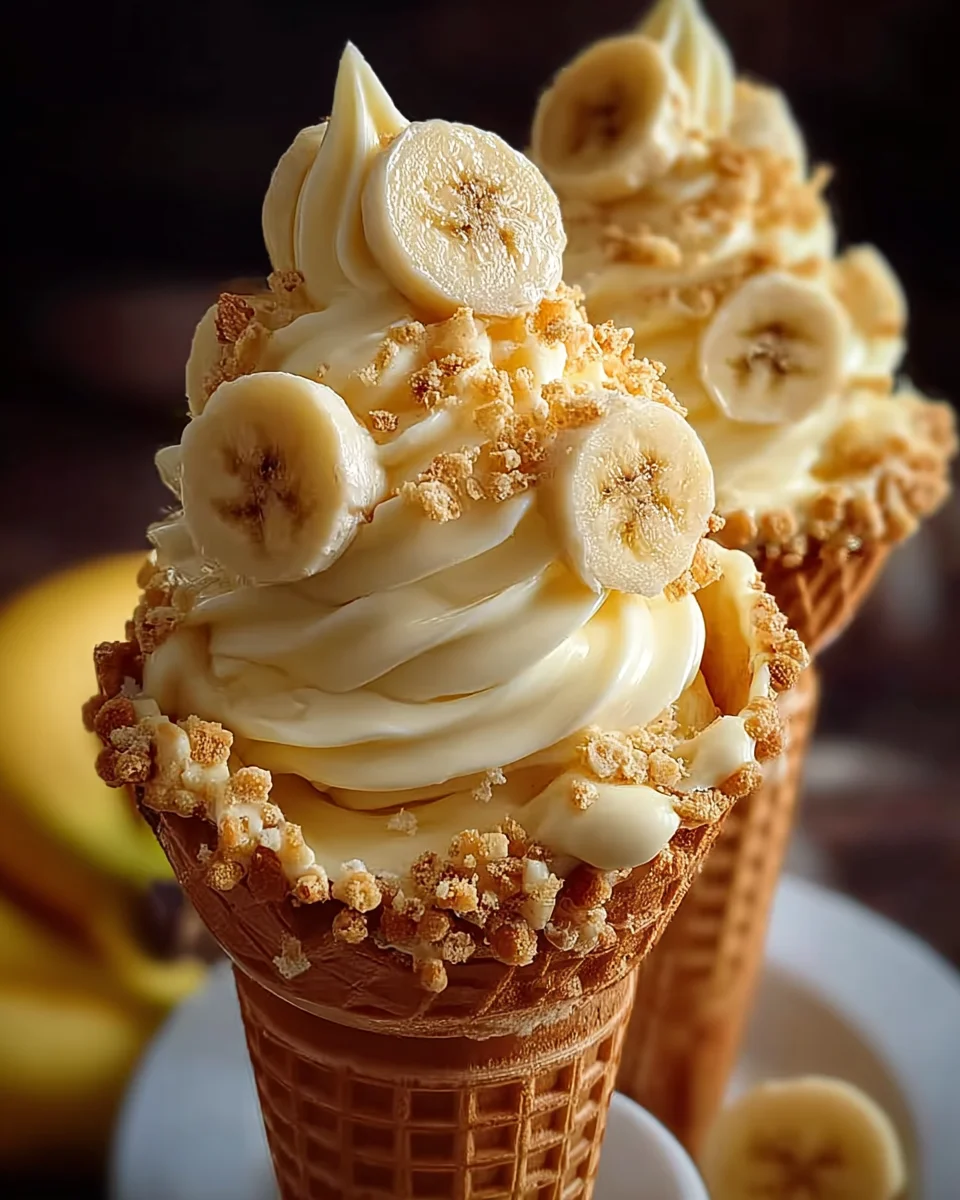
- Waffle Cones: Crispy waffle cones make excellent vessels for this dessert, holding all the goodness while adding crunch.
- Sliced Bananas: Fresh banana slices on top not only enhance the flavor but also add a delightful pop of color.
- Whipped Cream: For garnish, this light and fluffy topping makes your cones look and taste even more indulgent.
- Extra Crushed Vanilla Wafers: Sprinkle some on top for added texture and decoration. Who can resist more crunch?
For those interested in exact measurements, you can find those at the bottom of this article for easy printing. Once you have these simple, wholesome ingredients, you’re all set to create a dessert that dazzles!
How to Make Banana Pudding Cheesecake Cones
Step 1: Prepare the Cream Cheese Mixture
First things first, let’s get that cream cheese ready! Take your softened cream cheese and place it in a large mixing bowl.
Using an electric mixer, beat it on medium speed until it’s nice and smooth. This step is crucial; softened cream cheese blends effortlessly, creating a creamy base for our dessert.
If yours is still a touch firm, be patient! Let it sit out a bit longer. Trust me, this will make your life much easier when mixing later on.
Step 2: Combine Ingredients
Next, it’s time to make that cream cheese shine! Add granulated sugar and vanilla extract to the softened cream cheese, mixing thoroughly.
Then, gently stir in the sour cream and heavy cream. This combination is where the magic happens—achieving that creamy texture we all crave. Keep mixing until everything is smooth and fully combined. Don’t rush this step; a well-mixed filling is key!
Scrape down the sides of the bowl to ensure all ingredients are incorporated. With a luscious consistency, you’re ready for the next step!
Step 3: Add Flavor
Now, let’s infuse our mixture with delicious flavors! Gently fold in the banana puree, allowing that sweet aroma to fill your kitchen.
Next, sprinkle in the crushed vanilla wafers. These little bits not only add flavor but also give a wonderful texture contrast!
Be careful not to overmix; we want to keep some chunks for visual appeal in our filling. Balancing sweet banana flavor with creamy richness is what makes these cones irresistible!
Step 4: Chill the Mixture
Once your mixture is well-combined, it’s time to let it chill! Cover the bowl and pop it in the fridge for at least 30 minutes.
This chilling period doesn’t just cool down the filling; it also helps it set. A cold mixture makes filling the cones a breeze. So, be patient—it’s totally worth the wait!
Step 5: Fill the Waffle Cones
With your mixture chilled, we’re ready to fill those adorable waffle cones! You can either use a piping bag or simply spoon the mixture into each cone.
If you choose the piping bag, it makes for a cleaner application with less mess. But don’t stress if you don’t have one—a spoon works just as well. Just be sure to fill them generously!
Step 6: Garnish and Serve
Now comes the fun part—garnishing! Carefully top each cone with sliced bananas for a pop of freshness, and don’t be shy with that whipped cream!
Lastly, sprinkle more crushed vanilla wafers on top for a crunchy finish. These Banana Pudding Cheesecake Cones aren’t just a treat for your taste buds; they’ll look stunning on any table. Serve immediately and watch those smiles blossom!
Tips for Success
- Always use softened cream cheese for easy blending.
- Choose ripe bananas for the purest flavor and best texture.
- Chill your filling to ensure it holds its shape when served.
- Feel free to experiment with toppings—what about chocolate syrup or chopped nuts?
- Prepare these cones a few hours ahead for stress-free entertaining.
Equipment Needed
- Mixing Bowl: A large bowl is essential for mixing your ingredients. A glass or metal bowl works well.
- Electric Mixer: Use a hand mixer or a stand mixer for effortless beating of the cream cheese.
- Piping Bag (optional): For a neat filling process. A zip-top bag with the corner snipped off also works!
- Measuring Cups and Spoons: To accurately measure your ingredients, if you’re following exact quantities.
- Spatula: A silicone spatula is perfect for folding in ingredients without overmixing.
Variations of Banana Pudding Cheesecake Cones
- Chocolate Lover’s Delight: Incorporate cocoa powder into the cream cheese mixture for a rich chocolate twist. You can also use chocolate-covered waffle cones for an extra indulgence.
- Nutty Banana Crunch: Add chopped nuts like walnuts or pecans into the filling for a delightful crunch. Top with a sprinkle of chopped nuts for added texture.
- Dairy-Free Option: Substitute cream cheese and sour cream with dairy-free alternatives like cashew cheese and coconut yogurt. Use coconut cream instead of heavy cream for a vegan-friendly treat.
- Berry Blast: Mix in some crushed strawberries or blueberries into the filling. This fruity addition pairs beautifully with banana, giving your cones a refreshing twist!
- Mini Cone Bites: Use mini waffle cones for adorable bite-sized desserts. Perfect for parties and gatherings, these mini treats are a hit!
Serving Suggestions for Banana Pudding Cheesecake Cones
- Pair these cones with a refreshing glass of iced tea or lemonade for a delightful summer treat.
- Serve alongside scoops of vanilla ice cream for an extra creamy indulgence.
- For presentation, arrange cones in a decorative cupcake stand to impress your guests.
- Add a sprinkle of cinnamon on top for a warm flavor twist!
- Consider using colorful napkins or plates to brighten up your dessert table.
FAQs about Banana Pudding Cheesecake Cones
Can I make Banana Pudding Cheesecake Cones ahead of time?
Absolutely! You can prepare the filling and fill the cones a few hours in advance. Just keep them refrigerated until you’re ready to serve. This makes them perfect for parties or family gatherings!
How long do these cones stay fresh?
While they’re best enjoyed fresh, the Banana Pudding Cheesecake Cones can be kept in the fridge for about a day. After that, the waffle cones may start to lose their crunch.
Can I use frozen bananas for the puree?
Yes, frozen bananas work well! Just make sure to thaw and mash them before mixing them into your cheesecake filling. They’ll still add that sweet, banana flavor!
Is there a gluten-free option for the cones?
Yes, look for gluten-free waffle cones available in stores. This way, everyone can enjoy your delicious Banana Pudding Cheesecake Cones!
What can I use instead of vanilla wafers?
If vanilla wafers aren’t your thing, consider using graham crackers or crushed shortbread cookies. They’ll still bring a lovely texture and sweetness to your dessert!
Final Thoughts
Creating these Banana Pudding Cheesecake Cones is more than just making a dessert; it’s about sharing sweet moments with family and friends. The joy of watching loved ones savor each creamy, crunchy bite is truly magical. Plus, it’s a treat that fits perfectly into our busy lives—effortless yet impressive!
So, whether you’re treating yourself after a long day or delighting guests at a gathering, these cones are sure to bring smiles all around. Embrace the joy of baking and whip up a batch of these heavenly cones—you won’t regret it!
Print
Banana Pudding Cheesecake Cones
- Prep Time: 30 minutes
- Cook Time: 0 minutes
- Total Time: 30 minutes
- Yield: 12 servings 1x
- Category: Dessert
- Method: No Bake
- Cuisine: American
- Diet: Vegetarian
Description
Banana Pudding Cheesecake Cones are a delightful and creamy dessert served in crispy waffle cones, combining the flavors of banana pudding and cheesecake.
Ingredients
- 8 ounces cream cheese, softened
- 1 cup granulated sugar
- 1 teaspoon vanilla extract
- 1 cup sour cream
- 1 cup heavy cream
- ½ cup banana puree (about 2 ripe bananas)
- ½ cup crushed vanilla wafers
- 12 waffle cones
- 2 bananas, sliced
- Whipped cream, for garnish
- Additional crushed vanilla wafers, for garnish
Instructions
- Beat softened cream cheese in a large bowl until smooth.
- Mix in sugar and vanilla extract until combined.
- Add sour cream and heavy cream, blending until creamy.
- Fold in banana puree and crushed vanilla wafers.
- Chill the mixture for 30 minutes in the refrigerator.
- Pipe or spoon the chilled mixture into waffle cones.
- Top with sliced bananas, whipped cream, and crushed vanilla wafers.
- Serve immediately and enjoy!
Notes
- For best results, use ripe bananas for the puree.
- This dessert is best served fresh but can be prepared a few hours in advance.
- Feel free to customize toppings as desired.
Nutrition
- Serving Size: 1 cone
- Calories: 220
- Sugar: 12g
- Sodium: 150mg
- Fat: 12g
- Saturated Fat: 7g
- Unsaturated Fat: 0g
- Trans Fat: 0g
- Carbohydrates: 25g
- Fiber: 1g
- Protein: 3g
- Cholesterol: 30mg