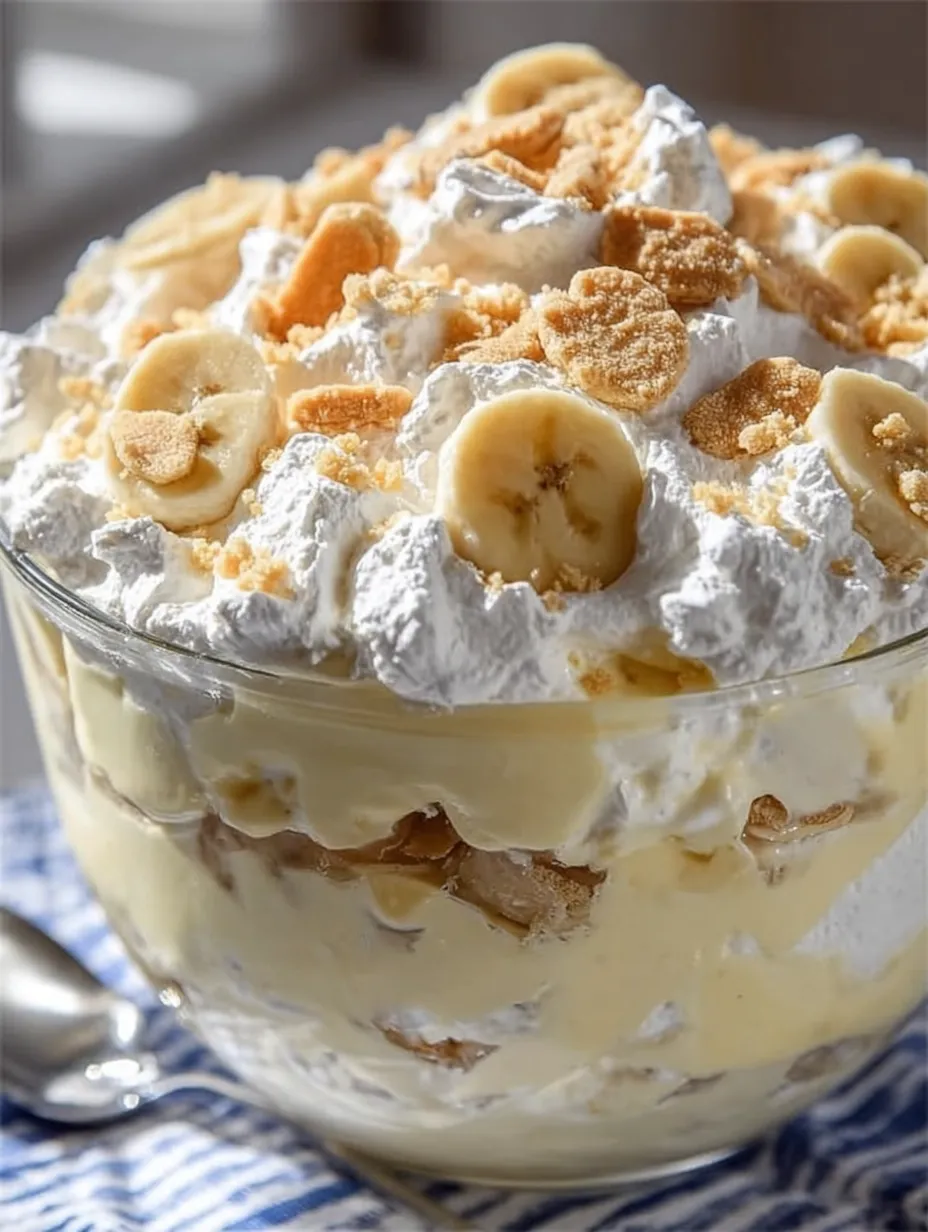
There’s something so nostalgic about a big glass bowl filled with creamy, dreamy banana pudding. If you grew up in the South or have ever been lucky enough to attend a Southern gathering, chances are you’ve tasted a version of this classic dessert. But let’s be real: not all banana puddings are created equal. The one in the picture above? That’s the one. It’s thick, fluffy, and full of flavor—with silky pudding, fresh bananas, clouds of whipped topping, and that unbeatable crunch from Nilla wafers.
Sound like heaven? You’re in the right place. This isn’t just a banana pudding recipe. This is a full dessert experience.
Why This Banana Pudding Stands Out
You’ve probably seen (or made) dozens of banana puddings before. So, what makes this one special?
- Texture, texture, texture — It’s not just creamy. It’s got that layered goodness where soft bananas meet crunchy wafers and melt-in-your-mouth pudding.
- No baking involved — That’s right. No oven required. Just mix, layer, and chill.
- Richness elevated with cream cheese — Optional, but seriously, try it once and thank us later.
- Looks as good as it tastes — Just look at that beautiful layered bowl!
And the best part? It’s super simple. This is a foolproof recipe that even beginners can whip up with confidence.
The Southern Legacy of Banana Pudding
Banana pudding isn’t just a dessert; it’s a Southern tradition. Found at potlucks, church dinners, family reunions, and holiday tables across the South, this dish has stood the test of time. Originally developed as a way to showcase bananas—once considered an exotic fruit in the U.S.—this dessert quickly evolved into a comfort food favorite.
Back in the day, the pudding was cooked on the stovetop. But modern times (and instant pudding) have made it way easier while keeping all the flavor. That’s what we’re going for here: classic taste with 2020s ease.
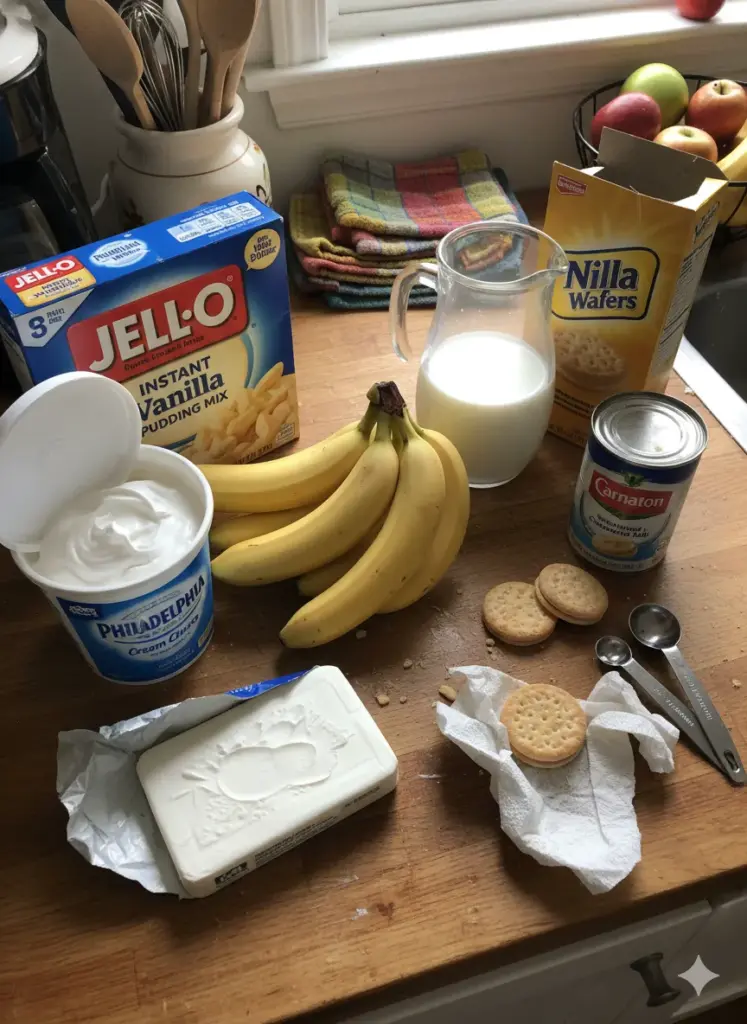
What You’ll Need: Ingredients Breakdown
Let’s break it down layer by layer so you know exactly what you’re working with.
Pudding Layer Must-Haves
- 1 box (5.1 oz) instant vanilla pudding mix
- 2 ¾ cups cold milk – Whole milk works best for richness.
- 1 can (14 oz) sweetened condensed milk
- 1 tsp vanilla extract
- 1 block (8 oz) cream cheese, softened – Optional, but adds incredible texture.
Whipped Cream Layer
- 1 large tub (16 oz) Cool Whip, thawed – Half goes into the pudding, the rest on top.
Crunchy & Fruity Additions
- 4–5 bananas, sliced – Not too ripe!
- 1 box (11–12 oz) Nilla Wafers – Use some whole, some halved, some crushed.
Optional But Irresistible: Cream Cheese for Richness
Let’s pause and talk about cream cheese for a second.
Yes, it’s optional. But honestly, once you try it, you’ll never skip it again. Cream cheese gives the pudding a thicker, more luscious texture that holds its shape beautifully, especially after chilling. Plus, it tones down the sweetness just a touch, balancing the overall flavor. If you’re going for Southern grandma-level banana pudding, this is your secret weapon.
Choosing the Right Bowl: Trifle Bowl or Bust
Presentation matters, especially for a dessert this beautiful. A clear trifle bowl is perfect because it shows off every delicious layer: the pudding, bananas, wafers, and whipped topping. If you don’t have one, any deep glass bowl will do. But trust us—people eat with their eyes first. This dessert needs to be seen.
Step-by-Step Instructions
Ready to dive in? Here’s exactly how to make this masterpiece.
Mixing the Pudding Layer
Start by whisking your instant vanilla pudding with 2 ¾ cups cold milk in a large bowl. Keep whisking for about 2 minutes until it starts to thicken.
Next, stir in the sweetened condensed milk and vanilla extract. This is where that rich, sweet base flavor comes in. Don’t rush it—make sure it’s super smooth and lump-free.
Incorporating Cream Cheese (Optional)
If using cream cheese (highly recommended!), beat the softened block until it’s creamy and smooth. You can do this in a separate bowl with a hand mixer. Once it’s soft, slowly add your pudding mixture in and continue to mix until fully blended.
No lumps. Just pure creamy goodness.
Folding in the Cool Whip
Take about 2 cups of Cool Whip and gently fold it into your pudding mixture. Don’t stir too aggressively—folding helps keep that fluffy, airy texture intact.
Refrigerate the pudding layer for 10–15 minutes to help it set up slightly before layering.
Layering Like a Pro
Now the fun part begins!
In your trifle bowl:
- Crushed Nilla wafers at the bottom—this soaks up the pudding and forms a soft base.
- Thick pudding layer – Spread a generous layer over the wafers.
- Sliced bananas – Lay them neatly, side-by-side, for full banana flavor in each bite.
- Whole or halved wafers – Press them gently into the pudding.
- Layer of Cool Whip – Fluffy, dreamy topping to contrast the creamy pudding.
Repeat these layers until your bowl is full, ending with a final layer of Cool Whip on top.
Finishing Touches
This is where the wow factor happens.
Add:
- Fresh banana slices (just a few for beauty—don’t overload or they’ll brown).
- Crushed Nilla wafers for texture.
- A few whole wafers standing upright for that iconic look.
Just like in the image—golden, creamy, and topped to perfection.
Chilling Time: Why You Shouldn’t Skip It
Here’s the deal—if you want that thick, scoopable, picture-perfect banana pudding, you have to chill it. At least 2–4 hours, but honestly, overnight is best. This gives the wafers time to soften just enough to blend with the pudding, and it allows all those layers to settle beautifully.
During this time:
- The pudding thickens to that velvety consistency.
- The bananas infuse the dessert with their natural sweetness.
- The flavors marry together, becoming richer and more balanced.
Trust the process. The wait is worth every single creamy bite.
Texture Heaven: Crunchy Meets Creamy
Banana pudding is all about the contrast. You’ve got:
- Silky pudding
- Fluffy whipped topping
- Soft, sweet banana slices
- Crunchy (or slightly softened) vanilla wafers
Every spoonful gives you a little bit of each texture, and that’s what keeps you going back for more. It’s like a dessert symphony in your mouth—smooth, light, sweet, and slightly crumbly. Comfort food and sensory joy all in one dish.
Banana Browning Hack: Keeping It Fresh
No one likes brown bananas in their pudding. To keep your bananas looking fresh and pretty (especially the ones on top), here are a few hacks:
- Toss slices in lemon juice – Just a light coating to slow oxidation.
- Ascorbic acid or Fruit Fresh – Available in the canning aisle; great for preserving color.
- Cover the top bananas completely with whipped cream – Less air exposure = less browning.
- Use bananas that are ripe but still firm – Avoid overripe ones with spots.
This way, your pudding stays camera-ready and appetizing.
Make-Ahead Magic: When to Prepare
One of the best things about this dessert? It’s a perfect make-ahead option. You can prepare it the night before and just chill it overnight. It actually tastes better the next day, once all the ingredients have time to meld together.
Make sure to:
- Cover the bowl with plastic wrap to avoid fridge smells.
- Add any decorative banana slices or wafers on top just before serving.
Hosting a party? This is your go-to dessert. All the work is done ahead of time.
Serving Suggestions: More Than Just a Spoon
Of course, you can serve this the classic way—scoop into a bowl, maybe with a spoonful of extra whipped cream. But if you want to wow your guests, try these fun ideas:
- Mini mason jar servings – Great for parties or BBQs.
- Individual cups layered like parfaits – Easy to grab and go.
- Serve with a caramel drizzle – Adds a rich depth of flavor.
- Top with toasted coconut flakes or chopped pecans – For texture lovers.
The possibilities are as endless as your creativity.
Perfect Pairings: What to Serve With Banana Pudding
This dessert plays well with others. Pair it with:
- Iced sweet tea or lemonade – Southern staples.
- Barbecue or grilled foods – Makes the perfect end to a summer cookout.
- Coffee or espresso – The creamy sweetness contrasts beautifully.
- Fresh fruit platters – For a refreshing balance.
And of course, it’s fabulous all on its own.
Print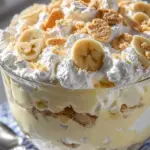
Classic Layered Banana Pudding Dessert
- Prep Time: 20 minutes
- Total Time: 2 hours 20 minutes–4 hours 20 minutes
- Category: Dessert – No-Bake Banana Pudding / Southern Classic Dessert
Description
🍌 A dreamy, silky, Southern-style banana pudding layered with creamy pudding, fluffy whipped topping, fresh bananas, and crunchy vanilla wafers. Every spoonful feels like pure comfort! 🤍✨
Ingredients
Pudding Layer:
1 box (5.1 oz) instant vanilla pudding
2 ¾ cups cold milk
1 can (14 oz) sweetened condensed milk
1 tsp vanilla extract
1 block (8 oz) cream cheese, softened (optional for extra richness)
Whipped Layer:
1 large tub (16 oz) Cool Whip, thawed
Add-Ins:
4–5 bananas, sliced
1 box (11–12 oz) Nilla Wafers (whole, broken, and crumbs)
Topping:
Extra banana slices
Crushed Nilla wafers
Whole Nilla wafers
Instructions
In a large bowl, whisk the instant pudding with cold milk for 2 minutes until thickened. (⏱️ Duration: 3 minutes)
Add the sweetened condensed milk and vanilla extract, stirring until smooth. (⏱️ Duration: 1 minute)
If using cream cheese, beat until smooth and fold it into the pudding mixture for a thicker, richer texture. (⏱️ Duration: 2 minutes)
Fold in 2 cups of Cool Whip to make the pudding extra silky. Chill for 10–15 minutes to firm up. 😍🍮 (⏱️ Duration: 15 minutes chill)
Begin layering in a trifle dish: crushed wafers, a thick layer of pudding, banana slices, whole or halved wafers, and a generous layer of Cool Whip. Repeat until full, finishing with Cool Whip on top. 🍌✨ (⏱️ Duration: 10 minutes)
Add the final touches: banana slices, wafer crumbs, and whole wafers for decoration. 🤍🍪 (⏱️ Duration: 3 minutes)
Refrigerate for 2–4 hours (or overnight) to let the layers set beautifully. ❄️ (⏱️ Duration: 2–4 hours chill)
Notes
Nutrition
- Serving Size: 10–12
- Calories: ~320 kcal per serving
Storage Tips: Save It for Later (If You Can!)
Got leftovers? Here’s how to store them:
- Refrigerator: Keep in an airtight container or covered bowl. It’s best within 2–3 days.
- Avoid freezing: The texture changes (bananas go mushy, whipped topping separates).
Pro tip: If you know you’ll have leftovers, avoid adding bananas to the top layer. Add fresh ones right before serving again to keep it looking and tasting fresh.
Fun Variations for the Adventurous Baker
Want to remix your banana pudding game? Try one of these delicious spins:
- Chocolate Banana Pudding – Add a layer of chocolate pudding or chocolate shavings.
- Peanut Butter Banana Pudding – Swirl in some peanut butter between layers.
- Biscoff Banana Pudding – Replace Nilla wafers with Biscoff cookies for a spiced twist.
- Strawberry-Banana Pudding – Alternate banana and strawberry slices.
- Salted Caramel Banana Pudding – Drizzle caramel between layers for that sweet-salty kick.
Once you’ve nailed the classic, go wild with the customizations.
You may read as well :
Banana Pudding Rice Krispie Treats Recipe: Sweet, Creamy, Crunchy Bliss!
Banana Split Fluff Sundae Bowl: A Scoop of Joy in Every Bite!
Nutrition Breakdown
Let’s be real—banana pudding is indulgent. But it’s worth every calorie. Here’s a rough breakdown per serving (based on 10–12 servings total):
| Component | Amount per Serving |
|---|---|
| Calories | ~320 kcal |
| Carbs | 40–45g |
| Fat | 12–15g |
| Protein | 4–6g |
| Sugar | 28–35g |
If you want to lighten it up:
- Use low-fat or skim milk
- Swap out Cool Whip for light or homemade whipped cream
- Use sugar-free pudding mix
Final Thoughts: Southern Sweetness in Every Spoonful
There’s just something magical about a chilled, creamy bowl of banana pudding. It’s not fussy. It’s not fancy. But it’s the kind of dessert that brings people together and makes you feel at home—whether it’s Sunday supper or a casual cookout.
This classic layered banana pudding isn’t just a treat—it’s a hug in dessert form. With its silky vanilla pudding, sweet bananas, fluffy whipped topping, and crunchy wafers, it’s the perfect balance of nostalgia and flavor.
Whip up a bowl, share it with your people, and soak up the smiles. Trust me—there won’t be a spoonful left.
Similar recipes :
Heavenly Banana Walnut Cream Cake
FAQs
1. Can I use homemade pudding instead of instant?
Absolutely! Homemade vanilla pudding gives it an extra-rich flavor. Just make sure it’s cooled before layering.
2. Can I make this dairy-free?
Yes! Use almond or oat milk with dairy-free pudding mix, plant-based whipped topping, and a vegan cookie alternative.
3. How do I keep bananas from turning brown overnight?
Use lemon juice on slices and fully cover bananas with pudding or whipped cream to block air exposure.
4. Can I use other cookies besides Nilla Wafers?
Totally. Try graham crackers, Biscoff, shortbread, or even Oreos for a twist.
5. How far in advance can I make this?
Up to 24 hours in advance is perfect. Just wait to add the final decorative bananas and wafers until serving time.