Introduction to Brownie Cookie Bombs
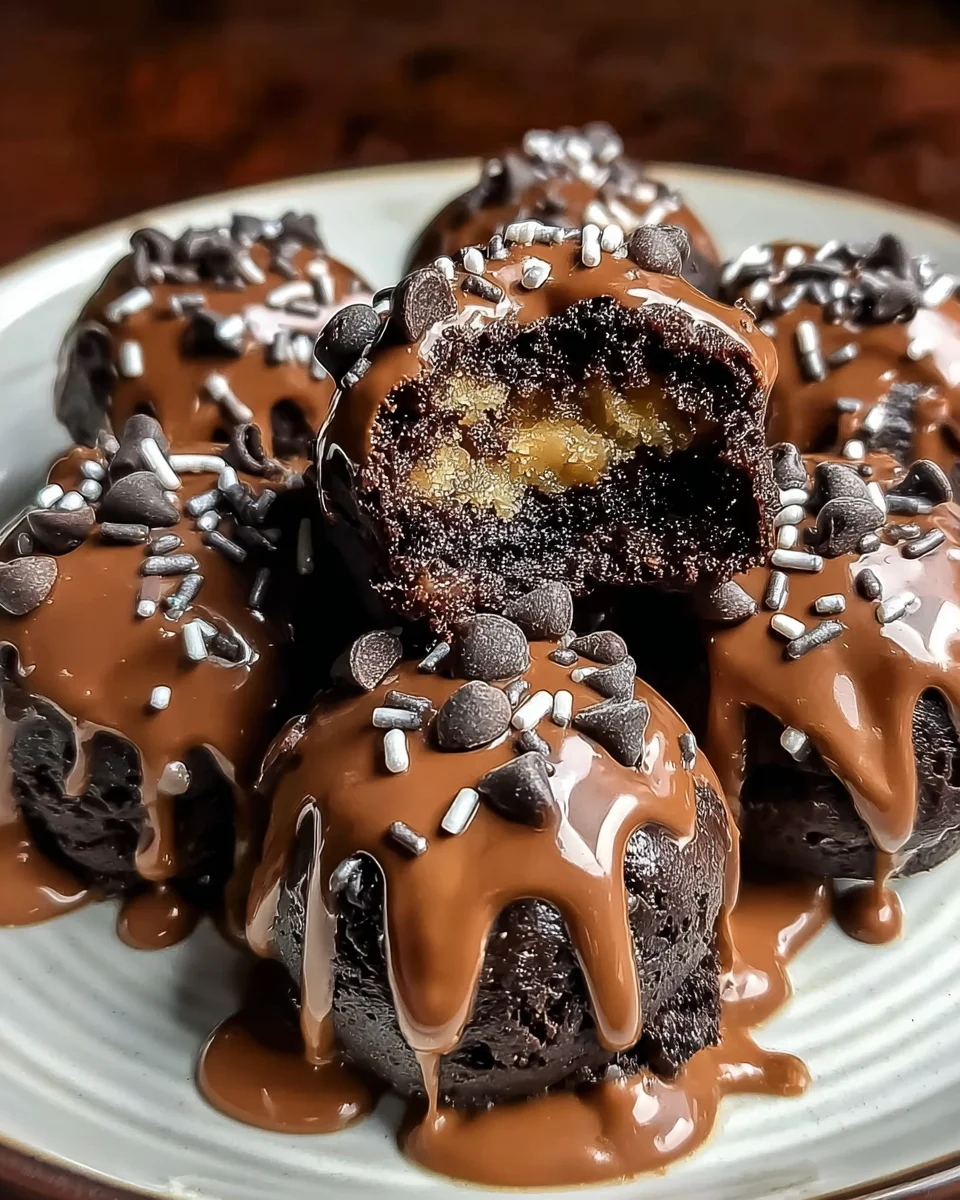
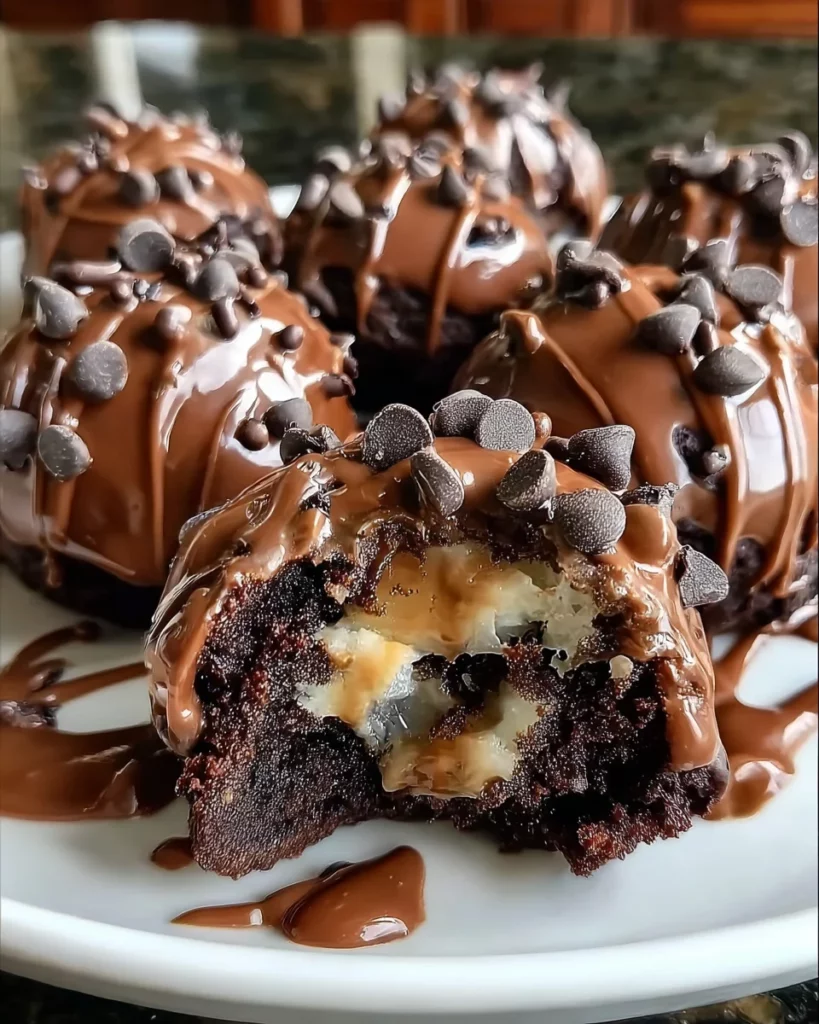
Hey there, lovely cooks! If you’re anything like me, life gets busy, and we all need a little sweet escape now and then. Enter Brownie Cookie Bombs! These delightful treats combine incredibly rich brownie layers with a satisfying cookie center, all wrapped up in melted chocolate. They’re perfect for satisfying that afternoon craving or impressing guests at your next gathering. Plus, these little gems are a quick solution for those hectic days when you want to whip up something special without any fuss. Trust me, everyone will be asking for seconds!
Why You’ll Love This Brownie Cookie Bombs
Brownie Cookie Bombs are the ultimate crowd-pleaser! They’re quick and easy to make, allowing you to satisfy sweet cravings without spending hours in the kitchen. Each bite bursts with layers of rich chocolatey delight and gooey cookie goodness. You’ll love how versatile they are, too—these treats can be customized with your favorite toppings or flavors. It’s an effortless way to bring joy to your loved ones or treat yourself after a long day!
Ingredients for Brownie Cookie Bombs
Let’s dive into the scrumptious ingredients that make up these beautiful Brownie Cookie Bombs! You’ll find everything you need right here, with exact quantities patiently waiting at the bottom of the article for your printing pleasure.
- Brownie Layer: A package of brownie mix comes to the rescue! It provides that rich, fudgy base that everyone loves. Make it according to the box directions for best results.
- Dough Center: The heart of our cookie bomb! You’ll use softened butter for that creamy texture, along with light brown sugar and white sugar for a perfectly sweet balance. Milk adds moisture, while vanilla enhances flavor. Finally, flour forms the structure and tiny chocolate chips bring in a delightful surprise in every bite.
- Chocolate Coating: Here’s where the magic happens! Melted chocolate wafers coat each bomb in decadence. You can mix it up using different chocolate flavors—think dark, milk, or even white chocolate for a fun twist!
- Optional Decorations: Want to jazz things up? Sprinkle decorations like crushed nuts or colorful sprinkles for a festive touch that’s sure to impress.
Don’t worry, I’m here to guide you on the journey to deliciousness! Just check out the bottom of the article for exact amounts and preparation tips.
How to Make Brownie Cookie Bombs
Prepare the Brownie Layer
Let’s get started with the brownie layer! First, follow the directions on your brownie mix box. This part is simple and straightforward. Once baked, remember to let those brownies cool completely. Cooling is key; if you cut them too soon, they may crumble. When they’re cool, slice them into small bite-sized squares. These pieces will wrap around your cookie dough, creating the perfect contrast between fudgy and chewy!
Mix the Cookie Dough Center
Now for the fun part: mixing the cookie dough center! In a large bowl, mix softened butter, light brown sugar, and white sugar until fluffy. You’ll notice it getting light and airy, which is just what you want. Next, pour in the milk and vanilla, stirring well to combine. Gradually add the flour, making sure it blends in smoothly. Don’t forget to add those tiny chocolate chips; they’re the delightful treasure hidden inside!
Form the Cookie Bombs
Time to roll out our cookie bombs! Scoop the dough and roll it into bite-sized balls—about one tablespoon each. Next, take one of your brownie squares and squash it slightly. This is where the magic happens! Wrap the brownie around the dough ball, ensuring it’s completely hidden. You want that delicious cookie center to stay under that fudgy coat. It’s like a sweet surprise waiting to be discovered!
Coat with Chocolate
The grand finale is coating everything in melted chocolate! Melt the chocolate wafers according to the package instructions. Once melted, dip each brownie cookie bomb into the luscious chocolate, making sure it’s fully covered. Place them on a parchment-lined tray, which helps avoid sticking. If you wish, add sprinkles or crushed nuts before the chocolate hardens. Finally, chill the tray in your fridge until the chocolate firms up completely. You’ll be rewarded with glossy, irresistible treats!
Tips for Success
- Make sure the brownies are completely cooled before wrapping the dough; this helps maintain shape.
- Experiment with different flavored chocolate wafers for delicious twists in taste.
- Use a small cookie scoop for even-sized dough balls, making your cookie bombs consistent.
- Don’t rush the chilling process; it’s crucial for that nice chocolate coating.
- Keep extra brownie bits! They make great toppings or snacks for next time.
Equipment Needed
- Baking dish: A round or square dish works. Just be sure it’s oven-safe.
- Mixing bowls: Grab a couple of different sizes for mixing your brownie and cookie dough.
- Cookie scoop: A tablespoon works too! It ensures uniformity in your cookie dough balls.
- Parchment paper: Perfect for lining your tray and keeping things mess-free.
- Microwave-safe bowl: For melting chocolate wafers smoothly.
Variations of Brownie Cookie Bombs
- Nutty Delight: Add chopped nuts like walnuts or pecans to your cookie dough for an added crunch.
- Cookie Dough Bliss: Swap in edible cookie dough for the center. It’s a decadent twist everyone will love!
- Peanut Butter Chocolate: Mix in creamy peanut butter with your cookie dough. It creates a delightful flavor fusion!
- Gluten-Free Option: Use a gluten-free brownie mix and substitute regular flour with a gluten-free blend.
- Low-Sugar Variation: Opt for sugar substitutes in the brownie mix and cookie dough for a lower sugar version without sacrificing taste.
- Fruit-Filled Surprise: Incorporate mini pieces of dried fruit like cherries or cranberries into the cookie dough for a fruity burst.
Serving Suggestions
- Serve Brownie Cookie Bombs on a decorative platter for a festive touch at gatherings.
- Pair with a scoop of vanilla ice cream for an indulgent dessert experience.
- Enjoy with a glass of cold milk or your favorite coffee for the perfect balance.
- Top with whipped cream and a drizzle of chocolate sauce for an extra special treat.
FAQs about Brownie Cookie Bombs
Can I make Brownie Cookie Bombs in advance?
Absolutely! These delightful treats can be prepared ahead of time and stored in the fridge for up to a week. You can even freeze them for a sweet surprise later. Just make sure they’re well-wrapped to prevent freezer burn!
What chocolate variations can I use for the coating?
The options are endless! You can use milk chocolate, dark chocolate, or even white chocolate for coating your Brownie Cookie Bombs. Mixing different types of chocolate can also create a unique flavor experience. Experiment and see what you love!
How can I store leftover Brownie Cookie Bombs?
Store your leftover brownie cookie bombs in an airtight container at room temperature for a couple of days, or in the refrigerator for up to a week. If they last that long, that is!
Can I customize the cookie dough center?
<pYes, you sure can! Feel free to add ingredients like nuts, dried fruit, or even swap out the mini chocolate chips for fun flavors like butterscotch or white chocolate. It’s all about making these delightful bombs your own!
Are Brownie Cookie Bombs suitable for kids?
Definitely! Brownie Cookie Bombs are a fun treat that kids love. Just be cautious with any possible allergy ingredients and supervise them while baking. It’s an excellent way to get the little ones involved in the kitchen!
Final Thoughts
Ah, the joy of creating and sharing Brownie Cookie Bombs! Every time I make these, it feels like I’m wrapping up a little happiness in each bite. The combination of textures—a fudgy brownie hugging a gooey cookie center—is nothing short of bliss. Whether I’m spoiling my family or treating myself, these sweet delights always manage to bring smiles. Plus, they’re customizable for any occasion, making them a fantastic go-to dessert. So, gather your loved ones and create some sweet memories together! Trust me, these treats are bound to become a cherished favorite in your home, just like they are in mine.
Print
Brownie Cookie Bombs
- Prep Time: 20 minutes
- Cook Time: 30 minutes
- Total Time: 50 minutes
- Yield: 12 servings 1x
- Category: Dessert
- Method: Baking and Freezing
- Cuisine: American
- Diet: Vegetarian
Description
Brownie Cookie Bombs are a delightful treat combining rich brownie layers with a sweet cookie center, all coated in melted chocolate.
Ingredients
- Brownie Layer
1 package of brownie mix, made following the box directions - Dough Center
½ cup of butter, at room temperature
½ cup of light brown sugar
¼ cup white sugar
2 tablespoons of milk
1 teaspoon pure vanilla
1¼ cups plain flour
1 cup tiny chocolate chips - Chocolate Coating
2 cups melted chocolate wafers
Optional: Sprinkle decorations
Instructions
- Follow the directions on the brownie box to bake them. Let them cool all the way down, then slice each brownie into small bite-sized pieces.
- Mix the softened butter, brown sugar, and white sugar in a large bowl until smooth and fluffy. Pour in the vanilla and milk, and blend. Slowly add the flour while stirring, then toss in the mini chocolate chips.
- Roll the dough into little balls about a tablespoon in size.
- Squash a brownie square and use it to wrap up each dough ball. Make sure the dough is completely hidden in the brownie piece.
- Melt the chocolate wafers based on package directions. Dip every brownie-covered ball into the melted chocolate, setting them onto a parchment-lined tray as you finish.
- If you want, sprinkle decorations before the chocolate firms up. Place the tray in the fridge so the chocolate hardens completely.
Notes
- Ensure the brownie is completely cooled before wrapping the dough.
- Use different types of chocolate wafers for varied flavors.
- Feel free to customize sprinkle decorations for special occasions.
Nutrition
- Serving Size: 1 cookie bomb
- Calories: 250
- Sugar: 18g
- Sodium: 120mg
- Fat: 12g
- Saturated Fat: 7g
- Unsaturated Fat: 5g
- Trans Fat: 0g
- Carbohydrates: 35g
- Fiber: 1g
- Protein: 3g
- Cholesterol: 20mg