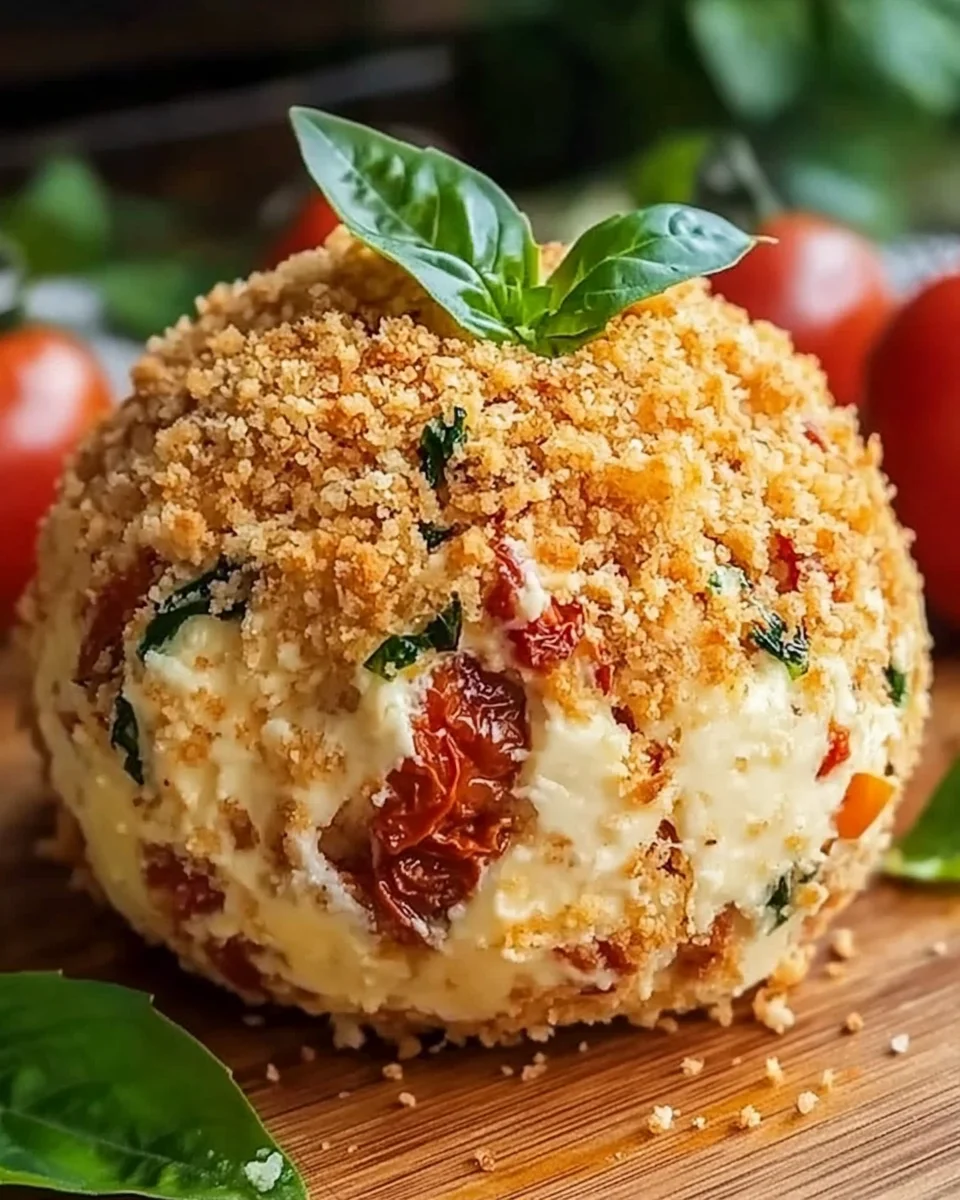
Introduction to Bruschetta Cheese Ball
As a passionate home cook, I know busy days often leave little room for elaborate meal prep. That’s where my Bruschetta Cheese Ball comes in! This delightful appetizer is not only quick to whip up, but it also impresses anyone who gets a taste. Imagine creamy goodness mixed with sun-dried tomatoes, olives, and fresh basil, all wrapped in a crunchy panko crust. Perfect for gatherings or a cozy family night, this recipe is sure to become a favorite in your entertaining arsenal. Let’s dive into this flavor-packed creation!
Why You’ll Love This Bruschetta Cheese Ball
This Bruschetta Cheese Ball is the ultimate crowd-pleaser. Its simplicity means you can whip it up in just 15 minutes! The combination of savory sun-dried tomatoes, fresh basil, and rich cheeses creates a burst of flavor that’s simply irresistible. Best of all, it’s a make-ahead dish, allowing you to prep it when you have a moment and serve it when guests arrive. No stress, just deliciousness!
Ingredients for Bruschetta Cheese Ball
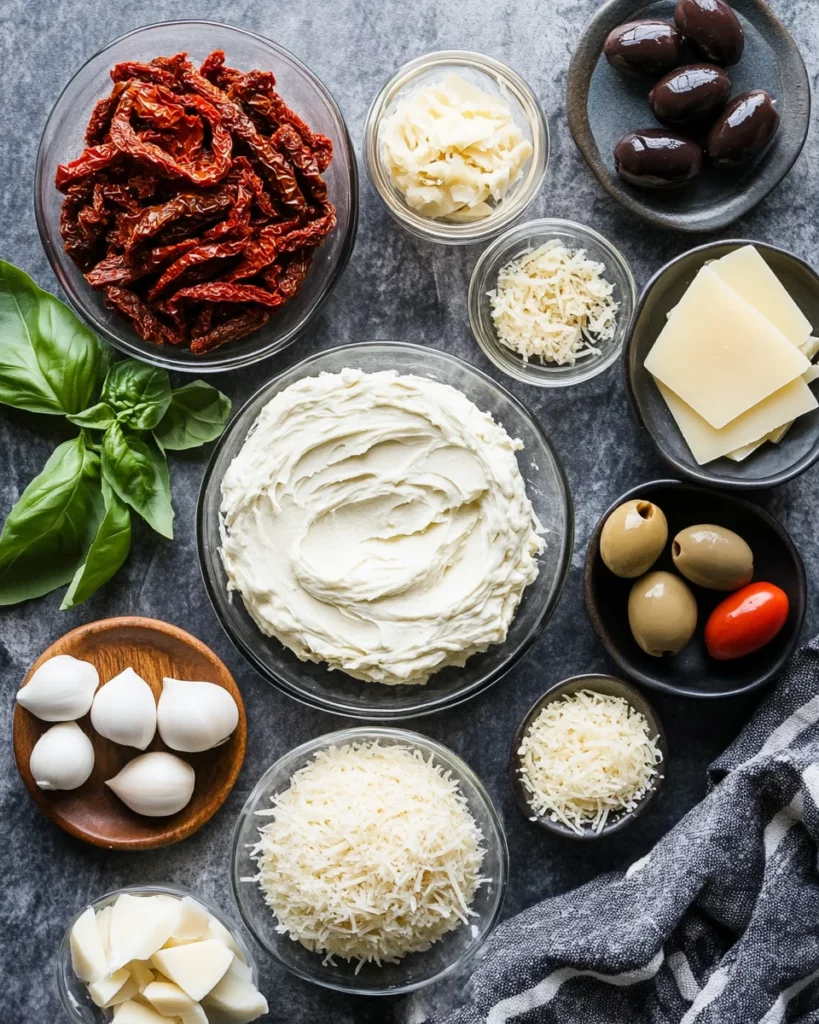
Gathering the right ingredients is crucial for crafting the best Bruschetta Cheese Ball. Here’s what you’ll need:
- Cream Cheese: A soft, rich base that provides the creamy texture you crave.
- Shredded Cheese Mix: A blend of mozzarella and Parmesan adds depth and a cheesy kick.
- Sun-Dried Tomatoes: These tangy gems provide a burst of flavor. Make sure to set some aside for garnish!
- Fresh Basil: Chopped fresh basil contributes a fragrant herbaceous note that brightens the dish.
- Olives: Use chopped olives for a salty, savory touch. They create a delightful contrast to the cheese.
- Garlic: Minced garlic adds a zing that elevates the overall taste profile of the cheese ball.
- Dried Oregano: This aromatic herb enhances the Italian flair of your bruschetta.
- Salt and Black Pepper: Basics that are essential to bringing out the flavors of your ingredients.
- Panko Breadcrumbs: These light and crunchy breadcrumbs form a crispy outer layer. You can also use regular breadcrumbs if needed.
- Butter: A touch of melted butter is used for toasting the panko, adding flavor and richness.
- Fresh Tomato and Basil Leaves: These are for garnishing, making your cheese ball visually appealing and fresh.
Feel free to customize this recipe based on your preferences! For a dairy-free option, swap the cream cheese with a plant-based alternative. If gluten is a concern, gluten-free breadcrumbs are readily available.
Exact measurements are at the bottom of the article, ready for you to print. Happy cooking!
How to Make Bruschetta Cheese Ball
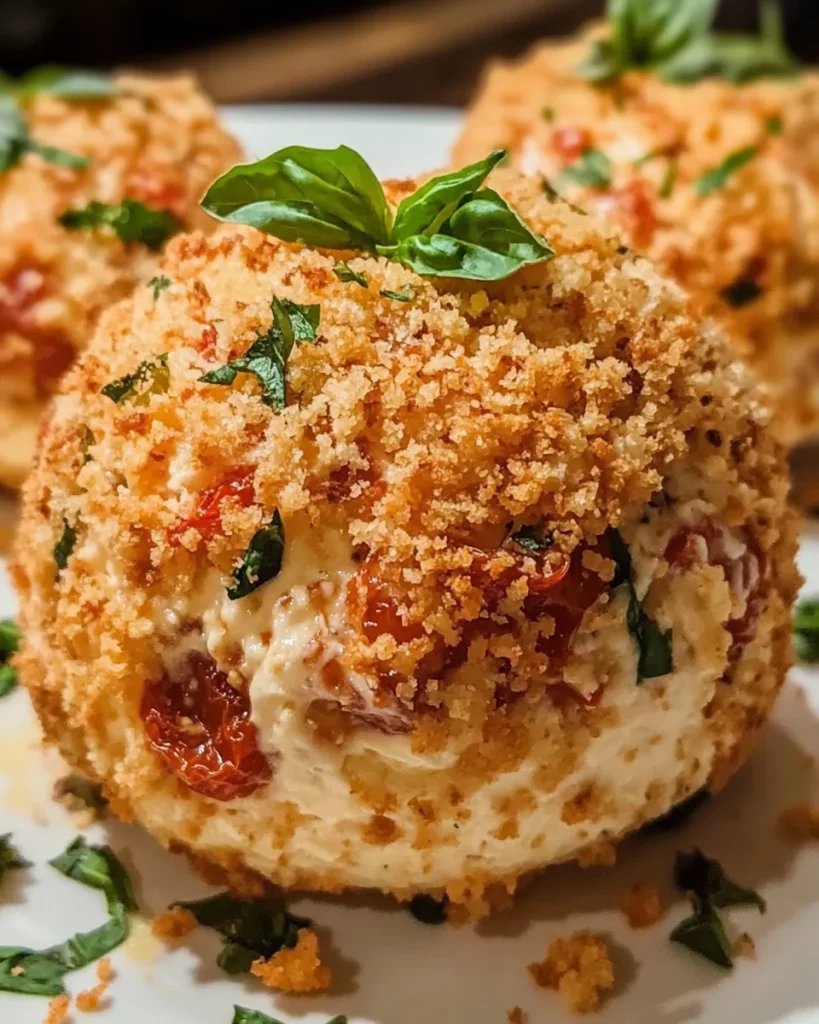
Let’s get down to the delicious details of making the Bruschetta Cheese Ball. This straightforward process is designed to be as enjoyable as it is rewarding. Each step brings you closer to serving this masterpiece at your gathering. Ready? Let’s go!
Step 1: Prepare the Sun-Dried Tomatoes
Start by finely chopping the oil-packed sun-dried tomatoes. These tangy bites are packed with flavor, making them essential to this dish. Remember, you need to divide them into two portions.
Set aside half for garnishing later. This simple step elevates the presentation, ensuring your cheese ball looks as good as it tastes!
Step 2: Mix the Ingredients
In a large mixing bowl, combine the softened cream cheese and shredded cheese mix. Use a sturdy spatula or wooden spoon to mix them vigorously.
Add the finely chopped sun-dried tomatoes, fresh basil, olives, minced garlic, oregano, salt, and black pepper. The result should be a creamy, flavorful mixture that pulls together all those delightful Mediterranean flavors.
Step 3: Shape the Cheese Ball
Once everything is well combined, use your hands to form the mixture into a ball. This part always makes me smile—it’s like crafting your own little edible sculpture!
Wrap the cheese ball tightly in plastic wrap and place it in the refrigerator. Chill it for at least 30 minutes. This lets the flavors meld beautifully while helping the cheese ball firm up.
Step 4: Prepare the Panko Crust
While your cheese ball chills, it’s time to conquer the panko crust. Heat a medium skillet over medium heat and melt the butter. Add the panko breadcrumbs, stirring frequently. This step is crucial for achieving that gorgeous golden brown color.
Keep an eye on it! Toasting the panko adds a satisfying crunch that contrasts wonderfully with the creamy cheese ball.
Step 5: Coat the Cheese Ball
Once the panko has toasted to perfection, it’s time to coat your cheese ball! Remove the cheese ball from the fridge and carefully unwrap it.
Roll the ball in the toasted panko, pressing gently to ensure even coverage. This crunchy coating makes your cheese ball stand out and adds irresistible texture.
Step 6: Garnish and Serve
Your Bruschetta Cheese Ball is almost ready to dazzle your guests! Transfer it to a serving plate and top it with the reserved diced tomatoes and fresh basil leaves.
For even more flair, serve it alongside slices of toasted baguette, crispy crackers, or fresh vegetable sticks. Your party guests won’t be able to resist this delightful creation!

Tips for Success
- Always soften your cream cheese to make mixing easier and to achieve a smoother texture.
- Experiment with different herbs like thyme or chives for a unique flavor twist.
- Chill the cheese ball longer for a firmer texture, making it easier to slice.
- Don’t skip toasting the panko; it elevates the flavor immensely.
- Serve with a variety of dippers to please all taste buds!
Equipment Needed
- Mixing Bowl: A large bowl for combining ingredients; any sturdy bowl will do.
- Spatula or Wooden Spoon: Essential for mixing; a sturdy fork works in a pinch.
- Plastic Wrap: To wrap the cheese ball; aluminum foil can be used instead.
- Skillet: For toasting panko; non-stick or any frying pan can work.
- Serving Plate: To present your cheese ball; a simple platter or board adds charm.
Variations for Bruschetta Cheese Ball
- Herbed Cheese Ball: Infuse additional flavor by mixing in fresh chopped herbs like thyme, dill, or chives.
- Spicy Kick: Add a diced jalapeño or some crushed red pepper flakes for a delightful spicy touch.
- Nutty Addition: Sprinkle in some finely chopped walnuts or toasted pine nuts for extra crunch and flavor.
- Sweet Touch: Mix in a small amount of honey or agave nectar for a sweet contrast to the savory flavors.
- Dairy-Free Delight: Use a plant-based cream cheese alternative and nutritional yeast for a cheesy flavor without dairy.
- Vegan Version: Combine cashew cream or tofu with herbs and spices to maintain that creamy texture while keeping it plant-based.
Serving Suggestions for Bruschetta Cheese Ball
- Pair the cheese ball with toasted slices of baguette for a crunchy, rustic dip.
- Serve with an assortment of colorful vegetable sticks, such as carrots, cucumbers, and bell peppers for freshness.
- Offer a variety of crackers, including whole grain or herb-flavored options.
- For drinks, a crisp white wine or sparkling water complements the flavors beautifully.
- Garnish the serving platter with extra basil leaves and cherry tomatoes for a stunning presentation.
FAQs about Bruschetta Cheese Ball
Can I make Bruschetta Cheese Ball ahead of time?
Absolutely! You can prepare the cheese ball a day in advance. Just chill it in the refrigerator, then coat it with panko right before serving. This ensures that every bite maintains that delightful crunch!
What can I serve with Bruschetta Cheese Ball?
Serve it alongside sliced baguette, crispy crackers, or fresh vegetable sticks. The variety provides a fun way for guests to enjoy this creamy dip!
Can I customize the ingredients in the cheese ball?
Definitely! Feel free to swap in your favorite cheeses, herbs, or even add spicy elements like diced jalapeños. It’s versatile and perfect for personalizing the flavor to your taste.
Is Bruschetta Cheese Ball gluten-free?
Only if you use gluten-free breadcrumbs instead of traditional panko. Once you’ve made that substitution, everyone can enjoy this tasty treat!
How long can I keep the leftovers?
Leftover Bruschetta Cheese Ball can be stored in an airtight container in the fridge for up to three days. Just be sure it’s well-wrapped to maintain freshness!
Final Thoughts
Creating a Bruschetta Cheese Ball isn’t just about the flavors; it’s about bringing joy to your table. The laughter of friends, the smiles of loved ones, and the delightful crunch of that panko crust weave together stories worth sharing. Whether it’s a casual Friday night with family or an elegant gathering, this appetizer steals the show!
Each bite is a reminder that great food can create unforgettable moments. So, roll up your sleeves and dive into this recipe—because every occasion deserves a touch of deliciousness!
Print
Bruschetta Cheese Ball: A Flavorful Party Delight!
- Prep Time: 15 minutes
- Cook Time: 10 minutes
- Total Time: 55 minutes
- Yield: 6–8 servings 1x
- Category: Appetizer
- Method: Mixing and Chilling
- Cuisine: Italian
- Diet: Vegetarian
Description
A delicious and flavorful Bruschetta Cheese Ball that is perfect for parties and gatherings.
Ingredients
- 12.35 oz cream cheese (softened)
- 1 cup shredded cheese mix (mozzarella and Parmesan)
- 1/2 cup oil-packed sun-dried tomatoes, divided
- 1/2 cup fresh basil, chopped
- 1/2 cup olives, chopped
- 2 cloves garlic, minced
- 2 tsp dried oregano
- 1 tsp salt
- 1 tsp black pepper
- 1 cup panko breadcrumbs
- 1 tbsp butter
- 1 fresh tomato, diced (for garnish)
- Fresh basil leaves (for garnish)
Instructions
- Prepare the Sun-Dried Tomatoes: Divide the sun-dried tomatoes into two portions. Finely chop one portion to mix into the cheese ball, and set the other portion aside for garnishing.
- Mix the Ingredients: In a large mixing bowl, combine the softened cream cheese, shredded cheese mix, finely chopped sun-dried tomatoes, chopped basil, chopped olives, minced garlic, oregano, salt, and pepper. Mix well until all ingredients are evenly incorporated.
- Shape the Cheese Ball: Form the cheese mixture into a ball shape and wrap it tightly with plastic wrap. Chill in the refrigerator for at least 30 minutes to allow the flavors to meld and the cheese ball to firm up.
- Prepare the Panko Crust: In a medium skillet over medium heat, melt the butter. Add the panko breadcrumbs and toast them until golden brown, stirring frequently. Remove from heat and set aside to cool.
- Coat the Cheese Ball: Once the cheese ball has firmed up, remove it from the refrigerator and unwrap it. Roll the cheese ball in the toasted panko breadcrumbs, pressing gently to ensure the entire ball is coated.
- Garnish and Serve: Top the cheese ball with diced tomatoes and fresh basil leaves for garnish. Serve with slices of toasted baguette, crackers, or vegetable sticks.
Notes
- For a dairy-free option, substitute cream cheese with a plant-based alternative.
- For a gluten-free version, replace panko breadcrumbs with gluten-free breadcrumbs.
Nutrition
- Serving Size: 1 serving
- Calories: 250
- Sugar: 2g
- Sodium: 300mg
- Fat: 17g
- Saturated Fat: 10g
- Unsaturated Fat: 5g
- Trans Fat: 0g
- Carbohydrates: 24g
- Fiber: 1g
- Protein: 6g
- Cholesterol: 40mg

