Welcome to Fall’s Sweetest Treat
There’s something magical about fall. The crisp air, the cozy layers, the smell of apples and caramel in the kitchen. If you’re looking for a treat that wraps all of those autumn vibes into one beautiful, bite-sized square, say hello to Caramel Apple Swirl Fudge. It’s not just a dessert—it’s edible art. With velvety caramel, bright green apple-colored swirls, and rich white chocolate fudge, this recipe brings major wow factor to any dessert table.
Whether you’re prepping for a holiday party, a bake sale, or just want to impress your family with something stunning and homemade, this fudge delivers both style and flavor. Let’s dive into this marbled masterpiece that’s as fun to make as it is to eat!
Table of Contents
Why You’ll Fall in Love with This Fudge
Let’s be real: fudge isn’t just for Christmas anymore. This version, with that vivid green swirl and rich caramel ribbons, is basically fall in a bite. Why do people go crazy for it? Here’s why:
- It looks like you bought it from a gourmet shop – but it’s made right at home.
- It tastes like a caramel apple exploded into a candy bar – in the best way.
- It’s simple enough for beginners – no candy thermometer or fancy gadgets needed.
- It’s perfect for gifting – wrap a few squares in parchment and ribbon? Instant gift.
- It’s versatile – you can switch up the colors or flavors to match any season.
But the best part? That satisfying moment when you drag a knife through the fudge and watch the swirls form like edible marble. It’s part craft, part dessert, and 100% irresistible.
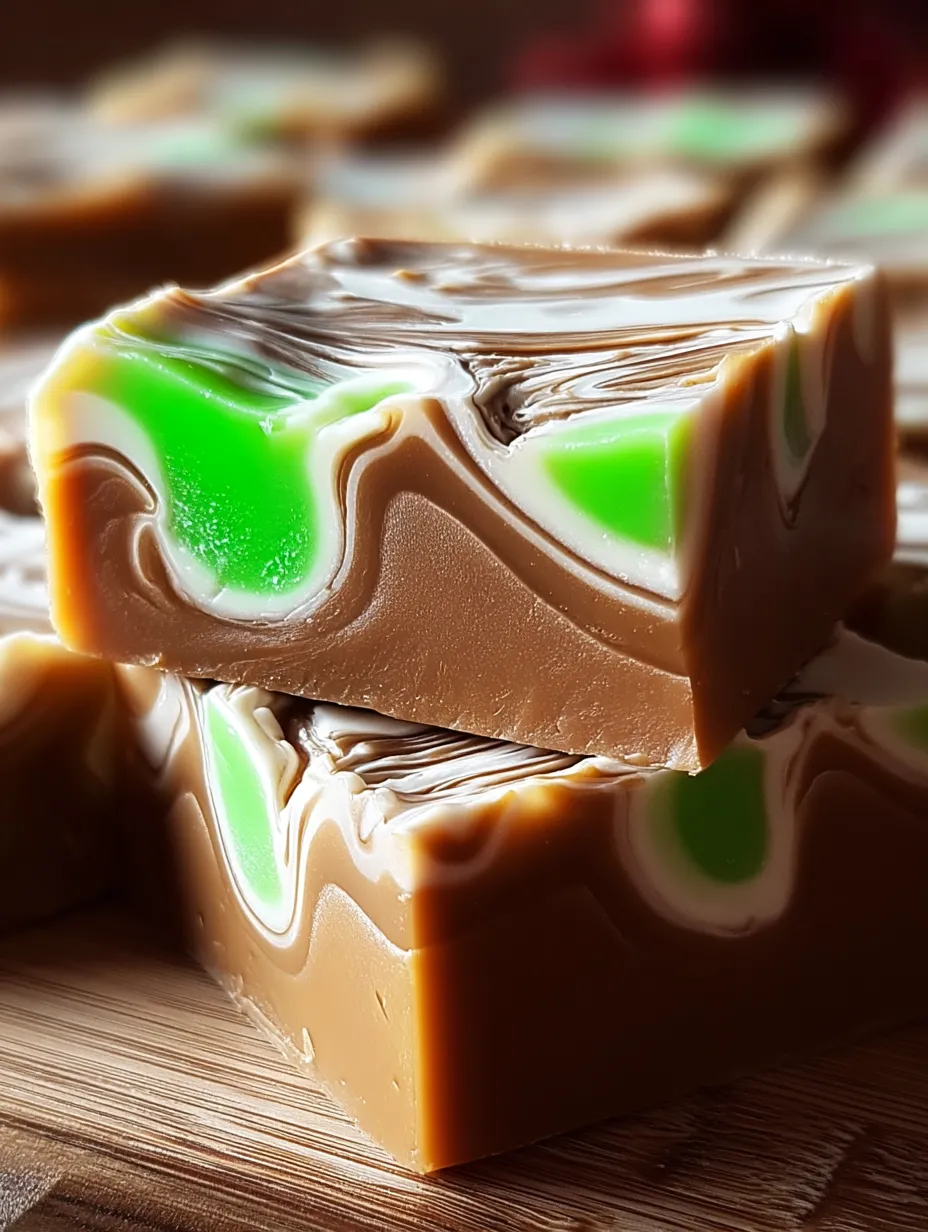
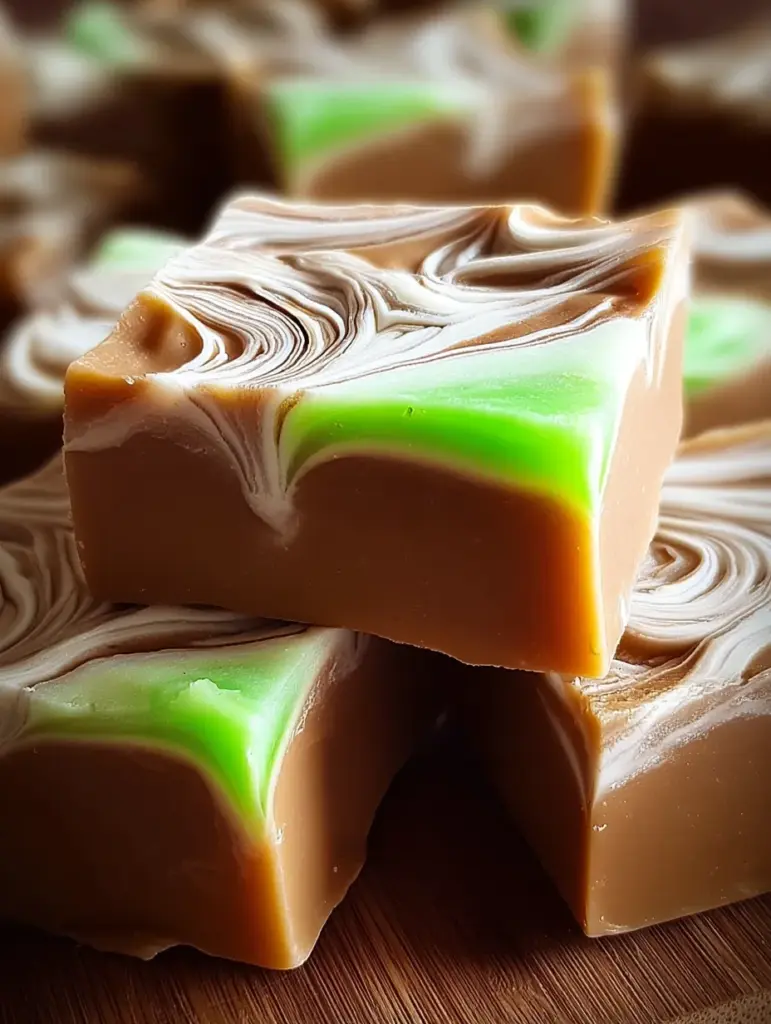
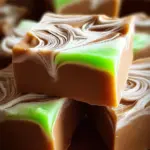
A Closer Look at the Final Product (What You See in the Image)
Let’s take a second to admire the finished fudge from the image. It’s thick, glossy, and absolutely striking. Here’s what stands out visually:
- That ultra-creamy caramel color base — not too dark, not too light.
- Glossy green apple swirls — bright, almost neon, they cut through the fudge like bursts of flavor.
- Subtle white chocolate ribbons — adding dimension and shine.
- Thick, clean-cut square shapes — no crumbs, no melting mess, just clean edges.
To match that look in your own kitchen, the caramel needs to be melted just enough to drizzle, not run. The fudge itself? Smooth, not gritty. That perfect sheen? Comes from using high-quality white chocolate and not over-mixing.
Ingredients Breakdown & Pro Tips
Let’s talk ingredients. This recipe is built on simple but powerful components. Here’s what you need and how each ingredient plays its part.
White Chocolate Chips
This is your base. It creates the creamy body of the fudge. Use a good quality white chocolate for the best taste and texture. Cheap chips often stay gritty or separate when melted.
Pro Tip: Ghirardelli or Guittard are excellent choices.
Sweetened Condensed Milk
This adds sweetness and helps everything stay soft and fudgy. Don’t confuse this with evaporated milk—they’re not interchangeable.
Unsalted Butter
Butter makes the fudge richer and helps it set properly. Cubing it before melting helps it blend faster and smoother.
Vanilla Extract & Salt
These bring balance. Vanilla rounds out the sweetness while salt enhances all the flavors—especially against the caramel.
Soft Caramel Squares or Bits
Think Kraft caramel cubes or caramel baking bits. When melted with a splash of cream, they become a silky caramel layer that stays soft even after chilling.
Pro Tip: Don’t skip the cream. It keeps the caramel from hardening into a chewy mess.
Heavy Cream
Just a little transforms your melted caramel into pourable liquid gold.
Green Gel Food Coloring
The green is what gives that “apple” vibe. Gel is key—it gives you bold color without watering down the fudge.
Optional: Add ½ tsp apple extract to the green swirl to mimic that caramel apple taste!
Kitchen Tools You’ll Need
No need to get fancy. You probably have most of these in your kitchen already:
- Medium saucepan
- Microwave-safe bowl
- Rubber spatula
- 8×8-inch square pan
- Parchment paper
- Small bowls for dividing mixtures
- Toothpick or skewer for swirling
- Sharp knife for clean cuts
Tips Before You Start Cooking
- Read through the recipe first. Always a smart move.
- Use parchment with overhang to make removing the fudge a breeze.
- Don’t overheat your chocolate – low and slow is the way.
- Make your caramel last so it’s still warm and pourable when marbling.
- Have fun with it! This is one of those forgiving recipes where a little imperfection = personality.
Step-by-Step Recipe Walkthrough
Step 1: Prep the Pan
Line an 8×8-inch baking dish with parchment paper, leaving a 2-inch overhang on each side. This overhang will act like handles to lift the set fudge out cleanly.
Time: 2 minutes
Step 2: Melt and Combine the Base
In a medium saucepan over low heat, melt your white chocolate chips, sweetened condensed milk, and butter. Stir constantly until it’s fully melted, glossy, and smooth. Once off the heat, stir in the vanilla, salt, and optional apple extract.
Time: 5–7 minutes
Step 3: Create the Green Apple Swirl
Scoop out about 1 cup of the fudge mixture into a small bowl. Add a few drops of green gel food coloring and stir until it’s evenly and brightly colored. Add a little more if you want that vivid green pop like in the image.
Time: 2 minutes
Step 4: Melt the Caramel
In a separate microwave-safe bowl, combine your caramels and heavy cream. Microwave in 20–30 second intervals, stirring in between, until smooth and pourable.
Time: 2 minutes
Step 5: Layer, Swirl & Marbling Technique
Now comes the fun part—building that gorgeous marbled look. Pour half of your white fudge mixture into the prepared pan and gently spread it out. Then, drop spoonfuls of the green mixture randomly over the top. Drizzle some of your warm caramel over that. Don’t stress about making it perfect—random is beautiful here.
Next, pour the remaining white fudge over the top. Repeat the green spoonfuls and caramel drizzle. Finally, take a toothpick, skewer, or butter knife and gently drag it through the fudge in swooping “S” shapes. Don’t swirl too much—just enough to create those lovely streaks and marble effects you see in the photo.
This step is where the magic happens. The more confident your swirls, the more dramatic the final look. Trust your hand and go for it!
Time: 4–5 minutes
Step 6: Chill Until Firm
Pop your pan into the fridge and let it chill for at least 2–3 hours. You want it fully set before cutting—otherwise, the swirl will smudge and your squares won’t hold their shape.
Don’t rush this step. Go watch an episode of your favorite show. Or two. When you come back, you’ll be greeted with a pan of stunning fudge ready to slice.
Time: 2–3 hours
Step 7: Slice & Serve
Once chilled and firm, use the parchment overhang to lift the whole block out of the pan. Grab a sharp knife and cut it into 16 clean squares. Wipe the knife between cuts if needed to keep those edges neat.
What you’ll see? Deep green and golden caramel ribbons threading through creamy white chocolate fudge—just like in the image. It’s the kind of treat that makes people gasp a little when you set it down on the table.
Time: 5 minutes
How to Get That Perfect Marbled Look
Marbling might look tricky, but it’s surprisingly easy once you get the hang of it. Here are a few tips to nail that swirled finish:
- Use different-sized dollops: Big and small green spoonfuls give depth.
- Don’t swirl too much: A few figure-8s is plenty. Overmixing turns it into a murky mess.
- Work while everything is warm: The fudge should still be spreadable and the caramel pourable.
- Drag lightly: You’re not stirring. Think of it more like drawing on the surface.
This method creates those gorgeous curves and waves that turn every square into its own little artwork.
Flavor Customizations & Add-Ons
Want to make this recipe your own? Try these fun twists:
- Add chopped dried apples for a real apple texture
- Sprinkle sea salt over the top before chilling for salted caramel vibes
- Use cinnamon extract in place of apple for a cozy twist
- Swap in peanut butter chips for a caramel-peanut combo
- Make it spooky! Turn the green swirl purple for Halloween
This fudge is a blank canvas. Change the swirl color to match any holiday: red for Valentine’s, blue for Hanukkah, orange for Thanksgiving. Go wild.
You may also like :
White Chocolate Caramel Pecan Fudge 🍫🌰 – The Ultimate Decadent Treat
How to Store Your Fudge (Short & Long Term)
Homemade fudge stores surprisingly well—if it lasts that long.
Short Term (1–2 weeks):
Store in an airtight container at room temperature, away from heat or sunlight. A cool pantry is perfect.
Fridge Storage (up to 3 weeks):
Wrap the fudge in parchment and store it in a sealed container. Let it come to room temp before serving for the best texture.
Freezer Storage (2–3 months):
Yes, you can freeze fudge! Wrap tightly in plastic wrap, then foil, and store in a freezer bag. Thaw overnight in the fridge before eating.
Serving Suggestions
You’ve made this beauty—now show it off! Here are some creative ways to serve it:
- On a dessert board with apples, nuts, and cheese
- As a party favor in clear wrap tied with twine
- With coffee or spiced cider for a fall afternoon treat
- Crumble over ice cream for a sundae with flair
- Paired with apple slices for a “caramel apple” effect
🍏 Caramel Apple Swirl Fudge Recipe
- Prep Time: 15 minutes
- Cook Time: 7 minutes
- Total Time: 2–3 hours
- Category: Fall Desserts / No-Bake Fudge Treats
Description
🍏✨ A dreamy blend of creamy white chocolate, bright green apple swirls, and smooth caramel ribbons. This fudge looks like marbled artwork and tastes like fall in every bite! 🍮💚
Ingredients
3 cups white chocolate chips
1 (14 oz) can sweetened condensed milk
½ cup unsalted butter, cubed
1 tsp vanilla extract
½ tsp salt
¾ cup soft caramel squares or caramel bits
2 tbsp heavy cream
Green gel food coloring
Optional: ½ tsp apple extract
Instructions
Line an 8×8-inch baking pan with parchment paper, leaving overhang for easy lifting. (⏱️ 2 minutes)
In a saucepan over low heat, melt the white chocolate chips, sweetened condensed milk, and butter, stirring until fully smooth and glossy. Stir in vanilla, salt, and optional apple extract. (⏱️ 5–7 minutes)
Transfer 1 cup of the fudge mixture into a separate bowl and tint it with green gel food coloring until vibrant. (⏱️ 2 minutes)
Melt the caramel and heavy cream in the microwave in 20–30 second intervals, stirring each time until silky and pourable. (⏱️ 2 minutes)
Pour half the white fudge into the prepared pan, then add spoonfuls of green fudge and drizzle caramel over the top. Add the remaining white fudge and repeat the swirl additions. Drag a thin knife through the mixture to create a marbled effect. (⏱️ 4–5 minutes)
Refrigerate for 2–3 hours, or until fully set and firm enough to slice. (⏱️ 2–3 hours)
Lift the fudge out of the pan, cut into squares, and admire the stunning swirls before enjoying. (⏱️ 5 minutes)
Notes
This fudge is ultra-creamy and perfect for fall-themed posts or holiday dessert boards.
The green apple swirl gives it a fun, eye-catching look — great for viral visuals.
Add apple extract for stronger “caramel apple” flavor.
Stores well in the fridge for up to 1 week.
Nutrition
- Serving Size: 16 squares
- Calories: 320 kcal
Creative Gift Ideas Using This Fudge
Homemade fudge is the perfect edible gift. Here’s how to turn it into something extra special:
- Holiday boxes: Fill with assorted homemade treats
- Mason jar stacks: Layer a few squares in a jar with a cute tag
- Teacher gifts: Wrap in parchment, tie with red and green ribbon, done
- Wedding favors: Mini fudge squares in gold wrappers
- Hostess gifts: Bring a tin of this fudge to your next dinner invite
Don’t forget a handwritten recipe card—they’ll beg you for it anyway.
Common Mistakes & How to Avoid Them
Even easy recipes have their pitfalls. Here’s what to watch out for:
- Overheating the chocolate: Keep it low and slow or it’ll seize.
- Skipping the cream in caramel: This step keeps the caramel soft and swirly.
- Swirling too much: It’s tempting, but less is more.
- Not chilling long enough: Patience = clean cuts.
- Using liquid food coloring: It waters down the fudge. Stick with gel.
FAQ: Green Apple Flavor or Food Coloring?
We’ve gotta address this: that bold green swirl—does it taste like apple?
Not by default, but it can! The base recipe uses just color, but you can absolutely add ½ tsp of apple extract to the green portion. It gives a subtle, candy-apple twist that pairs beautifully with the caramel.
Want it more intense? Use 1 tsp, but be cautious—it’s strong!
Similar recipes :
Chicago Style Bakery Apple Slices
Grandma’s Apple Crumb Bars – A Comforting Classic
Conclusion: Make It Once, Crave It Forever
Caramel Apple Swirl Fudge isn’t just candy. It’s a craft. A statement piece. A dessert that makes people stop mid-bite and say “Wait… did you make this?” Whether you’re whipping it up for a cozy fall gathering, packing it into lunchboxes, or just treating yourself on a random Tuesday, this recipe is one that’ll earn you fans for life.
It’s stunning, easy, and totally unforgettable. So grab your white chocolate and let’s swirl some sweetness into the season.
5 Unique FAQs
Q1: Can I use dark chocolate instead of white chocolate?
Technically yes, but it will change the color and flavor entirely. White chocolate gives that creamy canvas for swirls to pop.
Q2: What if I don’t have green food coloring?
No worries! Use another color, or leave it out entirely for a simple caramel vanilla look.
Q3: Is there a dairy-free version of this?
You can use dairy-free white chocolate and coconut condensed milk. Use coconut oil instead of butter. The texture changes a bit, but still yummy.
Q4: Can I double the recipe?
Absolutely. Use a 9×13-inch pan for a double batch. Just be sure to swirl evenly to reach all corners.
Q5: Can kids help with this recipe?
Totally! Let them do the swirling—it’s their favorite part. Just handle the hot melting steps yourself.