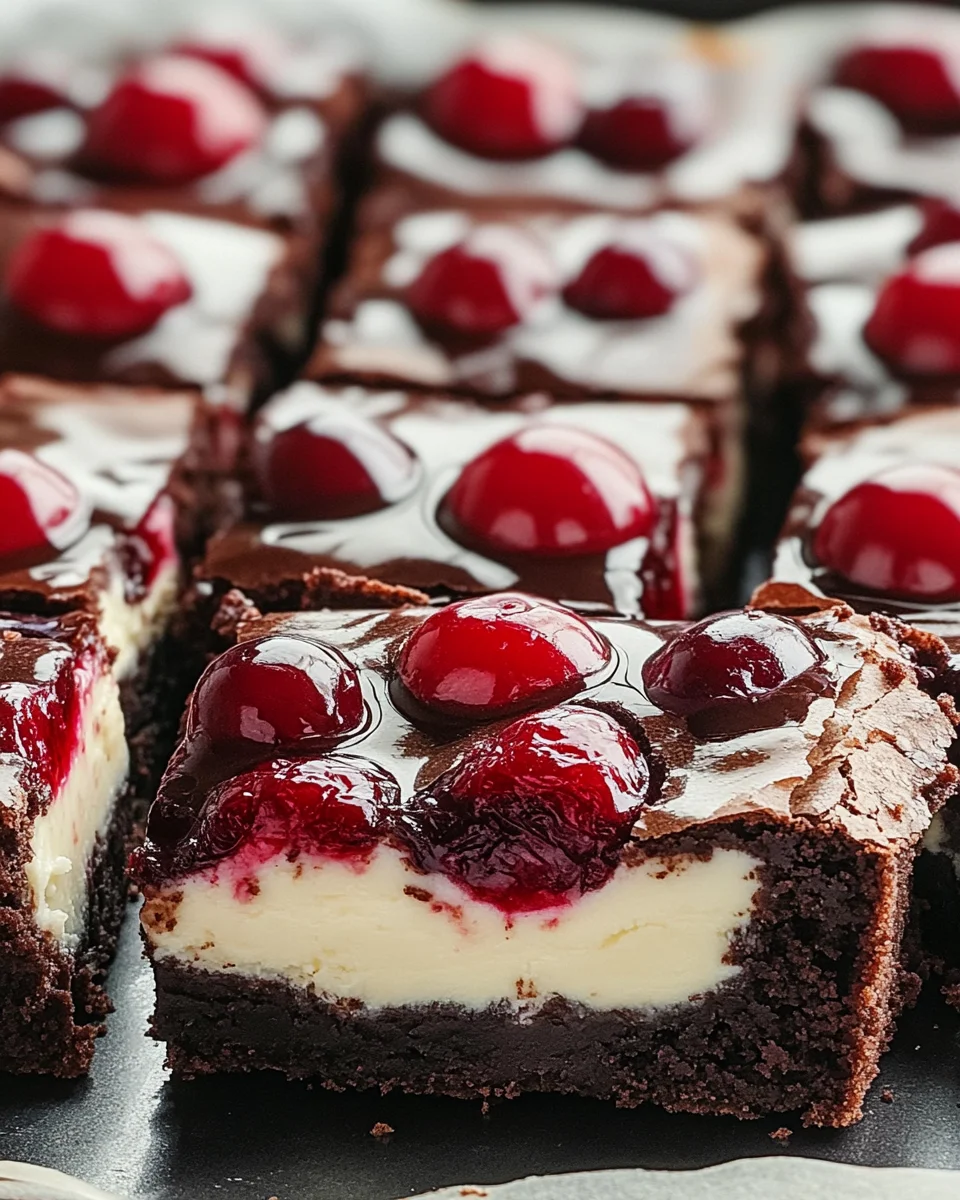
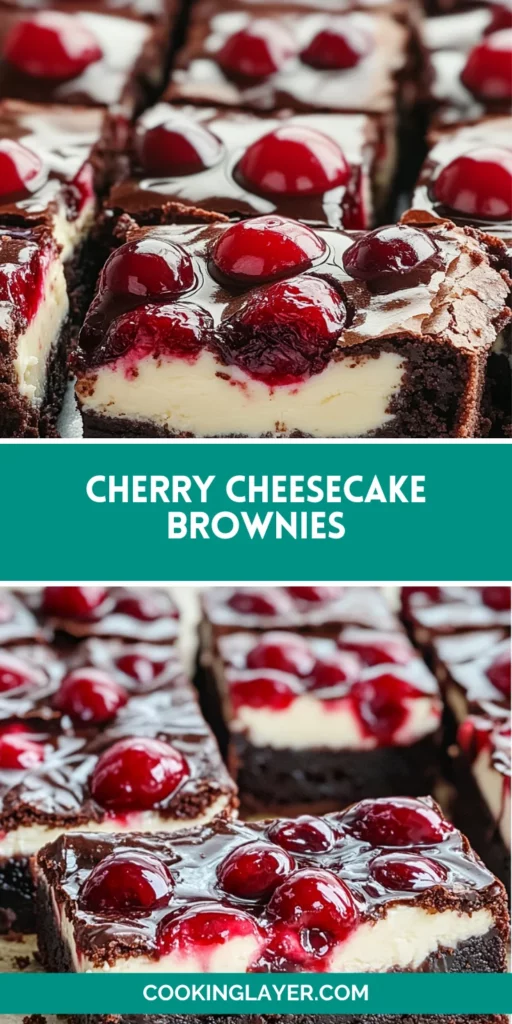
Introduction to Cherry Cheesecake Brownies
Hello there, fellow home cooks! If you’re like me, juggling a busy schedule, sometimes all you need is a sweet escape. Enter my cherry cheesecake brownies. They combine luscious brownie layers with creamy cheesecake and delightful cherry filling. This recipe is a lifesaver when you’re looking to create something magical with minimal effort. Perfect for a quick dessert on a busy weeknight or a show-stopping treat to impress your family or friends. Trust me, your taste buds will thank you for diving into this delicious treat!
Why You’ll Love This Cherry Cheesecake Brownies
These cherry cheesecake brownies are the perfect sweet solution for any occasion. They come together quickly, making them ideal for busy weeknights or unexpected guests. Plus, the rich, chocolatey brownie complemented by creamy cheesecake and tart cherries creates a flavor explosion in every bite. With just a handful of ingredients and simple steps, you’ll be enjoying your new favorite dessert in no time. Who wouldn’t love that?
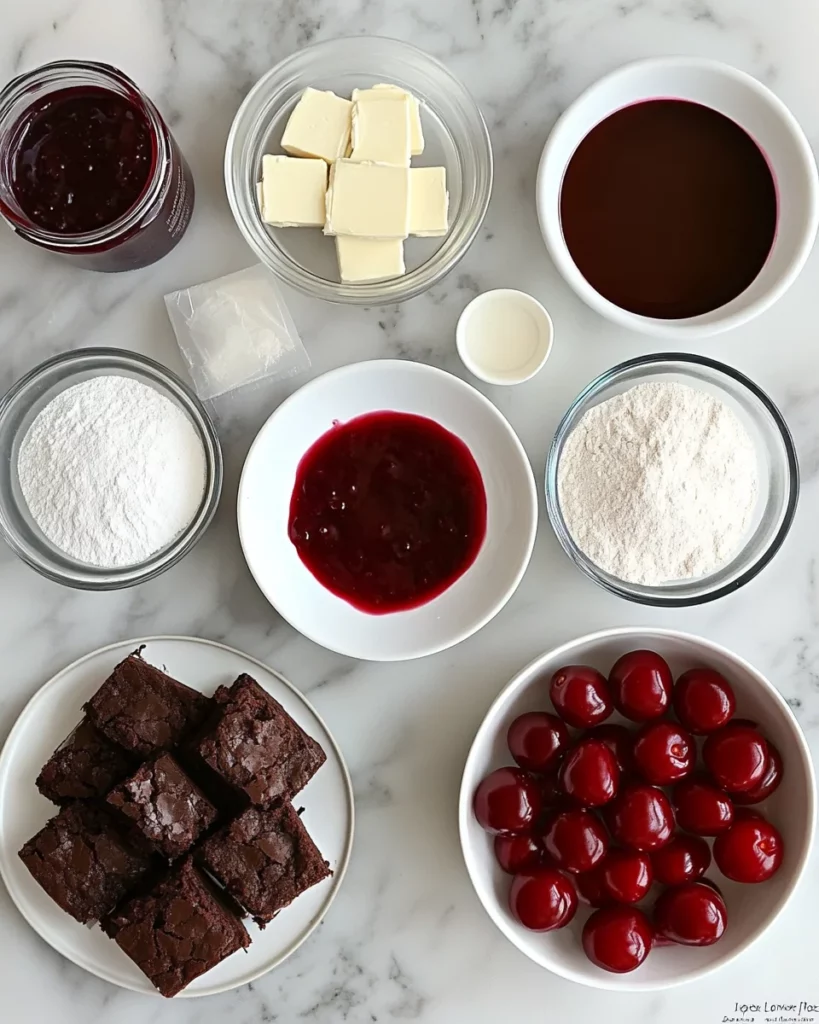
Ingredients for Cherry Cheesecake Brownies
This delightful dessert comes together with just a few simple ingredients, ensuring you won’t need to hunt down anything fancy. Here’s what you’ll need:
- Unsalted butter: Adds richness and helps bind the batter together.
- Granulated sugar: Balances the rich flavors and provides sweetness.
- Eggs: These act as a binder, giving the brownies a deliciously fudgy texture.
- Vanilla extract: A splash of this brings warmth and enhances the flavors throughout.
- Unsweetened cocoa powder: This is where the chocolate magic happens, bringing depth to our brownies.
- All-purpose flour: Provides structure and helps the brownies rise perfectly.
- Salt: A pinch enhances flavor and balances the sweetness of the dessert.
- Baking powder: Just a bit to help the brownies bloom without making them cake-like.
- Cream cheese: The heart of the cheesecake layer, it gives that rich creaminess we adore.
- Cherry pie filling: Adds a fruity tartness that complements the sweet and creamy layers beautifully.
You’ll find all these ingredients listed with their exact measurements at the bottom of the article, and they’re available for easy printing. For a fun twist, feel free to substitute with different pie fillings if cherries aren’t your jam. Blueberries or raspberries could be delightful alternatives!
How to Make Cherry Cheesecake Brownies
Preparing the Brownie Base
Let’s kick things off by making our rich brownie base. Start by melting the unsalted butter in a microwave-safe bowl. Once melted, whisk it together with the granulated sugar until it’s a smooth mixture. The warmth of the butter helps to dissolve the sugar, making the brownies chewy.
Next, add in the eggs one at a time, mixing well after each addition, followed by the vanilla extract. This adds a lovely flavor. Sift the cocoa powder, flour, salt, and baking powder directly into the brownie mixture. Gently stir until everything is just combined. This keeps our brownies fudgy and prevents them from being overmixed. Pour the brownie batter into your prepared baking pan, spreading it evenly. Let’s set the stage for that creamy cheesecake layer!
Making the Cheesecake Layer
Now onto the delightful cheesecake layer! In a separate bowl, beat the softened cream cheese until it’s nice and creamy. I often find that letting it sit at room temperature first makes it blend smoother. Add in the granulated sugar, followed by the egg and vanilla extract. This mixture should whip up into a dream—a smooth, rich filling that’s simply irresistible.
It’s important to blend these ingredients well, ensuring no lumps remain, leading to a velvety texture. This cheesecake layer is what truly elevates our cherry cheesecake brownies! Once done, set this aside while we prepare to assemble our layers. You’re almost done; it’s about to get delicious!
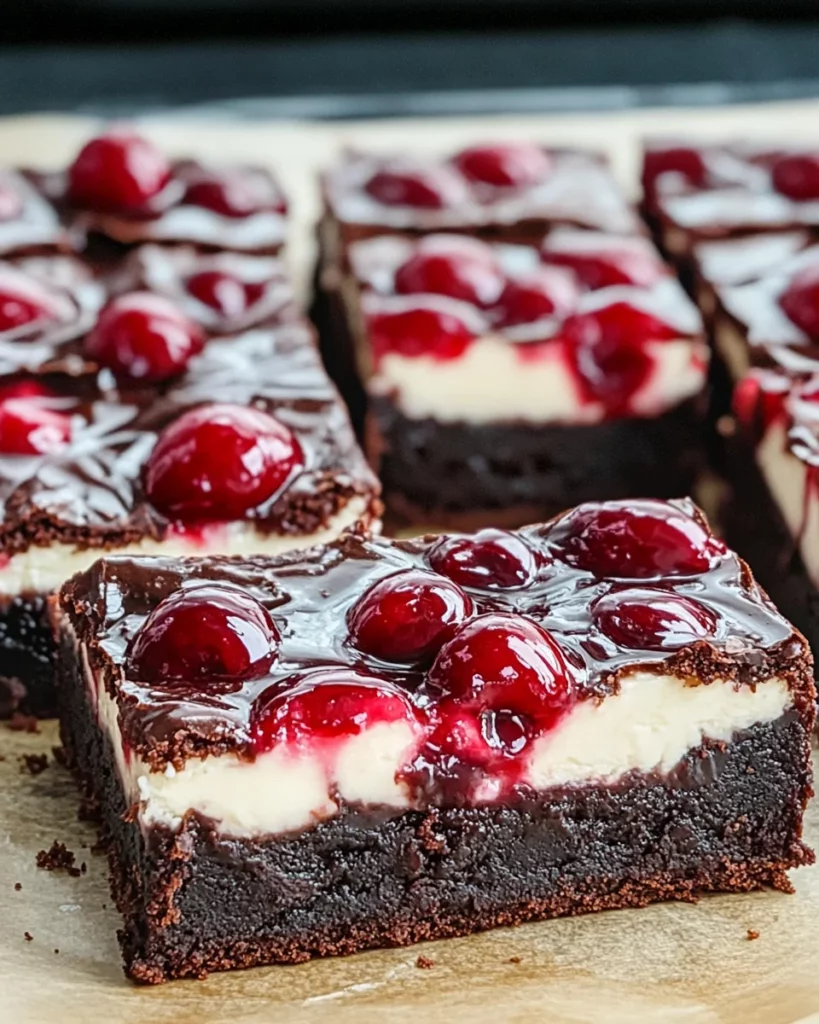
Assembling the Brownies
Let’s bring all the elements together! Carefully spread the cheesecake mixture over the brownie layer in the baking pan. Use a spatula to evenly distribute it, making sure to cover every corner. Now, it’s time for the cherry filling. Using a spoon, dollop the strained cherry pie filling across the cheesecake layer. This part is fun!
To create a beautiful marbled effect, take a knife or toothpick and gently swirl the cherry filling into the cheesecake. Be gentle though—too much mixing, and you’ll lose that striking contrast. Once you’re happy with the swirl, it’s time to pop them into the oven. Your hard work is about to pay off! Can you smell that chocolate-y goodness?
Baking Instructions
Time for the magic to happen in the oven! Preheat to 350°F (175°C) and bake the assembled brownies for 35-40 minutes. Keep an eye on them towards the end! You want the center to be set but not overbaked. A toothpick inserted in the center should come out with a few moist crumbs, signaling that they’re just perfect.
Once baked, let the brownies cool completely in the pan on a wire rack. After cooling, I recommend refrigerating them for at least two hours before cutting. This helps the flavors meld. Plus, chilling makes slicing cleaner. Prepare to be the star of the dessert table!
Tips for Success
- Always preheat your oven for even baking, ensuring those brownies rise beautifully.
- Don’t skip straining the cherry pie filling to avoid excess moisture, keeping the brownies perfectly fudgy.
- Let the cream cheese soften before mixing for a lump-free cheesecake layer.
- Cool the brownies completely before refrigerating for the best flavor and texture.
- Use high-quality ingredients for a more indulgent taste experience.
Equipment Needed
- 9×13-inch baking pan: You can use any comparable size, just adjust baking time if needed.
- Mixing bowls: A set of different sizes is helpful for various layers.
- Electric mixer: A hand mixer works well, but a whisk will do in a pinch!
- Spatula: Essential for spreading the batter evenly.
- Wire rack: For cooling; a plate can be used in a burst!
Variations
- Nutty Delight: Add chopped nuts like walnuts or pecans to the brownie layer for extra crunch.
- Chocolate Chip Cheesecake: Fold in semi-sweet chocolate chips into the cheesecake layer for indulgent bites.
- Gluten-Free Option: Substitute all-purpose flour with a gluten-free flour blend for a gluten-friendly treat.
- Fruit Swaps: Try swapping the cherry pie filling with blueberry or raspberry filling for a different fruity flavor.
- Vegan Version: Replace the eggs with flax eggs and use dairy alternatives for cream cheese and butter.
Serving Suggestions
- Serve with a dollop of whipped cream for a delightful touch.
- A scoop of vanilla ice cream on the side makes for a comforting pairing.
- Drizzle chocolate or caramel sauce over the top for added sweetness.
- Garnish with fresh cherries or mint leaves for a pop of color.
FAQs about Cherry Cheesecake Brownies
Can I use frozen cherries instead of cherry pie filling? Absolutely! Just thaw and drain the cherries well, and you can substitute them for the pie filling. Fresh cherries also work wonderfully!
How long do leftovers last? If stored in an airtight container in the refrigerator, your cherry cheesecake brownies will stay fresh for up to a week. They can also be frozen for longer storage.
Can I make these brownies ahead of time? Yes! These brownies are perfect for meal prep. Just bake, chill, and store them in the refrigerator until you’re ready to serve.
Are there other flavors I can add? Definitely! Feel free to experiment with other pie fillings or mix in chocolate chips. The sky’s the limit with these cherry cheesecake brownies!
What’s the best way to cut the brownies? After refrigerating, use a sharp knife to slice them into squares cleanly. Wiping the knife with a damp cloth between cuts helps for neat edges.
Final Thoughts
Making cherry cheesecake brownies isn’t just about baking; it’s about the joy of bringing people together over something delicious. I love how the rich brownie base, creamy cheesecake, and tart cherries blend into a symphony of flavors that can delight any crowd. Whether it’s a cozy family night or a gathering with friends, these brownies have a way of spreading happiness. You’ll be surprised at how easily they come together, making even the busiest days feel special. So, roll up your sleeves, grab those ingredients, and treat yourself and your loved ones to this delightful indulgence!
Print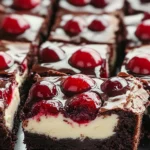
Cherry cheesecake brownies: Indulge in this delicious treat!
- Prep Time: 20 minutes
- Cook Time: 35-40 minutes
- Total Time: 2 hours 55 minutes (including cooling time)
- Yield: 16 brownies 1x
- Category: Dessert
- Method: Baking
- Cuisine: American
- Diet: Vegetarian
Description
Delicious cherry cheesecake brownies that combine rich brownie layers with creamy cheesecake and tart cherry filling for a perfect dessert.
Ingredients
- 1/2 cup (115g) unsalted butter, melted
- 1 cup (200g) granulated sugar
- 2 large eggs
- 2 teaspoons vanilla extract
- 1/3 cup (35g) unsweetened cocoa powder
- 1/2 cup (65g) all-purpose flour
- 1/4 teaspoon salt
- 1/4 teaspoon baking powder
- 8 ounces (225g) cream cheese, softened
- 1/3 cup (65g) granulated sugar
- 1 large egg
- 1 teaspoon vanilla extract
- 1 can (21 ounces) cherry pie filling, strained to remove excess liquid
Instructions
- Preheat your oven to 350°F (175°C). Grease a 9×13-inch (23×33 cm) baking pan or line it with parchment paper.
- In a large bowl, whisk together the melted butter and granulated sugar until well combined.
- Add the eggs and vanilla extract, mixing until smooth.
- Sift in the cocoa powder, flour, salt, and baking powder. Stir until just combined; avoid over-mixing.
- Spread the brownie batter evenly into the prepared baking pan.
- In a separate bowl, beat the softened cream cheese until creamy.
- Add the granulated sugar, egg, and vanilla extract, beating until smooth and well combined.
- Carefully spread the cheesecake mixture over the brownie layer in the pan.
- Evenly distribute the strained cherry pie filling over the cheesecake layer.
- Use a knife or toothpick to gently swirl the cherry filling into the cheesecake layer for a marbled effect.
- Bake in the preheated oven for 35-40 minutes, or until the center is set and a toothpick inserted into the center comes out with a few moist crumbs.
- Allow the brownies to cool completely in the pan on a wire rack. Once cooled, refrigerate for at least 2 hours before cutting into squares. Store leftovers in the refrigerator.
Notes
- Make sure to strain the cherry pie filling to avoid excess moisture.
- For enhanced flavor, use high-quality vanilla extract.
- These brownies are best served chilled after refrigerating.
Nutrition
- Serving Size: 1 brownie (based on 16 servings)
- Calories: 250
- Sugar: 18g
- Sodium: 150mg
- Fat: 12g
- Saturated Fat: 7g
- Unsaturated Fat: 3g
- Trans Fat: 0g
- Carbohydrates: 32g
- Fiber: 1g
- Protein: 3g
- Cholesterol: 70mg


