Introduction to Cherry Crumb Bars
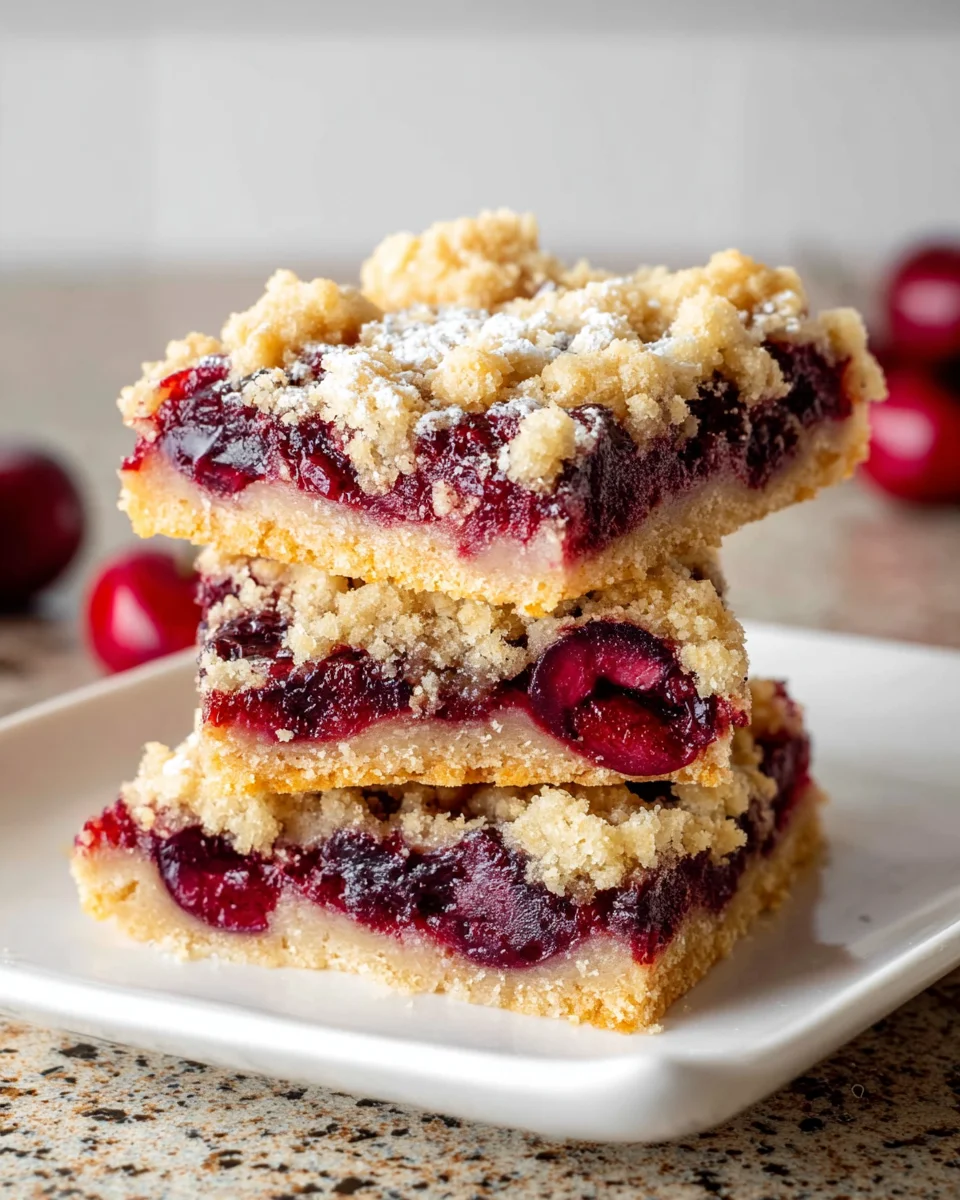
Life can get a little hectic, can’t it? Between juggling work, family, and everything in between, we all crave something sweet that doesn’t take hours to make. That’s where these delightful Cherry Crumb Bars come into play! They’re a perfect blend of juicy, tart cherries atop a buttery shortbread base, with a crumbly topping that gives each bite its own personality. This recipe whisks together quickly, making it an easy go-to for those busy days or gatherings when you want to impress your loved ones without breaking a sweat.
Why You’ll Love This Cherry Crumb Bars
If you’re like me, easy and fast recipes are a lifesaver during busy weeks. These Cherry Crumb Bars not only come together in a flash but also tantalize your taste buds with their sweet and tart cherry goodness. Plus, they’re versatile enough to serve at a casual family dinner or a festive gathering. You’ll love the cozy aroma as they bake, making your kitchen feel like home. Who wouldn’t want a slice of that?
Ingredients for Cherry Crumb Bars
Let’s dive into the ingredients that make these Cherry Crumb Bars so special. Each component plays a vital role in crafting this delectable dessert. Here’s what you’ll need:
- Cherry Layer: Fresh or frozen pitted cherries are essential. They offer that juicy burst of flavor. If you use sour cherries, you might want a touch more sugar to balance the tartness.
- Sugar: Granulated sugar sweetens the cherry layer and the shortbread mixture. Feel free to adjust based on your taste!
- Cornstarch: This helps thicken the cherry filling, ensuring it doesn’t turn runny. It’s a kitchen staple that’s handy in many recipes.
- Lemon Juice: Freshly squeezed lemon juice adds brightness and enhances the flavor of the cherries. Trust me, it makes a difference!
- Unsalted Butter: This magic ingredient gives the crust that melt-in-your-mouth quality. Be sure to use unsalted butter for better control over the sweetness.
- All-Purpose Flour: The foundation of the shortbread base. It creates that perfect crumbly texture we all adore in dessert bars.
- Brown Sugar: This adds a hint of caramel flavor and moisture. You can experiment with light or dark brown sugar, depending on your preference!
- Salt: A pinch of salt enhances the sweetness and balances flavors beautifully. Don’t skip it!
You’ll find exact quantities of these ingredients at the bottom of the article, along with a printable version. Let’s make some tasty memories with these Cherry Crumb Bars!
How to Make Cherry Crumb Bars
Step 1: Preheat the Oven
Let’s kick off this delicious adventure by preheating the oven to 325°F (170°C). A warm oven is essential for those scrumptious Cherry Crumb Bars. This step ensures that they bake evenly and develop that lovely golden crust we all adore.
Step 2: Prepare the Baking Pan
Next, it’s time to grab your trusty 8×8 inch (20×20 cm) baking pan. Line it with parchment paper, allowing some overhang on the edges. This little trick will help you lift those glorious bars out easily later. Trust me; your future self will thank you!
Step 3: Prepare the Cherry Filling
Now, let’s prepare that juicy cherry layer. In a medium bowl, toss together your pitted and sliced cherries with 1 tablespoon of granulated sugar, 2 tablespoons of cornstarch, and fresh lemon juice. This mixture will awaken the sweet-tart flavor you’ll fall in love with. Set it aside, allowing the flavors to mingle!
Step 4: Mix the Shortbread Base
In a large mixing bowl, combine the dry ingredients for the shortbread base. Whisk together 1 3/4 cups of all-purpose flour, 2/3 cup granulated sugar, 3 tablespoons cornstarch, and 1/4 teaspoon salt. Then, stir in that melted unsalted butter until the mixture looks crumbly—a perfect blend of butter and sweetness awaits!
Step 5: Bake the Base
Grab a little more than half of the crumbly shortbread mixture and press it firmly into the bottom of your lined baking pan. Bake for about 15-20 minutes, or until the top looks set. This step lays the foundation for the Cherry Crumb Bars, so don’t rush it!
Step 6: Layer it Up
Time to assemble the masterpiece! Carefully spoon the cherry mixture over the baked shortbread base. Spread it evenly, but be cautious with the juice—you don’t want a soggy bottom. Crumble the remaining shortbread mixture over the cherries, letting some of those gorgeous cherries peek through!
Step 7: Final Bake
Pop the pan back into the oven and bake for an additional 25 minutes. Keep an eye on it; you’re looking for a lovely golden color on top. The aroma of cherries and buttery goodness will soon fill your kitchen, making it hard to resist!
Step 8: Cooling and Slicing
Once baked to perfection, remove the pan from the oven and allow it to cool completely. This step is crucial; cooling for 3-4 hours will help the bars set properly. When you’re ready to slice, use the parchment paper to lift them out. A sharp knife will give you those clean, beautiful pieces!
Tips for Success
- Use fresh, in-season cherries for the best flavor, but frozen works just as well.
- Don’t skip the resting time after baking; it makes slicing much easier!
- For a fun twist, add a sprinkle of cinnamon or almond extract to the cherry layer.
- Ensure butter is melted, not just softened, for a perfectly crumbly base.
- Store any leftovers in an airtight container to keep them fresh longer.
Equipment Needed
- Baking Pan: An 8×8 inch (20×20 cm) pan is ideal. If you don’t have one, a similar sized dish will work.
- Parchment Paper: To line the pan for easy removal. Wax paper can be used in a pinch, but it’s not as reliable.
- A medium and large bowl, or any deep bowls, will do.
- Whisk: For mixing ingredients together. A fork can also work if you’re feeling adventurous!
- Sharp Knife: To slice the bars cleanly. A serrated knife could help too for crusty edges.
Variations
- Berry Bliss: Swap out cherries for a mix of berries like blueberries, raspberries, or strawberries. You’ll enjoy a delightful burst of colors and flavors!
- Nutty Topping: Add chopped nuts such as pecans or walnuts to the crumb topping for added crunch and a nutty flavor. Just be sure no one has a nut allergy!
- Gluten-Free Option: Use a gluten-free flour blend to make the shortbread crust. It works beautifully and caters to those avoiding gluten.
- Vegan Twist: Substitute unsalted butter with coconut oil or a vegan butter alternative and replace eggs with a flax egg mixture for a plant-based version.
- Spiced Cherry Delight: Enhance the cherry layer with a pinch of cinnamon or nutmeg for a warm, comforting twist that’s perfect for cozy gatherings.
Serving Suggestions for Cherry Crumb Bars
- Pair these Cherry Crumb Bars with a scoop of vanilla ice cream for a delightful contrast of warm and cold.
- Enjoy with a dollop of fresh whipped cream for an extra touch of indulgence.
- Serve alongside a cup of hot coffee or a refreshing iced tea.
- For a charming presentation, dust with powdered sugar before serving.
- Garnish with a sprig of mint for a pop of color and freshness.
FAQs about Cherry Crumb Bars
Can I use frozen cherries for Cherry Crumb Bars? Absolutely! Frozen cherries work well in this recipe. Just make sure they are pitted and drained before using. They may require a quick thaw to help release any excess moisture.
How do I store leftover Cherry Crumb Bars? Store the bars in an airtight container at room temperature for up to a week. If you want to extend their freshness, pop them in the fridge.
Can I make Cherry Crumb Bars gluten-free? Yes! Just substitute regular all-purpose flour with a gluten-free flour blend. The bars will still turn out delightful and tasty.
What can I serve with Cherry Crumb Bars? These bars are perfect with a scoop of vanilla ice cream or a dollop of whipped cream. Pairing with tea or coffee makes for a lovely afternoon snack!
How do I prevent the cherry filling from being too runny? Ensure you properly mix the cornstarch with the cherries before baking. This step thickens the filling and keeps it from getting soggy.
Final Thoughts
Making these Cherry Crumb Bars isn’t just about baking; it’s about creating sweet memories in the kitchen and bringing joy to those you love. The combination of fresh cherries on a buttery crust evokes warm, nostalgic feelings, each bite reminding us of simpler times. As the aromas dance through your home, you’ll realize it’s not just a dessert—it’s a way to connect with family and friends. So roll up your sleeves, gather your ingredients, and dive into this delightful adventure. Trust me, you’ll be met with smiles and compliments, and that’s the sweetest reward of all!
Print
Cherry Crumb Bars
- Prep Time: 20 minutes
- Cook Time: 45 minutes
- Total Time: 1 hour 5 minutes
- Yield: 16 bars 1x
- Category: Dessert
- Method: Baking
- Cuisine: American
- Diet: Vegetarian
Description
Delicious Cherry Crumb Bars made with a cherry layer and a buttery shortbread base topped with a crumb mixture.
Ingredients
- Cherry Layer
- 2 cups pitted cherries, measure after pitting & slicing in half
- 1 tablespoon granulated sugar, use 3 tablespoons if using sour cherries
- 2 tablespoons cornstarch (16 grams)
- 1 tablespoon lemon juice, freshly squeezed
- Shortbread Base & Crumb Topping
- 3/4 cup unsalted butter (168 grams), melted
- 1 3/4 cup all-purpose flour (219 grams)
- 2/3 cup granulated sugar (133 grams)
- 3 tablespoons cornstarch (24 grams)
- 1/4 teaspoon salt
- 1 tablespoon brown sugar
Instructions
- Preheat the oven to 325F (170C).
- Line an 8×8 inch (20×20 cm) pan with parchment paper, leaving an overhang around the edges.
- Ensure your cherries are pitted (use a cherry pitter) and slice each cherry in half or quarters.
- In a medium bowl, toss together the cherry filling ingredients: cherries, 1 tablespoon sugar, 2 tablespoons cornstarch, and fresh lemon juice. Set aside.
- In a separate large bowl, whisk together the dry ingredients for the shortbread layer: 1 3/4 cups all-purpose flour, 2/3 cup granulated sugar, 3 tablespoons cornstarch, and 1/4 teaspoon salt (leave out the 1 tablespoon brown sugar).
- Stir/whisk the melted butter into the flour mixture until crumbly.
- Press a little more than half of the shortbread layer into the prepared pan.
- Bake in the preheated oven for 15-20 minutes, or until the top looks set. Remove from the oven, but leave the oven turned on.
- With the reserved shortbread mixture, stir in the 1 tablespoon of brown sugar.
- Carefully spoon the cherry mixture on top of the baked shortbread base to create an even layer, avoiding excess juice.
- Crumble the remaining shortbread mixture over the cherry layer, allowing some cherries to poke through.
- Place the pan back in the preheated oven and bake for about 25 minutes or until the top turns golden yellow.
- Cool the bars completely (this will take 3-4 hours).
- When ready to slice, lift the bars out using the parchment overhang and slice using a sharp knife.
Notes
- Use fresh or frozen cherries, but ensure they are pitted and drained if frozen.
- These bars can be stored in an airtight container for up to a week.
- For best results, allow the bars to cool completely before slicing.
Nutrition
- Serving Size: 1 bar
- Calories: 250
- Sugar: 15g
- Sodium: 150mg
- Fat: 10g
- Saturated Fat: 6g
- Unsaturated Fat: 4g
- Trans Fat: 0g
- Carbohydrates: 38g
- Fiber: 2g
- Protein: 3g
- Cholesterol: 30mg