Why Everyone’s Obsessed with Cherry Pecan Cheesecake Lush
Have you ever tasted a dessert so creamy, so crunchy, and so indulgently sweet that you had to pause mid-bite just to appreciate it? That’s exactly what Cherry Pecan Cheesecake Lush does to you. This isn’t just a dessert—it’s a layered miracle that melts in your mouth while giving you that satisfying nutty crunch and tangy cherry burst. Oh, and did we mention? It’s completely no-bake. 🙌
Whether you’re headed to a holiday dinner, a weekend BBQ, or just satisfying a Tuesday night craving, this cheesecake lush is a guaranteed crowd-pleaser. It looks fancy, tastes incredible, and yet—surprisingly—takes very little time to put together. We’re talking minimal effort for maximum flavor.
Let’s walk you through every decadent, dreamy layer of this dessert masterpiece.
What is a Cheesecake Lush, Anyway?
If you’ve never heard the term “lush” in the dessert world, you’re in for a treat (pun intended). A “lush” is a layered no-bake dessert, usually made with a buttery base, creamy cheesecake or pudding layers, and some kind of fruity or chocolate topping.
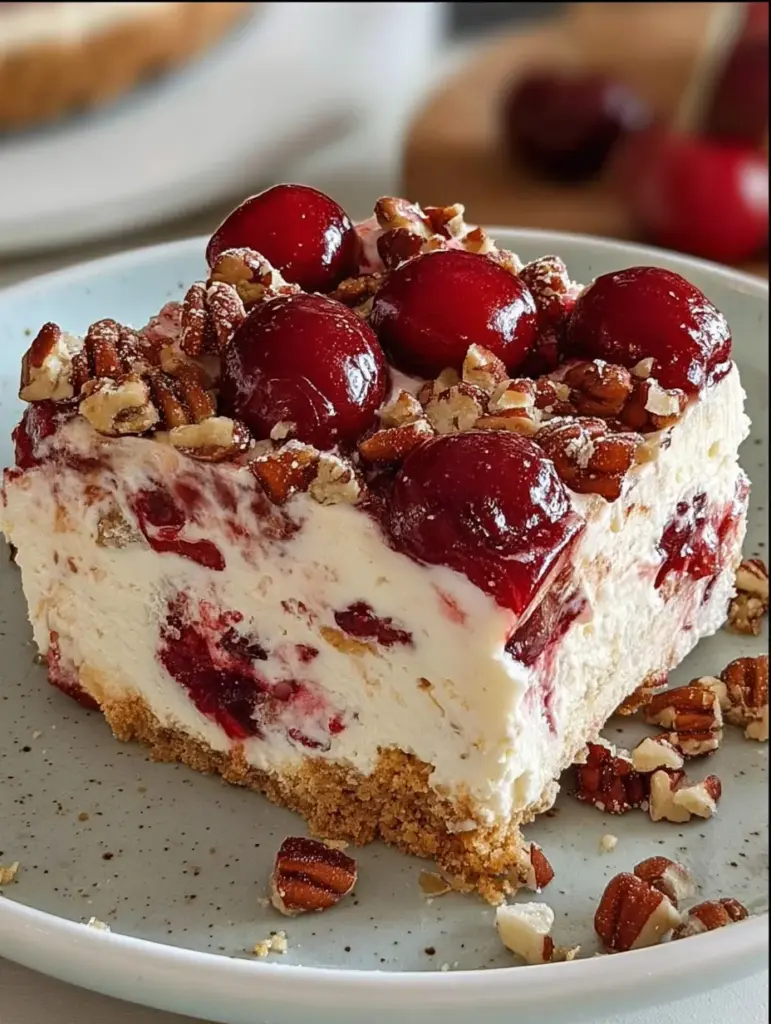
Think of it as a hybrid between a trifle, cheesecake, and icebox cake. Each bite gives you layers of texture: crunchy, smooth, creamy, fruity, and nutty. And with the cherries and pecans in this one? You’re basically spooning up happiness.
Why This Recipe is the Ultimate No-Bake Dessert
There are a lot of lush desserts out there—but the Cherry Pecan Cheesecake Lush hits differently. Why? Because it combines classic comfort flavors like graham cracker crust, sweet-tart cherry pie filling, rich cheesecake, and crunchy pecans. Plus:
- No oven? No problem.
- Prep time? Only about 30 minutes.
- Fancy looking? Absolutely.
- Tastes like you slaved all day? Yep.
- Did you actually? Not even close.
It’s the ultimate “cheat code” for a beautiful dessert that looks bakery-made but is totally beginner-friendly.
Ingredients Overview: Let’s Talk Layers
Let’s break down the magic.
Crust Layer
- 1 ½ cups graham cracker crumbs
- ½ cup finely chopped pecans
- ½ cup melted butter
The crust is buttery, nutty, and gives the dessert a solid base that holds all that creamy goodness without getting soggy.
Cheesecake Layer
- 16 oz cream cheese (softened)
- 1 cup powdered sugar
- 1 tsp vanilla extract
- 1 ½ cups whipped topping (Cool Whip or homemade)
This is where the fluff meets the tang. Softened cream cheese + whipped topping = silky heaven.
Pudding Layer
- 2 boxes (3.4 oz each) instant cheesecake pudding mix
- 2 ½ cups cold milk
Instant pudding adds structure, sweetness, and body—without the hassle of baking or cooking. Cheesecake-flavored pudding takes things over the top.
Topping Layer
- 1 can (21 oz) cherry pie filling
- ½ cup chopped pecans
- Extra whipped topping (optional)
The cherries add a juicy, glossy, ruby-red finish. Pecans bring in that signature crunch.
Essential Tools You’ll Need
You don’t need a professional kitchen for this recipe. Just gather:
- 9×13-inch glass dish (a must for seeing those gorgeous layers)
- Electric hand mixer or stand mixer
- Spatula
- Mixing bowls
- Whisk
- Measuring cups
Optional: Piping bag if you want to decorate the top with whipped cream swirls.
Let’s Make the Crust
Alright, let’s get to the good stuff.
- Mix it up: In a bowl, combine your graham cracker crumbs, finely chopped pecans, and melted butter.
- Press it down: Pour the mixture into your dish and press it evenly into the bottom. Use the bottom of a measuring cup to get it flat and firm.
- Chill it: Pop it in the fridge for at least 15 minutes so it firms up.
Pro Tip: Want extra depth? Add a pinch of cinnamon or nutmeg to the crust.
Creating That Dreamy Cheesecake Layer
This layer is all about silky, creamy, sweet perfection.
- Whip the cream cheese: Make sure it’s softened! Beat it with powdered sugar and vanilla until smooth.
- Fold, don’t mix: Gently fold in the whipped topping. This keeps the texture light and airy.
- Spread it: Spoon it over your chilled crust and spread it evenly.
Pro Tip: Cold cream cheese will create lumps. Let it soften at room temp for 30 minutes first.
Cheesecake Pudding Layer: The Hidden Hero
This part adds firmness and a cheesecake-like texture without actually baking anything.
- Whisk it fast: In a bowl, combine the pudding mix with cold milk and whisk for about 2 minutes until thick.
- Layer it on: Spread the pudding over the cream cheese layer.
The result? A silky-smooth, lightly sweet layer that pulls the whole dessert together.
Cherry on Top: Literally 🍒
You can’t have Cherry Cheesecake Lush without the cherries!
- Use a spoon to gently spread the cherry pie filling over the pudding layer.
- Try not to press or drag—just gently guide the cherries into place.
Want to use fresh cherries instead? You can—but the classic glossy topping from cherry pie filling really gives it that retro dessert vibe.
Adding Crunch: Pecans, Pecans, Pecans!
Sprinkle chopped pecans all over the top—don’t be shy. You want that nutty texture in every bite. Pecans pair perfectly with cherries, adding both earthiness and crunch.
For even more flavor, you can toast the pecans in a skillet for 2-3 minutes before adding them.
Final Touch: Optional Whipped Topping Swirls
Want to impress your guests or Instagram followers? Add a little whipped topping around the edges using a piping bag. It adds a beautiful, bakery-worthy finish.
You can also dust with a little extra graham cracker or cinnamon if you’re feeling fancy.
Chilling Time – And Why It’s So Important
This isn’t a dessert you eat right away. It needs time to firm up.
- Chill for at least 2 hours—overnight is even better.
- This allows the layers to set and the flavors to blend beautifully.
Pro Tip: If you’re in a rush, pop it in the freezer for an hour, then finish chilling in the fridge.
How to Serve It Perfectly Every Time
When it’s time to serve:
- Use a sharp knife to cut clean squares.
- Wipe the knife between slices to keep the edges tidy.
- Use a spatula to lift slices—go slow and steady.
Serve chilled for best results.
Storage Tips: Make It Last Longer (If It Lasts at All!)
If you somehow manage to have leftovers (kudos for your self-control), you’ll want to store them the right way to keep all that goodness intact.
- Refrigerator: Cover the dish tightly with plastic wrap or an airtight lid. It’ll stay fresh for up to 5 days.
- Freezer: Want to keep it longer? Freeze individual slices on a baking sheet, then transfer them to an airtight container or freezer bag. It will last for about 2-3 months.
- Thawing: Let frozen portions thaw in the fridge overnight. The texture might be a little softer, but still totally delicious.
Avoid leaving it out at room temperature for more than an hour, especially on warm days—it’s cream-based, after all!
Perfect Occasions for Cherry Pecan Cheesecake Lush
This dessert isn’t just a one-season wonder. It’s perfect year-round:
- 🎄 Christmas: The red cherries and snowy cream scream holiday vibes.
- 🦃 Thanksgiving: Add it to your dessert spread—it balances out all the pies!
- 🎂 Birthdays: Who says you need cake?
- 🎉 Potlucks and BBQs: It’s no-bake, travels well, and feeds a crowd.
- 💖 Date Nights or Self-Treats: Because YOU deserve it.
Basically, if there’s a table, this dessert deserves to be on it.
Variations to Try Next Time
Feeling adventurous? Customize your cheesecake lush with these fun twists:
- Chocolate Cherry: Add mini chocolate chips between layers or drizzle chocolate syrup on top.
- Tropical Vibes: Replace cherry pie filling with crushed pineapple and mango slices.
- Nut-Free Version: Use crushed pretzels or just graham crackers for the crust. Skip the pecans.
- Fresh Berries: Instead of cherry pie filling, use a mix of fresh raspberries, blueberries, and strawberries.
- Pumpkin Spice: Add pumpkin puree and cinnamon to the cheesecake layer for a fall version.
The base recipe is super flexible—don’t be afraid to make it your own!
Common Mistakes to Avoid
Let’s keep your cheesecake lush dreamy—not disastrous.
- Using Cold Cream Cheese: This causes lumps. Let it soften first!
- Overmixing the Whipped Topping: Fold gently or you’ll lose that fluffy texture.
- Not Chilling Long Enough: It won’t set properly and will be a runny mess.
- Soggy Crust: Always chill your crust before adding layers.
- Too Much Cherry Topping: It can overwhelm the other layers. Spoon it evenly.
Avoid these pitfalls, and you’ll be golden. ✨
Print
Cherry Pecan Cheesecake Lush
- Prep Time: 30 minutes
- Total Time: 2 hours 30 minutes
- Category: No-Bake Desserts / Holiday Cheesecake Lush
Description
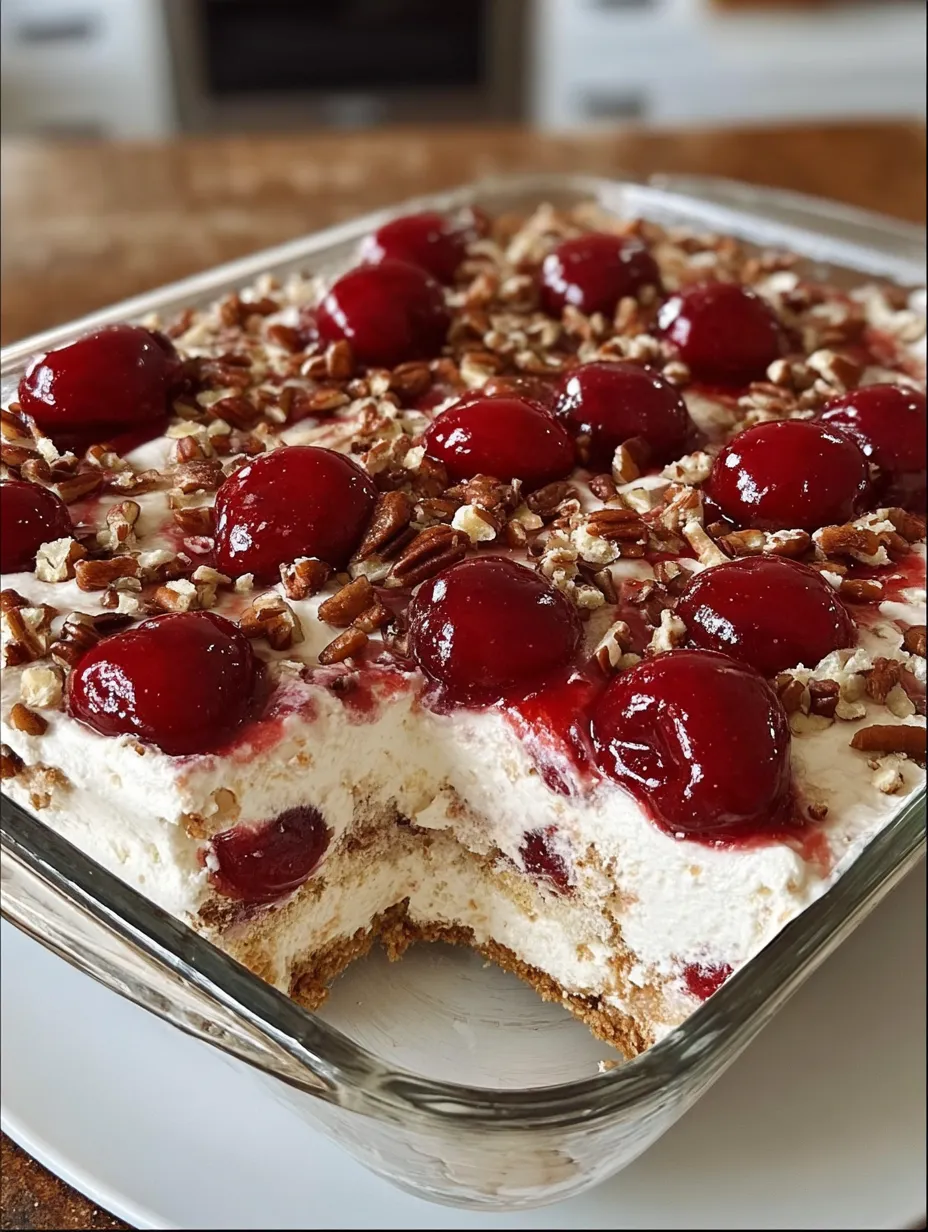
🍰 A soft, dreamy no-bake delight layered with creamy cheesecake, smooth pudding, toasted pecans, and a glossy cherry topping. This is one of those desserts that disappears before you even set the pan down. 💖 Sometimes the simplest treats bring the biggest smiles — especially when they taste like pure comfort. 😍
Ingredients
For the crust:
1 ½ cups graham cracker crumbs
½ cup finely chopped pecans
½ cup melted butter
For the cheesecake layer:
16 oz cream cheese, softened
1 cup powdered sugar
1 teaspoon vanilla extract
1 ½ cups whipped topping
For the pudding layer:
2 boxes (3.4 oz each) instant cheesecake pudding mix
2 ½ cups cold milk
For the topping:
1 can (21 oz) cherry pie filling
½ cup chopped pecans
Extra whipped topping (optional)
Instructions
Prepare the crust (10 minutes):
Mix graham cracker crumbs, pecans, and melted butter until well coated. Press firmly into a 9×13 inch pan, making sure the base is even. Chill for 15 minutes to set. 🧊Make the cheesecake layer (10 minutes):
Beat cream cheese, powdered sugar, and vanilla until creamy and smooth. Fold in whipped topping gently to keep it fluffy. Spread over the chilled crust.Prepare the pudding layer (5 minutes):
Whisk pudding mix with cold milk until thickened (about 2 minutes). Spread the pudding evenly over the cheesecake layer.Add the topping (5 minutes):
Spoon cherry pie filling across the top, letting the cherries shine. Sprinkle pecans for that perfect crunch. Add dollops of whipped topping if desired. 🍒✨Chill before serving (2 hours):
Refrigerate for at least 2 hours — overnight is even better — to let all the layers set beautifully.
Notes
Multi-layered, creamy, and perfect for gatherings.
Uses a graham–pecan crust for extra flavor.
Simple no-bake cheesecake and pudding layers = beginner-friendly.
Cherry topping adds color and festive appeal.
Best when chilled several hours or overnight for clean slices.
Nutrition
- Serving Size: 12
- Calories: 380 kcal
Nutritional Breakdown (Per Serving)
Let’s be real—this isn’t a “diet” dessert, but it’s 1000% worth it. Here’s the breakdown (approximate, for one of 12 servings):
| Nutrient | Amount |
|---|---|
| Calories | 380 kcal |
| Total Fat | 24g |
| Saturated Fat | 11g |
| Cholesterol | 40mg |
| Sodium | 240mg |
| Carbohydrates | 36g |
| Sugar | 26g |
| Protein | 4g |
Moderation is key—but don’t be surprised if you go back for seconds. Or thirds.
Similar recipes :
Christmas Cherry Cheesecake Bars: A Festive Delight That’ll Steal the Dessert Table
Christmas Cherry Fluff Recipe – A No-Bake Holiday Classic Full of Cheer
Christmas Cherry Bombs: The Ultimate Festive Dessert You Need This Holiday Season
Oreo Cherry Chocolate Chip No-Bake Cheesecake
Conclusion: Sweet, Crunchy, Creamy Bliss
Cherry Pecan Cheesecake Lush is more than just a dessert—it’s a love letter to all things indulgent and delicious. From the buttery pecan-graham crust to the cloud-like cheesecake and pudding layers, topped with that iconic cherry finish… every bite is a little celebration.
It’s no-bake. It’s rich. It’s ridiculously easy. And it’s guaranteed to make anyone who tastes it ask for the recipe.
So whether you’re whipping this up for a holiday dinner, a backyard party, or just because your sweet tooth demanded attention—this is the dessert to reach for. Go on, get layering and enjoy every spoonful of this creamy cherry dream. 🍒
FAQs: Everything You Need to Know Before You Make It
1. Can I make Cherry Pecan Cheesecake Lush ahead of time?
Yes! In fact, it’s even better when made a day ahead because it gives the layers more time to set and blend flavors.
2. What if I don’t have cheesecake pudding mix?
You can use vanilla pudding as a substitute. It’ll still be delicious, though slightly less tangy.
3. Can I use homemade whipped cream instead of Cool Whip?
Absolutely. Just make sure to stabilize it with a bit of powdered sugar or gelatin so it holds up in the layers.
4. How can I make it gluten-free?
Use gluten-free graham crackers for the crust and double-check your pudding mix and pie filling are gluten-free.
5. How do I keep the layers from mixing together?
Make sure each layer is spread gently and evenly, and that the crust is properly chilled before adding the next layer.


