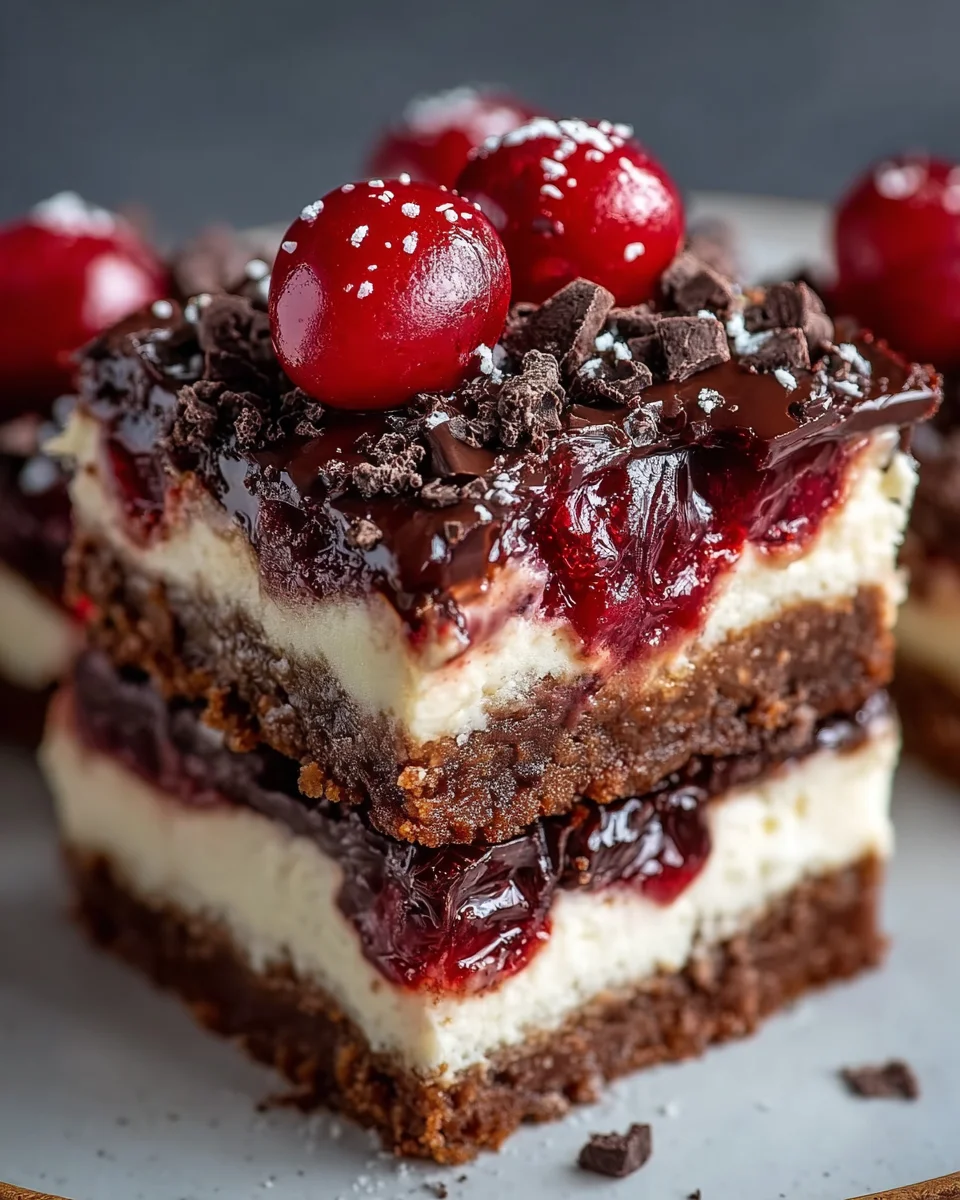
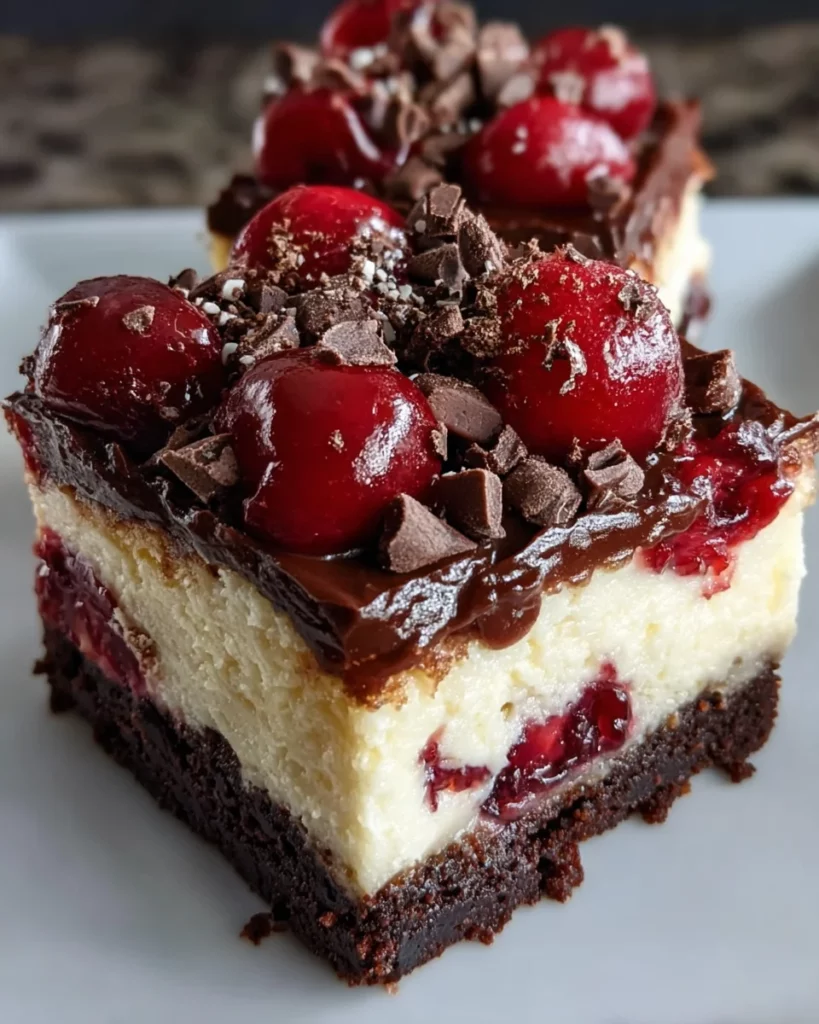
Introduction to Chocolate Cherry Cheesecake Bars
Hey there, fellow dessert lovers! If you’re anything like me, you know how busy life can get. Between juggling work, family, and everything in between, finding time to whip up something special can feel overwhelming. That’s why I’m excited to share my recipe for Chocolate Cherry Cheesecake Bars. They’re the perfect blend of creamy cheesecake, chocolatey goodness, and delectable cherry flavor. Whether you need a quick treat for a last-minute gathering or want to impress your loved ones with a homemade delight, these bars are just what you need to satisfy that sweet tooth!
Why You’ll Love This Chocolate Cherry Cheesecake Bars
These Chocolate Cherry Cheesecake Bars are a dream come true for busy moms and professionals alike! They come together quickly and easily, meaning you can whip them up even on a hectic day. The luscious combination of chocolate and cherry is not only indulgent but also a surefire way to please a crowd. Plus, they can be prepared ahead of time, making them an ideal solution for last-minute gatherings or sweet cravings after dinner!
Ingredients for Chocolate Cherry Cheesecake Bars
Let’s talk about the star ingredients that make up these delicious Chocolate Cherry Cheesecake Bars. You’ll find that each component plays a vital role in creating that perfect flavor and texture combination. Here’s what you’ll need:
- Graham cracker crumbs or chocolate sandwich cookie crumbs: Both options create a delightful crust, but chocolate sandwich cookies can intensify the chocolatey flavor.
- Unsalted butter: Butter brings richness to the crust. Unsalted allows you to control the saltiness in the recipe.
- Cream cheese: The foundation of our cheesecake filling! Softened cream cheese ensures a smooth blend and velvety texture.
- Granulated sugar: This brings sweetness to balance the tangy cream cheese for a creamy filling.
- Eggs: Eggs help to bind the filling together and give it that cheesecake consistency we all crave.
- Vanilla extract: A splash of vanilla adds depth and enhances the sweet flavors in the cheesecake.
- Cherry pie filling: This delicious topping not only adds fruity flavor but also gives a beautiful marbling effect.
- Semi-sweet chocolate chips: The finishing touch! They add bursts of chocolate goodness in each bite.
For those interested in experimenting, you can replace the cherry pie filling with other fruits, like blueberries or raspberries, for a new twist!
If you’d like to see the exact quantities for these ingredients, they’re detailed at the bottom of the article and you can print them out for easy reference!
How to Make Chocolate Cherry Cheesecake Bars
Now that we’ve gathered everything we need, let’s dive into making these irresistible Chocolate Cherry Cheesecake Bars. Follow these simple steps, and you’ll have a crowd-pleasing dessert in no time!
Step 1: Preheat and Prepare Your Baking Pan
First things first, preheat your oven to 350°F (175°C). This is essential for achieving that perfect baked texture.
Next, line an 8-inch square baking pan with parchment paper. Leave overhang on two sides for easier removal later. Trust me, this step is your best friend when it’s time to serve those bars!
Step 2: Create Your Crust
In a bowl, combine your graham cracker crumbs or chocolate sandwich cookie crumbs with melted butter. Mix until the crumbs are well coated.
Now, press this mixture firmly into the bottom of your prepared baking pan. This will form a sturdy crust for your cheesecake filling. Remember, if you choose chocolate sandwich cookies, you’ll get an even more intense chocolate flavor!
Step 3: Make the Cheesecake Filling
In a large mixing bowl, beat the softened cream cheese with granulated sugar. You want a smooth and creamy consistency, so take your time!
Add the eggs one at a time, mixing gently after each addition. Then, blend in the vanilla extract until everything is well incorporated. This creamy filling is the heart of your Chocolate Cherry Cheesecake Bars!
Step 4: Combine with Cherry Pie Filling
Once your filling is ready, pour it over the prepared crust. Use a spatula to smooth the surface gently.
Next, drop spoonfuls of cherry pie filling over the cheesecake filling. Here comes the fun part! Take a knife and gently swirl the cherry filling to create a beautiful marbled effect. Just be careful not to overmix—it’s all about balance!
Step 5: Add Chocolate Chips
Sprinkle semi-sweet chocolate chips across the top of the batter. Press them in slightly if you want them to settle into the filling. This will add those delightful chocolate bursts in every bite.
Step 6: Bake to Perfection
Pop the pan into your preheated oven and bake for 30–45 minutes. Keep an eye on those edges! You want them set, but the center should still be a little jiggly when you pull them out.
Don’t worry, the bars will firm up as they cool. You’ll know they’re ready when the edges are firm, and the top looks slightly golden.
Step 7: Cool and Chill
After baking, remove the pan from the oven and allow it to cool completely in the pan. The cooling time is essential for a great texture!
Once cooled, refrigerate them for several hours—preferably overnight. This helps the flavors meld beautifully. Plus, trust me, they’re even better chilled!
Tips for Success
- Make sure your cream cheese is fully softened for a smooth filling.
- For a cleaner cut, use a sharp knife dipped in warm water to slice the bars.
- Consider chilling the bars overnight for optimal flavor and texture.
- Don’t skip lining the pan—this makes removing the bars a breeze!
- Experiment with different toppings, like whipped cream or fresh cherries.
Equipment Needed
- 8-inch square baking pan: You can also use a 9-inch pan, but the bars may be slightly thinner.
- Parchment paper: Use aluminum foil in a pinch, but parchment is best for easy removal.
- Mixing bowls: A large bowl for the filling and a smaller one for the crust.
- Spatula: For smoothing the filling and swirling the cherry topping.
- Electric mixer: A hand mixer works great, but a whisk can also do the job with a little extra effort!
Variations for Chocolate Cherry Cheesecake Bars
- Fruit Options: Swap out the cherry pie filling for other fruits like blueberries, raspberries, or even strawberries for a different flavor profile.
- Gluten-Free Version: Use gluten-free graham cracker crumbs or almond flour mixed with butter for the crust.
- Cheesecake Swirl: Add a layer of flavored cheesecake by mixing in a bit of lemon or orange zest to the filling for a citrusy twist.
- Low-Sugar Alternative: Use a sugar substitute like Stevia or erythritol for those watching their sugar intake.
- Dairy-Free Option: Replace cream cheese with a dairy-free alternative made from cashews or coconut for a similar texture.
Serving Suggestions for Chocolate Cherry Cheesecake Bars
- Serve with a dollop of whipped cream on top for extra decadence.
- Pair with a scoop of vanilla ice cream for a delightful contrast in textures.
- Fresh mint leaves make a lovely garnish for presentation.
- Enjoy these bars with a cup of steaming coffee or tea to balance the sweetness.
- For a festive touch, sprinkle powdered sugar over the top before serving.
FAQs about Chocolate Cherry Cheesecake Bars
As we embark on this delicious journey together, you might have a few questions about making these Chocolate Cherry Cheesecake Bars. Don’t worry; I’ve got you covered! Let’s dive into some of the most frequently asked questions.
Can I freeze the Chocolate Cherry Cheesecake Bars?
Absolutely! These bars freeze beautifully. Just make sure they’re completely chilled first. Wrap them in plastic wrap and then in aluminum foil. They can last up to three months in the freezer. Just thaw in the refrigerator before serving!
How can I make these bars less sweet?
If you’re looking to cut back on sweetness, consider reducing the sugar in the filling. You can also opt for dark chocolate chips, which have a stronger chocolate flavor without additional sweetness. It’s a great way to maintain richness!
What should I do if my cheesecake bars crack?
Cracks can occur if the bars bake too quickly. Make sure to keep the oven temperature steady, and avoid overmixing your filling. If cracks do appear, don’t fret! They’ll still taste amazing, and a sprinkle of chocolate chips or whipped cream can cover them up beautifully!
Can I use fresh cherries instead of cherry pie filling?
Yes, you can use fresh cherries! Just make sure to pit and chop them before adding them to the mixture. You may want to add a bit of sugar to sweeten them, especially if they’re tart. This lends a fresh twist to the bars!
How long do these cheesecake bars keep in the refrigerator?
Once chilled, these Chocolate Cherry Cheesecake Bars can last up to five days in the refrigerator when stored in an airtight container. They tend to get better as they sit, allowing all the flavors to meld!
Final Thoughts
As I whip up these Chocolate Cherry Cheesecake Bars, I’m reminded of the simple joys of baking. This recipe brings together flavors that dance on your palate, creating sweet memories with each bite. They’re not just a dessert; they’re a moment of happiness to share with family and friends. Whether you’re savoring a quiet evening or celebrating a special occasion, these bars elevate any occasion. Plus, their ease of preparation lets you focus on what truly matters—enjoying life’s little moments. So roll up your sleeves and let the laughter and sweetness fill your home with joy!
Print
Chocolate Cherry Cheesecake Bars
- Prep Time: 15 minutes
- Cook Time: 30-45 minutes
- Total Time: 45 minutes plus chilling time
- Yield: 16 bars 1x
- Category: Dessert
- Method: Baking
- Cuisine: American
- Diet: Vegetarian
Description
Decadent chocolate cherry cheesecake bars that combine a creamy filling with the rich flavors of chocolate and cherry.
Ingredients
- 1 1/2 cups graham cracker crumbs or chocolate sandwich cookie crumbs
- 5 tablespoons unsalted butter, melted
- 16 ounces cream cheese, softened
- 1/2 cup granulated sugar
- 2 large eggs
- 1 teaspoon vanilla extract
- 1/2 cup cherry pie filling
- 1/2 cup semi-sweet chocolate chips
Instructions
- Preheat the oven to 350°F (175°C). Line an 8-inch square baking pan with parchment paper, leaving an overhang on two sides.
- Combine graham cracker crumbs or chocolate sandwich cookie crumbs with melted butter in a bowl. Press the mixture firmly into the bottom of the prepared baking pan to form an even base.
- Beat softened cream cheese with granulated sugar in a large bowl until the mixture is smooth and creamy.
- Add eggs one at a time, mixing gently after each addition, then blend in the vanilla extract just until combined.
- Pour the cheesecake filling over the prepared crust and smooth the surface with a spatula.
- Drop spoonfuls of cherry pie filling over the cheesecake layer. Gently swirl with a knife for a marbled effect, being careful not to overmix.
- Sprinkle semi-sweet chocolate chips across the top, pressing them slightly into the filling if desired.
- Bake in the preheated oven for 30–45 minutes or until the edges are set and the center is just slightly jiggly.
- Remove from the oven and cool completely in the pan. Refrigerate for several hours or until fully chilled before slicing into bars.
Notes
- For a more intense chocolate flavor, use chocolate sandwich cookie crumbs for the crust.
- Allowing the bars to chill in the refrigerator enhances their flavor and texture.
Nutrition
- Serving Size: 1 bar
- Calories: 250
- Sugar: 15g
- Sodium: 200mg
- Fat: 15g
- Saturated Fat: 9g
- Unsaturated Fat: 4g
- Trans Fat: 0g
- Carbohydrates: 29g
- Fiber: 1g
- Protein: 3g
- Cholesterol: 70mg


