Introduction to Christmas Brownie Trees
As the holiday season rolls around, I can’t help but feel a rush of excitement! It’s that magical time when kitchens fill with sweet aromas and laughter. If you’re like me and appreciate a delightful treat without the fuss, then these Christmas Brownie Trees are just for you! They’re an adorable and festive solution to bring joy to any gathering, no matter how busy life gets. Plus, they’re perfect for impressing your loved ones, and let’s be honest, who doesn’t love chocolatey goodness shaped like a Christmas tree?
Why You’ll Love This Christmas Brownie Trees
Christmas Brownie Trees are a cozy blend of simplicity and deliciousness. You can whip them up in no time, making them a perfect treat for busy days. Their rich chocolatey flavor paired with fun decorations delights both kids and adults alike. Plus, you won’t need advanced baking skills to create these festive confections. They’re sure to become a cherished holiday tradition you’ll look forward to year after year!
Ingredients for Christmas Brownie Trees
Gathering your ingredients is always an exciting part of the cooking adventure! For these Christmas Brownie Trees, you’ll need a handful of simple yet essential items that create magic in every bite.
- Large eggs: They help bind everything together, giving the brownies a rich texture.
- Brown sugar: Adding depth with its molasses flavor, it makes the brownies chewy and delightful. You can swap it out for granulated sugar if you’re in a pinch.
- Salted butter: This is where the magic happens. If you only have unsalted butter, just add a tiny pinch of salt to flavor your concoction.
- Bittersweet chocolate: This is the heart and soul of your brownies, providing that decadent chocolate taste. Semi-sweet also works if that’s what you have on hand.
- Cocoa powder: A sprinkle of cocoa powder enhances the chocolate flavor even more. Dutch-processed is preferred for its smooth richness.
- All-purpose flour: This helps give structure to our brownies, so they’re not too gooey but perfectly fudgy.
- Optional mix-ins: Feel free to toss in chopped nuts, extra chocolate chunks, or cookie pieces for added texture and flavor!
- White chocolate: This will become our decorative drizzle. Melt it down for a smooth coating that looks festive.
- Green food coloring: A few drops will tint your melted white chocolate, transforming it into garland for your brownie trees.
- Christmas sprinkles: These are the finishing touch! They add color and fun, making your brownies delightful to look at.
- Popsicle sticks: If you want to serve your brownies as cute handheld treats, these are optional yet highly recommended.
Exact quantities of each ingredient are available at the end of the article for easy printing. Get ready to create a festive masterpiece that’s as delicious as it is charming!

How to Make Christmas Brownie Trees
Step 1: Preheat and Prepare
First things first, let’s get that oven roaring! Preheat your oven to 350°F (175°C) to ensure the perfect bake. While it warms up, grab a 20cm square baking pan and give it a good greasing. Line it with parchment paper for easy removal later on. This little trick will save you from a brownie disaster waiting to happen!
Step 2: Melt Chocolate and Butter
Next, it’s time to melt chocolate and butter together. In a microwave-safe bowl or double boiler, combine your bittersweet chocolate and salted butter. Heat gently, stirring every 30 seconds until smooth. You want a silky mixture that looks inviting and rich. The aroma will sweep you off your feet! Just be sure not to overheat, or you might end up with a burnt taste.
Step 3: Mix Ingredients
Now, we’re diving into mixing! Whisk in your brown sugar to that lovely chocolate-butter combo. It should look glossy and well-blended. Then, crack in the eggs one at a time, mixing thoroughly after each addition. This step adds volume and texture to your brownies. Don’t rush—mix until it’s all combined and thick. Patience pays off here—trust me, your tastebuds will thank you!
Step 4: Combine Dry Ingredients
Let’s bring in the dry ingredients! Sift the cocoa powder and all-purpose flour directly into your chocolate mixture. Gently fold them in using a spatula or a wooden spoon. Remember, you don’t want to overmix. Just combine until you see no dry streaks. This will keep your brownies fudgy and moist, rather than dry and cake-like!
Step 5: Bake the Brownies
Time to spread that delicious batter! Pour it into your prepared pan and smooth the top with a spatula. Pop it into the oven and let it bake for about 40 minutes. To test for doneness, insert a toothpick in the center; a few moist crumbs should stick to it. This is your golden mark—don’t let it bake too long, or you’ll lose that gooey goodness!
Step 6: Cool and Cut
Once those brownies are out of the oven, allow them to cool completely in the pan. This is crucial for easy cutting! Patience is a virtue, my friend. Once cool, place them on a cutting board and slice into triangle shapes. This adds to that festive Christmas tree vibe. Trust me, waiting is worth it when you see those adorable shapes.
Step 7: Decorate
Now, here comes the fun part—decorating! Take your melted white chocolate and add a few drops of green food coloring. Stir until you get your desired shade of festive green. Drizzle this mixture over each brownie tree in zigzag patterns to mimic garlands. Then, sprinkle your colorful Christmas sprinkles over the trees while the chocolate is still warm. Watch them come to life!
Step 8: Optional Assembly
If you want to make these treats even more fun, you can insert popsicle sticks at the base of each brownie. It’s a little touch that makes them perfect for holding during holiday gatherings. Plus, it makes them feel a bit like holiday pops for the kids!
Tips for Success
- Make sure your butter and chocolate mixture is smooth before adding other ingredients for a cohesive batter.
- Always sift your dry ingredients to eliminate lumps and ensure an even texture.
- Don’t rush the cooling process; cutting warm brownies can lead to a crumbly mess.
- Use festive, colorful sprinkles to make your brownie trees extra cheerful!
- Store any leftover brownies in an airtight container to keep them fresh.
Equipment Needed
- Baking pan: A 20cm square pan is ideal, but an 8×8 inch one will work too.
- Parchment paper: Necessary for easy removal; foil can be a substitute.
- Mixing bowls: Any size will do for combining ingredients.
- Whisk: A regular whisk or wooden spoon will do the trick.
- Spatula: Use it for folding and spreading the brownie batter.
Variations
- Nutty Delight: Add chopped walnuts or pecans for a delightful crunch in every bite.
- Mint Chocolate: Mix in peppermint extract and top with crushed peppermint candies for a festive minty twist.
- Gluten-Free: Substitute all-purpose flour with gluten-free flour blend for a delicious gluten-free option.
- Vegan-Friendly: Use flax eggs and dairy-free chocolate for a plant-based version of Christmas Brownie Trees.
- Fruitful Addition: Toss in dried cranberries or cherries for a tart contrast to the sweet chocolate.
Serving Suggestions
- Hot Cocoa: Pair your brownie trees with a warm mug of hot cocoa topped with whipped cream for a cozy treat.
- Holiday Platter: Arrange brownie trees on a festive platter alongside cookies and candy canes for a delightful dessert spread.
- Ice Cream: Serve with a scoop of vanilla or peppermint ice cream for a delightful contrast of flavors and temperatures.
- Decorative Touch: Garnish with fresh mint leaves or edible flowers for an elegant presentation.
FAQs about Christmas Brownie Trees
Can I make Christmas Brownie Trees ahead of time?
Absolutely! You can bake the brownies a day or two in advance. Just keep them stored in an airtight container at room temperature. Decorate them on the day you plan to serve for the best visual impact!
What can I substitute for eggs in this recipe?
If you’re looking for an egg substitute, you can use flax eggs (1 tablespoon of ground flaxseed mixed with 3 tablespoons of water per egg) or unsweetened applesauce (1/4 cup for each egg) for a similar texture. Just keep in mind that this may slightly alter the texture of your Christmas Brownie Trees.
Can I freeze my Christmas Brownie Trees?
You bet! Once fully cooled, wrap the brownie trees tightly in plastic wrap and place them in a freezer-safe container. They can be frozen for up to 3 months. Thaw them in the refrigerator before serving.
How do I get my melted white chocolate smooth?
Melt white chocolate slowly to prevent it from seizing up. Use a microwave-safe bowl and heat it in 20-30 second intervals, stirring in between until it’s melted and smooth. Adding a bit of vegetable oil can also help achieve a silky consistency.
What’s the best way to store leftover brownies?
To keep your Christmas Brownie Trees fresh and delicious, store any leftovers in an airtight container at room temperature. If they last longer than a few days, consider refrigerating them for an extra boost of freshness.
Final Thoughts
As the holiday season sparkles to life, creating these Christmas Brownie Trees adds a cozy touch to your celebrations. Watching faces light up with delight when they see these festive treats brings me pure joy. The combination of rich chocolate and colorful decorations not only satisfies sweet cravings but also ignites cherished memories among family and friends. They are easy to make and even easier to love. So, whether it’s a busy weeknight or a festive gathering, these brownie trees are sure to become a holiday favorite in your home! Happy baking, and enjoy the magic of the season!
Print
Christmas Brownie Trees
- Prep Time: 20 minutes
- Cook Time: 40 minutes
- Total Time: 1 hour
- Yield: 16 brownies 1x
- Category: Dessert
- Method: Baking
- Cuisine: American
- Diet: Vegetarian
Description
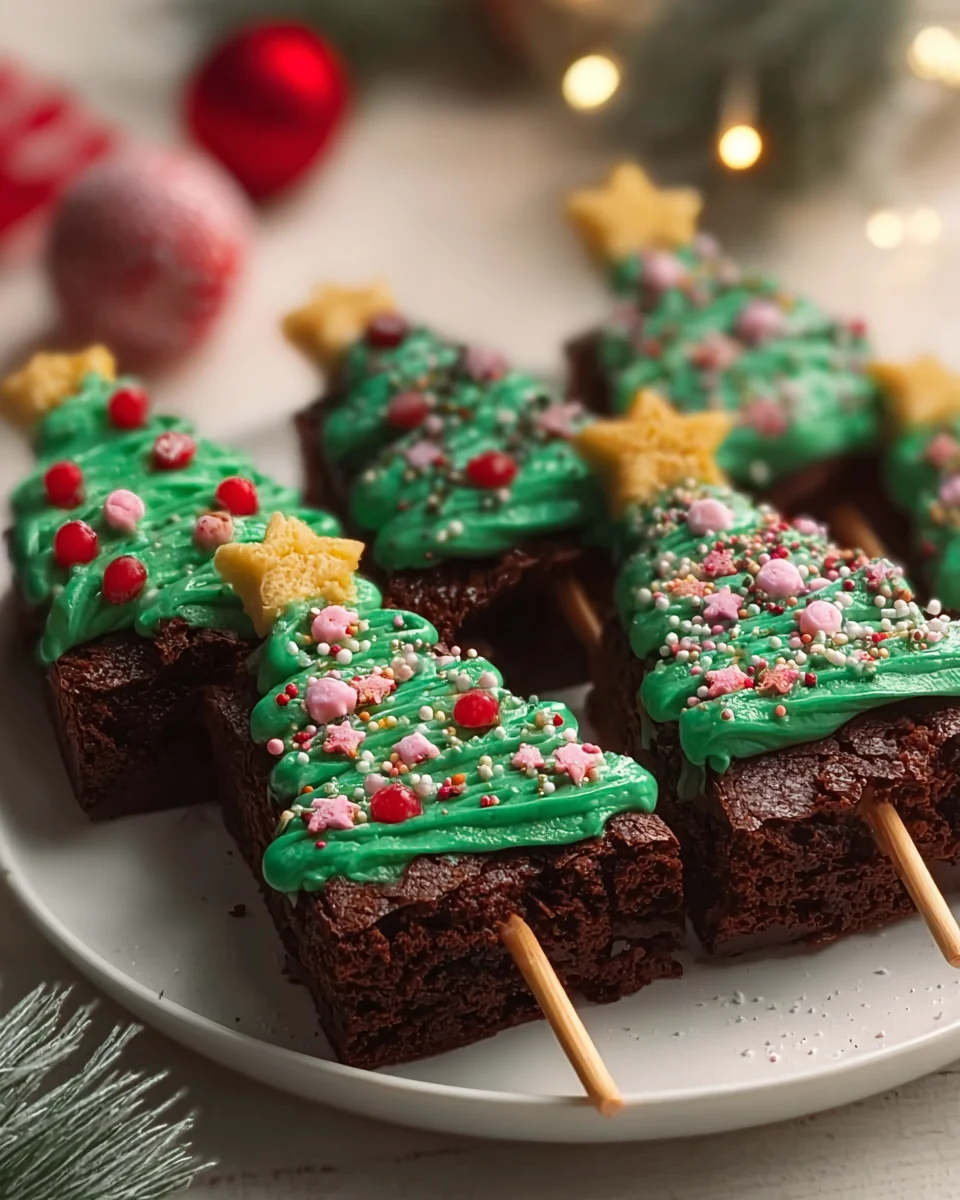
Festive brownies cut into Christmas tree shapes, drizzled with green-tinted white chocolate and decorated with sprinkles.
Ingredients
- 2 large eggs
- 130 g brown sugar (about ⅔ cup; granulated sugar can be substituted)
- 90 g salted butter (if using unsalted, add a pinch more salt)
- 160 g bittersweet chocolate (semi-sweet also works)
- 5 g cocoa powder (about 1 tablespoon; Dutch-processed preferred)
- 65 g all-purpose flour (about ½ cup)
- optional mix-ins (chopped nuts, extra chocolate chunks, or cookie pieces)
- white chocolate (melted, for decorating; candy melts also work)
- green food coloring (to tint white chocolate for garlands)
- Christmas sprinkles (for decoration)
- popsicle sticks (optional, for serving)
Instructions
- Preheat the oven to 350°F (175°C). Grease and line a 20cm square baking pan with parchment paper.
- Melt the bittersweet chocolate and butter together in a microwave-safe bowl or double boiler until smooth. Stir well to combine.
- Whisk in the brown sugar, then add eggs one at a time, mixing until the batter becomes glossy and thick.
- Sift in flour and cocoa powder. Fold gently until just combined. Stir in any optional mix-ins.
- Spread the batter evenly into the prepared pan and bake for 40 minutes, or until a toothpick comes out with a few moist crumbs.
- Allow brownies to cool completely in the pan. Once cooled, remove and cut into triangle shapes to resemble Christmas trees.
- Tint melted white chocolate with green food coloring. Drizzle in zigzag patterns over each brownie tree to form garlands.
- Add Christmas sprinkles as ornaments while the chocolate is still soft, then allow it to set.
- Insert popsicle sticks into the base of each triangle for a festive handheld treat (optional).
Notes
- Ensure the brownies are completely cooled before cutting for best results.
- Adjust the amount of green food coloring based on your preferred shade.
- Feel free to customize with different sprinkles or decorations.
Nutrition
- Serving Size: 1 brownie
- Calories: 200
- Sugar: 18g
- Sodium: 100mg
- Fat: 10g
- Saturated Fat: 6g
- Unsaturated Fat: 4g
- Trans Fat: 0g
- Carbohydrates: 25g
- Fiber: 2g
- Protein: 3g
- Cholesterol: 60mg


