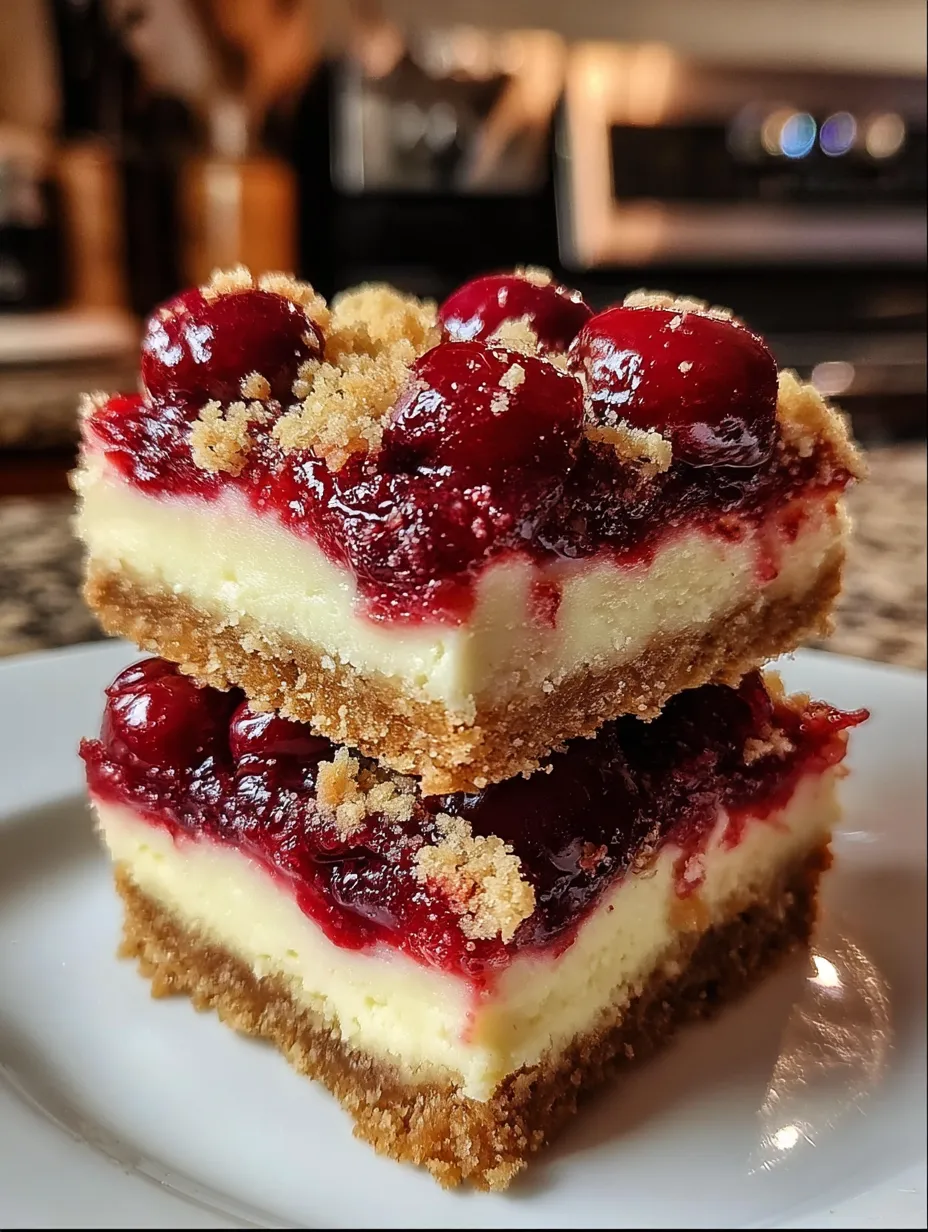
The holidays are a time of warmth, laughter, and unforgettable food. And when it comes to Christmas desserts, there’s always room for something rich, fruity, and totally indulgent. That’s where these Christmas Cherry Cheesecake Bars come in — a dreamy mash-up of creamy cheesecake, tart cherry compote, buttery graham crust, and a crumbly streusel topping. They look like something straight out of a bakery display window — and trust me, they taste even better.
What makes these bars the perfect treat? Well, they check every holiday dessert box. They’re festive, easy to make in advance, ridiculously delicious, and most importantly, they cut beautifully into squares, making them ideal for sharing (or sneaking one from the fridge at midnight). Whether you’re feeding a crowd at a holiday party or just treating yourself with a cup of coffee and some holiday tunes, these bars are pure magic.
The Perfect Dessert for the Holidays
Let’s face it — full-sized cheesecakes are stunning, but they’re not always practical, especially when you’re juggling 12 different dishes, five guests with different dessert preferences, and a to-do list that never ends. Cheesecake bars solve that problem like a holiday miracle.
You get all the creamy richness of traditional cheesecake, layered with a jewel-toned cherry topping and a crunchy crumble that gives you texture in every bite. And the best part? You can slice them up and serve them without the hassle of dealing with cracked tops or fancy garnishes. Each bar holds its shape and gives you a bite of every single layer — crust, filling, fruit, and crumb.
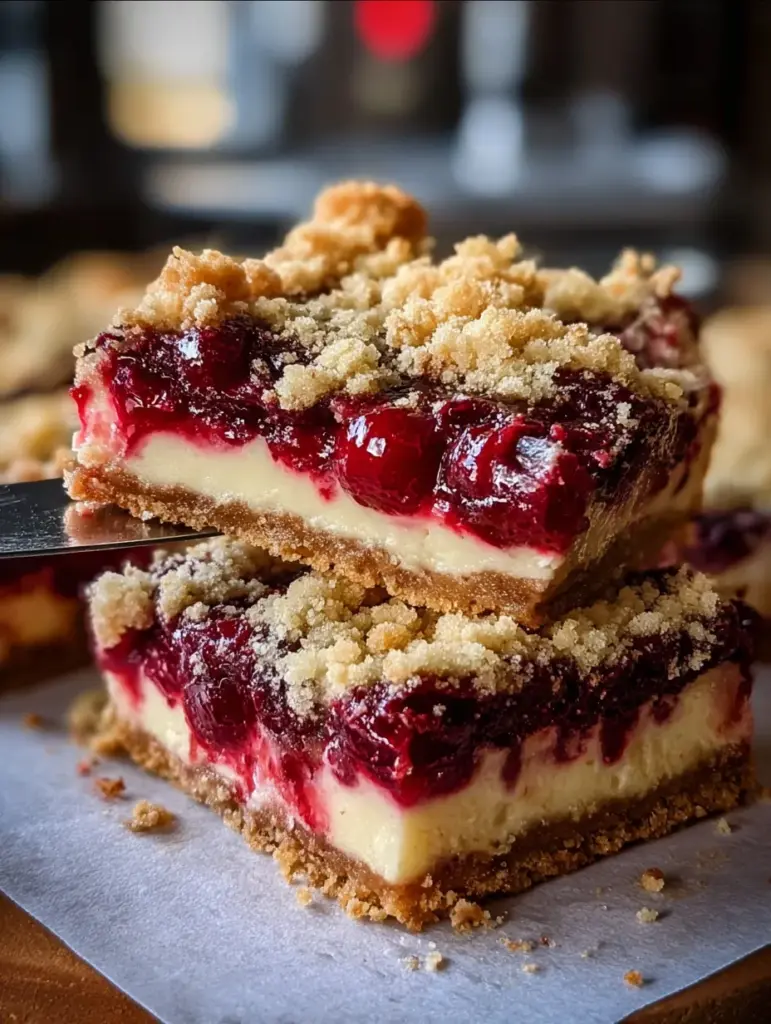
And let’s not ignore the visual appeal. That cherry layer is the showstopper — bright red and glistening, like edible Christmas ornaments on a buttery cheesecake base. It’s the kind of treat that makes people ask, “Where did you buy these?” (and you’ll love saying, “I made them!”)
What Makes These Cherry Cheesecake Bars So Special?
It’s all in the layers, baby.
Every bite offers the perfect contrast: the bottom crust is sweet, buttery, and firm — the base that holds it all together. The cheesecake is soft, smooth, and slightly tangy, like velvet on your tongue. Then comes that ruby red cherry topping — a sweet and slightly tart explosion of fruitiness that cuts through the richness. Finally, the streusel topping adds that perfect buttery crunch to finish it all off.
And unlike store-bought versions or shortcuts that use canned pie filling, this recipe uses real cherries — fresh or frozen — which means you’re getting bold, natural fruit flavor in every bite. Add a touch of almond extract, and you elevate the whole dish with a subtle nutty undertone that complements the cherries beautifully.
They’re not just dessert bars; they’re Christmas in edible form.
Ingredients Breakdown
Let’s walk through the real heroes of this recipe, layer by layer.
Crust: The Buttery Foundation
- 2 cups graham cracker crumbs
- ½ cup packed brown sugar
- ¾ cup melted butter
This classic combo gives you a crust that’s firm, flavorful, and holds up beautifully under the weight of the cheesecake and cherry layers. Brown sugar adds a deeper, caramel-like sweetness that regular sugar doesn’t, and the melted butter brings it all together into a mixture that presses perfectly into your baking dish. Once it’s baked, it forms a crisp, golden base that tastes like the holidays.
Pro Tip: Use a flat-bottomed measuring cup to press the crust evenly into your pan — this helps it bake evenly and creates a nice, solid bottom layer.
Cheesecake Layer: The Creamy Heart
- 24 oz (680g) cream cheese, softened
- 1 cup granulated sugar
- 2 large eggs
- 1 tbsp lemon juice
- 1 ½ tsp vanilla extract
This is your silky-smooth layer of holiday joy. Softened cream cheese blends into a velvety base, sweetened just right with granulated sugar. The eggs add structure without making it too heavy, and that splash of lemon juice and vanilla wakes the whole thing up with brightness and warmth.
Make sure your cream cheese is fully softened — this is the secret to getting that creamy, lump-free texture. If it’s too cold, you’ll end up with a clumpy filling, and nobody wants that.
Cherry Layer: The Festive Crown
- 3 cups fresh or frozen whole cherries
- ½ cup granulated sugar
- 2 tbsp cornstarch
- 2 tbsp water
- 1 tbsp lemon juice
- ½ tsp almond extract (optional)
This layer is what brings the Christmas magic. Whole cherries are gently cooked down with sugar and lemon juice until they start to soften. Then, a cornstarch slurry thickens everything into a glossy, pie-like filling that’s vibrant and full of flavor. Add almond extract if you like a hint of nutty depth — it’s optional, but it makes the flavor sing.
Don’t overcook the cherries — we want them glossy and juicy, not mushy. You want that pop of texture when you bite into each one.
Streusel Topping: The Crumbly Blanket
- ¾ cup all-purpose flour
- ½ cup brown sugar
- ⅓ cup cold butter, cubed
The final flourish. This crumb topping bakes into a golden, buttery crunch that contrasts perfectly with the soft cherry layer beneath. Mixing cold butter into the dry ingredients creates coarse crumbs that hold their shape as they bake — and add that irresistible crumbly finish.
Use your fingers or a pastry cutter to mix — just don’t overdo it. We want small clumps, not dough.
Kitchen Equipment You’ll Need
You don’t need any fancy gadgets for this — just the basics:
- 9×9-inch baking pan (lined with parchment paper)
- Hand or stand mixer
- Mixing bowls
- Saucepan
- Whisk and spatula
- Measuring cups and spoons
Step-by-Step Recipe: Christmas Cherry Cheesecake Bars
Step 1: Preheat and Prep the Pan
Preheat your oven to 350°F (180°C) and line your 9×9 baking pan with parchment paper, leaving a bit of overhang for easy lifting. This will make it so much easier to remove and slice your bars once they’re chilled.
Step 2: Make the Graham Cracker Crust
In a bowl, mix the graham cracker crumbs, brown sugar, and melted butter until the texture resembles wet sand. Press this mixture firmly into the bottom of your prepared pan.
Bake the crust for 10 minutes, then set it aside to cool slightly. This helps it firm up and creates a solid base for the creamy cheesecake.
Step 3: Cook the Cherry Topping
In a saucepan over medium heat, combine the cherries, sugar, and lemon juice. Let them cook for about 3-4 minutes, just until the juices start to release. Then stir together the water and cornstarch in a small bowl and pour it into the cherries. Cook for another 2-3 minutes, stirring constantly, until the mixture thickens and turns glossy.
Remove from heat and stir in the almond extract if using. Let the cherry mixture cool — it should be warm, not hot, when added to the cheesecake.
Step 4: Whip Up the Cheesecake Layer
In a large bowl, beat the softened cream cheese until smooth. Add the sugar and continue mixing until fully combined. Add the eggs, one at a time, mixing just until incorporated. Stir in the lemon juice and vanilla.
Pour this mixture over your cooled crust and use a spatula to smooth it out evenly.
Step 5: Layer It Like a Pro
Now that your cheesecake layer is smoothed out and ready to go, it’s time to bring in the star of the show: the cherry layer.
Spoon the cooled cherry mixture gently and evenly over the cheesecake layer. Don’t press or mix it in — just let it sit right on top. Use the back of your spoon or a small spatula to gently spread the cherries out so you get good coverage across the entire surface.
The contrast between the white cheesecake and the ruby-red cherry topping is already starting to look magical. Just wait until it’s baked!
Step 6: Sprinkle on That Crumbly Streusel
Grab your bowl of crumb topping and use your fingers to sprinkle it all over the cherry layer. Don’t pack it down — just let it fall in little clumps. The streusel will bake into a golden, crumbly topping that adds both texture and a gorgeous rustic finish.
If you’re feeling extra festive, you can even add a pinch of cinnamon or nutmeg to the streusel for a hint of holiday spice.
Step 7: Bake Until Just Right
Place the pan in your preheated oven and bake at 350°F (180°C) for 40–45 minutes. You’re looking for a few key signs that your cheesecake bars are ready:
- The edges should be slightly golden.
- The center should still have a gentle jiggle when you give the pan a light shake.
- The streusel should be golden brown and crisp-looking.
Avoid overbaking — cheesecake will continue to set as it cools, and overbaking can lead to cracks or a dry texture. That little jiggle in the center is what keeps things creamy and dreamy.
Step 8: Cool, Chill & Slice
Once it’s out of the oven, let the pan cool completely at room temperature. Then, cover it and refrigerate for at least 4 hours, or ideally overnight.
This is what allows the cheesecake to fully set, the flavors to meld, and the texture to become firm enough for clean slicing. Trust me, the longer it chills, the better it tastes.
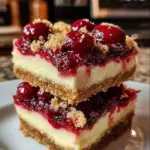
Once fully chilled, lift the bars out of the pan using the parchment overhang and place them on a cutting board. Use a sharp knife (wipe it clean between cuts!) and slice into 16 even squares.
Every slice should show those gorgeous layers:
- Buttery golden crust
- Creamy cheesecake
- Ruby-red cherry topping
- Crumbly golden streusel
Absolutely irresistible.
Tips for Success
Want your cheesecake bars to turn out bakery-perfect every single time? Here are a few extra tips:
- Use room-temperature ingredients for the cheesecake filling — this prevents lumps and ensures a silky-smooth texture.
- Don’t overmix the batter once the eggs are added — overbeating can add air, which leads to cracks.
- Let the cherry mixture cool before spooning it on top of the cheesecake. Hot cherries will start cooking the top of the cheesecake prematurely.
- Chill thoroughly — patience is key to firm, clean-cut bars.
- For clean cuts, use a hot knife and wipe it clean between slices.
Variations You Can Try
These bars are super versatile! If you want to play around with the recipe, here are some easy swaps:
- Berry Swap: Use raspberries, blueberries, or a mix for a different fruity flavor.
- Nutty Crunch: Add chopped pecans or walnuts to the streusel topping for a crunchier texture.
- Chocolate Twist: Stir mini white chocolate chips into the cheesecake layer for a rich, creamy boost.
- Gluten-Free Version: Use gluten-free graham crackers and a 1:1 gluten-free flour blend for the crust and topping.
- Citrus Touch: Add a little orange zest to the cheesecake for a festive citrus flavor.
Christmas Cherry Cheesecake Bars
- Prep Time: 15 minutes
- Cook Time: 45 minutes
- Total Time: 5 hours
- Category: Desserts / Holiday Treats / Christmas Baking
Description
🍒✨ A festive blend of creamy cheesecake, sweet cherries, and buttery streusel—all layered into the most irresistible holiday bars! Perfect for Christmas parties, dessert tables, or a cozy winter treat. 🎄❄️
Ingredients
Crust:
2 cups graham cracker crumbs
½ cup packed brown sugar
¾ cup melted butter
Cheesecake Layer:
24 oz (680g) cream cheese, softened
1 cup granulated sugar
2 large eggs
1 tbsp lemon juice
1 ½ tsp vanilla extract
Cherry Layer:
3 cups fresh or frozen whole cherries
½ cup granulated sugar
2 tbsp cornstarch
2 tbsp water
1 tbsp lemon juice
½ tsp almond extract (optional)
Streusel Topping:
¾ cup all-purpose flour
½ cup brown sugar
⅓ cup cold butter, cubed
Instructions
Preheat oven to 350°F (180°C). Line a 9×9-inch baking pan with parchment paper. (⏱️ 2 minutes)
Mix the graham crumbs, brown sugar, and melted butter until sandy. Press firmly into the pan and bake for 10 minutes. Set aside. (⏱️ 12 minutes)
For the cherry layer, heat cherries, sugar, and lemon juice over medium heat for 3–4 minutes. Mix cornstarch with water, stir it into the cherries, and cook 2–3 more minutes until thick and glossy. Remove from heat and add almond extract. Let cool. (⏱️ 10 minutes)
For the cheesecake layer, beat the cream cheese until smooth. Add sugar, then eggs one at a time. Stir in lemon juice and vanilla. Spread over the crust. (⏱️ 5 minutes)
Spoon the cooled cherry mixture evenly over the cheesecake layer. (⏱️ 1 minute)
Make the streusel by combining flour and brown sugar, then cutting in cold butter until crumbly. Sprinkle over the cherry layer. (⏱️ 4 minutes)
Bake for 40–45 minutes, until the edges are golden and the center has a slight jiggle. (⏱️ 45 minutes)
Cool completely, then refrigerate for at least 4 hours or overnight for perfect slices. (⏱️ 4 hours)
Notes
Chill time is crucial for clean, bakery-style slices.
Fresh cherries give the brightest flavor, but frozen works perfectly when simmered.
Add the almond extract for a deeper cherry flavor—it elevates the whole dessert.
These bars freeze beautifully; slice first, then freeze individually.
Nutrition
- Serving Size: 12 bars
- Calories: ~320 kcal
Storage Tips: Make Ahead & Keep Fresh
These bars are great for making ahead and storing:
- In the fridge: Store in an airtight container for up to 5 days. Place parchment or wax paper between layers if stacking.
- In the freezer: Wrap individual bars in plastic wrap and then place in a zip-top bag or container. Freeze for up to 2 months. Thaw in the fridge overnight before serving.
They’re the perfect make-ahead dessert for busy holiday weeks.
Serving Suggestions
These bars are stunning on their own, but you can always level up the presentation:
- Dust with powdered sugar for a snowy holiday look.
- Top with whipped cream or a drizzle of white chocolate.
- Serve with hot cocoa, mulled wine, or a festive coffee drink.
- Add a few fresh cherries or mint leaves on the plate for a decorative touch.
These details turn a humble dessert into a holiday showstopper.
You may like also :
Christmas Cherry Fluff Recipe – A No-Bake Holiday Classic Full of Cheer
Christmas Cherry Bombs: The Ultimate Festive Dessert You Need This Holiday Season
Why These Bars Are the Ultimate Christmas Treat
Let’s wrap it all up: These Christmas Cherry Cheesecake Bars are a holiday masterpiece. They’re packed with flavor, full of texture, and absolutely gorgeous to look at. They slice cleanly, serve easily, and are a guaranteed hit with kids, adults, and anyone with a sweet tooth.
Whether you’re baking them for a cookie exchange, bringing them to a party, or just enjoying them at home by the fire — they deliver everything we love about holiday baking: warmth, flavor, and joy in every bite.
They’re not just dessert — they’re Christmas, wrapped in a buttery graham cracker crust, topped with cherries, and finished with love.
Conclusion: One Recipe, Endless Holiday Memories
Holiday baking should feel magical — and it should be something you actually enjoy, not stress over. These Christmas Cherry Cheesecake Bars strike that perfect balance between festive elegance and homey comfort. They taste like you spent hours in the kitchen, but they’re surprisingly easy to pull off.
Bake them once, and they’ll become a staple in your holiday dessert lineup for years to come. From the first buttery bite to the last cherry-stained forkful, these bars deliver big on flavor, style, and joy.
Here’s to sweet traditions and even sweeter bites. 🎄🍒
Similar recipes :
Christmas Cherry Bombs – A Festive No-Bake Delight
10 Delicious Cherry Recipes You’ll Love Creating at Home
FAQs
1. Can I use canned cherry pie filling instead?
Yes, you can — but the flavor won’t be quite as fresh and vibrant as using whole cherries. If you’re in a pinch, canned filling will work, but homemade cherry topping really takes these bars to the next level.
2. What if I don’t have graham crackers?
You can substitute with crushed digestive biscuits, vanilla wafers, or even gingerbread cookies for a spiced holiday twist.
3. Can I make these dairy-free?
Yes, with some tweaks. Use dairy-free cream cheese and plant-based butter. Just know the texture might vary slightly, but they’ll still taste amazing.
4. How do I know when the bars are fully baked?
The edges will look set and slightly golden, while the center should still have a bit of jiggle. That’s exactly what you want — don’t wait for it to be completely firm.
5. Can I double this recipe for a bigger crowd?
Absolutely. Just use a 9×13-inch pan and increase baking time slightly (about 5–10 minutes more). Keep an eye on the center’s jiggle!


