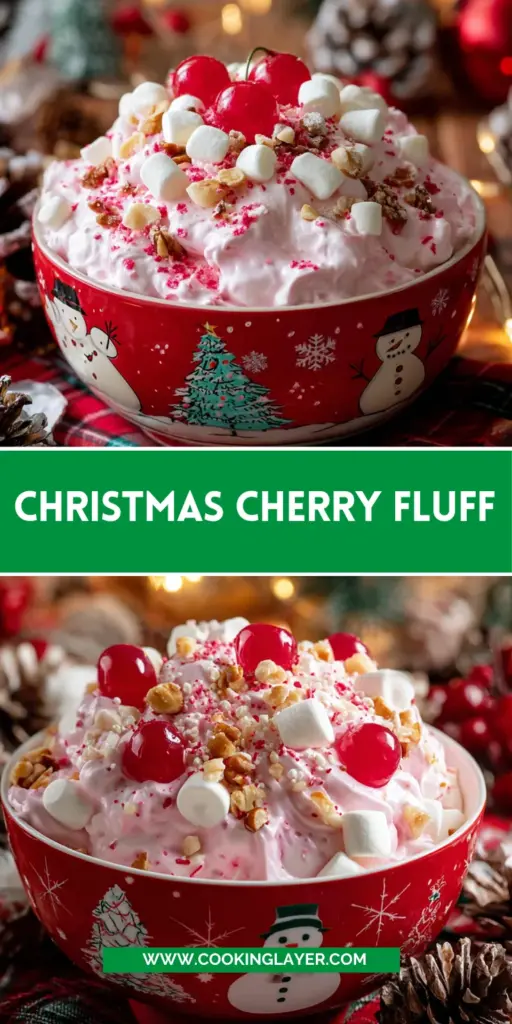
Introduction to Christmas Cherry Fluff
As the holiday season approaches, I find myself craving festive treats that evoke warmth and joy.
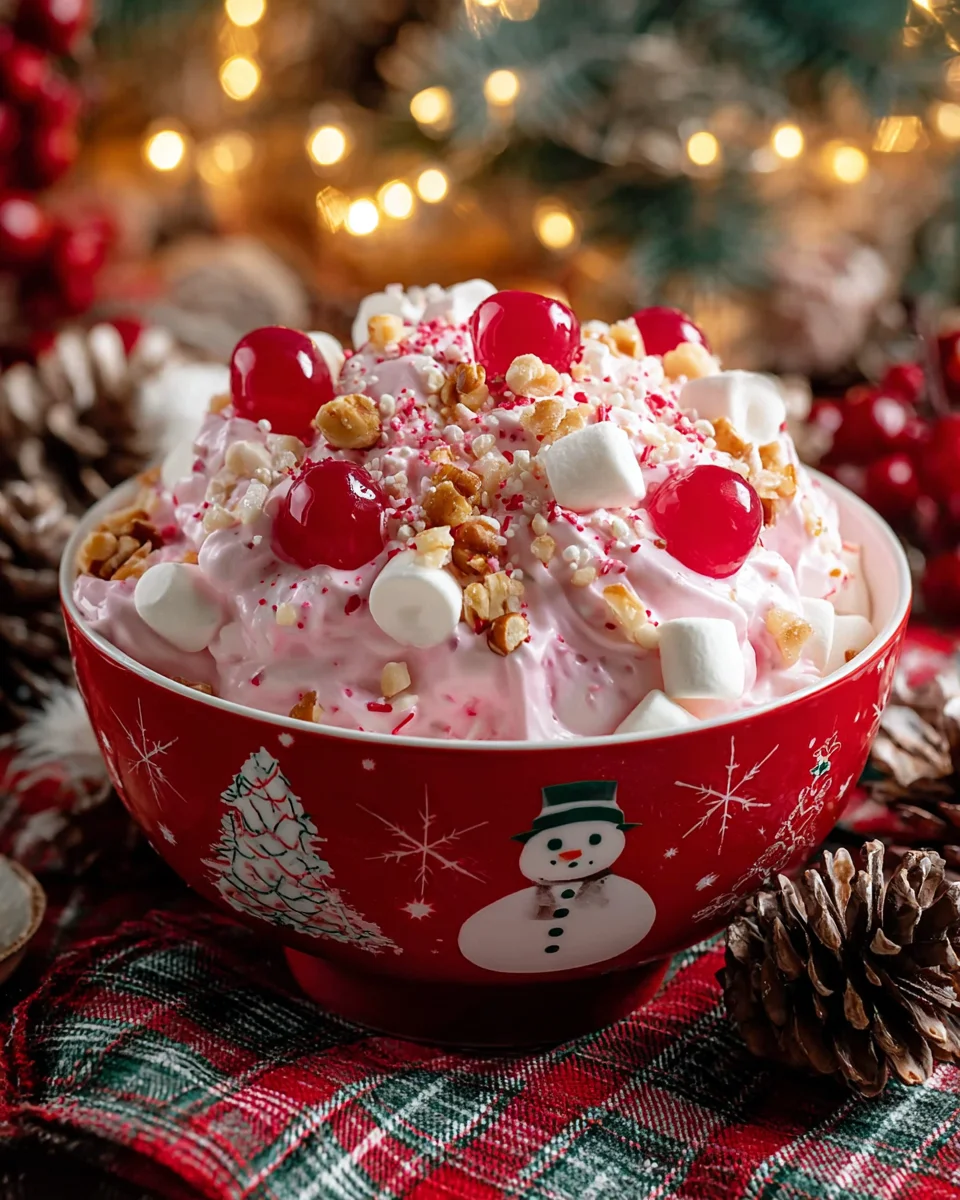
That’s where my beloved Christmas Cherry Fluff comes in! This delightful dessert is not just a visual feast with its vibrant colors,
but it’s also a quick solution for busy days. With just a handful of ingredients, it comes together in a flash,
making it perfect for gatherings. Plus, this fluffy delight is sure to impress your loved ones, creating sweet memories
that linger long past dessert time.
Why You’ll Love This Christmas Cherry Fluff
One of the best things about Christmas Cherry Fluff is how effortlessly it comes together. With minimal prep time and no baking required, it’s a lifesaver for busy moms and professionals like us. The bright cherry flavor and creamy texture create a delightful balance that pleases almost everyone at the table. Plus, it’s adaptable! You can customize it easily, making each holiday season special and unique.
Ingredients for Christmas Cherry Fluff
Let’s dive into the ingredients that make up this festive delight! Each element adds its unique charm to the overall flavor and texture of Christmas Cherry Fluff, ensuring a memorable dessert experience.
- Cherry Pie Filling: This is the star of the show. It offers a rich, sweet cherry flavor, bringing that festive red hue to your dish.
- Sweetened Condensed Milk: This ingredient adds creaminess and a hint of sweetness. It works like magic, binding the flavors together.
- Crushed Pineapple: A splash of tropical taste! Just be sure to drain it well so it doesn’t make your fluff soggy.
- Whipped Topping: You can use Cool Whip or homemade whipped cream. It brings that light, fluffy texture we love.
- Mini Marshmallows: These little bites add a fun chewiness and enhance the fluffiness. They’re a must-have!
- Shredded Coconut (optional): For those looking to add an extra layer of flavor and texture; it’s like a sprinkle of snow on top!
- Chopped Pecans or Walnuts (optional): These nuts lend a lovely crunch. Choose your favorite for added depth. You can also skip them for a nut-free option.
- Extra Cherry Pie Filling for Garnish: A dollop on top not only looks beautiful but also boosts the cherry flavor.
- Whipped Cream for Garnish: A cloud of whipped cream on top is never a bad idea! It makes each spoonful even creamier.
- Holiday Sprinkles or Crushed Candy Canes (optional): For that festive touch, these toppings add color and a fun crunch!
How to Make Christmas Cherry Fluff
Now that we have all the ingredients lined up, let’s hop into the kitchen! Making Christmas Cherry Fluff is as easy as pie, and you’ll see just how simple each step is.
Grab your mixing bowl, and let’s get started on this delightful treat that’s bound to wow your guests!
Step 1: Prepare the Cherry Mixture
Begin by adding the cherry pie filling to a large mixing bowl. Gently stir it with a spatula, breaking down some of the larger cherries.
This step enhances the texture, allowing every scoop to be bursting with flavor.
Step 2: Combine the Sweetened Condensed Milk
Pour in the sweetened condensed milk next. This creamy addition is key to achieving that luscious consistency we crave.
Mix it well until everything looks glossy and unified. Trust me; this makes the flavor dance on your taste buds!
Step 3: Add the Crushed Pineapple
Next, drain the crushed pineapple thoroughly before adding it to the mix.
A soggy fluff is nobody’s friend, right? This little detail helps keep the texture light and airy.
Stir gently, ensuring the pineapple integrates well into the cherry mixture.
Step 4: Incorporate the Whipped Topping
Time to fold in the whipped topping! Use a spatula to gently incorporate it into the mixture.
Think of it like tucking a delicate blanket around your dessert; you want the airiness to stay intact.
Fold it slowly, and watch as the mixture blooms into a fluffy wonder!
Step 5: Mix in the Marshmallows and Optional Ingredients
Now, toss in those mini marshmallows, along with any optional ingredients like shredded coconut or nuts.
Gently fold them in, ensuring an even distribution throughout the fluff.
This is where your creativity can shine; feel free to tweak it to match your family’s tastes!
Step 6: Chill Before Serving
Finally, transfer your cherry fluff to a serving bowl or individual dessert cups.
Cover and refrigerate for at least 2 to 3 hours – this step is crucial for the flavors to meld and the fluff to set perfectly.
The wait will certainly be worth it, as each bite will be an explosion of festive cheer!
Tips for Success
- Always drain the crushed pineapple well to prevent sogginess.
- Make your Christmas Cherry Fluff a day in advance for enhanced flavor.
- Customize with your favorite nuts and toppings to suit your family’s taste.
- Keep the whipped topping cold until you’re ready to fold it in.
- For a prettier presentation, serve in individual cups with whimsical garnishes!
Equipment Needed
- Large mixing bowl: Any sturdy bowl will do!
- Spatula: A rubber or silicone spatula works best for folding.
- Measuring cups: Essential for accurate ingredient portions.
- Serving bowl or dessert cups: Use what you have on hand for a charming presentation.
- Refrigerator: To chill and set your delightful fluff.
Variations for Christmas Cherry Fluff
- Chocolate Cherry Fluff: Add a few tablespoons of cocoa powder or chocolate pudding mix for a rich chocolatey twist!
- Yogurt Substitute: Swap the whipped topping for Greek yogurt for a healthier version that still tastes delightful.
- Alternative Fruits: Mix in diced strawberries or blueberries for a colorful fruit medley that adds a fresh twist to your fluff.
- Gluten-Free Option: Ensure that your marshmallows and toppings are gluten-free, making this a treat everyone can enjoy!
- Vegan Version: Use coconut whipped cream and dairy-free sweetened condensed milk for a vegan-friendly holiday delight!
Serving Suggestions for Christmas Cherry Fluff
- Pair with buttery shortbread cookies for a melt-in-your-mouth experience.
- Serve alongside a warm gingerbread cake to contrast the cool fluffiness.
- Try it as a topping for vanilla ice cream for an indulgent treat.
- Garnish with mint leaves for a pop of color and freshness.
- Serve in festive individual cups for a charming presentation!
FAQs about Christmas Cherry Fluff
If you’re wondering about Christmas Cherry Fluff, I’ve got you covered! Here are some common questions that pop up when making this delightful dessert.
Can I make Christmas Cherry Fluff in advance?
Absolutely! In fact, making it a day ahead enhances the flavors. Just keep it refrigerated until you’re ready to serve!
Can I use fresh cherries instead of cherry pie filling?
While fresh cherries will give a lovely natural taste, you might miss out on that signature creaminess and sweetness. If you prefer to use fresh, consider adding some sugar and a thickening agent to mimic the pie filling.
What if I have nut allergies?
No worries! Simply skip the nuts or substitute them with seeds like pumpkin or sunflower. Your Christmas Cherry Fluff will still be delightful without them.
Can I freeze Christmas Cherry Fluff?
I don’t recommend freezing it, as the texture can change when thawed. It’s best enjoyed fresh or refrigerated. Trust me; you want that fluffy texture!
How can I make this dessert gluten-free?
To keep it gluten-free, just double-check that your mini marshmallows and any optional toppings are labeled as gluten-free. Enjoy this treat worry-free during the holidays!
Final Thoughts on Christmas Cherry Fluff
Christmas Cherry Fluff has a special way of bringing joy to any holiday gathering.
It’s not just a dessert; it’s a festive experience filled with laughter, warmth, and sweet memories.
With its vibrant colors and delightful flavors, it captures the essence of the season in every spoonful.
I love how easy it is to whip up and how it can be customized to fit any family tradition.
So, gather your loved ones, serve up this delightful treat, and watch as smiles spread around the table.
Happy holidays and happy cooking!
Print
Christmas Cherry Fluff
- Prep Time: 15 minutes
- Cook Time: 0 minutes
- Total Time: 2-3 hours (refrigeration time included)
- Yield: 6–8 servings 1x
- Category: Dessert
- Method: No-bake
- Cuisine: American
- Diet: Vegetarian
Description
A delightful and festive dessert made with cherry pie filling, whipped topping, and marshmallows, perfect for Christmas gatherings.
Ingredients
- 1 can (20 oz / 560 g) cherry pie filling
- 1 can (14 oz / 395 g) sweetened condensed milk
- 1 cup (250 g) crushed pineapple, drained
- 1 ½ cups (375 mL) whipped topping (such as Cool Whip or whipped cream)
- 2 cups (100 g) mini marshmallows
- ½ cup (40 g) shredded coconut (optional)
- ½ cup (60 g) chopped pecans or walnuts (optional)
- Extra cherry pie filling for garnish
- Whipped cream for garnish
- Holiday sprinkles or crushed candy canes (optional)
Instructions
- In a large mixing bowl, add the cherry pie filling and stir gently to break up some larger cherries.
- Pour in the sweetened condensed milk and stir until glossy and evenly combined.
- Thoroughly drain crushed pineapple and stir it into the cherry mixture.
- Add the whipped topping and gently fold it in with a spatula to maintain a light texture.
- Fold in the mini marshmallows and optional shredded coconut and chopped nuts.
- Transfer to a serving bowl or dessert cups, cover, and refrigerate for at least 2–3 hours.
- Before serving, garnish with extra cherry pie filling, whipped cream, and festive toppings like crushed candy canes or sprinkles.
Notes
- Ensure the crushed pineapple is well-drained to avoid excess liquid.
- This dessert can be made a day in advance for convenience.
- Feel free to customize with your choice of nuts and toppings.
Nutrition
- Serving Size: 1 cup
- Calories: 290
- Sugar: 30g
- Sodium: 100mg
- Fat: 10g
- Saturated Fat: 5g
- Unsaturated Fat: 3g
- Trans Fat: 0g
- Carbohydrates: 45g
- Fiber: 1g
- Protein: 4g
- Cholesterol: 15mg


