The Magic of Christmas Baking
Ah, Christmas time—the season of twinkling lights, cozy sweaters, and the irresistible smell of something sweet baking in the oven. There’s something nostalgic and heartwarming about baking cookies during the holidays. It’s not just about the end product, but the experience—the mess, the laughs, the stolen spoonfuls of dough, and the joy of sharing something homemade.
Among all the festive treats out there, one recipe always finds its way into my oven every December: Christmas Chocolate Chip Cookies. They’re everything a holiday cookie should be—soft, buttery, speckled with melty chocolate chips, and decked out in red and green cheer. Let’s make some magic, shall we?
Why These Christmas Chocolate Chip Cookies Steal the Show
Sure, there are gingerbread men, sugar cookies, and peppermint barks galore. But these cookies? They’re the showstopper. They take your classic chocolate chip cookie and give it a holly jolly twist—think melty chocolate, a hint of vanilla, festive sprinkles, and that perfect soft-in-the-center, slightly-crispy-around-the-edges bite.
They don’t just look merry and bright—they taste like Christmas morning. And let’s be honest—who doesn’t love a little extra color and joy in every bite?
A Quick Look at What You’ll Need
Ingredients Overview
To bring these cookies to life, you’ll need:
- All-purpose flour – the structure
- Baking soda – helps them rise just right
- Unsalted butter – the rich base
- Granulated sugar + brown sugar – balance of sweetness and moisture
- Salt – don’t skip it!
- Vanilla extract – the flavor hero
- Eggs – for binding and richness
- Semisweet chocolate chips – gooey goodness
- Holiday sprinkles – festive fun!
Equipment You’ll Use
- Mixing bowls
- Hand or stand mixer
- Measuring cups & spoons
- Baking sheet
- Parchment paper (optional, but helpful!)
- Cookie scoop or tablespoon
The Secret Behind Soft and Chewy Cookies
Here’s the deal: you can follow any cookie recipe, but if you don’t understand the why behind each step, you’re missing out on cookie greatness. The key to soft and chewy cookies lies in:
- Room temp butter for smooth, fluffy dough
- More brown sugar than white for extra chew
- Eggs to lock in moisture
- Chilling the dough to keep them thick and tender
- Don’t overbake! The centers should look a little underdone
All these tiny tricks add up to cookies that are soft, flavorful, and perfectly textured—just like the ones in that photo you’re drooling over right now.
Ingredient Breakdown: Why Each One Matters
Let’s dive a little deeper into what each ingredient does and why it matters.
All-purpose Flour
Your cookie’s structure depends on it. Too much, and your cookies are dry. Too little, and they’ll spread like pancakes.
Baking Soda
Not to be confused with baking powder! Soda gives the cookies a little lift and helps with browning.
Unsalted Butter
Softened, not melted. You want it creamy so it blends well with the sugars. Salted butter can throw off the flavor balance.
Sugars
Brown sugar adds moisture and chew. White sugar adds structure and sweetness. The 1:2 ratio (white to brown) is ideal for soft cookies.
Salt
It enhances all the other flavors—don’t skip it, even if it’s just a teaspoon.
Vanilla Extract
The deeper, richer the vanilla, the more holiday magic you’ll taste. Go pure, not imitation.
Eggs
Two eggs give these cookies the richness and moisture they need. Always use room temperature eggs!
Semisweet Chocolate Chips
They melt just enough to stay gooey. You can even mix in chunks for that bakery-style vibe.
Holiday Sprinkles
Use the classic red and green mix—jimmies and confetti styles work best. Avoid sugar pearls or hard candies—they won’t melt nicely.
Prepping for the Perfect Cookie
Importance of Room Temperature Butter
Cold butter won’t cream properly with sugar, and melted butter can make cookies greasy. Room temp butter creates the perfect creamy base, trapping air that expands during baking to give you soft, puffed cookies.
Should You Chill the Dough?
Yes—if you want thick, bakery-style cookies. Chilling helps the dough firm up, so the cookies don’t spread too much. Even 30 minutes in the fridge makes a noticeable difference in shape and texture.
Step-by-Step Recipe Instructions
Let’s break it down like we’re baking side-by-side.
1. Preheat and Prep
Heat that oven to 375°F (190°C). Line your baking sheets with parchment or leave them ungreased—your call.
2. Mix Dry Ingredients
Whisk together the flour and baking soda in a bowl and set it aside.
3. Cream the Butter and Sugars
In a larger bowl, beat the softened butter, granulated sugar, brown sugar, salt, and vanilla extract until the mixture is light and fluffy. This takes about 2–3 minutes with a mixer on medium speed.
4. Add Eggs
Crack in one egg at a time, mixing well after each one. You’re building up the structure here—don’t rush it.
5. Combine Wet and Dry
Gradually beat the flour mixture into the wet ingredients. Do this slowly to avoid overmixing.
6. Fold in the Fun
Gently stir in your chocolate chips and festive sprinkles. You want every scoop to have a bit of chocolate and a pop of color.
7. Scoop the Dough
Use a tablespoon or cookie scoop to drop rounded mounds of dough onto the baking sheet—about 2 inches apart.
8. Bake
Pop them into the oven for 9–11 minutes. Look for golden edges and soft, slightly underdone centers—they’ll finish baking as they cool.
9. Cool Down
Let them sit on the baking sheet for 2 minutes, then move to a wire rack to cool completely (if you can wait that long!).
What Makes These Cookies So Festive?
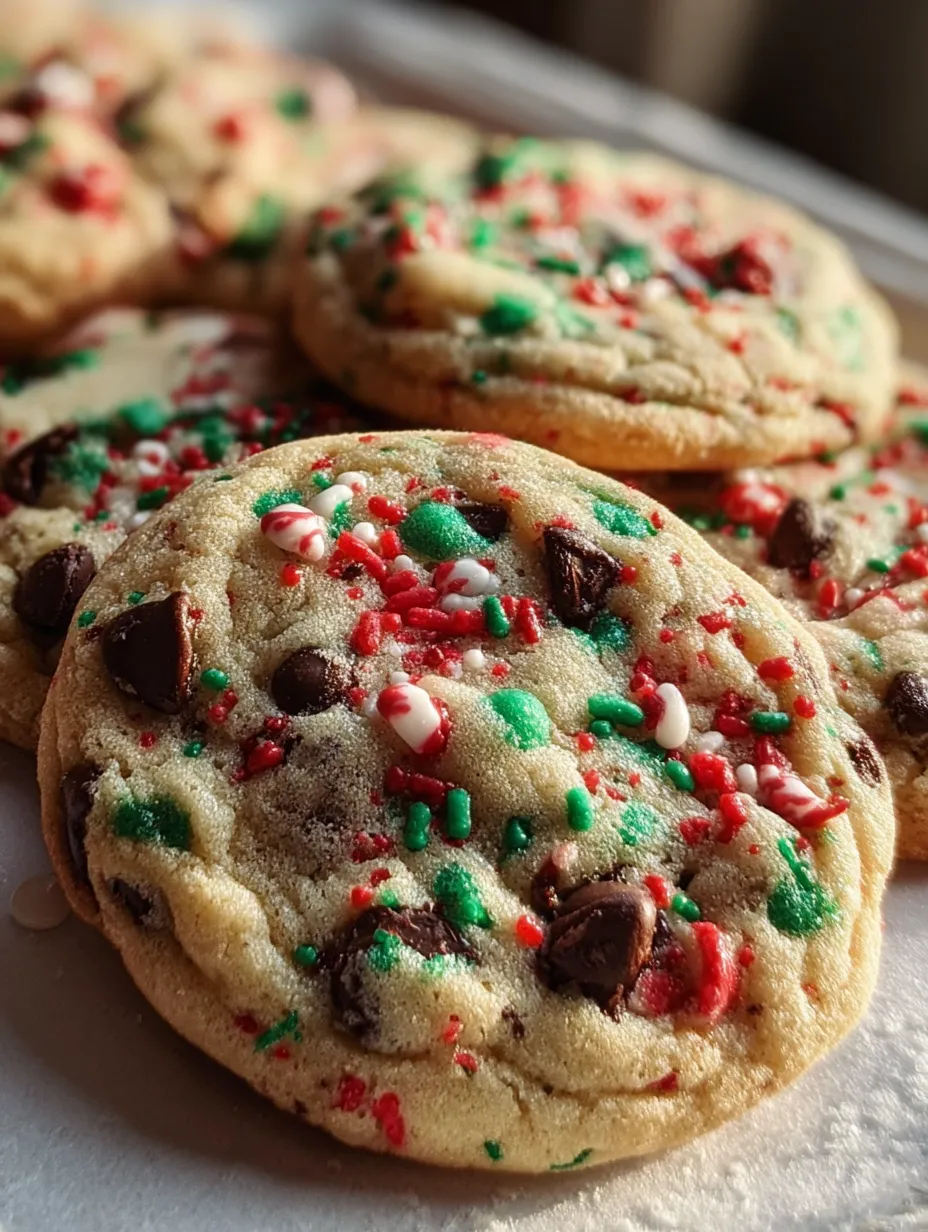
It’s all in the details. At first glance, these may look like your classic chocolate chip cookies—but that explosion of red and green? Total holiday vibes. The sprinkles aren’t just for show—they bring a subtle crunch and a fun pop of color that screams Christmas!.
And those chocolate chips? They stay slightly melted even after cooling, giving you that gooey, rich center in every bite. The balance between the chewy cookie base and the sweet, decorative crunch of the sprinkles is what makes this recipe perfect for cookie exchanges, holiday parties, or just sneaking a few while wrapping gifts.
Want to go even more festive? Crush up a few peppermint candies and add them in. But honestly, the cookie you see in the image? It’s perfect as-is—cheerful, rich, and guaranteed to make Santa do a double take.
Cookie Texture Tips: Crisp Edge, Soft Center
We all have our favorite cookie texture. Some want them thin and crispy, others thick and cakey. This recipe finds a beautiful middle ground.
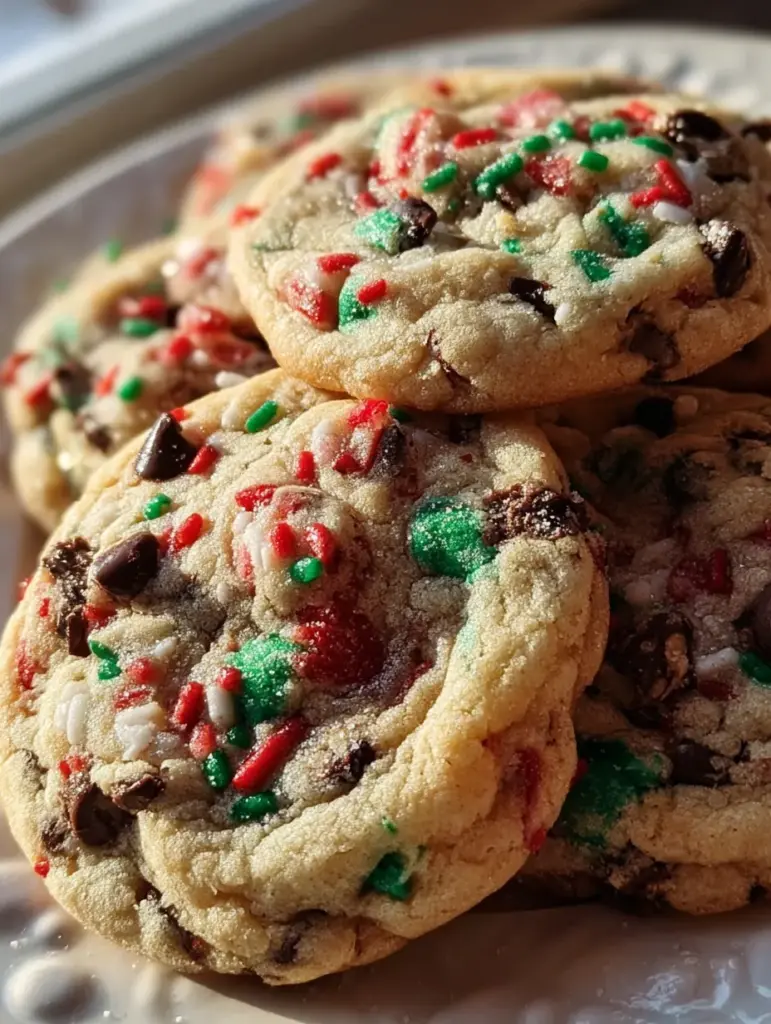
Here’s how to keep them soft and chewy like the ones in the photo:
- Chill the dough: At least 30 minutes before baking, especially if your kitchen is warm. This stops spreading and gives your cookies that lovely puffy center.
- Scoop evenly: Use a cookie scoop so each cookie bakes the same.
- Watch the edges: The moment the edges start turning golden brown, pull them out. The centers will look soft—that’s good! They’ll set as they cool.
- Rest on the sheet: Don’t transfer too fast. Let the cookies rest on the baking sheet for 2–3 minutes before moving them to a wire rack. This ensures the centers finish cooking without overbaking.
If you like thicker cookies, you can even scoop the dough into balls and refrigerate overnight. The longer chill helps develop flavor and prevents spreading.
Make-Ahead Tips & Freezing Dough
These cookies aren’t just delicious—they’re convenient. You can prep them ahead of time and bake them fresh whenever that cookie craving hits (which, during the holidays, is always).
To Make Ahead:
- Make the dough and scoop it into balls.
- Store in an airtight container in the fridge for up to 3 days.
- Ready to bake? Just pop them straight onto your baking sheet (add 1–2 extra minutes of baking time if chilled).
To Freeze Dough:
- Scoop the dough onto a baking sheet and freeze until solid (about 1–2 hours).
- Transfer frozen dough balls into a zip-top bag or airtight container.
- Label with baking temp and time.
- Freeze for up to 3 months.
No need to thaw—bake straight from frozen and add 2–3 minutes to the usual bake time. They’ll come out warm, gooey, and perfect.
Storing Baked Cookies for Maximum Freshness
Once you’ve baked a batch (or three), here’s how to keep your cookies tasting fresh for days:
- Store in an airtight container at room temperature.
- Add a slice of bread to the container—the bread gives up its moisture and keeps your cookies soft!
- Keep away from heat or sunlight.
They’ll stay fresh for up to 5 days. But let’s be honest—these cookies rarely last that long.
Want to save some for later? Freeze the baked cookies:
- Let them cool completely.
- Wrap individually in plastic wrap, then store in a freezer bag.
- Thaw at room temperature or pop into a warm oven for a minute to refresh.

Christmas Chocolate Chip Cookies Recipe
- Prep Time: 15 minutes
- Cook Time: 11 minutes
- Total Time: 26 minutes
- Category: Christmas Bars / Holiday Baking
Description
🍪✨ Soft, festive, and full of holiday cheer! These chocolate chip cookies with red and green sprinkles are perfect for sharing, gifting, or enjoying with a warm cup of cocoa. 🎄☕
Ingredients
2 1/4 cups all-purpose flour
1/2 teaspoon baking soda
1 cup unsalted butter, softened
1/2 cup granulated sugar
1 cup packed brown sugar
1 teaspoon salt
2 teaspoons pure vanilla extract
2 large eggs
2 cups semisweet chocolate chips
1 cup red and green holiday sprinkles
Instructions
Preheat oven to 375°F (190°C). ⏱️ 5 minutes
In a small bowl, combine flour and baking soda; set aside. ⏱️ 3 minutes
In a large bowl, beat softened butter, granulated sugar, brown sugar, salt, and vanilla extract until creamy. ⏱️ 3 minutes
Add eggs one at a time, beating well after each addition. ⏱️ 2 minutes
Gradually beat in the flour mixture. ⏱️ 2–3 minutes
Stir in chocolate chips and holiday sprinkles. ⏱️ 2 minutes
Drop dough by rounded tablespoonfuls onto ungreased baking sheets about 2 inches apart. ⏱️ 5 minutes
Bake for 9–11 minutes or until golden brown around the edges. ⏱️ 11 minutes
Cool on baking sheets for 2 minutes, then transfer to wire racks to cool completely. ⏱️ 10 minutes
Notes
These bars are a festive mix of sweet, salty, and crunchy—great for holiday parties or gifting.
Adding extra pretzels or potato chips will make them even crunchier if you prefer more texture.
Let the bars cool completely before slicing to keep clean edges.
Store in an airtight container for up to 5 days; they also freeze well for make-ahead planning.
Nutrition
- Serving Size: 36 cookies
- Calories: 190 kcal per cookie
Creative Add-ins to Try This Season
Want to put your own spin on this recipe? Go for it! The cookie base is super flexible, so get creative:
- Crushed candy canes – for a peppermint crunch
- White chocolate chips – for extra sweetness
- Toffee bits – add a caramel crunch
- Chopped nuts – pecans or walnuts work beautifully
- Dried cranberries – for a tart holiday twist
Just don’t overload the dough. Stick to about 1 extra cup of mix-ins total, or the cookies won’t hold together well.
You may also like :
Thick Caramel Christmas Crack 🍬
White Chocolate Peppermint Pretzels
How to Turn These Into Cookie Gifts
These cookies aren’t just tasty—they’re giftable! Here’s how to share the love:
- Stack and wrap – Tie a ribbon around a stack of cookies and wrap in cellophane.
- Cookie tins – Line a decorative tin with wax paper and arrange cookies inside.
- Mason jars – For a rustic touch, fill jars with cookies and tie with twine and a festive tag.
- Cookie boxes – Use bakery boxes with windows and a holiday sticker or seal.
Include a little handwritten recipe card, and boom—instant holiday gift that people will actually want.
Holiday Variations (Gluten-Free, Vegan)
Looking to make your cookies more inclusive? Here’s how to adapt them for different diets:
Gluten-Free Option
- Swap the all-purpose flour with a good 1-to-1 gluten-free flour blend.
- Let the dough rest 10–15 minutes after mixing to allow the flour to hydrate.
Vegan Option
- Use plant-based butter (like Earth Balance).
- Replace eggs with flax eggs (1 tbsp ground flaxseed + 3 tbsp water per egg).
- Make sure your chocolate chips and sprinkles are dairy-free.
They won’t be exactly the same, but they’ll still be festive and delicious.
Final Thoughts on a Cookie Classic
There’s a reason these Christmas Chocolate Chip Cookies are a holiday favorite. They’re everything a festive cookie should be—sweet, soft, gooey, colorful, and nostalgic. They’re easy to whip up, perfect to share, and impossible to stop eating after just one.
Whether you’re baking them for a cookie exchange, gifting them to friends, or just enjoying them with a cup of hot cocoa by the fire, these cookies will absolutely become part of your holiday tradition.
So grab your apron, turn on those holiday tunes, and let’s bake some joy. 🎄🍪
Similar recipes :
Peppermint Chocolate-Dipped Sandwich Cookies
Pineapple Upside Sugar Cookies – A Tropical Twist on a Classic Treat!
FAQs
1. Can I use milk chocolate chips instead of semisweet?
Absolutely! Just know that milk chocolate is sweeter, so the cookies will have a slightly more sugary taste.
2. How long do these cookies stay fresh?
Stored in an airtight container, they stay fresh for up to 5 days at room temperature.
3. Can I freeze baked cookies?
Yes! Let them cool completely, wrap individually, and freeze in an airtight bag for up to 2 months.
4. Do I have to use holiday sprinkles?
Not at all, but they make the cookies extra festive. You can sub in mini M&Ms, colored sugar, or even skip them for a more classic look.
5. What if I want thicker cookies?
Chill the dough longer—overnight if possible. It helps the cookies hold their shape and makes them thicker and chewier.


