There’s something truly magical about the holiday season — the lights, the music, the cozy evenings, and of course… the cookies! But if you’re anything like me, juggling a million things during the holidays, the idea of baking batch after batch of cookies sounds… well, exhausting. That’s where Christmas Cookie Bars come to the rescue. These bars are basically all the goodness of your favorite Christmas cookies, baked into a single pan. Soft, chewy, and loaded with red and green M&Ms and holiday sprinkles — they’re festive, foolproof, and oh-so-delicious.
What Are Christmas Cookie Bars?
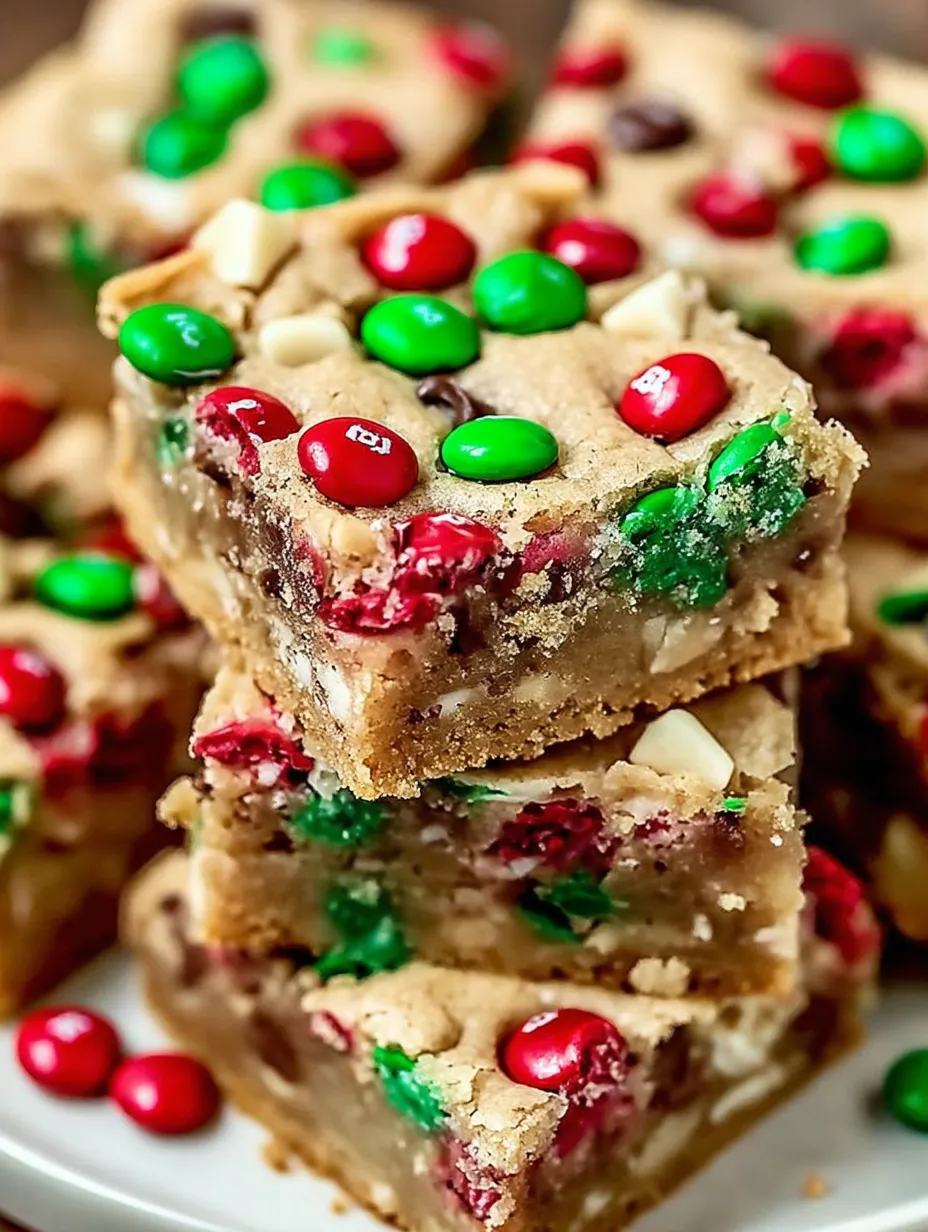
Think of cookie bars as cookies without the hassle. Instead of rolling dough or cutting shapes, you just spread everything into a baking dish, bake it, slice it, and voila — Christmas cheer in every square. These cookie bars are buttery and soft in the center, with slightly crisp golden edges and a chewy texture that feels like biting into the best part of a classic cookie. The colorful M&Ms and sprinkles on top? That’s the holiday sparkle we all need!
Perfect for parties, potlucks, cookie exchanges, or just snacking with a cup of hot cocoa by the fire — these bars bring all the holiday spirit in one easy-to-make dessert.
Why You’ll Love These Bars
- Quick & Easy: Just 10 minutes of prep, no chilling required.
- Festive Look: The red and green M&Ms and sprinkles instantly scream “Christmas!”
- One Pan = Less Mess: No scooping, no rolling, no extra baking trays.
- Soft & Chewy Texture: Thanks to the perfect balance of brown sugar and butter.
- Kid-Approved: Kids LOVE the colorful candy and fun sprinkles.
- Customizable: You can change the mix-ins to match any occasion.
These bars are like the holiday version of a warm hug — cozy, colorful, and full of joy.
Ingredients Breakdown
Let’s take a quick peek at what makes these bars so irresistible:
Butter – The Flavor Booster
Start with 1 cup of unsalted butter, melted. Melted butter gives the bars a rich, fudgy texture that helps them stay soft and gooey on the inside. It also enhances the depth of flavor — think warm, buttery bliss in every bite. You want it fully melted but not scorching hot before mixing with the sugars.
Sugars – Sweet & Chewy Combo
This recipe uses a combo of:
- 1 cup packed brown sugar – adds moisture, chewiness, and a slight caramel-like taste.
- ½ cup granulated sugar – gives structure and balances sweetness.
Together, they create the ultimate soft and chewy texture while still giving the edges a gentle crisp.
Eggs & Vanilla – Richness & Aroma
- 2 large eggs – bind everything together and add richness.
- 1 tsp vanilla extract – a must-have for that classic homemade cookie flavor. Don’t skimp here – the smell alone is enough to make your kitchen feel festive!
Flour, Baking Soda, and Salt – The Structure
- 2 cups all-purpose flour – gives the dough body and structure.
- ½ tsp baking soda – helps the bars rise just slightly so they’re not too flat.
- ½ tsp salt – enhances the other flavors and balances the sweetness.
M&Ms & Sprinkles – Festive Finishing Touch
- 1 cup red and green holiday M&Ms – the stars of the show!
- ½ cup holiday sprinkles – adds extra crunch and color. Use jimmies, not nonpareils, to avoid color bleeding.
Pro tip: Save some M&Ms and sprinkles to press into the top before baking. That’s what gives them the bright, bakery-style look — just like the photo!
Equipment You’ll Need
Nothing fancy here! You likely already have everything:
- 9×13-inch baking dish
- Parchment paper (for easy lift-out and clean-up)
- Mixing bowls (one large, one medium)
- Whisk and spatula
- Measuring cups & spoons
Prepping for the Magic – Setting Up Your Kitchen
Before you dive in, make sure your butter is melted and slightly cooled, your eggs are at room temp (helps with even mixing), and your pan is lined with parchment. That lining makes it super easy to lift the bars out later and slice them into clean squares.
Preheat your oven to 350°F (175°C) — the sweet spot for baking these cookie bars to golden perfection without over-baking.
Step-by-Step: Making Christmas Cookie Bars
Step 1: Preheat & Line Your Pan
Start by preheating your oven to 350°F and lining your 9×13-inch baking pan with parchment paper. Let a little overhang on the sides for easy lifting later. Trust me, it’s worth the extra 30 seconds.
Step 2: Mix the Wet Ingredients
In a large mixing bowl, combine:
- Melted butter
- Brown sugar
- Granulated sugar
Whisk it until smooth and glossy. Then add in your eggs and vanilla extract. Stir until it becomes a creamy, uniform batter.
This is where the magic begins. The mixture should already smell amazing — like sweet, buttery cookie heaven.
Step 3: Combine the Dry Ingredients
In a separate bowl, whisk together:
- Flour
- Baking soda
- Salt
Gradually add the dry ingredients into the wet mix. Don’t dump it all in at once — add it in stages and stir gently until just combined. Overmixing can lead to tough bars, and nobody wants that.
Step 4: Bringing It All Together
Once the dough is formed, fold in the M&Ms and holiday sprinkles. Save a few for topping! Mix them in gently so they stay whole and evenly distributed.
The dough will be thick — almost like soft cookie dough. That’s perfect!
Step 5: Decorating Before Baking
Spread the dough evenly into the prepared pan. Use a spatula to press it into all corners. Then — this is key — press those reserved M&Ms and sprinkles on top. This gives you that gorgeous, festive look just like in the photo.
Step 6: Baking to Perfection
Bake in the center of your oven for 20–25 minutes. You’re looking for:
- Lightly golden edges
- A set center that doesn’t jiggle
- A shiny, slightly cracked top
The bars will continue to firm up as they cool. Don’t overbake — it’s better to err on the side of slightly underdone for gooey, chewy perfection.
Step 7: Cooling & Cutting
Let the bars cool completely in the pan. Once cool, lift them out using the parchment and cut into 16 even squares (or smaller bites if serving a crowd).
You’ll see those melty red and green M&Ms dotting each slice like holiday jewels.
Pro Tips for the Best Cookie Bars
- Don’t overmix your dough — gentle stirring is enough.
- Use fresh ingredients, especially baking soda.
- Chill the dough briefly before baking for thicker bars (optional).
- Press M&Ms in after baking if you want the tops extra vibrant.
- Line your pan to avoid sticking and make slicing cleaner.
Make-Ahead & Storage Instructions
One of the best things about these Christmas Cookie Bars? They’re make-ahead friendly. That’s right—you can bake them a day (or two) before your holiday event, and they’ll still taste just as amazing.
Storing at Room Temperature:
- Store the bars in an airtight container at room temperature.
- They’ll stay fresh and chewy for up to 5 days.
- Stack them with parchment or wax paper in between to prevent sticking.
Refrigeration:
While not necessary, you can refrigerate them for a slightly firmer texture. If you love a chilled cookie, go for it! Just let them sit out a few minutes before serving so they soften up.
Freezing & Reheating Tips
Yes, these bars freeze beautifully!
How to Freeze:
- Allow the bars to cool completely.
- Slice them and wrap each square in plastic wrap.
- Place wrapped bars in a freezer-safe bag or airtight container.
They’ll stay fresh in the freezer for up to 3 months.
Reheating (Optional):
Want that fresh-out-of-the-oven warmth? Just microwave a bar for 10–15 seconds. It’ll be soft, warm, and the M&Ms will get slightly melty again. Cozy perfection!
Fun Variations to Try
Once you’ve mastered the base recipe, the possibilities are endless. Here are a few festive twists to switch it up:
1. White Chocolate Cranberry Bars
Swap M&Ms for white chocolate chips and dried cranberries. Still festive, but with a tart-sweet twist.
2. Peppermint Twist
Add crushed candy canes to the batter or sprinkle on top for that peppermint crunch.
3. Chocolate Lovers’ Dream
Stir in mini chocolate chips and drizzle melted chocolate over the top after baking.
4. Nutty Holiday Bars
Add ½ cup of chopped pecans or walnuts for a toasty, nutty flavor and crunch.
5. Gluten-Free Version
Use a 1:1 gluten-free flour blend in place of all-purpose flour. Just make sure your M&Ms and sprinkles are certified GF.
Print
Christmas Cookie Bars
- Prep Time: 10 minutes
- Total Time: 35 minutes
- Category: Holiday Desserts / Christmas Cookie Bars
Description
🎄 Soft, chewy, colorful, and bursting with holiday cheer — these Christmas Cookie Bars are the easiest way to bring magic to your dessert table! Perfect for parties, gifting, or cozy nights by the tree. ❄️💚❤️
Ingredients
1 cup unsalted butter, melted
1 cup brown sugar, packed
1/2 cup granulated sugar
2 large eggs
1 tsp vanilla extract
2 cups all-purpose flour
1/2 tsp baking soda
1/2 tsp salt
1 cup red and green M&Ms
1/2 cup holiday sprinkles
Instructions
Preheat oven to 350°F (175°C). Line a 9×13-inch baking pan with parchment paper. ⏱️ 2 minutes
In a large bowl, whisk the melted butter, brown sugar, and granulated sugar until smooth and glossy. Add eggs and vanilla, mixing well. ⏱️ 5 minutes
In another bowl, combine the flour, baking soda, and salt. Gradually fold the dry ingredients into the wet mixture until a soft dough forms. ⏱️ 4 minutes
Gently fold in the M&Ms and holiday sprinkles, reserving some for topping. ⏱️ 2 minutes
Spread the dough evenly into the prepared pan. Sprinkle the remaining M&Ms and sprinkles over the top. ⏱️ 2 minutes
Bake for 20–25 minutes, or until the edges are golden and the center is set. Cool completely before cutting into squares. ⏱️ 20–25 minutes + cooling time
Notes
These bars are thick, chewy, and perfect for making in big batches.
Let them cool fully so they slice neatly into perfect squares.
You can swap M&Ms for white chocolate chips, crushed peppermint, or holiday Oreos.
Great for Christmas parties, potlucks, or gifting in cookie tins.
Nutrition
- Serving Size: 16 bars
- Calories: 250 kcal
How to Serve These Cookie Bars
These Christmas Cookie Bars are crowd-pleasers. Here are a few cute, creative ways to serve them during the holidays:
- On a Christmas cookie tray with other holiday favorites
- Wrapped in clear treat bags tied with red and green ribbons for gifting
- With mugs of hot chocolate or eggnog at your holiday party
- Cut into bite-sized pieces for dessert platters
- Stacked like a cookie tree on a cake stand for a fun centerpiece
They’re also great for school parties, holiday bake sales, or just to surprise your neighbors with a sweet little gift.
You may like as well :
Christmas Sugar Cookie Bars Recipe: The Ultimate Festive Treat You’ll Bake on Repeat
Christmas Cookie Lasagna Recipe: The Ultimate Festive Dessert to Wow Your Guests
Perfect for Gifting & Parties
Looking to spread some holiday cheer? These bars are made for gifting. They travel well, stay fresh, and look adorable packaged up with a festive label. You can even pop them into a holiday-themed tin, box, or jar.
Hosting a party? Slice them into smaller squares and serve them on a tiered platter with other treats. Their colorful look and rich flavor make them stand out.
Troubleshooting Guide
If something seems off, don’t worry. Here’s how to fix or avoid the most common cookie bar mishaps:
- Too Dry? You may have overbaked. Always check a few minutes early.
- Too Gooey in the Center? Make sure you baked long enough and let them cool completely before cutting.
- Bars Fell Apart? Let them cool fully before slicing—this gives them time to set.
- Too Sweet? Reduce the granulated sugar slightly next time or use dark chocolate M&Ms for balance.
Nutritional Info (Per Bar)
| Nutrient | Amount (Approx.) |
|---|---|
| Calories | 250 kcal |
| Total Fat | 12g |
| Saturated Fat | 7g |
| Carbohydrates | 34g |
| Sugar | 24g |
| Protein | 2g |
| Sodium | 100mg |
Note: Values are estimates and may vary based on brand of ingredients used.
Wrapping Up the Holiday Sweetness
These Christmas Cookie Bars aren’t just a recipe—they’re a holiday experience. Every bite is buttery, chewy, and filled with nostalgic flavors and festive colors that scream “Merry Christmas!” Whether you’re whipping up a quick treat for the family or prepping goodies for a big holiday bash, these bars deliver big-time holiday cheer without the fuss.
They’re easy enough for beginners, fun enough for kids to help with, and delicious enough to impress every guest. So why not spread a little sweetness this season? Bake a batch (or two), and let the holiday magic begin.
You may like this one also : Caramel Crunch Cookies
FAQs
1. Can I use different candy instead of M&Ms?
Absolutely! Try using chocolate chips, mini Reese’s pieces, or even chopped peppermint bark for a different holiday twist.
2. Can I make these bars gluten-free?
Yes! Just use a good-quality 1:1 gluten-free flour blend. Make sure your mix-ins (like M&Ms and sprinkles) are also gluten-free.
3. Why are my bars too dry or crumbly?
That usually means they were overbaked. Try reducing the baking time by a couple of minutes and watch the edges carefully.
4. Can I double the recipe?
Yes! If you’re baking for a crowd, double the recipe and bake it in a half-sheet pan. Adjust the baking time—start checking around 25 minutes.
5. How long do they stay fresh?
Stored properly in an airtight container, they’ll stay soft and chewy for up to 5 days. You can also freeze them for longer storage.


