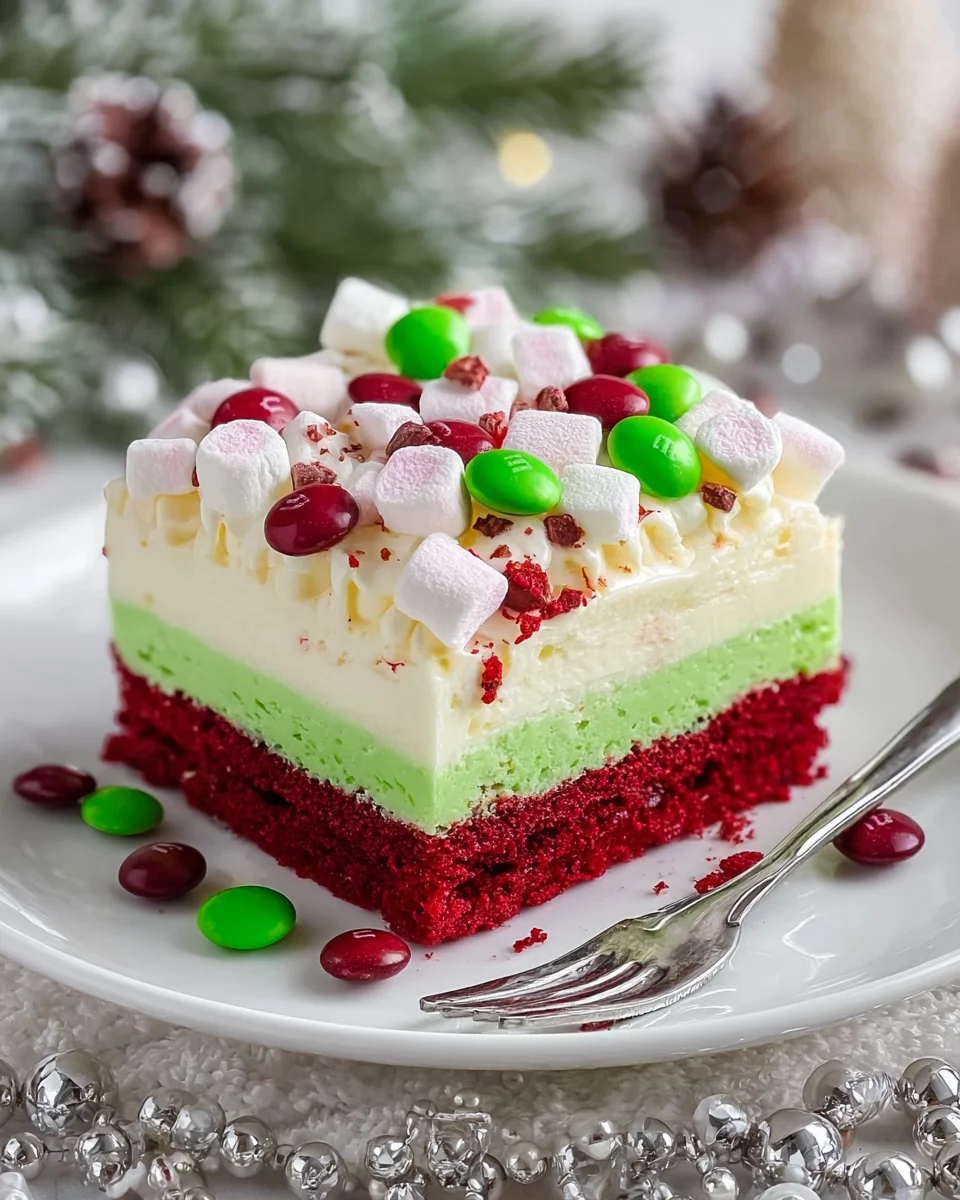
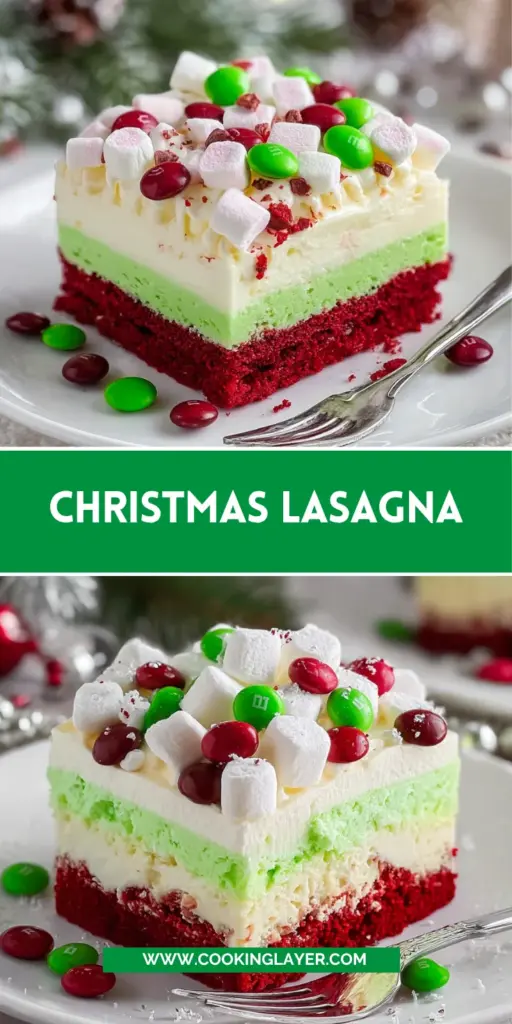
Introduction to Christmas Lasagna
Ah, Christmas—what a magical time of year! The chill in the air, the twinkling lights, and the sweet aroma of festive treats wafting through our homes all come together to create a sense of warmth and joy. Now, imagine bringing all of that cheer to your dessert table with a delightful Christmas Lasagna. This festive dessert is a decadent, layered masterpiece that dazzles the eye and tantalizes the taste buds. Perfect for busy moms and professionals, it’s an easy-to-make treat that will leave your family and friends asking for seconds, or thirds!
Why You’ll Love This Christmas Lasagna
This Christmas Lasagna is not just a treat for the eyes; it’s a real crowd-pleaser! It’s incredibly easy to whip up, combining simple layers that create a stunning dessert without hours in the kitchen. With a perfect balance of creamy, crunchy, and sweet flavors, each bite feels like a holiday celebration. Whether you’re hosting a party or just want to brighten a weeknight dinner, this is dessert magic that fits seamlessly into your busy schedule.
Table of Contents
Table of Contents
Ingredients for Christmas Lasagna
Let’s dive into the delightful ingredients that make this Christmas Lasagna a showstopper! Each component plays a unique role, creating layers of flavor and texture that will have your loved ones raving. Here’s what you’ll need:
- Unsalted butter: This creamy goodness is the base of our shortbread layer, providing a rich flavor and tenderness.
- Powdered sugar: This sweet white dust not only sweetens our layers but also gives the shortbread a delicate sweetness.
- All-purpose flour: The backbone of the shortbread mixture, helped along by the sugar and butter to create a lovely crust.
- Cocoa powder: A little bit of chocolate flavor sneaks into the shortbread layer, adding depth and richness.
- Salt: Just a pinch enhances all of the other flavors, making the sweetness pop.
- Red food coloring: A splash of holiday spirit! This vivid color makes our dessert festively eye-catching.
- Peppermint Cheesecake Filling:
- Powdered sugar: Another round of sweetness for our creamy layer, ensuring it’s luscious and smooth.
- Cream cheese: This soft cheese adds a tangy richness that pairs perfectly with the sweet elements.
- Cool Whip: This whipped topping provides lightness and creaminess to the cheesecake layer.
- Peppermint extract: A dash of this brings in that signature holiday flavor that everyone loves!
- Green pudding layer:
- White chocolate instant pudding: This decadent pudding mix forms the silky part of our delicious dessert.
- Milk: Essential for creating the pudding’s smooth, rich texture. Whole milk works wonderfully here!
- Green food coloring: Adds a festive hue, transforming our pudding into a delightful layer.
- Cool Whip: More of this delicious topping is spread over the pudding layer, creating a light and fluffy finish.
- Mini marshmallows: Tiny clouds of sweetness that add texture and whimsy to the dessert’s presentation.
- Red and green sprinkles: The final touch that brings a sprinkle of joyful festivity and color to your Christmas Lasagna.
- M & M candies: These colorful chocolates not only add sweetness but also a playful crunch that kids (and adults) adore!
You’ll find the specific quantities for each ingredient listed below, making it super easy for you to gather them up and get cooking!
How to Make Christmas Lasagna
Now, let’s roll up our sleeves and dive into the fun part—creating our Christmas Lasagna! Don’t worry; each step is straightforward and enjoyable. I promise you’ll feel like a holiday chef in no time!
Step 1: Prepare the Shortbread Layer
First things first, preheat your oven to 350°F. While it’s warming up, grab a 9 x 13 inch baking dish and lightly butter it. This will help our shortbread layer prevent sticking.
In a small bowl, stir together the flour, salt, and cocoa powder to create your dry mix. In a larger bowl, beat the softened butter and powdered sugar together until smooth and creamy. Add a splash of red food coloring to give it a festive hue—don’t be shy; this dessert is all about the cheer!
Slowly blend in the flour mixture until everything is combined. This shortbread mix should be thick but manageable, ready to be pressed into your baking dish like a warm hug.
Step 2: Bake and Cool
Once your mix is ready, evenly press it into the bottom of the baking dish. Bake this beauty for 18-20 minutes. Your kitchen will soon smell like heaven! The layer should be lightly golden brown when you take it out.
But hold on! It’s vital to let the shortbread cool completely in the dish before adding the next layers. This helps prevent any melting and keeps our dessert looking fabulous.
Step 3: Create the Cream Cheese Layer
While the shortbread cools, let’s create the creamy filling. In a mixing bowl, combine the softened cream cheese and powdered sugar. Beat them together until smooth and creamy—trust me, you want it to be perfectly blended for the right texture.
Now, gently fold in 1 ½ cups of Cool Whip and peppermint extract. Mixing these ingredients creates a fluffy, peppermint cheesecake layer that’s pure bliss. Spread this dreamy mixture evenly over the cooled shortbread base, and place the dish in the freezer for a tad while we tackle the next layer.
Step 4: Whisk the Green Pudding Layer
For the green pudding layer, grab a bowl and whisk together the two boxes of white chocolate instant pudding mix and milk. Don’t forget to add just a few drops of green food coloring to achieve that festive holiday hue. The goal is to make it vivid yet delicious!
Continue whisking until the mixture is smooth and thick. Once ready, gently spread this delightful layer over the cream cheese filling. This isn’t just tasty—it adds a fun pop of color to our Christmas Lasagna!
Step 5: Assemble and Chill
Now for the magic moment! Layer the remaining Cool Whip over the green pudding gently, creating a light and fluffy finish. Toss on those mini marshmallows and sprinkles for an extra festive touch.
Finally, pop the entire dish in the refrigerator for 3-4 hours—or even overnight for the best results. This chilling time allows all those delicious layers to meld together beautifully. The anticipation will be worth it when you finally serve this Christmas Lasagna!
Tips for Success
- Soften your cream cheese well—it makes mixing a breeze!
- Ensure your shortbread layer cools completely to keep everything intact.
- Don’t rush the chilling time; patience makes for a better texture!
- For festive flair, let your kids help with the sprinkles and toppings.
- Feel free to adjust the color intensity with food coloring to suit your holiday decor.
Equipment Needed
- 9 x 13 inch baking dish – Any similar-sized dish will do!
- Mixing bowls – A couple of different sizes help for convenience.
- Whisk – A good fork can work in a pinch.
- Electric mixer – A handheld one speeds things up but isn’t essential.
- Spatula – Perfect for spreading layers evenly.
Variations
- Gluten-free option: Substitute all-purpose flour with a gluten-free flour blend for the shortbread layer.
- Nut allergy-friendly: Use nut-free whipped toppings and check your pudding mix source to ensure safety.
- Vegan twist: Swap traditional cream cheese for a vegan alternative and use almond or coconut milk for the pudding.
- Chocolate lover’s delight: Add chocolate chips or chunks between the layers for an extra chocolatey kick.
- Fruit layer: Incorporate some fresh fruit like raspberries or strawberries in the layers for a burst of natural sweetness.
Serving Suggestions
- Serve with a scoop of vanilla ice cream for an indulgent treat.
- Pair with peppermint hot cocoa for a winter warming duo.
- Present in festive holiday-themed dishes to enhance your table’s charm.
- Add fresh mint leaves as a garnish for a pop of color.
- Set out extra sprinkles and candies for guests to customize their slices.
FAQs about Christmas Lasagna
Can I make Christmas Lasagna ahead of time?
Absolutely! This festive dessert can be made a day in advance. Just be sure to let it chill in the refrigerator for at least 3-4 hours before serving. The flavors meld beautifully when it has time to set.
Can I substitute ingredients for Christmas Lasagna?
Yes! There are plenty of substitutions you can use. For example, opt for a gluten-free flour blend in the shortbread, or use a non-dairy cream cheese if you need a vegan option. Experiment with flavors!
What other toppings can I use for this Christmas Lasagna?
Beyond mini marshmallows and sprinkles, you can add crushed candy canes, chocolate shavings, or even colorful fruit for a fresh twist. It’s all about making it your own and festive!
How should I store leftover Christmas Lasagna?
Seal any leftovers in an airtight container and store in the refrigerator. It should last for up to 4 days—the flavors only get better!
Can I use chocolate pudding instead of white chocolate?
Absolutely! If your family loves chocolate, switching to chocolate pudding will create a deliciously different flavor profile. Just keep in mind that it may change the color theme of your dessert.
Final Thoughts
Bringing this Christmas Lasagna to your holiday celebrations will feel like unwrapping a beautifully wrapped gift full of delightful surprises. The beauty of this dessert lies in its festive layers and luscious flavors that ignite joy in every bite! The smiles on your family’s faces as they dive into this sweet treat will make all the effort worthwhile. You’ll create delicious memories while easing the stress of the holiday bustle. So roll up your sleeves, embrace the magic of the season, and make this Christmas Lasagna a part of your holiday traditions. Your festive table deserves it!
Print
Christmas Lasagna
- Prep Time: 30 minutes
- Cook Time: 20 minutes
- Total Time: 4 hours 50 minutes
- Yield: 12 servings 1x
- Category: Dessert
- Method: Baking and layering
- Cuisine: American
- Diet: Vegetarian
Description
A delightful festive dessert that layers shortbread cookies, peppermint cheesecake, and white chocolate pudding, all topped with cool whip and holiday decorations.
Ingredients
- 3/4 cup unsalted butter – softened
- ½ cup powdered sugar
- 1 1/2 cups all-purpose flour
- 1 tablespoon cocoa powder
- ¼ teaspoon salt
- Red food coloring
- 1 cup powdered sugar (Peppermint Cheesecake Layer)
- 8 oz. cream cheese – softened
- 1 ½ cup Cool Whip – thawed
- 1 teaspoon peppermint extract
- 2 x 3.9 oz. box white chocolate instant pudding (Pudding Layer)
- 3 cups milk
- Green food coloring
- 1 ½ cups cool whip (For Topping)
- 2 cups mini marshmallows (For Garnish)
- Red and green sprinkles
- M & M candies
Instructions
- Preheat the oven to 350 F. Lightly butter a 9 x 13 inch baking dish and set aside.
- In a small bowl, stir together flour, salt, and cocoa powder.
- In a large bowl, beat butter and powdered sugar until smooth. Add red food coloring and mix well (about 1 tablespoon for an intense color). Gradually add the flour mixture while mixing on low speed until combined.
- Press the mixture into the bottom of the baking dish and bake for 18-20 minutes. Remove from the oven and cool completely.
- To make the cream cheese layer, beat softened cream cheese and powdered sugar until smooth. Add 1 ½ cup Cool Whip and peppermint extract, mixing to combine. Spread over the cooled shortbread layer and place in the freezer to firm while preparing the pudding.
- For the green pudding layer, whisk together the pudding mix and milk. Add green food coloring (a few drops at a time to reach desired color) and whisk until smooth. Spread over the cream cheese layer and set in the freezer for 5 minutes.
- Spread the remaining 1 ½ cup Cool Whip over the pudding layer and top with mini marshmallows and sprinkles. Place in the fridge for 3-4 hours until set.
Notes
- For a more intense red color, increase the amount of red food coloring as needed.
- Ensure the cream cheese is softened for easy mixing.
- Allow enough time for the dessert to chill in the refrigerator before serving.
Nutrition
- Serving Size: 1 slice
- Calories: 250
- Sugar: 20g
- Sodium: 150mg
- Fat: 11g
- Saturated Fat: 7g
- Unsaturated Fat: 2g
- Trans Fat: 0g
- Carbohydrates: 35g
- Fiber: 1g
- Protein: 3g
- Cholesterol: 30mg


