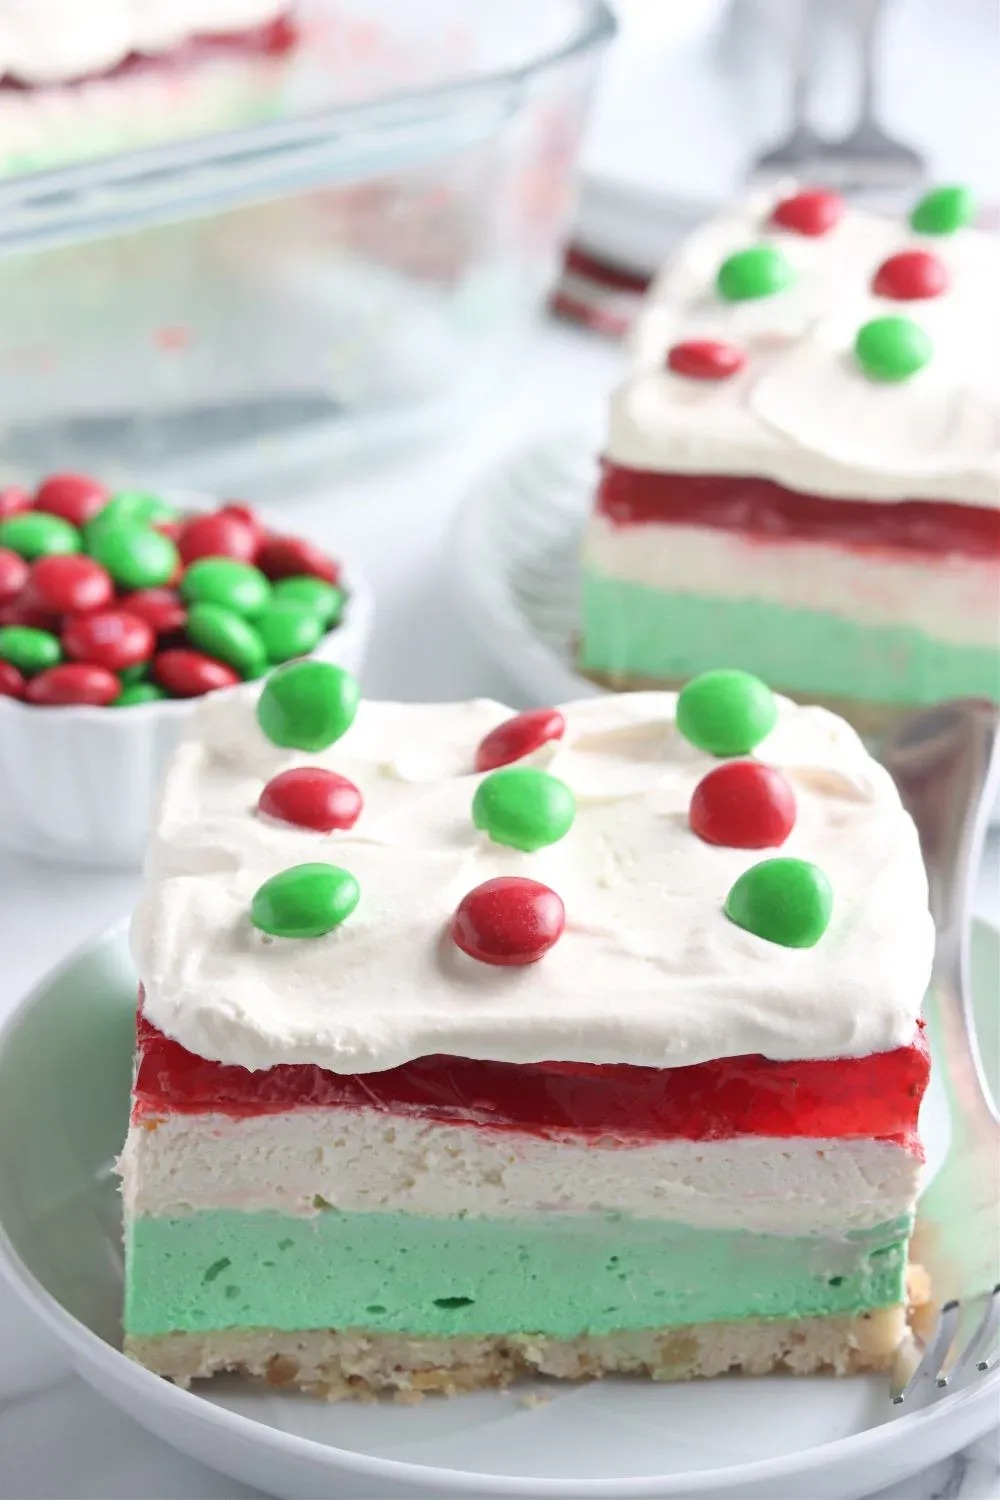
Let’s be honest—when the holidays roll around, we’re not just looking for something sweet. We’re looking for festive, fun, colorful, and memorable. That’s exactly what this Christmas Lush Layer Dessert brings to your table. With its dreamy layers of green pistachio, snowy white cream, bright red Jell-O, and fluffy whipped topping decked with M&M “ornaments,” this treat is basically Christmas in edible form.
It’s cold, creamy, and absolutely magical—like a snow day in dessert form. And the best part? It’s surprisingly easy to make. Whether you’re bringing it to a potluck, serving it after Christmas dinner, or enjoying it in your PJs while watching a Hallmark movie, this dessert belongs in your holiday lineup.
🎁 What is a Lush Dessert?
If you’ve never heard the term before, let’s clear it up! A lush dessert is a layered, chilled dessert made with a cookie or nut crust, creamy pudding layers, and whipped topping. It’s sometimes called a “dessert lasagna,” but honestly, it’s way more fun than it sounds.
It’s often no-bake or minimal-bake (only the crust here is baked), and it can be customized for any occasion—lemon lush for summer, pumpkin lush for fall, and now… Christmas Lush for the holidays!
🎉 Why This Christmas Lush Dessert is the Ultimate Holiday Treat
Here’s why this recipe deserves a prime spot on your dessert table:
- Festive as heck – The red, green, and white layers scream holiday spirit!
- Kid-friendly & adult-approved – Creamy, sweet, and not overly rich.
- Make-ahead magic – Perfect for prepping the night before.
- No baking drama – Only the crust is baked, the rest is chill-and-stack.
- Visually stunning – It looks like you spent hours, but it’s deceptively simple.
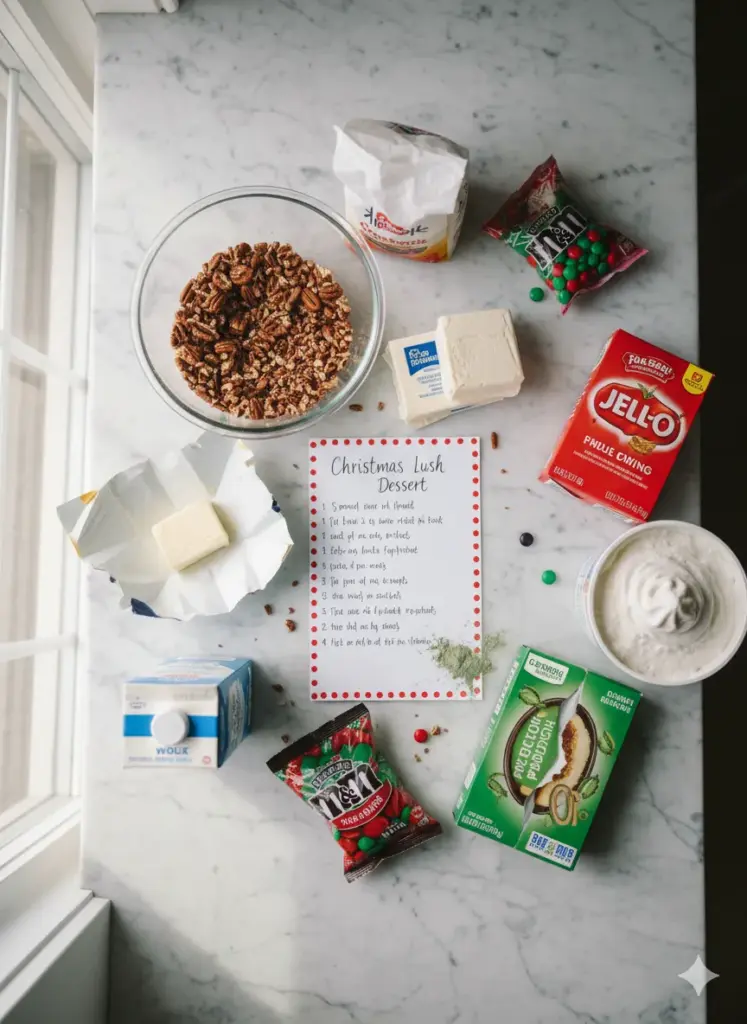
📝 Ingredients Overview: Layer-by-Layer Breakdown
Let’s break down what makes each layer of this dessert special:
Crust:
- 1 cup all-purpose flour
- ½ cup unsalted butter, softened
- ¼ cup finely chopped pecans
- 2 tbsp sugar
This crust is buttery, nutty, and lightly crisp. It gives the dessert structure and a nice contrast to the creamy layers above.
Green Pistachio Layer:
- 1 box (3.4 oz) instant pistachio pudding mix
- 1 ½ cups cold milk
- 4 oz cream cheese, softened
- 1 cup whipped topping (Cool Whip)
This layer brings the festive green color and that subtle, nutty pistachio flavor everyone adores during the holidays.
White Cream Layer:
- 8 oz cream cheese, softened
- ½ cup powdered sugar
- 1 tsp vanilla extract
- 1 ½ cups whipped topping
It’s smooth, fluffy, and tastes like a dreamy vanilla cheesecake cloud.
Red Jell-O Layer:
- 1 large box (6 oz) strawberry or cherry Jell-O
- 2 cups boiling water
The most vibrant and eye-catching layer! It’s like a glistening red ribbon in the middle of your dessert.
Topping:
- 2–3 cups whipped topping
- Red & green M&M’s
This is where the holiday flair really comes in. The M&M’s make it playful and give a cheerful crunch.
🍽 Essential Tools You’ll Need
Before we dive in, gather your tools:
- 9×13 inch glass or ceramic dish
- Hand mixer or stand mixer
- Spatula
- Mixing bowls
- Measuring cups and spoons
- Saucepan or kettle for boiling water
- Offset spatula (optional, but makes spreading layers easier)
👩🍳 Step-by-Step Instructions
1. Make the Buttery Pecan Crust 🍪
Preheat your oven to 350°F (175°C). In a bowl, mix together flour, softened butter, chopped pecans, and sugar. It should look crumbly and soft—kind of like a sandy cookie dough.
Press this mixture firmly into the bottom of a 9×13 baking dish. Use your fingers or the bottom of a flat measuring cup to spread it evenly.
Bake for 12–15 minutes until the edges start turning golden. Let it cool completely before adding any layers—this keeps them from melting or sinking.
Chill time tip: Stick it in the fridge or even freezer to speed up the cooling.
2. Mix the Green Pistachio Dream Layer 💚
In one bowl, beat the softened cream cheese until smooth. In a separate bowl, whisk together the pistachio pudding mix and cold milk until thick—this only takes a minute or two. Combine the pudding with the cream cheese until it’s creamy and well-blended.
Next, fold in a cup of Cool Whip gently. You want it light and airy. Spread this luscious green layer over the cooled crust. Pop it in the fridge to chill for 30 minutes.
This layer sets the tone—fluffy, colorful, and rich with pistachio flavor.
3. Craft the Smooth White Cream Layer 🤍
Now beat together the second block of cream cheese, powdered sugar, and vanilla until silky smooth. Add in your whipped topping (Cool Whip again) and fold it in gently.
Once the green layer is firm enough, spread the white cream mixture on top of it evenly.
It adds contrast and balances the pistachio flavor with a sweet vanilla note. Chill again—about 20 minutes this time—to let it set.
4. Prepare the Bright Red Jell-O Layer ❤️
Bring 2 cups of water to a boil and pour it over the Jell-O powder in a mixing bowl. Stir until it completely dissolves, then let it cool to room temperature.
Important: Do NOT pour hot Jell-O over your cream layers—it will melt them into a sad puddle.
Once the Jell-O is room temperature, pour it gently over the back of a spoon onto the white cream layer (this helps prevent it from disturbing the layer beneath).
Refrigerate the whole dish for 2–3 hours, or until the Jell-O is fully set.
5. Finish with Fluffy Whipped Topping & M&M Magic ❄️
Once the Jell-O layer is firm, spread a final thick layer of whipped topping over the entire dessert. Use an offset spatula for a smooth finish if you want to get fancy.
Now, decorate! Add red and green M&M’s all over the top. You can go random, make a pattern, or even spell out “JOY” or “HO HO HO.”
Chill for another 15 minutes, then slice and serve!
📏 Layering Tips for the Perfect Stack
The real charm of this Christmas Lush is in the gorgeous layers. Getting them right isn’t hard, but there are a few golden rules to follow:
- Let each layer chill before adding the next. If a layer is too soft, the next one will sink into it and make things messy.
- Use a spatula to spread evenly—work corner to corner, and don’t press too hard.
- Keep your dish flat in the fridge to avoid slanting layers.
- Use a clear glass dish to show off your beautiful stack—because this dessert deserves to be seen!
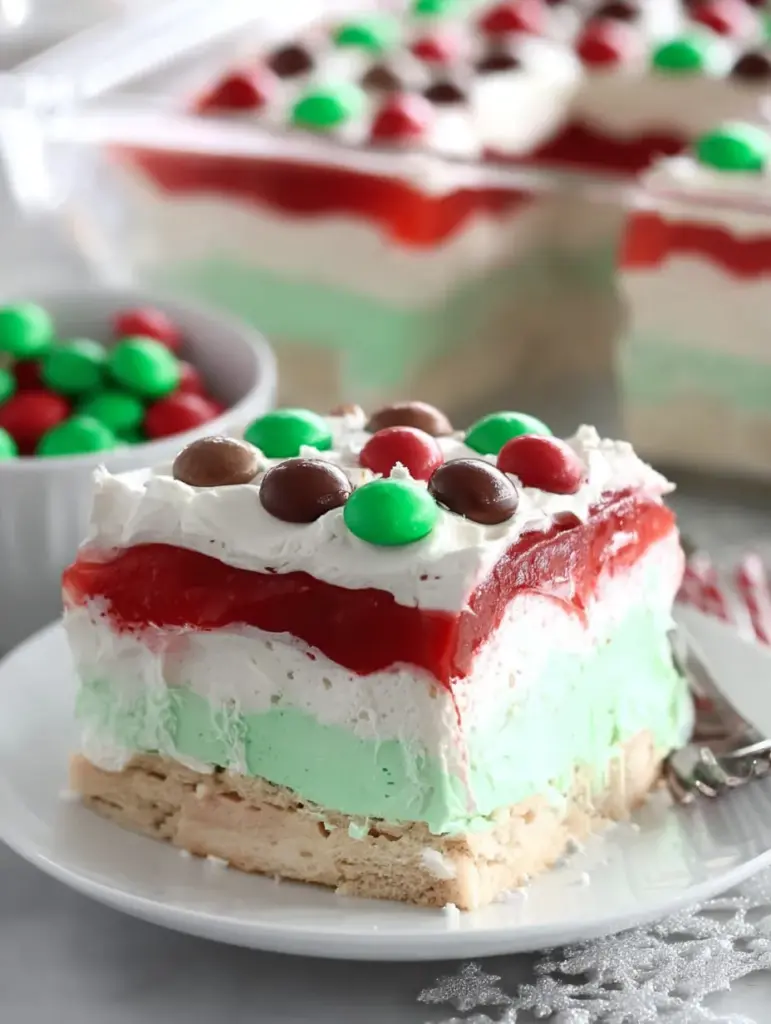
Visual appeal is part of the magic here. When you slice into it, you want that crisp contrast between the green, white, and red—just like in the photo.
🕰️ Chilling: The Secret to Lush Perfection
One of the key components to a successful lush dessert? Patience.
Each layer needs time to firm up before the next one is added. Rushing through the process might cause the colors to bleed or layers to collapse.
Here’s a suggested chill timeline:
- After crust: Cool completely (use the fridge to speed up)
- After pistachio layer: Chill 30 minutes
- After white cream layer: Chill 20 minutes
- After Jell-O: Chill 2–3 hours until fully set
- After whipped topping: Chill 15 minutes before serving
Want to make your life easier? Make this dessert a day ahead and let it sit overnight in the fridge. The flavors meld beautifully, and the structure firms up for perfect slices.
🔪 How to Slice it Beautifully (Without the Mess)
Slicing layered desserts like this can get messy fast—but with a few tricks, you’ll get bakery-style squares every time.
Tips for clean cuts:
- Use a sharp, thin knife.
- Wipe the knife clean between each cut.
- Chill it well before slicing—cold layers hold their shape better.
- For perfect squares, use a ruler to gently score the top as a guide.
Use a cake lifter or thin spatula to lift each slice out without disrupting the ones next to it. Want to go fancy? Add a dollop of whipped cream or a few extra M&M’s on the plate when serving.
🕒 Make-Ahead Instructions for Holiday Convenience
One of the best things about this Christmas Lush Dessert is how easily it fits into a busy holiday schedule.
You can make the entire dessert 24 to 48 hours in advance. In fact, it actually tastes better after sitting overnight in the fridge—the flavors blend, and the layers stay intact.
Just remember:
- Don’t add the M&M topping until the day you serve it. If they sit too long on the whipped topping, the color might bleed.
- Cover the dessert tightly with plastic wrap to prevent it from absorbing fridge odors.
- Store it in a glass dish with a fitted lid if you plan to transport it to a holiday party.

🎄 Christmas Lush Layer Dessert Recipe
- Prep Time: 20 minutes
- Total Time: 3 hours 20 minutes
- Category: Holiday Dessert
Description
🎄 A festive, creamy, and colorful holiday treat! ✨ Each layer brings its own magic — from the buttery pecan crust to the silky pistachio filling, snowy white cream, bright red Jell-O, and a fluffy whipped topping sprinkled with Christmas M&M’s. Pure holiday joy in every slice! ❤️💚❄️
Ingredients
Crust:
1 cup all-purpose flour
½ cup unsalted butter, softened
¼ cup finely chopped pecans
2 tbsp sugar
Green Pistachio Layer:
1 box (3.4 oz) instant pistachio pudding mix
1 ½ cups cold milk
4 oz cream cheese, softened
1 cup whipped topping (Cool Whip)
White Cream Layer:
8 oz cream cheese, softened
½ cup powdered sugar
1 tsp vanilla
1 ½ cups whipped topping
Red Layer:
1 large box (6 oz) strawberry or cherry Jell-O
2 cups boiling water
Topping:
2–3 cups whipped topping
Red & green M&M’s
Instructions
Preheat oven to 350°F (175°C). Mix flour, butter, pecans, and sugar until crumbly. Press into a 9×13 dish and bake until lightly golden. Cool completely. 🍪 (⏱️ Duration: 20 minutes)
Beat cream cheese until smooth. Whisk pudding mix with cold milk until thick, then combine with cream cheese. Fold in Cool Whip and spread over crust. Chill. 💚 (⏱️ Duration: 10 minutes + 30 minutes chill)
Beat cream cheese, powdered sugar, and vanilla until creamy. Fold in whipped topping. Spread over green layer and chill. 🤍 (⏱️ Duration: 10 minutes + 20 minutes chill)
Dissolve Jell-O in boiling water and cool to room temperature. Gently pour over the cream layer. Chill until fully set. ❤️ (⏱️ Duration: 5 minutes + 3 hours chill)
Spread whipped topping over the set Jell-O and decorate with red & green M&M’s. Chill before slicing. ❄️ (⏱️ Duration: 5 minutes + 15 minutes chill)
Notes
Nutrition
- Serving Size: 15–20
- Calories: 320 kcal (approx.)
📦 Storage Tips: Keeping Your Lush Fresh & Fabulous
Leftovers? Lucky you! This dessert stores surprisingly well.
- In the fridge: Cover tightly and store for up to 4 days.
- Freezing? Not recommended. The Jell-O layer and whipped topping can become watery when thawed.
If you’re meal-prepping for the week, slice it into single-serving portions and keep them in airtight containers for easy grab-and-go desserts.
🔄 Ingredient Swaps & Variations (If You Want to Get Creative)
Feeling a little wild? Want to customize your lush dessert? Here are some fun and festive twists:
Crust Variations:
- Swap pecans for walnuts or almonds.
- Use a graham cracker crust or Oreo cookie crust for a different texture.
- Try a layer of shortbread cookies for extra holiday flavor.
Pudding Layer:
- Not a pistachio fan? Use vanilla, white chocolate, or peppermint pudding (with green food coloring).
- Add crushed pineapple for a fruity twist.
Jell-O Ideas:
- Use raspberry or cranberry Jell-O instead of strawberry or cherry.
- Add sliced strawberries or maraschino cherries into the Jell-O for extra texture.
Topping Fun:
- Sprinkle with crushed candy canes, mini marshmallows, or holiday sprinkles instead of M&M’s.
- Drizzle a little white chocolate on top for elegance.
This recipe is a canvas—feel free to paint it with whatever holiday flavors you love most.
🎨 Serving Ideas: How to Present it Like a Pro
Sure, you could scoop this into bowls, but for maximum wow factor, serve it with style:
- Cut into even squares and place on a white serving platter.
- Garnish each slice with a mini candy cane or a dollop of whipped cream.
- Serve with a small festive fork or holiday toothpick topper.
- Add a drizzle of red berry sauce or a dusting of powdered sugar.
Hosting a buffet? Place a mini chalkboard sign next to the dessert labeled “Christmas Lush: Pistachio, Cream & Jell-O Delight!”
You may like as well :
Coconut Cream Poke Cake: A Tropical Hug in Every Slice
🍒 Cherry Pecan Cheesecake Lush Recipe: A No-Bake Dessert Dream
👨👩👧👦 Why Kids and Adults Alike LOVE This Dessert
This dessert is a total crowd-pleaser. Why?
- It’s colorful, like a holiday party in every slice.
- It’s cold and creamy—so satisfying after a big meal.
- It’s light enough that you won’t feel overly full.
- And those M&M’s? Total kid magnet.
Adults love it for its nostalgic, no-fuss charm. Kids love it because it looks and tastes like Christmas candy. It’s one of those recipes that bridges the generation gap and makes everyone smile.
🎅 Final Thoughts: A Festive Tradition in the Making
There’s something magical about recipes that become tradition. And once you make this Christmas Lush Layer Dessert, don’t be surprised if it becomes one of yours.
It’s easy, colorful, no-stress, and full of classic holiday flavors. Whether you’re hosting a family dinner, a holiday potluck, or just treating yourself to some festive cheer, this dessert is a guaranteed hit.
Every layer brings something special: the nutty crust, creamy green pistachio, smooth vanilla cream, vibrant red Jell-O, and the snowy topping with little candy ornaments. It’s basically the edible version of a Christmas sweater—cheerful, colorful, and full of holiday spirit.
Similar recipes :
Midnight Frost Christmas Punch Recipe
Million Dollar Pie💛 The No-Bake Dessert That Feels Like Winning the Sweet Lottery
❓ FAQs: Your Christmas Lush Questions, Answered
1. Can I make this dessert gluten-free?
Yes! Just use a gluten-free flour blend in the crust, and double-check that your pudding mix and Jell-O are certified gluten-free.
2. Can I use homemade whipped cream instead of Cool Whip?
Absolutely. Just make sure it’s whipped to stiff peaks. You’ll need about 4–5 cups total for the recipe.
3. How long will this dessert last in the fridge?
It’ll stay fresh for up to 4 days if covered tightly. Best eaten within 48 hours for best texture.
4. What’s the best way to transport this to a party?
Use a glass baking dish with a locking lid or cover tightly with foil and plastic wrap. Keep it chilled until serving.
5. Can I make this with other holiday colors?
Totally! Use blue raspberry Jell-O and vanilla pudding for a “winter wonderland” theme. Or go all red and white for a candy cane vibe.


