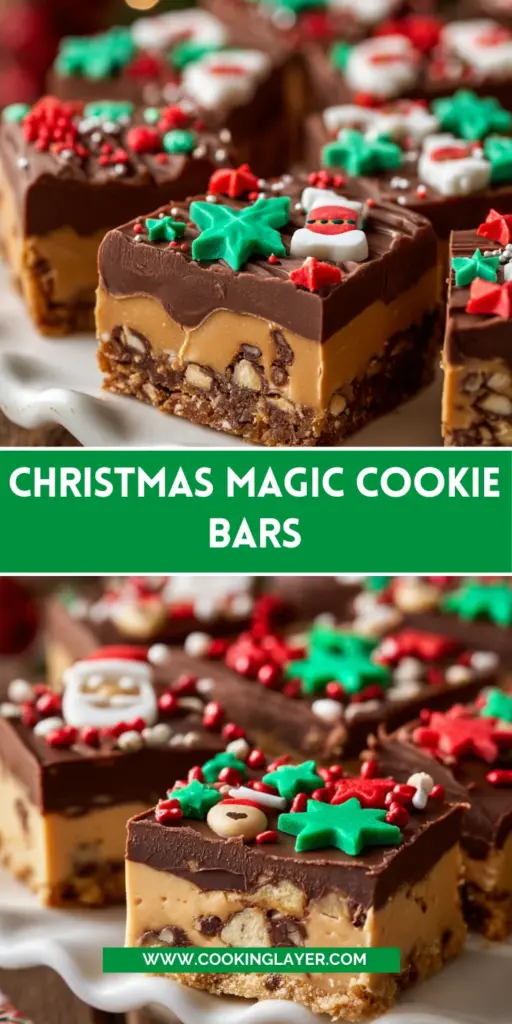
Introduction to Christmas Magic Cookie Bars
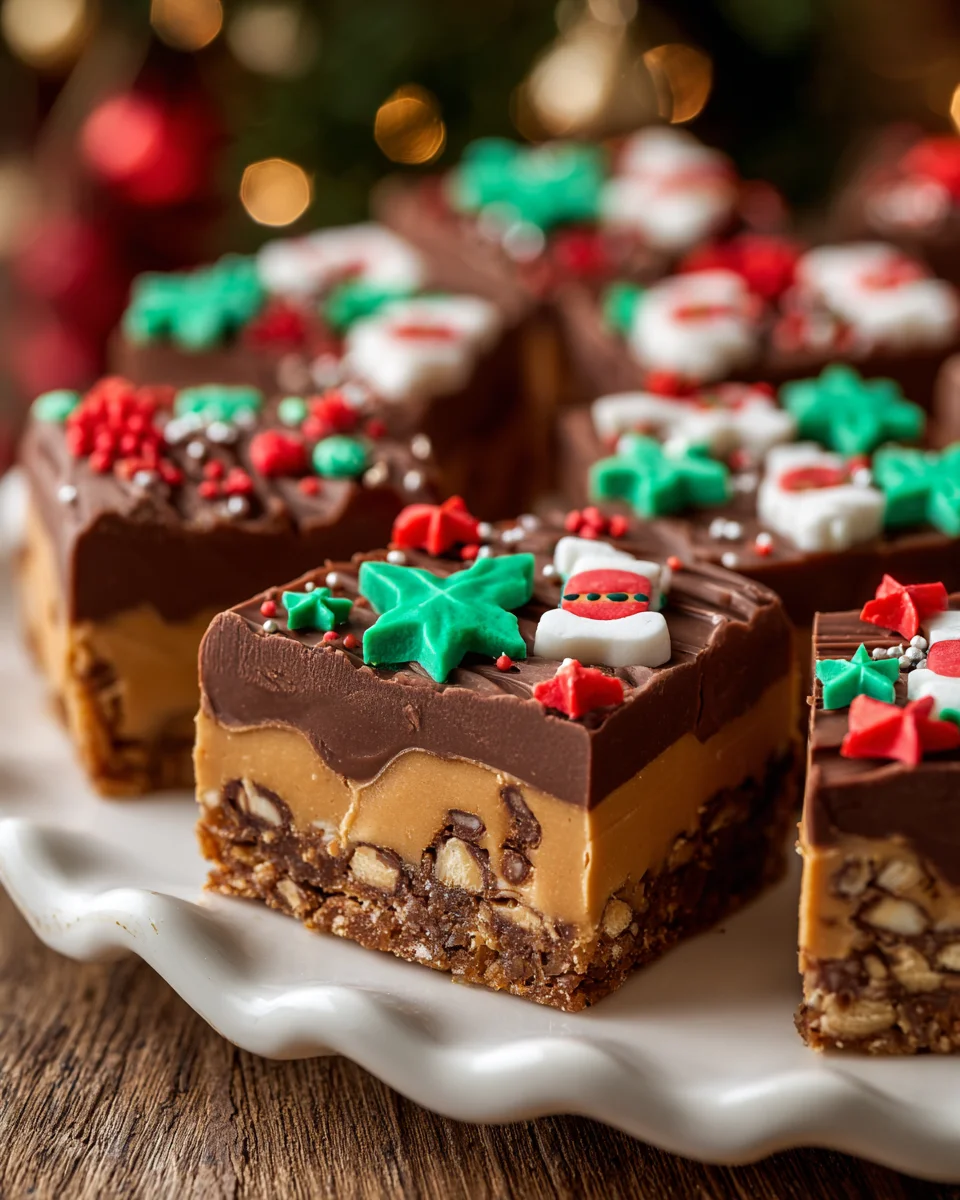
There’s something truly enchanting about the holiday season, isn’t there? The air is filled with laughter, joy, and, of course, the delightful aroma of baking. If you’re anything like me, you’re always on the lookout for a quick, yet impressive treat to share with loved ones. That’s where these Christmas Magic Cookie Bars come into play! They’re super easy to whip up, making them the perfect solution for busy days packed with holiday prep. With layers of chocolate, butterscotch, and festive M&Ms, these bars are sure to bring a smile to everyone’s face!
Why You’ll Love This Christmas Magic Cookie Bars
If you’re pressed for time as the holidays approach, these Christmas Magic Cookie Bars are your new best friend! They come together in just 15 minutes of prep and require minimal fuss. Plus, the taste is simply divine. With a combination of creamy chocolate, buttery butterscotch, and festive pops of color, they’ll impress your guests, yet are easy enough that even the kids can pitch in to help!
Ingredients for Christmas Magic Cookie Bars
Let’s dive into the delightful ingredients that make up these Christmas Magic Cookie Bars! Each element plays a unique role in creating that scrumptious bite you’ll love.
- Graham cracker crumbs: These form the perfect sweet, crunchy crust. You can buy them pre-crushed or make your own by crushing whole crackers.
- Unsalted butter: Melted butter coats the crumbs, adding rich flavor and aiding in binding. Using unsalted gives you control over the overall saltiness.
- Sweetened condensed milk: The star that brings it all together! This syrupy goodness adds creaminess and helps bind the layers. Look for Eagle Brand for top quality!
- Semi-sweet chocolate chips: A classic choice for those chocolatey bursts. Feel free to use dark chocolate if you’re a fan of that deeper flavor!
- Butterscotch chips: These add a sweet, caramel-like flavor that pairs beautifully with the chocolate. If you can’t find them, white chocolate chips work too!
- Shredded coconut: Optional but recommended for a tropical twist! If you’re not a fan, simply omit it without losing the bar’s charm.
- Chopped pecans: Toasted pecans add a delightful crunch and nutty depth. Walnuts or almonds can be a tasty alternative if you prefer!
- M&Ms (red and green): These festive candies aren’t just for decoration; they add a pop of color and a bit of extra sweetness. You can swap them with other chocolate candies for a different vibe.
- Fine salt: Just a pinch enhances all the sweet flavors, bringing them to life beautifully!
For exact measurements, feel free to check the bottom of the article—easy to print out for your next baking adventure!
How to Make Christmas Magic Cookie Bars
Now that we’ve gathered our ingredients, let’s roll up our sleeves and create these delightful Christmas Magic Cookie Bars! Follow these steps closely, and you’ll have a festive treat that will warm hearts and sweeten spirits.
Prepare the Crust
First things first, preheat your oven to 350°F (175°C). This is the essential step for everything else to follow. Next, grab a 9×13-inch pan and line it with parchment paper, leaving a little overhang. It’ll make removing the bars super easy later. Now, combine the graham cracker crumbs with melted butter until it feels like damp sand. Press this mixture firmly into the bottom of the pan. You want it compact! After that, chill the crust in the fridge for about 5 minutes. This helps to set the base beautifully.
Add the Magic Layer
Once your crust has chilled a bit, it’s time to pour on the sweetened condensed milk. Drizzle it evenly over your crust, tilting the pan gently to ensure it spreads into all the corners. This layer is the glue that binds the flavors together, creating that magic we all love. Next, sprinkle the semi-sweet chocolate chips and butterscotch chips on top. Make sure to scatter them evenly to get that luscious blend of flavors with every bite!
Sprinkle the Toppings
Ah, now for the fun part! Grab your shredded coconut and sprinkle it over the chip layer if you’re using it, along with the toasted pecans and M&Ms. You’ll want to press them lightly into the layers. This helps them stay put and gives your bars that impressive appearance. The colorful M&Ms will make your bars festive and fun!
Bake to Perfection
Slide your pan into the preheated oven and bake for about 18 to 22 minutes. You’ll know they’re done when the edges are golden and the center is gently bubbling. Keep an eye on them; the timer might become your new best friend! It’s that golden edge that creates that perfect combination of crunch and chewiness.
Cool and Cut
Once they’re out of the oven, let your bars cool in the pan for at least 30 minutes. Patience is part of baking! After that, for neater slices, chill them in the refrigerator for 1 to 2 hours. When you’re ready, lift the parchment paper and cut them into squares. Voila! You’ve created a delightful batch of Christmas Magic Cookie Bars to share with family and friends!
Tips for Success
- Use parchment paper for easy removal; it’s a game changer!
- Chill the crust well before adding layers. This prevents sogginess.
- Experiment with toppings for unique flavor combos your family will love.
- Keep an eye on the baking time; every oven is different!
- Let the bars cool fully before cutting for neat squares.
Equipment Needed
- 9×13-inch baking pan: If you don’t have one, an 8×8-inch pan can work—just adjust baking time.
- Parchment paper: Essential for easy removal; aluminum foil can be an alternative if parchment is unavailable.
- Mixing bowls: You’ll need two—one for the crust and another for layering.
- Spatula: A simple spatula is great for spreading the condensed milk and pressing toppings evenly.
- Measuring cups: Accurate measurements ensure your sweet treat turns out just right!
Variations
- Nut-Free Option: Skip the pecans and replace them with pumpkin seeds for a crunchy, nut-free alternative.
- Gluten-Free Option: Use gluten-free graham crackers to ensure a safe treat for gluten-sensitive friends.
- Dairy-Free Alternative: Substitute coconut oil for butter and use dairy-free chocolate chips for a deliciously dairy-free version.
- Fruit Additions: Toss in dried cranberries or chopped cherries for a sweet and tart contrast to the rich flavors.
- Spiced Version: Add a pinch of cinnamon or nutmeg to the crust for a warm, festive flavor.
- Double Chocolate: Use chocolate graham crackers instead of regular ones for an extra chocolatey twist!
Serving Suggestions
- Pair these Christmas Magic Cookie Bars with a warm cup of cocoa for a cozy holiday treat.
- Serve with a scoop of vanilla ice cream on the side for an indulgent dessert experience.
- For a festive touch, plate them on a colorful holiday-themed platter.
- Add a sprinkle of powdered sugar on top for an elegant finish.
- Consider serving with a dollop of whipped cream for extra creaminess.
FAQs about Christmas Magic Cookie Bars
As a passionate home cook, I often get a few questions about my favorite festive recipes. Here are some of the most common inquiries I hear about these delightful Christmas Magic Cookie Bars!
Can I make these Christmas Magic Cookie Bars ahead of time?
Absolutely! These bars are fantastic for making ahead. Just bake them a day or two early, and store them in an airtight container in the fridge. They actually taste even better after a day or two as the flavors meld!
Can I freeze Christmas Magic Cookie Bars?
You bet! Once they are fully cooled, wrap them tightly in plastic wrap and then in aluminum foil. They’ll be good in the freezer for up to three months. Just thaw them in the fridge before serving!
What can I substitute for sweetened condensed milk?
If you can’t find sweetened condensed milk, you can make your own by simmering regular milk with sugar until it thickens. Another alternative is using coconut cream mixed with sugar for a dairy-free option, adding depth and flavor.
Can I customize the toppings on these cookie bars?
<pAbsolutely! The beauty of these Christmas Magic Cookie Bars lies in their adaptability. Switch out the pecans for walnuts or add your favorite candies for a unique twist. Get creative; your bar should reflect your taste!
How should I store leftover cookie bars?
Keep the leftover bars in an airtight container, either in the fridge or at room temperature. If they last more than a few days, the fridge will help preserve their freshness longer!
Final Thoughts
Creating these Christmas Magic Cookie Bars is like unwrapping a gift of joy during the holiday season! They not only bring a delightful mix of flavors to your table but also all the magic and warmth of holiday gatherings. Every bite is a reminder that cheerful moments can be shared effortlessly in a busy life. I love how these bars become the highlight of family get-togethers or cozy nights in. So, gather your loved ones, whip up a batch, and enjoy the laughter and love that come with every square of deliciousness!
Print
Christmas Magic Cookie Bars
- Prep Time: 15 minutes
- Cook Time: 22 minutes
- Total Time: 1 hour 30 minutes
- Yield: 16 squares 1x
- Category: Dessert
- Method: Baking
- Cuisine: American
- Diet: Vegetarian
Description
Delicious Christmas Magic Cookie Bars that are a perfect holiday treat.
Ingredients
- 2 cups graham cracker crumbs (about 200 g)
- 1/2 cup unsalted butter (115 g, melted)
- 1 can sweetened condensed milk (14 oz, Eagle Brand)
- 1 cup semi-sweet chocolate chips (Toll House)
- 1 cup butterscotch chips
- 1 cup sweetened shredded coconut (optional)
- 1/2 cup chopped pecans (toasted)
- 1/2 cup M&Ms (red and green)
- Fine salt (a pinch)
Instructions
- Preheat oven to 350°F (175°C) and line a 9×13-inch pan with parchment paper, leaving an overhang for easy bar removal.
- Combine graham cracker crumbs with melted butter until the mixture resembles damp sand, then press firmly into the pan and chill for 5 minutes.
- Pour sweetened condensed milk evenly over the chilled crust, tilting the pan so it coats every corner.
- Sprinkle semi-sweet chocolate chips and butterscotch chips in an even layer on top of the condensed milk.
- Evenly distribute shredded coconut, chopped pecans, and M&Ms over the chip layers, pressing lightly so they stick.
- Bake for 18–22 minutes until the edges are golden and the center is gently bubbling.
- Allow bars to cool in the pan for 30 minutes, then chill 1–2 hours for cleaner cuts before lifting out and slicing into 16 squares.
Notes
- Chilling the bars before cutting helps achieve cleaner slices.
- Feel free to customize the toppings based on your preference.
Nutrition
- Serving Size: 1 square
- Calories: 220
- Sugar: 15 g
- Sodium: 90 mg
- Fat: 10 g
- Saturated Fat: 5 g
- Unsaturated Fat: 3 g
- Trans Fat: 0 g
- Carbohydrates: 28 g
- Fiber: 1 g
- Protein: 3 g
- Cholesterol: 5 mg


