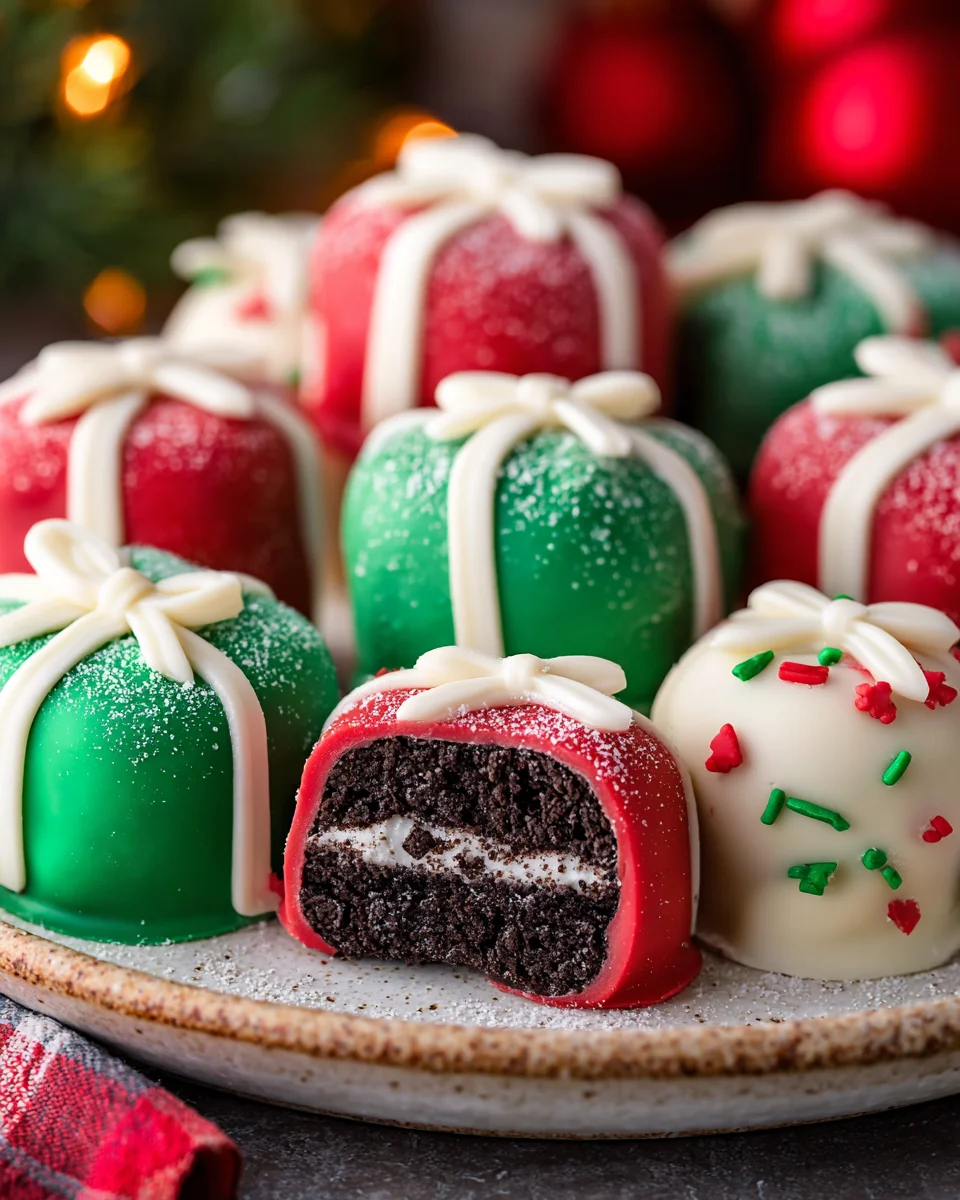
Introduction to Christmas Oreo Balls
Ah, the joy of holiday baking! For me, the kitchen transforms into a festive wonderland filled with laughter and delicious aromas. That’s why I adore making Christmas Oreo Balls. They’re not just a treat; they symbolize togetherness and love during this special time of year. As a busy mom, I know time slips away during the holiday season. These no-bake delights come together quickly, making them the perfect sweet surprise for gatherings or sweet gifts for loved ones. Grab your ingredients, and let’s create some fabulous memories together!
Why You’ll Love This Christmas Oreo Balls
These Christmas Oreo Balls are an absolute delight! They’re incredibly simple to make, allowing even the busiest among us to whip up a batch without any fuss. Their festive appearance instantly lights up a table, and the delightful blend of classic Oreo flavors and holiday cheer creates the perfect treat. Whether you’re bringing them to a gathering or giving them as gifts, they’re guaranteed to be a hit!
Ingredients for Christmas Oreo Balls
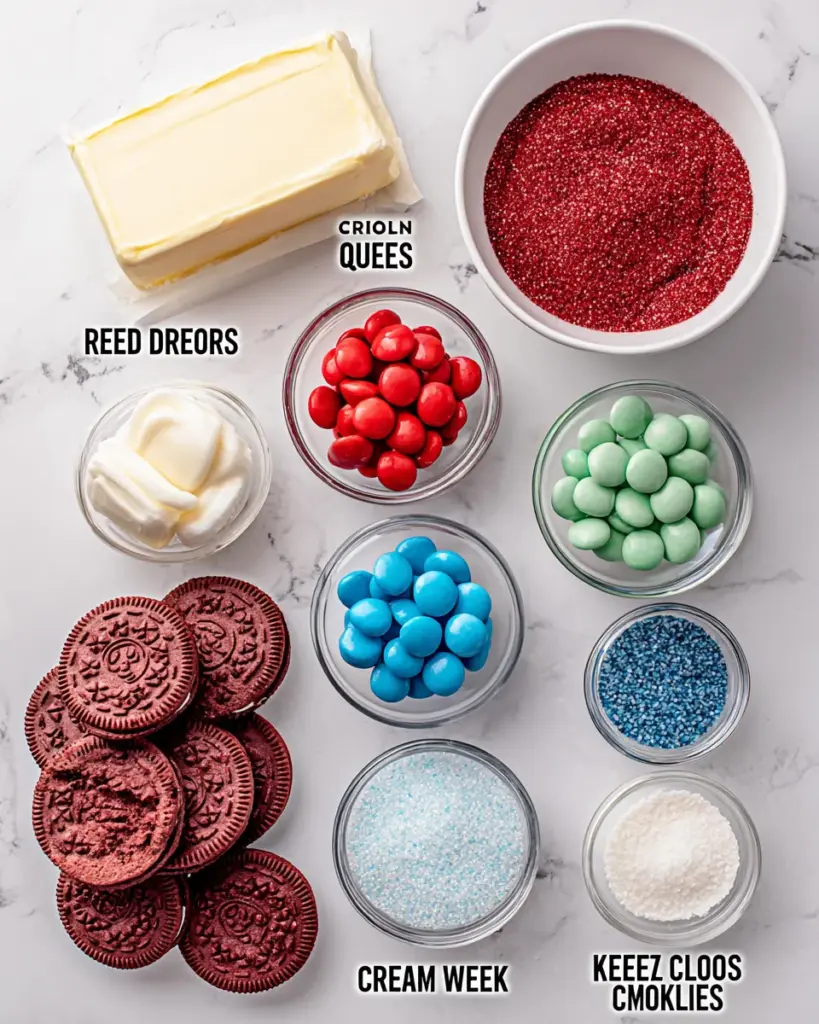
To craft these delightful Christmas Oreo Balls, you’ll need both regular and Red Velvet Oreo cookies, which provide a rich, chocolatey flavor that’s simply irresistible.
A nice dollop of cream cheese helps bind everything together, ensuring each bite is creamy and decadent. Colored candy melts come in three festive hues: red, dark green, and white, perfect for creating an eye-catching design that mimics cute little gifts.
If you’re feeling extra festive, sprinkle on some sparkly sanding sugar for a dazzling finish. You can find exact quantities listed at the bottom of this article for your convenience!
- 22 regular Oreo cookies
- 22 Red Velvet Oreo cookies
- 8 oz cream cheese softened to room temperature, divided
- 10 oz red candy melts divided
- 10 oz dark green candy melts divided
- 10 oz white candy melts divided
- white sparkly sanding sugar optional
How to Make Christmas Oreo Balls
Prepare the Cookie Mixture
To start, grab your food processor and toss in those Oreo cookies. I love how the sound of them crunching signals the beginning of something delicious! Pulse until they’re finely ground, almost like sand. You want that powdery consistency for the best texture.
Next, repeat the process with the Red Velvet Oreo cookies. Place the crumbs in a separate bowl—it feels like creating a magical color palette! Once you’ve got both mixtures ready, we can move on.
Combine with Cream Cheese
Now, grab a medium mixing bowl and plop in half of that softened cream cheese. Blend until it’s nice and smooth. The smoothness of the cream cheese fills me with such excitement; it’s the glue that holds our treasures together!
Once creamy, add in the regular Oreo crumbs and mix thoroughly until everything is combined. You’ll notice the mixture becomes thicker—it makes my heart sing! For the Red Velvet mixture, repeat the blending process with the remaining cream cheese and cookie crumbs. Each combination feels like a celebration of flavors!
Shape the Balls
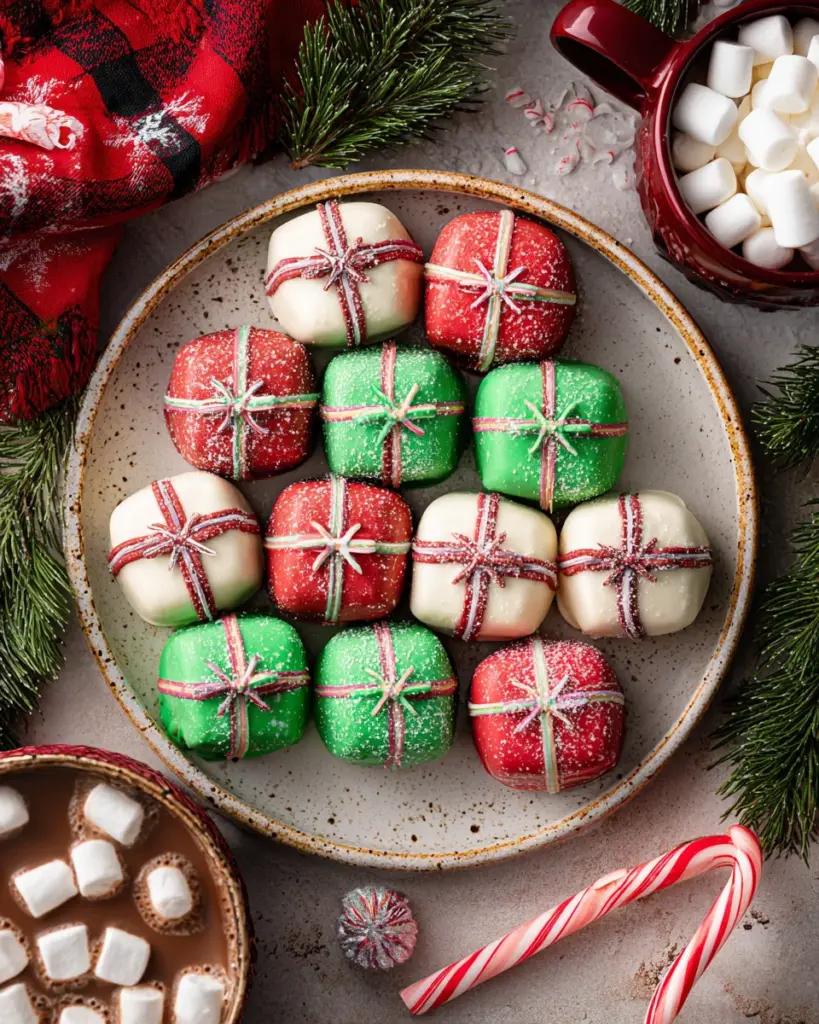
With your mixtures ready, it’s time to create delicious little squares! Using a 1.5-inch cookie scoop, I scoop out portions of the mixture and shape them into cubes. Just a fun little twist to make them look like wrapped gifts!
Place these cuties on your prepared baking sheet and pop them into the refrigerator for about two hours. This chilling time ensures they firm up nicely. You know it’s serious business when you can shake the baking sheet a little, and they stay perfectly in place!
Melt Candy and Coat
While we wait, let’s melt those beautiful candy melts! Choose your color—red, green, or white—and toss them into a microwave-safe bowl. Heat them in 30-second intervals, stirring in between. This step feels like magic as the candy transforms!
Carefully dip each chilled Oreo truffle into the melted candy melts using a fork. Let the excess chocolate drip off before placing them back on the baking sheet. This coats them perfectly, giving that shiny finish we all adore!
Decorating
Ready for the final touch? Melt the remaining candy melts for drizzling. Using a piping bag, drizzle the melted colors over your coated truffles to create that lovely ribbon effect.
If you’ve made those little bows in your silicone molds, now’s the time to add them atop your drizzles for even more festivity! Once everything is set, admire your creative handiwork before serving these delicious Oreo truffles to loved ones!
Tips for Success
To make your Christmas Oreo Balls perfect every time, here are a few handy tips!
First, make sure the cream cheese is softened for easy blending. Chill your cookie balls for at least two hours—this helps maintain shape when coating. For even coating, use a fork and tap off excess chocolate gently.
Lastly, don’t hesitate to get creative with toppings—each batch can be uniquely festive!
Equipment Needed
To whip up your Christmas Oreo Balls, you’ll need a few handy tools. A food processor helps crush the cookies, but you can use a sturdy ziplock bag and rolling pin if you prefer a workout!
Silicone molds are fantastic for shaping bows, and piping bags make drizzling a breeze. If you don’t have a piping bag, a simple plastic sandwich bag with a corner snipped off works just as well!
Variations for Christmas Oreo Balls
The fun doesn’t stop with just one flavor! Feel free to play around with different Oreo flavors, like peanut butter or mint, for a surprising twist on your Christmas Oreo Balls. If you’re looking for a lighter option, try using low-fat cream cheese or alternative candy coatings, like dark chocolate. These adaptations allow you to customize the treats for any occasion, making them perfect for family gatherings or festive parties!
Serving Suggestions for Christmas Oreo Balls
To create a festive display, arrange your Christmas Oreo Balls on a colorful platter or decorative cake stand. You can even use cute cupcake liners for an extra touch! Pair them with a warm cup of cocoa or creamy eggnog for a delightful holiday treat experience!
FAQs about Christmas Oreo Balls
Wondering how to store those delicious Christmas Oreo Balls? Keep them in an airtight container in the fridge for up to a week. They taste even better after chilling!
Can you replace ingredients? Absolutely! You can substitute regular cream cheese with a non-dairy alternative to cater to dietary preferences. Similarly, switch up cookie flavors or use different candy melts for a unique twist on your Oreo truffles.
For a flawless coating, ensure your candy melts are smooth and not too thick. If they seem clumpy, add a teaspoon of coconut oil to get that silky finish. Lastly, remember to let the excess chocolate drip off properly—this step is key!
Feel free to experiment! Each batch can be an adventure in flavor and creativity. Enjoy making these delightful treats for your family and friends!
Final Thoughts
Making Christmas Oreo Balls brings pure joy and excitement into the holiday season! Each bite is a sweet nod to cherished moments, crafted with love. As I share these treats with family and friends, I see their faces light up, and it makes the effort so worth it. These little delights not only satisfy the sweet tooth but also create lasting memories around the table. Let’s gather, savor, and laugh together as we celebrate the season, one delectable Oreo truffle at a time. The kitchen transforms into a hub of happiness filled with love and laughter!
Print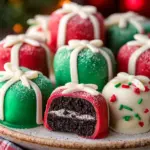
Christmas Oreo Balls
- Prep Time: 30 minutes
- Cook Time: 2 hours chill time
- Total Time: 2 hours 30 minutes
- Yield: 44 Oreo Balls 1x
- Category: Dessert
- Method: No-bake
- Cuisine: American
- Diet: Vegetarian
Description
Christmas Oreo Balls are a fun and festive treat designed to resemble little wrapped gifts, combining the classic flavors of Oreo cookies with a holiday twist.
Ingredients
- 22 regular Oreo cookies
- 22 Red Velvet Oreo cookies
- 8 oz cream cheese softened to room temperature, divided
- 10 oz red candy melts divided
- 10 oz dark green candy melts divided
- 10 oz white candy melts divided
- white sparkly sanding sugar optional
Instructions
- Line a cookie sheet with parchment paper and set it aside.
- Pulse the Oreo cookies in a food processor until finely ground and place in a bowl.
- Repeat with Red Velvet Oreo cookies, placing them in a separate bowl.
- In a medium mixing bowl, blend half of the cream cheese until smooth.
- Add regular Oreo crumbs to the blended cream cheese and mix thoroughly.
- Repeat the blending process with the remaining cream cheese and Red Velvet Oreo crumbs.
- Using a 1.5-inch cookie scoop, form evenly sized Oreo cream cheese balls and shape them into cubes. Place on the prepared baking sheet.
- Refrigerate for two hours.
- Melt the desired color of candy melts for the bows in a microwave-safe bowl in 30-second intervals, stirring in between.
- Pour the melted candy into silicone bow molds and refrigerate until set.
- Melt the candy melts for dipping the truffles using the same microwave method.
- Dip each Oreo truffle into the candy melts using a fork, letting excess chocolate drip off before placing on the baking sheet.
- Top with sanding sugar and sprinkles if desired.
- Repeat the coating process with the remaining truffles in different colors.
- Melt the remaining candy melts for drizzling over the truffles.
- Use a piping bag to drizzle the melted chocolate over the truffles to create a ribbon effect. Add mini bows once the drizzle sets.
- Let the decorations set completely before serving.
Notes
- Store the finished Oreo balls in the refrigerator.
- Feel free to mix and match candy melt colors for personalization.
- These Oreo balls make great gifts or party favors!
Nutrition
- Serving Size: 1 Oreo ball
- Calories: 120
- Sugar: 10g
- Sodium: 50mg
- Fat: 7g
- Saturated Fat: 4g
- Unsaturated Fat: 2g
- Trans Fat: 0g
- Carbohydrates: 14g
- Fiber: 1g
- Protein: 1g
- Cholesterol: 10mg