
🎄 The Magic of Christmas Desserts
The holiday season is about twinkling lights, cozy nights, and let’s be honest… dessert! If you’re looking for a show-stopping treat that screams Christmas magic, look no further than this Christmas Red Velvet Poke Cake. It’s a dreamy, rich, and super festive dessert that will have your guests asking for seconds (and maybe even the recipe).
❤️ Why You’ll Fall in Love With This Red Velvet Poke Cake
What makes this cake so special? It’s the perfect marriage of three textures and flavors: the moist richness of red velvet cake, the creamy decadence of cheesecake pudding, and the light, cloud-like whipped topping. Topped off with holiday sprinkles and pops of white chocolate, it’s basically Christmas in every bite.
This dessert doesn’t just look amazing (hello, red and white holiday vibes!)—it tastes like the holidays wrapped in a bow. If you want something festive yet super simple to whip up, this is it.
🤔 What is a Poke Cake Anyway?
If you’ve never made a poke cake before, get ready to fall in love with the concept. It’s exactly what it sounds like—you bake a cake, then poke holes in it while it’s still warm. Into those holes, you pour something delicious like pudding, sweetened condensed milk, or Jell-O. The result? A soft, moist, flavor-packed cake that melts in your mouth.
Think of it as a dessert that does all the work for you—infusing flavor and creaminess with every bite. And with red velvet and cheesecake pudding in play? Let’s just say this cake earns a permanent spot on your Christmas table.
🎂 The Origins of Red Velvet – A Cake with a Rich History
Red velvet isn’t just a pretty cake—it’s got a story. Originally popularized in the early 1900s, it became iconic thanks to its unique blend of cocoa, buttermilk, and vinegar, which create a tender crumb and deep, tangy flavor. The red hue was initially a reaction between ingredients but later enhanced with food coloring.
Over time, red velvet became associated with celebration—and what’s more celebratory than Christmas? That vibrant red, soft crumb, and gentle cocoa flavor make it the perfect holiday canvas for our poke cake creation.
🎅 Why This Cake is Perfect for Christmas
Here’s the deal: you want something festive, but not a three-hour ordeal in the kitchen. This cake is easy to prepare, looks stunning, and delivers knockout flavor. The bright red cake, white creamy topping, and red-and-white sprinkles look like Santa himself made dessert.
Plus, you can make it ahead of time and keep it in the fridge until guests arrive. Less stress, more joy. That’s what the holidays are all about, right?
📝 Ingredients Overview
Let’s break down what you’ll need to recreate this beauty.
Red Velvet Cake Base
- 1 box of red velvet cake mix (plus ingredients on the box: usually eggs, oil, and water)
Cheesecake Pudding Layer
- 2 boxes (3.4 oz each) instant cheesecake pudding mix
- 4 cups cold milk
Whipped Topping & Garnish
- 1 container (8 oz) whipped topping, thawed
- Optional: 1 cup white chocolate chips
- Holiday sprinkles or crushed candy canes (for extra cheer)
🧁 Essential Tools You’ll Need
- 9×13 inch baking dish
- Mixing bowls
- Electric or hand whisk
- Wooden spoon (for poking holes)
- Rubber spatula
- Refrigerator space (important!)
👩🍳 Step-by-Step Recipe Guide
1. Prepare the Cake Base
Start by preheating your oven to 350°F (175°C). Grease your 9×13-inch baking dish or line it with parchment paper.
Mix your red velvet cake ingredients according to the package instructions. Usually, this means adding eggs, oil, and water. Beat until smooth and pour into your baking dish.
Pop it into the oven and bake for about 30 minutes or until a toothpick comes out clean.
Let the cake cool for 10 minutes after baking, but don’t wait too long—you’ll want it warm for the next step.
2. Poking the Cake Like a Pro
Here comes the fun part! Grab the handle of a wooden spoon or anything round and sturdy. Gently poke holes all across the top of the cake—space them about an inch apart. Don’t go all the way to the bottom; halfway is perfect.
This is where all that luscious pudding is going to soak in, making every bite incredibly moist and flavorful.
3. Mixing the Cheesecake Pudding
In a large bowl, whisk together 2 boxes of cheesecake pudding mix with 4 cups of cold milk. Whisk it quickly for about 2 minutes until it thickens just slightly.
This mix should be pourable but not runny—it’ll set beautifully in those holes and add a creamy cheesecake flavor that’s irresistible.
4. Filling the Poke Cake
Pour the pudding mixture evenly over the warm cake, making sure it seeps into all the holes you poked earlier. Use a spatula to smooth it out and push it gently into the holes if needed.
Let it sit for 10 minutes to settle and begin to set.
5. Whipping Up the Whipped Topping
Once the pudding layer has set a bit, it’s time to go fluffy! Spread the thawed whipped topping generously over the entire cake. Use the back of a spoon or spatula to create swirls for a bit of drama.
This creamy white topping gives that classic snowy holiday look, and balances the richness of the cake and pudding layers.
6. Adding Garnish: White Chocolate & Sprinkles
Here’s where your cake turns magical. Sprinkle white chocolate chips evenly on top for a sweet crunch and creamy contrast.
Then add your holiday sprinkles—go red and white for a classic Christmas look or add green for more color. You can even crush some candy canes and sprinkle them on top for a pepperminty twist.
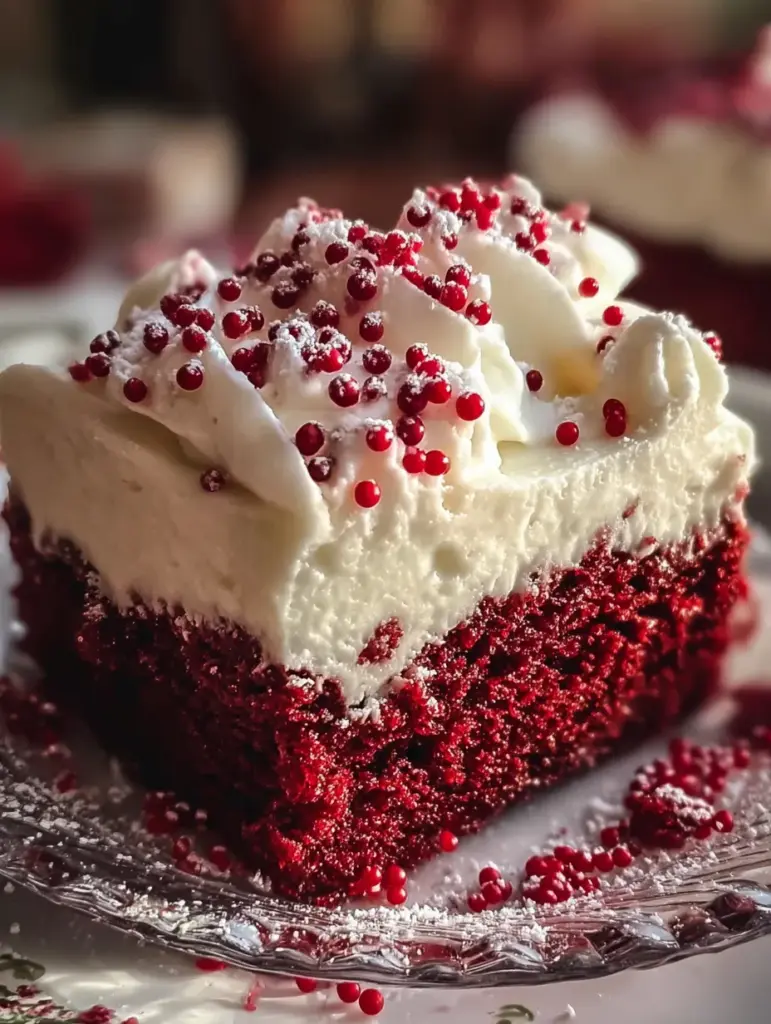
In the photo you shared, the topping features gorgeous red pearl-like candies. You can use red sugar pearls or edible pearls to achieve that look and texture.
7. Chill & Serve: Let the Flavors Marry
This step is the secret behind the “wow” factor. Once your masterpiece is assembled, cover it lightly with plastic wrap and refrigerate for at least 2 hours—but honestly, overnight is even better.
Why? Because chilling gives the pudding time to fully set and soak into the cake, while the whipped topping firms up to a silky, sliceable texture. The flavors meld into one dreamy, melt-in-your-mouth bite.
Before serving, you can sprinkle a bit of powdered sugar on top for that final snowy finish—just like in the image you shared. It makes every piece look like it came straight out of a Christmas bakery window!
🎁 Serving Suggestions
This cake is already a showstopper, but here are a few fun serving ideas to level it up:
- Add a scoop of vanilla bean ice cream on the side
- Serve with hot cocoa or peppermint mocha for the coziest dessert moment ever
- Use a festive cake stand or holiday platter for extra presentation points
- Top each slice with a mini candy cane or red sugar pearl for a sweet personal touch
Want to get even fancier? Serve it in clear cups in layers like a trifle—just scoop some cake, add whipped topping, and repeat. It’s a hit at parties!
Print
🎄 Christmas Red Velvet Poke Cake Recipe
- Total Time: 2 hours 45 minutes
- Category: Dessert • Holiday Baking • Christmas Cake
Description
🎅 A festive holiday delight that’s rich, creamy, and irresistibly merry! This Red Velvet Poke Cake brings together moist red velvet cake, luscious cheesecake pudding, and fluffy whipped topping for the ultimate Christmas dessert everyone will love. ✨🍰
Ingredients
1 box red velvet cake mix (plus required ingredients on the box)
2 boxes (3.4 oz each) instant cheesecake pudding mix
4 cups cold milk
1 container (8 oz) whipped topping, thawed
1 cup white chocolate chips (optional)
Holiday sprinkles or crushed candy canes for garnish
Instructions
Prepare the red velvet base 🧁
Preheat oven to 350°F (175°C). Prepare and bake the red velvet cake according to the package directions in a 9×13-inch pan.
⏱️ Prep Time: 10 minutes | Bake Time: 30 minutesPoke the holes 🍴
After baking, let the cake cool for about 10 minutes. Use the handle of a wooden spoon to poke holes evenly across the cake surface.
⏱️ Cooling & Poking: 15 minutesMake the pudding mix 🍶
Whisk together the cheesecake pudding mixes and cold milk for 2 minutes until creamy and slightly thick.
⏱️ Mixing Time: 5 minutesFill the cake with pudding 💧
Pour the pudding mixture evenly over the warm cake, making sure it seeps into the holes for maximum creaminess.
⏱️ Set Time: 10 minutesAdd the topping 🎂
Spread the whipped topping evenly over the pudding layer. Add white chocolate chips and festive sprinkles or crushed candy canes on top.
⏱️ Decoration Time: 5 minutesChill & enjoy ❄️
Refrigerate for at least 2 hours before slicing and serving to let the flavors blend perfectly.
Notes
For deeper flavor, let the cake chill overnight — it becomes even creamier and richer.
You can swap cheesecake pudding for vanilla or white chocolate pudding if preferred.
Add crushed peppermint candies for a refreshing minty twist.
Use gel food coloring only if you want to enhance the cake’s red color even more.
Nutrition
- Serving Size: 12
- Calories: ~320 kcal per slice
❄️ Storage Tips: Keep That Cake Fresh
This cake stores beautifully, which makes it perfect for make-ahead planning.
Refrigerator:
- Store in an airtight container or cover with plastic wrap.
- Stays fresh for 3–4 days in the fridge.
Freezer:
- Yes, you can freeze it! Slice it first, wrap pieces individually in plastic wrap, and place them in a freezer-safe container.
- Thaw in the fridge overnight before serving.
Note: If freezing, consider leaving off the whipped topping until you’re ready to serve for best texture.
You may like also :
Soft Christmas Peppermints Recipe: Sweet, Buttery, and Melt-in-Your-Mouth Magic for the Holidays!
🎨 Optional Variations to Try
Want to make it your own? Here are a few fun variations and swaps:
1. Candy Cane Crunch
- Sprinkle crushed peppermint candy or candy canes on top for that cool minty twist.
2. Cream Cheese Frosting Instead of Whipped Topping
- Whip 1 package (8 oz) cream cheese with 1/2 cup powdered sugar and fold in 1 container of whipped topping. Richer and tangier!
3. Chocolate Drizzle
- Melt some semi-sweet or white chocolate and drizzle over the top before serving. Adds elegance and flavor depth.
4. Oreo Crumble Topping
- Crush red velvet or classic Oreos and sprinkle on top for an extra crunch.
📊 Nutrition Breakdown (Per Slice, Serves 12)
| Nutrient | Amount |
|---|---|
| Calories | ~320 kcal |
| Total Fat | 14g |
| Saturated Fat | 5g |
| Carbohydrates | 44g |
| Sugars | 30g |
| Protein | 4g |
| Sodium | 380mg |
Note: Nutrition values may vary based on exact products used.
🎯 Tips & Tricks for a Perfect Poke Cake
- Poke While Warm: Poking the cake when it’s still warm ensures the pudding seeps deep into the crumb.
- Don’t Overfill: Only fill the holes with pudding—don’t drown the cake. Too much liquid = soggy mess.
- Cool Before Whipping: Let pudding set before adding whipped topping, or it’ll mix into the pudding layer.
- Chill Is Key: Don’t skip the refrigeration step—it’s essential for the cake to set and flavors to meld.
- Presentation Matters: Use festive toppings and creative swirls to make it as stunning as it is delicious.
🎉 Conclusion: The Sweetest Ending to Any Holiday Feast
There’s something magical about a dessert that looks this good and tastes even better. This Christmas Red Velvet Poke Cake is the perfect blend of rich, creamy, fluffy, and festive. Whether you’re hosting a family dinner, attending a holiday potluck, or just baking to get into the Christmas spirit, this cake is a guaranteed crowd-pleaser.
Not only does it capture the colors of the season—deep red and snowy white—but it delivers on taste, texture, and holiday cheer. Make it once, and it might just become your go-to Christmas tradition.
So grab your apron, preheat that oven, and get ready to create a dessert that’s merry, magical, and melt-in-your-mouth amazing. 🎄❤️
Similar recipes :
Traditional Christmas Cake Recipe: A Rich & Fruity Holiday Classic
Mom’s Christmas Jello Balls 🎄 | The Ultimate No-Bake Holiday Treat
Red Velvet Honeybun Cake with Cinnamon Cream Cheese Icing – The Ultimate Sweet Indulgence
🙋♀️ FAQs
1. Can I make this cake ahead of time?
Absolutely! This cake actually tastes better when made a day ahead. Just keep it refrigerated until you’re ready to serve.
2. What if I don’t have cheesecake pudding?
You can use vanilla or white chocolate pudding instead. It’ll still be creamy and delicious—just a slightly different flavor profile.
3. Can I freeze Red Velvet Poke Cake?
Yes, but it’s best to freeze the cake and pudding layer without the whipped topping. Add the topping fresh after thawing for best texture.
4. What toppings go best with this cake?
White chocolate chips, red and green sprinkles, crushed candy canes, or red edible pearls (like in the image) are all festive and tasty choices.
5. Can I make it gluten-free?
Yes! Use a gluten-free red velvet cake mix and double-check your pudding mix to ensure it’s gluten-free as well.


