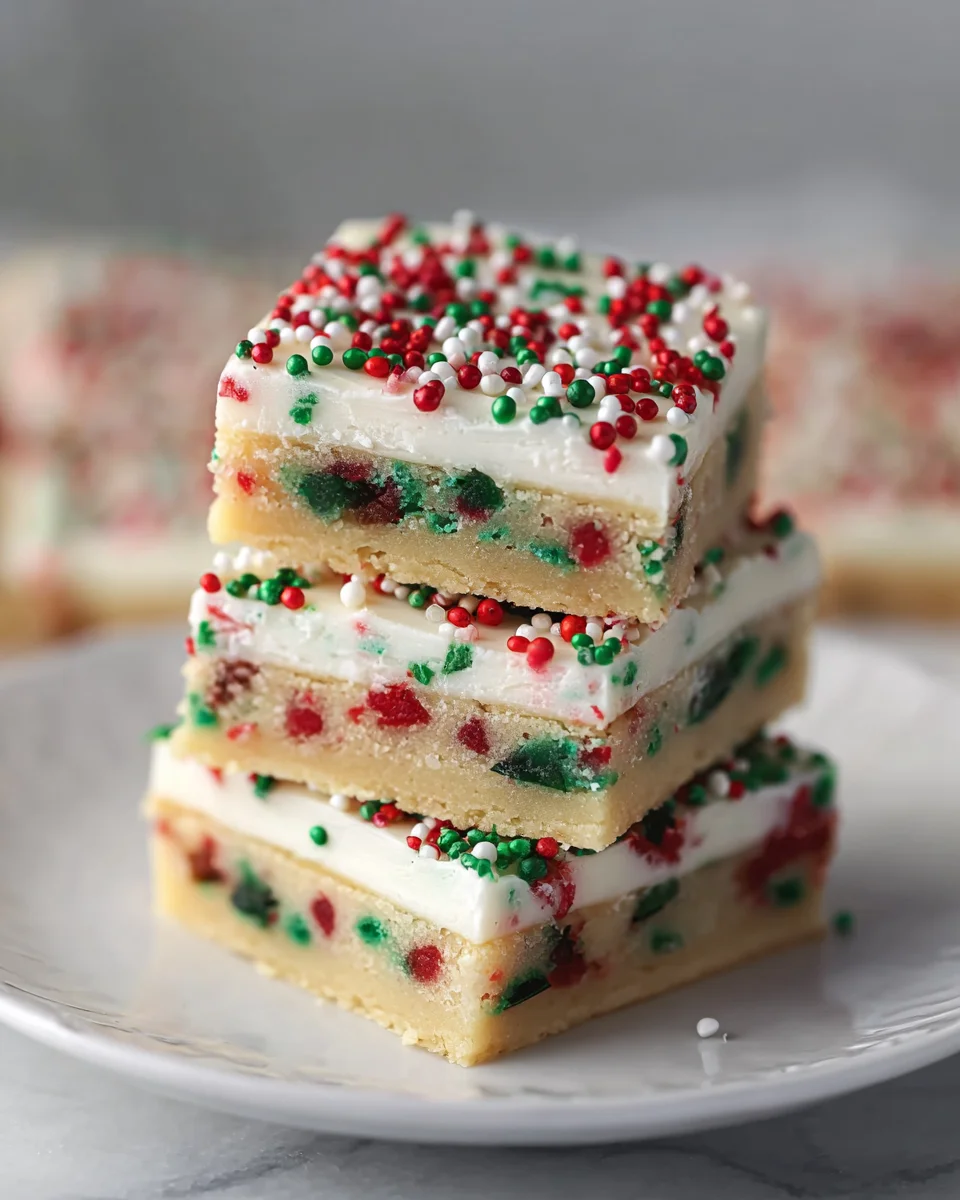
Introduction to Christmas Sugar Cookie Bars
As the holiday season wraps us in its cozy embrace, I can’t help but think of those delightful moments filled with warmth and laughter. That’s where my Christmas Sugar Cookie Bars come into play! These treats are not only a quick solution for busy days but also a surefire way to impress your loved ones. They’re soft, buttery, and just scream festive cheer with their vibrant sprinkles! Trust me, when the family gathers around, you’ll want something that shines bright amidst the holiday bustle. Let’s turn your kitchen into the heart of the holiday festivities with these scrumptious bars!
Why You’ll Love This Christmas Sugar Cookie Bars
These Christmas Sugar Cookie Bars are the perfect blend of ease and flavor. They come together in just 15 minutes, which means less time in the kitchen and more time sharing joy with family. The soft, chewy texture just melts in your mouth, and the colorful sprinkles add a festive touch! Whether you’re hosting a holiday gathering or simply want something sweet to brighten your day, these bars truly deliver.
Ingredients for Christmas Sugar Cookie Bars
Gathering the ingredients for these Christmas Sugar Cookie Bars is half the fun! Here’s what you need:
- Sugar: A backbone of sweetness that balances the flavors.
- Powdered Sugar: Adds a touch of creaminess to the frosting, making it melt-in-your-mouth delicious.
- Butter: Use softened butter for the best texture; it contributes to that rich, buttery flavor we all crave.
- Vanilla Extract: A little splash goes a long way in enhancing the cookie’s sweetness and aroma.
- Eggs: They act as a binding agent, ensuring your bars hold together beautifully.
- Baking Powder: This helps the bars rise and gives them that light, airy texture.
- Salt: Just a pinch enhances all the other flavors, creating a perfect balance.
- All-Purpose Flour: The main structure of the bars; it makes them hearty without being too heavy.
- Red and Green Jimmy Sprinkles: The festive touch that makes your bars irresistible and visually appealing!
For the frosting:
- Powdered Sugar: A must-have for creating that smooth, sweet frosting.
- Unsalted Butter: Allows you to control the saltiness in your frosting for a balanced sweetness.
- Heavy Cream (or Milk): Helps to achieve the perfect creamy consistency—go with heavy cream for richness!
- Salt: Just a hint elevates the flavor of the frosting.
- Vanilla Extract: Adds a delightful finish, making the frosting irresistible.
Exact quantities of each ingredient can be found at the bottom of the article, available for printing. Happy baking!
How to Make Christmas Sugar Cookie Bars
Making these Christmas Sugar Cookie Bars is a delightful journey through the sweetest of traditions. I promise, it’s easier than you think! Just follow these simple steps, and soon your kitchen will be filled with the aromas of holiday cheer.
Step 1: Preheat and Prepare the Pan
First things first, preheat your oven to 375 degrees F. This is key for achieving the perfect texture in your cookie bars. While the oven warms up, grab a 9×13 inch baking pan and give it a generous spray of cooking spray. This little trick ensures your bars won’t stick, making clean-up a breeze!
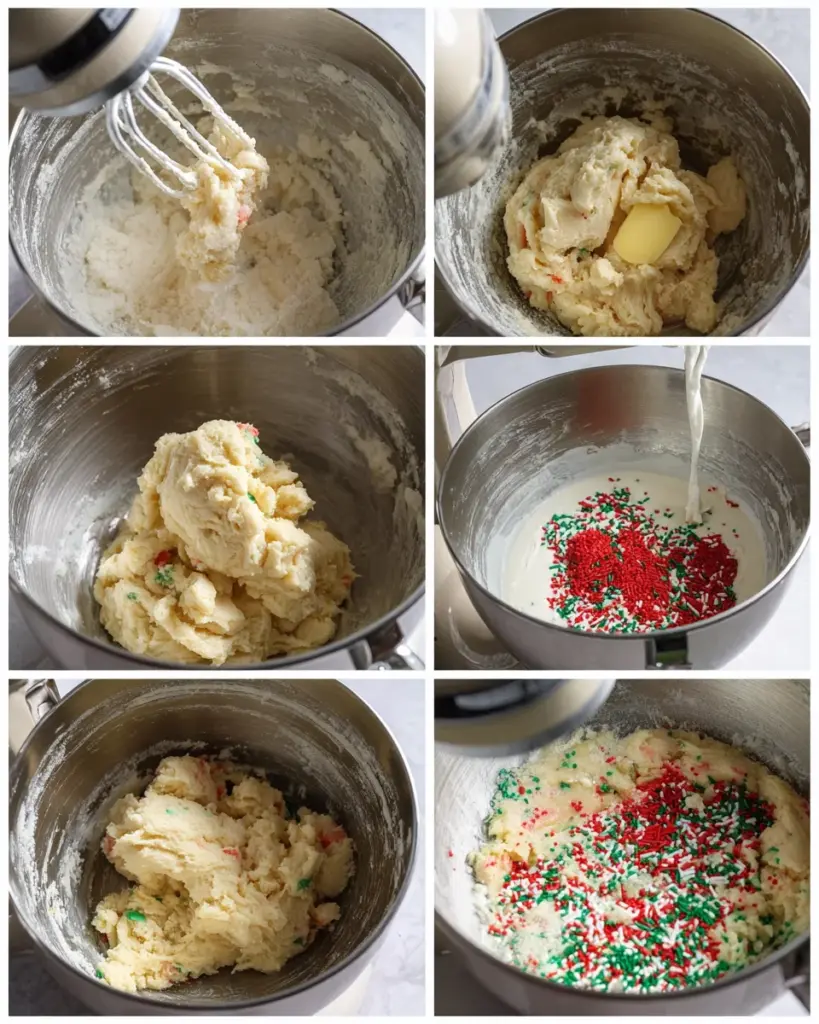
Step 2: Cream Together Ingredients
In the bowl of your stand mixer, let’s bring together the sugar, powdered sugar, and softened butter. Cream them together for about 3 minutes until the mixture is light and fluffy. It’s almost like making a smooth cloud of happiness! Next, mix in the vanilla extract and eggs. Beat until everything is smooth. Don’t forget to scrape down the sides of the bowl if the mixture tries to escape!
Step 3: Mix Dry Ingredients
In a separate bowl, whisk together the baking powder, salt, and flour. Gradually add this dry mixture into the wet ingredients. Mix until just combined. Be careful not to overmix; we want those bars soft and chewy, not tough! This step is like a warm hug for your dough.
Step 4: Incorporate the Sprinkles
Now, it’s time for a dash of festive color! Gently fold in the red and green jimmy sprinkles using a spatula. Be kind to them as you mix; too much stirring can cause them to lose their vibrancy. Just a few folds should keep the colors bright while blending them nicely into the dough!
Step 5: Spread and Bake
Using a spatula or your lovely hands, evenly spread the cookie dough into the prepared pan. It should look like a canvas ready for its masterpiece. Bake for 12-14 minutes, but keep an eye on them! You want them just barely golden on the edges without overbaking. The aroma wafting from the oven might just make you forget you’re making a dessert!
Step 6: Cool Completely
Once baked to perfection, pull your bars from the oven and let them cool completely in the pan. This step is important! If you frost them too soon, the frosting will melt away and create a sad mess. I usually set a timer for 30 minutes to ensure they can cool down and become ready for the delicious frosting!
Step 7: Make the Frosting
While those bars are cooling, it’s time to create that silky frosting. In your stand mixer, whip the softened butter for about 2 minutes until it’s creamy and lighter in color. Gradually add in the powdered sugar, then mix in the vanilla extract and heavy cream. Start with 3 tablespoons of cream and add more if needed to reach a smooth, spreadable consistency. Remember, it should be fluffy and delectable, just like a fluffy cloud!
Step 8: Frost and Cut
Now for the fun part! Once the bars are completely cool, spread the buttercream frosting evenly over the top. You can use a spatula or a knife to smooth it out. Then, sprinkle some extra festive sprinkles on top for that holiday sparkle. Finally, using a sharp knife, cut them into 24 pieces. Each piece should be a delightful square of holiday joy!

Tips for Success
- Make sure your butter is softened for easy creaming.
- Measure your flour correctly; spoon it into the measuring cup and level it off to prevent dense bars.
- Don’t overbake! Check a minute early for that perfect soft texture.
- Wait until bars are completely cool before frosting to avoid melting.
- For extra pizzazz, use various sprinkles or colored frosting!
Equipment Needed
- Stand Mixer: A must-have for creaming and frosting, but a hand mixer works just as well.
- Baking Pan (9×13 inches): Ideal for even baking; a larger pan will yield thinner bars.
- Spatula: Perfect for spreading dough and frosting; silicone spatulas are my favorite!
- Measuring Cups and Spoons: Essential for accuracy; a kitchen scale can also be handy.
Variations of Christmas Sugar Cookie Bars
- Gluten-Free: Substitute all-purpose flour with a 1:1 gluten-free flour blend for a tasty alternative.
- Sprinkle Variety: Use different types of sprinkles like stars, sugar crystals, or edible glitter for a unique flair!
- Citrus Zest: Add some lemon or orange zest to the dough for a refreshing twist that brightens the flavor.
- Chocolate Chip Delight: Mix in some semi-sweet or white chocolate chips along with the sprinkles for extra indulgence.
- Nutty Flavor: Incorporate finely chopped nuts like walnuts or pecans into the dough for added texture and flavor.
Serving Suggestions for Christmas Sugar Cookie Bars
- Festive Beverage: Pair the bars with hot cocoa or spiced apple cider to warm the holiday spirit.
- Holiday Platter: Serve them on a colorful platter alongside other festive treats like gingerbread cookies or peppermint bark.
- Wrap & Gift: Cut into squares, wrap with decorative foil, and share with friends as homemade holiday gifts!
FAQs about Christmas Sugar Cookie Bars
Can I make these Christmas Sugar Cookie Bars ahead of time?
Absolutely! These bars can be made a day or two in advance. Just let them cool completely before frosting and cover them with plastic wrap to keep them fresh. They’re perfect for preparing ahead of holiday gatherings!
What if I don’t have a stand mixer?
No worries! A hand mixer or even a sturdy whisk can do the job just fine. Just put in a little elbow grease, and you’ll still achieve that fluffy, delicious batter for your Christmas Sugar Cookie Bars.
How long can I store these bars?
Stored in an airtight container at room temperature, these cookie bars will stay fresh for about a week. If you need to keep them longer, you can freeze them, and they’ll last for about three months. Just make sure to thaw them at room temperature before enjoying!
Can I customize the frosting for the bars?
Absolutely! Feel free to experiment with different flavors like almond extract, or even add a touch of cocoa powder for a chocolate version. The beauty of these Christmas Sugar Cookie Bars lies in their versatility!
What can I use instead of heavy cream in the frosting?
If you don’t have heavy cream on hand, you can substitute it with milk or even a non-dairy alternative like almond or coconut milk. Just keep in mind that the consistency might be a little lighter, but the flavor will still shine through!
Final Thoughts
There’s something magical about baking during the holiday season, especially with these Christmas Sugar Cookie Bars. They embody the joy of togetherness and the spirit of celebration, making your kitchen feel like a festive wonderland. As you share each square of sweetness, you’re not just offering a treat; you’re spreading love and warmth. Whether for family gatherings or joyful moments with friends, these bars will surely make hearts smile. So, roll up your sleeves, embrace the holiday cheer, and create delicious memories that last! Happy baking, and may your home be filled with joy and sprinkles!
Print
Christmas Sugar Cookie Bars
- Prep Time: 15 minutes
- Cook Time: 14 minutes
- Total Time: 29 minutes
- Yield: 24 servings 1x
- Category: Dessert
- Method: Baking
- Cuisine: American
- Diet: Vegetarian
Description
Delicious and festive Christmas Sugar Cookie Bars, perfect for holiday gatherings.
Ingredients
- 3/4 cup sugar
- 1/4 cup powdered sugar
- 3/4 cup butter, softened
- 2 tsp vanilla extract
- 2 large eggs
- 1 tsp baking powder
- 1/2 tsp salt
- 2 1/4 cups all-purpose flour
- 3 tablespoons red and green jimmy sprinkles
- Frosting:
- 2 1/4 cups powdered sugar
- 1/2 cup unsalted butter + 2 tablespoons, softened
- 3–4 tablespoons heavy cream (or milk)
- 1/8 tsp salt
- 1 1/2 tsp vanilla extract
Instructions
- Preheat oven to 375 degrees F. Spray a 9×13 pan with cooking spray.
- In the bowl of a stand mixer fitted with the paddle attachment, cream together the sugar, powdered sugar, and butter for about 3 minutes or until light and fluffy. Mix in the vanilla and eggs. Beat until smooth. Scrape down the sides if needed. Add the baking powder and salt. Mix until combined. Then slowly add in the flour, and mix until just combined. Gently stir in the 3 tablespoons of red and green sprinkles.
- Using a spatula or your hands evenly spread the cookie dough into the prepared pan. Bake for 12-14 minutes, do not overbake.
- Cool completely.
- For the Frosting: In a stand mixer fitted with the paddle attachment, or in a large bowl using beaters, whip the butter for about 2 minutes, or until it’s creamy and lightened in color. Slowly add in the powdered sugar. Add the vanilla extract and heavy cream or milk. Start with 3 tablespoons of cream or milk and add 1 more tablespoon if the frosting seems to be too thick.
- Beat on medium-high for 3-5 minutes, stopping to scrape the sides of the bowl once or twice. If using food coloring, mix it in. Beat on low speed for about 1 minute to help remove any air bubbles.
- Spread the buttercream frosting evenly over the cooled bars and top with sprinkles. Cut into 24 pieces.
- Enjoy!
Notes
- Ensure the bars are fully cooled before frosting for best results.
- Store leftovers in an airtight container at room temperature.
Nutrition
- Serving Size: 1 bar
- Calories: 150
- Sugar: 10g
- Sodium: 70mg
- Fat: 6g
- Saturated Fat: 4g
- Unsaturated Fat: 2g
- Trans Fat: 0g
- Carbohydrates: 22g
- Fiber: 0g
- Protein: 2g
- Cholesterol: 30mg


