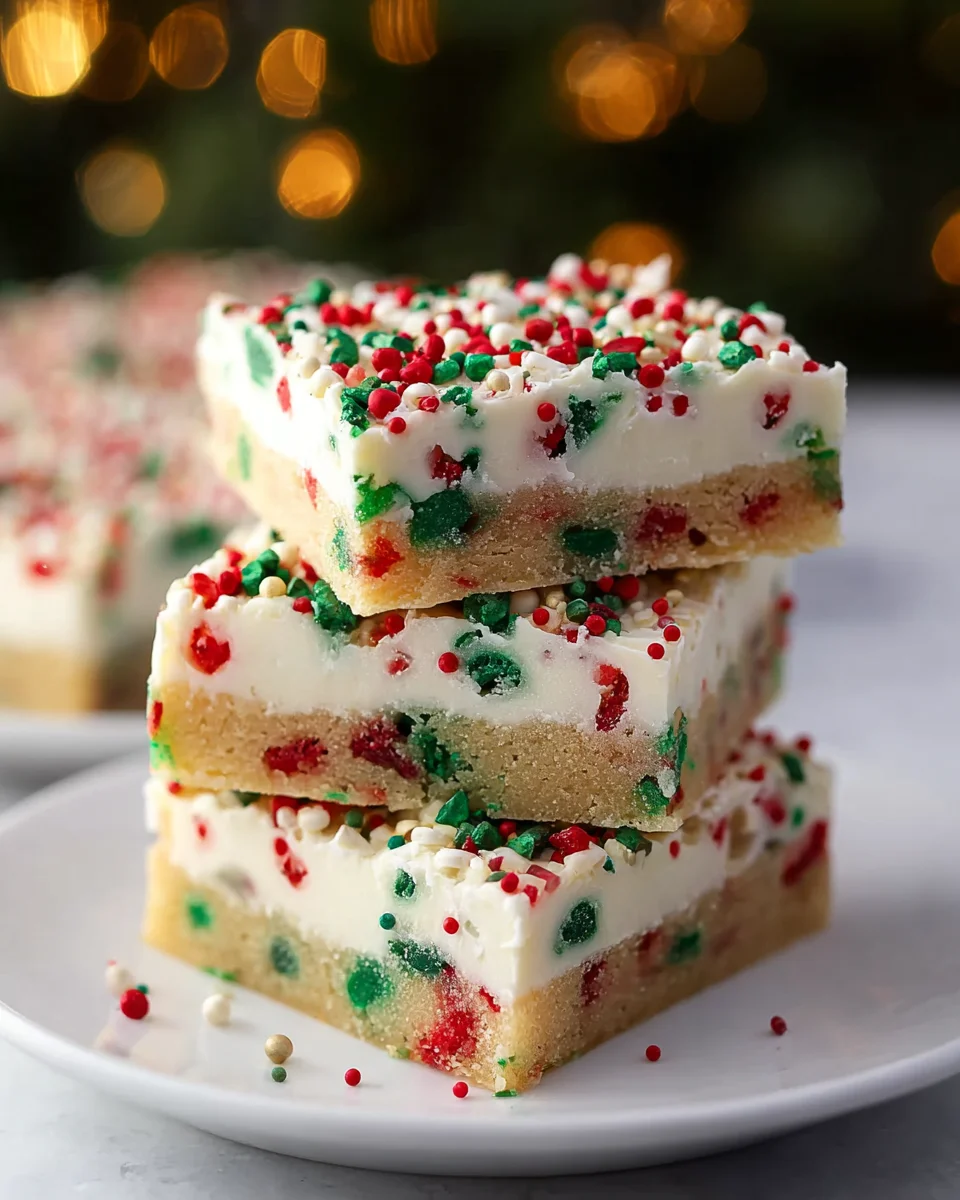
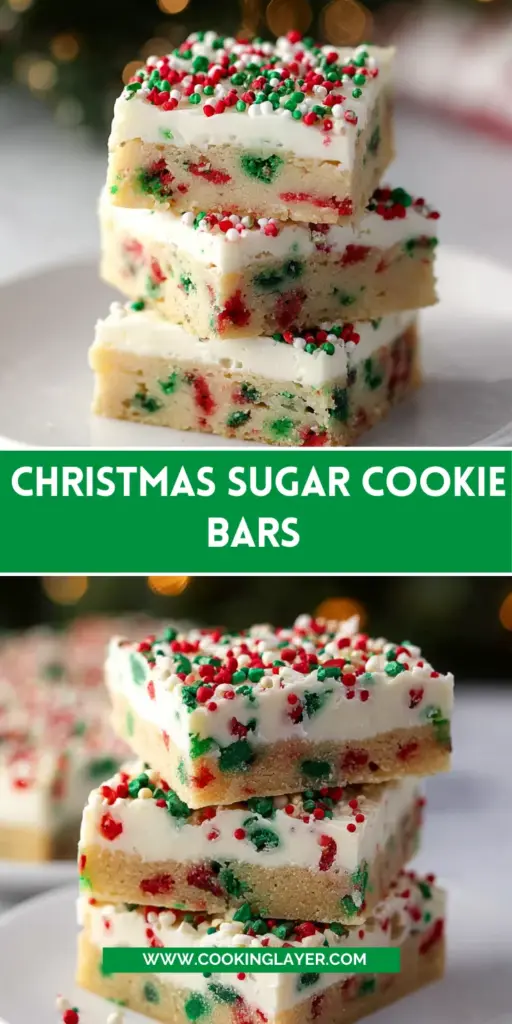
Introduction to Christmas Sugar Cookie Bars
Every year, as the holiday season rolls around, I find myself in a delightful frenzy of baking. Among my favorite treats are these Christmas Sugar Cookie Bars. They embody the spirit of the season—a sweet hug for the taste buds!
With their soft texture, creamy frosting, and colorful sprinkles, these bars are perfect for busy moms and professionals like us. They’re not just easy to whip up; they’re also a vibrant addition to any holiday gathering. Trust me, they’ll bring smiles to your loved ones’ faces and make your home feel even cozier!
Why You’ll Love This Christmas Sugar Cookie Bars
These Christmas Sugar Cookie Bars are not only a breeze to make, but they also taste heavenly! In just 29 minutes, you can create a batch that will impress even the fussiest of eaters. The soft, buttery texture blends beautifully with the sweet frosting and sprinkles. Plus, they’re perfect for holiday gatherings, making them a go-to treat for spreading joy without the holiday baking stress!
Ingredients for Christmas Sugar Cookie Bars
Gathering the right ingredients is half the battle in baking these delightful Christmas Sugar Cookie Bars! Here’s what you’ll need:
- Sugar: A classic sweetener that gives the bars their sweetness and wonderful texture.
- Powdered Sugar: This adds a touch of extra sweetness and helps create a smooth frosting.
- Butter: Softened butter is crucial for a rich flavor and tender crumb in the bars.
- Vanilla Extract: A splash of this brings warmth and aromatic sweetness to the dough.
- Eggs: Essential for binding the ingredients together and achieving that melt-in-your-mouth consistency.
- Baking Powder: This is the magical leavening agent that helps the bars rise, creating a fluffy effect.
- Salt: A pinch boosts all the flavors, balancing out the sweetness with a hint of savory.
- All-Purpose Flour: The foundation of the dough; it gives structure and helps form those yummy bars.
- Sprinkles: Red and green jimmy sprinkles add a festive touch that’s pure holiday cheer!
For the frosting, you’ll need:
- Powdered Sugar: The base for a velvety, sweet frosting that pairs perfectly with the bars.
- Unsalted Butter: This ensures you control the saltiness, making your frosting creamy and rich.
- Heavy Cream or Milk: Adds a lovely smoothness to the frosting; adjust based on desired consistency.
- Salt: A dash helps to enhance the sweetness of the frosting.
- Vanilla Extract: For that same stunning flavor, similar to what’s in the bars!
- Additional Sprinkles: Because more color never hurts, a festive sprinkle topping makes it complete!
If you’re looking for ingredient ratios, you’ll find the exact quantities at the bottom of the article, ready for printing. Happy baking!
How to Make Christmas Sugar Cookie Bars
Making Christmas Sugar Cookie Bars is easier than you might think! Follow these simple steps, and soon you’ll have a delicious batch that everyone will adore. Ready? Let’s bake!
Step 1: Prepare Your Baking Dish
First things first. Preheat your oven to 375 degrees F. Grab a 9×13 inch baking pan and spray it with cooking spray. This will ensure your cookie bars release easily once baked. A well-prepared pan is like a warm welcome to your holiday treats!
Step 2: Cream Together the Base Ingredients
In the bowl of your stand mixer—if you have one—combine the sugar, powdered sugar, and softened butter. Mix them on medium speed for about three minutes until they’re light and fluffy. It’s like making a fluffy cloud of sweetness! Don’t forget to add in the vanilla extract and the eggs next. Beat until everything is well mixed, and remember to scrape down the sides of the bowl if needed.
Step 3: Mix in Eggs and Dry Ingredients
Now it’s time to add in the baking powder and salt. Mix until just combined. This step is crucial, as these ingredients will help your bars rise beautifully. Gradually add the all-purpose flour, mixing gently until everything is just combined. Once it comes together, it’s sprinkle time! Gently fold in those cheerful red and green sprinkles that scream holiday fun!
Step 4: Spread the Dough and Bake
Using a spatula or even your hands, spread the cookie dough evenly into the prepared pan. Don’t rush this part. An even layer ensures uniform baking! Pop it into the oven and bake for 12-14 minutes. Watch carefully; you don’t want to overbake and lose that soft, chewy texture. Your kitchen will start to smell like a festive wonderland, so enjoy the aroma!
Step 5: Create the Frosting
While your cookie bars are cooling, let’s whip up the frosting. In a clean mixing bowl, beat your softened butter for about two minutes until it’s creamy. Gradually add the powdered sugar, mixing until everything is smoothly combined. Add the vanilla extract and begin mixing in the heavy cream or milk. Start with three tablespoons and adjust if you need a creamier texture. Beat this luscious mix for another 3-5 minutes. It should be light and airy, just like the holiday spirit!
Step 6: Frost the Bars and Add Sprinkles
Once your cookie bars are completely cool, it’s time to frost! Spread that beautiful buttercream frosting generously over the top. Use your spatula to create fun swirls or just a smooth finish—whatever your heart desires! Don’t forget to finish with a sprinkle of festive sprinkles on top for that extra holiday cheer! Finally, slice the bars into 24 delightful pieces that will bring smiles to everyone’s faces!
Tips for Success
- Make sure your butter is softened, not melted, for the best texture.
- Chill the dough for 15-20 minutes if your kitchen is warm.
- Use a toothpick to check for doneness; it should come out clean or with a few moist crumbs.
- Experiment with different sprinkles to match your theme or occasion.
- Store cookie bars in an airtight container to maintain freshness.
Equipment Needed
- Stand Mixer: A great tool for creaming and mixing, but a hand mixer works just as well!
- Baking Pan: A 9×13 inch pan is ideal; you can also use two smaller pans if needed.
- Spatula: Perfect for spreading the dough and frosting; a simple offset spatula works wonders.
- Measuring Cups and Spoons: Essential for accuracy, but feel free to estimate if you’re comfortable!
- Mixing Bowls: Any size will do; a large bowl for mixing is a must.
Variations of Christmas Sugar Cookie Bars
- Chocolate Chip Addition: Fold in mini chocolate chips for a delicious twist on the classic bars.
- Citrus Zest: Add a teaspoon of orange or lemon zest to the dough for a refreshing citrusy flavor.
- Egg-Free Option: Substitute the eggs with unsweetened applesauce (1/4 cup per egg) for a vegan-friendly version.
- Gluten-Free Bars: Use a gluten-free all-purpose flour blend to create delightful treats for gluten-sensitive friends and family.
- Nutty Twist: Stir in chopped nuts such as pecans or walnuts for added texture and flavor.
- Different Frosting Flavors: Try a chocolate or peppermint frosting for a festive variation that will wow everyone at the table.
Serving Suggestions for Christmas Sugar Cookie Bars
- Pair with a warm cup of cocoa or spiced cider to create a cozy holiday vibe.
- Serve on a festive platter adorned with seasonal decor, like pine branches or ornaments.
- For a fun twist, drizzle with melted chocolate or caramel before serving!
- Wrap individual pieces in cellophane with a bow for delightful gifts.
FAQs about Christmas Sugar Cookie Bars
Can I make these Christmas Sugar Cookie Bars ahead of time?
Absolutely! These bars can be made a day or two in advance. Just store them in an airtight container at room temperature. When you’re ready to serve, you can frost them fresh for that delightful homemade touch!
Can I freeze the Christmas Sugar Cookie Bars?
You bet! These bars freeze beautifully. Wrap them tightly in plastic wrap and then foil. They’ll stay fresh for up to three months. Just thaw them at room temperature before serving.
What if I don’t have a stand mixer?
No worries! A handheld mixer works just as well. You can also use a wooden spoon and mix by hand, though it may take a bit more muscle—and a sprinkle of extra holiday cheer!
Can I use different types of sprinkles?
Definitely! While I love the classic red and green ones, feel free to get creative. Holiday-themed sprinkles, sparkles, or even colored sugar can add a unique flair to your bars!
How do I store the leftover cookie bars?
Store your cookie bars in an airtight container at room temperature for up to a week. This ensures they remain soft and delicious, ready to be enjoyed whenever a sweet craving strikes!
Final Thoughts
These Christmas Sugar Cookie Bars bring so much joy to the holiday season! They’re not just a treat; they’re a way to create warm memories with loved ones. As I whip up a batch, I think of the laughter around the table and the smiles from family and friends. Each soft, chewy bar topped with creamy frosting is a reminder of togetherness. Whether you’re sharing these bars at a gathering or enjoying them at home, they add a sprinkle of magic to the festivities. Happy baking, and may your holidays be filled with sweetness and love!
Print
Christmas Sugar Cookie Bars
- Prep Time: 15 minutes
- Cook Time: 14 minutes
- Total Time: 29 minutes
- Yield: 24 pieces 1x
- Category: Dessert
- Method: Baking
- Cuisine: American
- Diet: Vegetarian
Description
Delightfully soft and festive Christmas Sugar Cookie Bars topped with creamy frosting and sprinkles, perfect for holiday celebrations.
Ingredients
- 3/4 cup sugar
- 1/4 cup powdered sugar
- 3/4 cup butter, softened
- 2 tsp vanilla extract
- 2 large eggs
- 1 tsp baking powder
- 1/2 tsp salt
- 2 1/4 cups all-purpose flour
- 3 tablespoons red and green jimmy sprinkles
Frosting:
- 2 1/4 cups powdered sugar
- 1/2 cup unsalted butter + 2 tablespoons, softened
- 3–4 tablespoons heavy cream (or milk)
- 1/8 tsp salt
- 1 1/2 tsp vanilla extract
- sprinkles
Instructions
- Preheat oven to 375 degrees F. Spray a 9×13 pan with cooking spray.
- In the bowl of a stand mixer fitted with the paddle attachment, cream together the sugar, powdered sugar, and butter for about 3 minutes or until light and fluffy. Mix in the vanilla and eggs. Beat until smooth. Scrape down the sides if needed. Add the baking powder and salt. Mix until combined. Then slowly add in the flour, and mix until just combined. Gently stir in the 3 tablespoons of red and green sprinkles.
- Using a spatula or your hands evenly spread the cookie dough into the prepared pan. Bake for 12-14 minutes, do not overbake.
- Cool completely.
- For the Frosting: In a stand mixer fitted with the paddle attachment, or in a large bowl using beaters, whip the butter for about 2 minutes, or until it’s creamy and lightened in color. Slowly add in the powdered sugar. Add the vanilla extract and heavy cream or milk. Start with 3 tablespoons of cream or milk and add 1 more tablespoon if the frosting seems to be too thick.
- Beat on medium-high for 3-5 minutes, stopping to scrape the sides of the bowl once or twice. If using food coloring mix it in. Beat on low speed for about 1 minute to help remove any air bubbles.
- Spread the buttercream frosting evenly over the cooled bars and top with sprinkles. Cut into 24 pieces.
- Enjoy!
Notes
- Store the cookie bars in an airtight container at room temperature for up to a week.
- These bars can be frozen for up to 3 months; just thaw before serving.
- Feel free to use different colored sprinkles for variety.
Nutrition
- Serving Size: 1 piece
- Calories: 180
- Sugar: 12g
- Sodium: 80mg
- Fat: 7g
- Saturated Fat: 4g
- Unsaturated Fat: 2g
- Trans Fat: 0g
- Carbohydrates: 26g
- Fiber: 0g
- Protein: 2g
- Cholesterol: 30mg


