Imagine biting into a delicate cloud of sweetness, shaped like a sparkling Christmas tree and kissed with edible gold glitter. These Christmas Tree Meringue Cookies are everything you want in a holiday treat — light, crisp, magical, and almost too pretty to eat (almost!). Whether you’re hosting a party, baking for a cookie swap, or gifting something sweet and handmade, these little trees bring big holiday cheer.
Why You’ll Fall in Love With These Cookies
Let’s be honest — holiday baking can get intense. From rolling dough to making intricate decorations, it sometimes feels like a full-time job. But here’s the beauty of these cookies: they look incredibly fancy without being hard to make. They require only a few basic ingredients, and the steps are totally manageable even for beginner bakers.
Plus, they’re naturally gluten-free, and since they’re mostly made of egg whites and sugar, they’re light enough to enjoy even after a big holiday meal. Oh, and did we mention they sparkle?
What Are Meringue Cookies?
Meringue cookies are made by whipping egg whites and sugar into a glossy foam that’s baked at a low temperature until dry and crisp. Think of them like little sugar clouds — melt-in-your-mouth bites with a satisfying crunch.
But we’re taking it up a notch. By piping them into swirling trees and decorating them with gold glitter and star toppers, we’re turning a humble cookie into a stunning centerpiece.
The Magic Behind the Christmas Tree Look
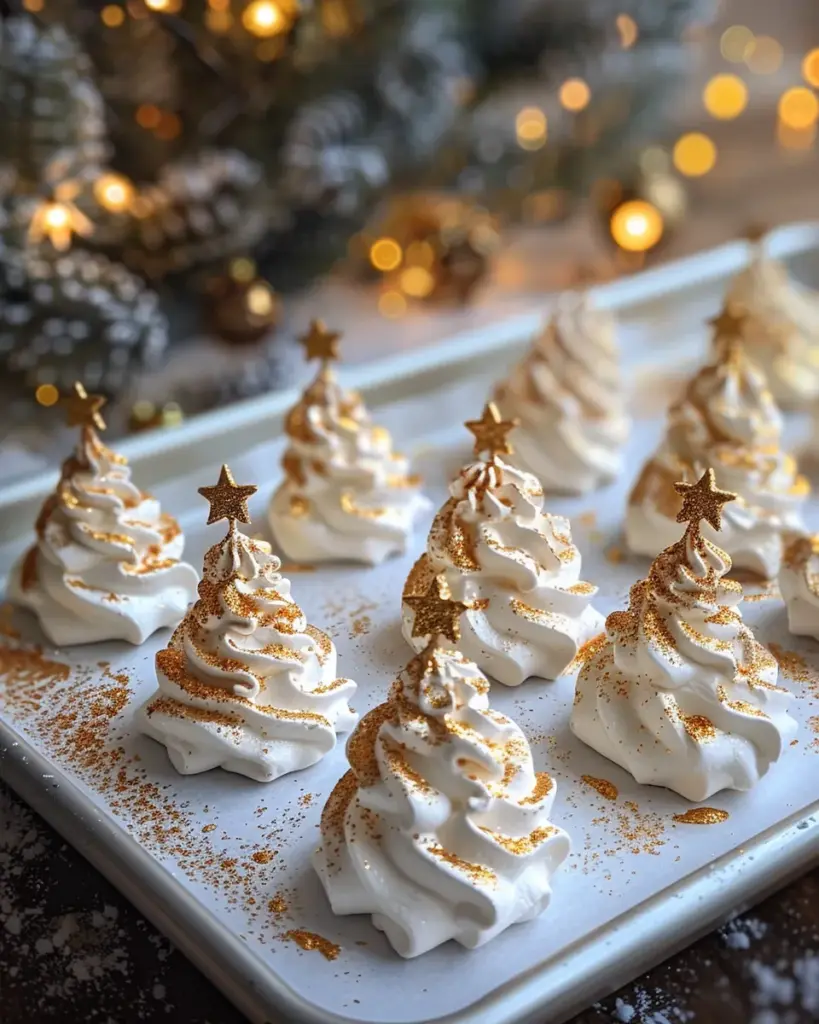
The swirling design of the cookies is what gives them their tree-like appearance. Using a large star piping tip, you build the tree shape from the base upward in concentric circles, narrowing as you go. A sprinkle of gold glitter mimics garland, and a tiny edible star on top seals the deal.
The result? Cookies that look like they’ve been pulled straight from Santa’s dessert buffet.
Gather Your Ingredients
Here’s what you’ll need for your Christmas Tree Meringue Cookies:
Core Ingredients:
- 4 large egg whites, room temperature
- 1 cup granulated sugar
- 1 teaspoon vanilla extract
- ½ teaspoon cream of tartar
- Gel food coloring (optional, for tinting trees light green or leaving them white as in the photo)
Decorating Essentials:
- Edible gold glitter (for that sparkling garland look)
- Star-shaped sprinkles or edible stars (for the topper)
- Icing or melted chocolate (to attach to cookie bases)
- Round cookies (like shortbread or sugar cookies – optional, but match the image perfectly)
You probably have most of these on hand already — and the rest can easily be found in the baking aisle or online.
Tools You’ll Need for This Recipe
You don’t need a lot of fancy equipment, but a few tools make this recipe much easier:
- Electric mixer (stand or handheld)
- Large piping bag
- Large star piping tip (such as Wilton 1M or 2D)
- Baking sheets
- Parchment paper
- Small offset spatula (optional but great for lifting cookies)
Let’s Talk Technique: Meringue Basics
The key to making perfect meringue cookies lies in how you handle the egg whites. Here are some tips to nail it:
- Room temp eggs whip better: Let your egg whites sit out for 30 minutes before starting.
- Clean bowl = happy meringue: Any fat or grease will ruin your peaks. Use a metal or glass bowl and wipe it with vinegar or lemon juice before starting.
- Cream of tartar helps stabilize the egg whites, making them whip faster and stay stiffer.
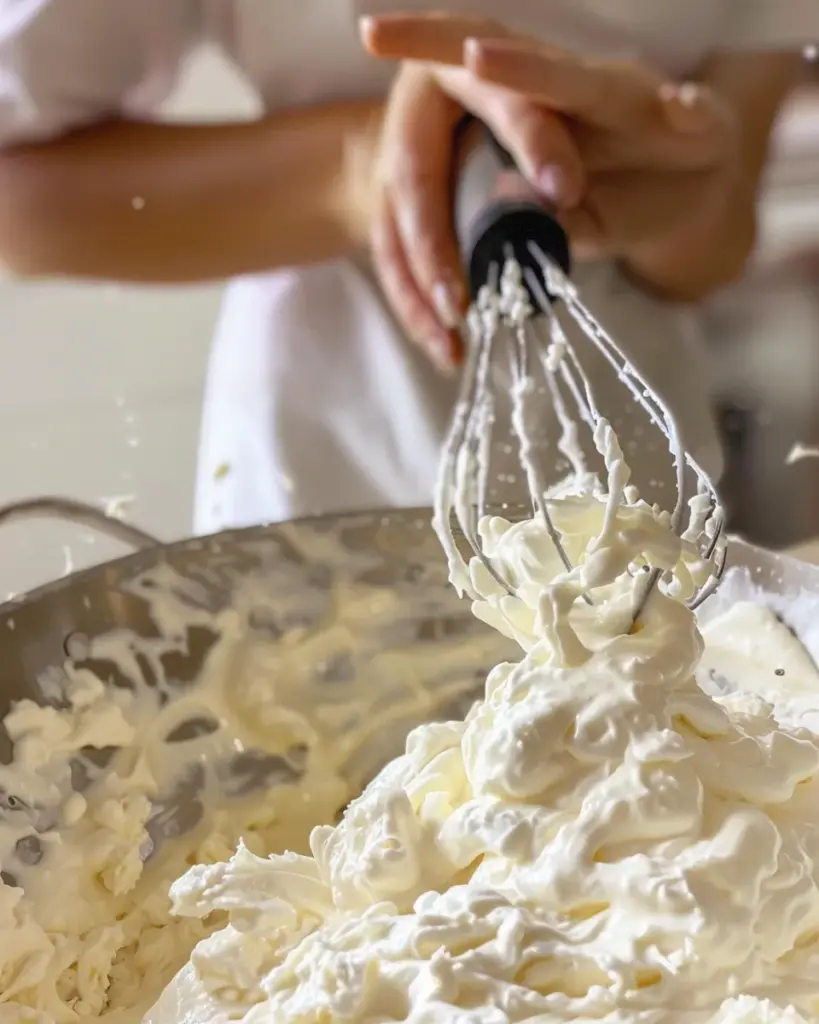
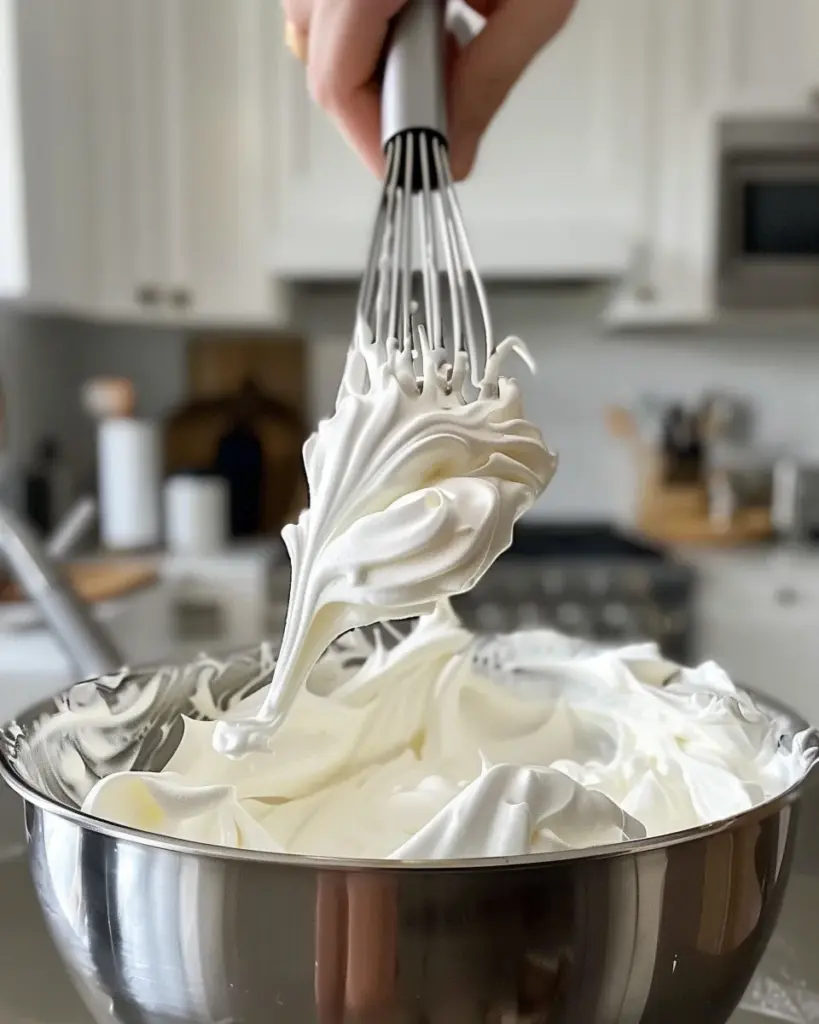
How to Make the Perfect Stiff Peaks
This part matters. After the soft peak stage (where the meringue holds its shape but flops over), you’ll continue to beat until stiff peaks form. When you lift the beater, the peaks should stand tall with a glossy finish.
If the meringue looks grainy or dry, you’ve gone too far. Stop as soon as it holds shape and looks shiny.
Tinting Your Meringue (Optional But Fun!)
Want your trees to be green? Add a few drops of green gel food coloring after the meringue reaches stiff peaks and gently fold it in. But honestly, the white meringues with gold glitter, as shown in your photo, are super elegant and chic — like snowy trees on a winter night.
Either way, make sure you don’t deflate the meringue when adding color. Use a spatula and fold gently.
Piping Your Christmas Trees
Now for the fun part: shaping your trees!
- Fit your piping bag with a large star tip.
- Fill it with your fluffy meringue.
- On a parchment-lined baking sheet, start piping by swirling from a wide base upward in smaller spirals until you reach a peak.
- Each cookie should look like a tiny, fluffy Christmas tree.
Tips for success:
- Keep the bag vertical as you pipe.
- Apply even pressure to get smooth lines.
- Pipe in one motion from bottom to top.
They don’t have to be identical — a little variety adds charm!
Baking Low and Slow: The Meringue Secret
Set your oven to 225°F (110°C). The trick is to dry the meringues rather than bake them. This helps them keep their shape, color, and crunch.
Bake for 1.5 to 2 hours, depending on their size. You’ll know they’re done when they lift cleanly from the parchment and feel dry to the touch.
Cooling & Crisping: The Most Overlooked Step
Once baked, turn off the oven and leave the meringues inside for at least another hour (or until completely cool). This prevents cracking and helps them finish drying out.
Don’t rush this part! It’s crucial for getting that perfect texture — crisp on the outside, melt-in-your-mouth on the inside.
Decorating Like a Pro
Now let’s make these trees dazzle!
- Sprinkle gold glitter over each tree while they’re still slightly tacky or use a tiny brush with water to help it stick.
- Add a star sprinkle right at the peak. You can use a dab of icing or chocolate to hold it in place.
- Want extra sparkle? Add some edible silver balls or sugar pearls for a “bauble” effect.
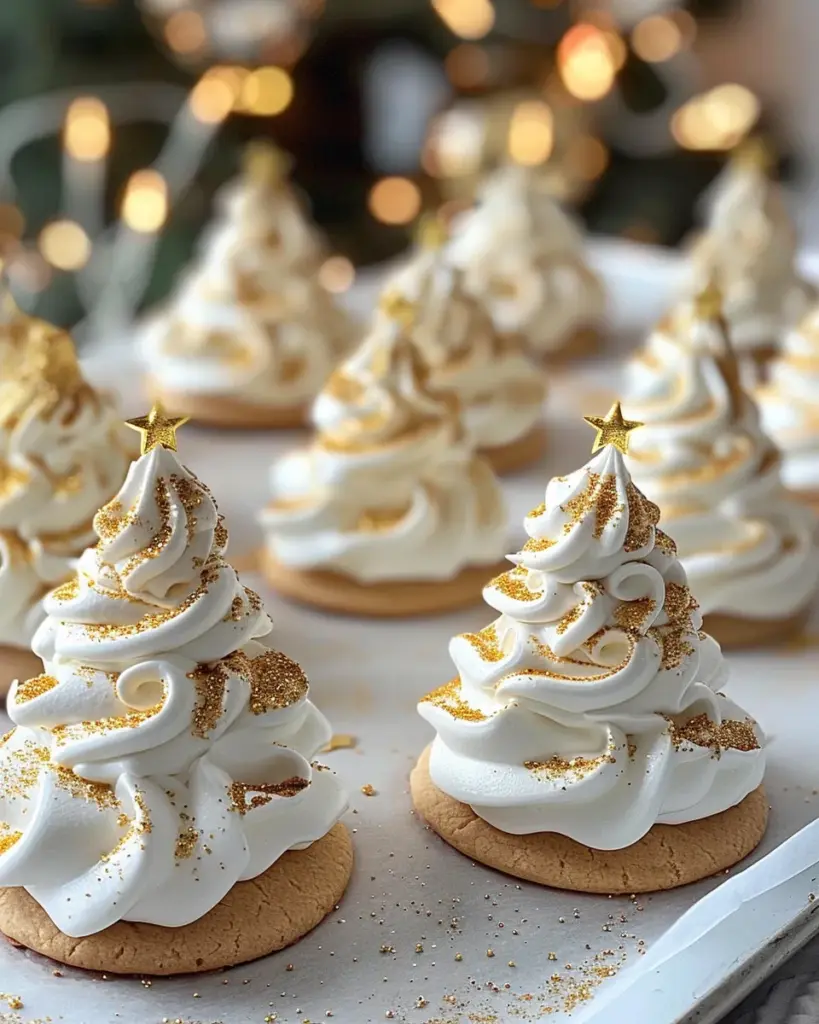
Adding Cookie Bases: Optional But Recommended
To match the beautiful cookies in your image, place each meringue tree onto a round cookie base.
Here’s how:
- Use a small dot of melted chocolate or royal icing on the cookie.
- Gently press the meringue tree on top.
- Let it set for 10 minutes before moving.
Shortbread or sugar cookies work great — just make sure they’re flat and slightly larger than the tree base.
Troubleshooting Common Meringue Issues
- Weepy or sticky meringues? Humidity is the enemy. Try again on a drier day.
- Cracked tops? Oven might be too hot or cooled too quickly.
- Not holding shape? Make sure your peaks were stiff enough before piping.
Storing Your Meringue Cookies for Freshness
Now that your cookies are looking like edible works of art, you’ll want to keep them crisp and fresh until it’s time to share (or devour) them. Meringue is delicate — it loves dry air but hates moisture. So here’s how to store them the right way:
- Store in an airtight container at room temperature.
- Keep them away from humidity and heat. No fridge, please — that’s a meringue’s worst nightmare.
- Add a small silica gel pack or a bit of uncooked rice in a breathable sachet inside the container to absorb moisture.
- If stored properly, they’ll stay crisp for up to two weeks!
Want to make them in advance? Go for it. They’re one of the few holiday treats you can prep way ahead of time.
Print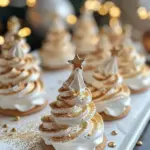
Christmas Tree Meringue Cookies
- Prep Time: 25 minutes
- Total Time: 2 hours 25 minutes
- Category: Holiday Desserts / Christmas Cookies / Meringue Treats
Description
🎄 Light as snow and sweet as holiday memories, these Christmas Tree Meringue Cookies bring pure magic to the dessert table. Crisp on the outside, melt-in-your-mouth soft inside, and sparkling with festive charm — they always feel like a little celebration with every bite. ✨🍪
Ingredients
4 large egg whites, room temperature
1 cup granulated sugar
½ teaspoon cream of tartar
1 teaspoon vanilla extract
Gel food coloring (optional, for tinting)
Edible glitter or festive sprinkles
Star-shaped sprinkles (optional)
Instructions
Preheat oven to 225°F (110°C) and line baking sheets with parchment paper. ⏱️ 5 minutes
In a clean bowl, beat egg whites on medium speed until foamy, then add cream of tartar and continue beating until soft peaks form. ⏱️ 5 minutes
Gradually add sugar, one tablespoon at a time, beating on high speed until stiff, glossy peaks form. Beat in vanilla extract and food coloring if using. ✨ ⏱️ 7–8 minutes
Transfer meringue to a piping bag fitted with a large star tip and pipe tree shapes onto prepared baking sheets. 🎄 ⏱️ 10 minutes
Bake for 1½–2 hours, until meringues are fully dry and lift easily from parchment. Turn off oven and let cool completely inside. ⏱️ 2 hours
Once cooled, decorate with edible glitter and top with star sprinkles for a festive finish. ⭐ ⏱️ 5 minutes
Notes
These cookies are naturally gluten-free and wonderfully light, making them perfect after a heavy holiday meal.
Low oven temperature is key—slow drying keeps them crisp without browning.
Humidity matters: make them on a dry day for the best texture and shine.
They store beautifully in an airtight container for up to a week, staying crisp and airy.
Ideal for cookie boxes, dessert tables, or as a delicate edible decoration during the holidays.
Nutrition
- Serving Size: 20 meringue cookies
- Calories: 60 kcal
Creative Gifting Ideas With These Cookies
These cookies are almost too pretty to keep to yourself, so why not turn them into heartfelt, handmade holiday gifts?
Here are a few creative packaging ideas:
- Mini cookie boxes with crinkle paper and ribbon — perfect for coworkers, neighbors, or party favors.
- Cellophane treat bags tied with a festive tag. Add a pun like, “Have a tree-mendous holiday!”
- Place them in a clear ornament ball for a truly unique gift. Just make sure the ball is food-safe.
- Make a DIY cookie bouquet using skewers attached to the base and placing them in a decorated mug.
They’re great for teacher gifts, secret Santa, or even stocking stuffers.
You may like also :
🎄 Christmas Trash (Sweet & Salty Holiday Bark) – The Ultimate Reindeer Crack Recipe ❤️💚
🎄 Christmas Sprinkle Cheesecake Recipe: The Ultimate Festive Dessert 🎄
Kid-Friendly Holiday Activity: Get the Family Involved!
These Christmas Tree Meringue Cookies are the perfect family baking project. Little ones can help with:
- Sprinkling the glitter
- Placing the star toppers
- Adding decorations like mini sugar pearls or colored sprinkles
And because there’s no raw dough or hot oil, it’s a relatively safe and low-mess activity for kids to enjoy.
Turn on some Christmas music, grab some hot cocoa, and let everyone decorate their own meringue tree. You’ll make memories just as sweet as the cookies themselves.
Pairing These Cookies with Holiday Beverages
Want to level up your cookie experience? Try pairing your Christmas Tree Meringue Cookies with cozy winter drinks:
- Hot chocolate: Rich, creamy cocoa and a crisp meringue? Yes, please.
- Spiced apple cider: The tartness of the cider cuts through the sweetness of the cookie.
- Peppermint tea: A refreshing, sugar-balancing companion.
- Eggnog: If you’re going full festive, eggnog and these cookies are a match made in holiday heaven.
You can even use them as a cute stirrer or topper on mugs of cocoa or coffee. Talk about a double-duty dessert!
Conclusion: A Cookie That Captures Christmas Magic
These Christmas Tree Meringue Cookies are more than just a treat — they’re an experience. From the moment you whip the glossy meringue to the final sprinkle of edible glitter, you’re creating something special. They embody the spirit of the holidays: joy, creativity, and the sweetness of sharing something handmade.
They’re light enough to enjoy guilt-free, dazzling enough to impress at any gathering, and easy enough to make with your kids or on a quiet winter evening. Whether you’re gifting them, serving them, or simply enjoying one with your morning coffee, these cookies are pure Christmas magic in every bite.
So preheat that oven, dust off your piping tips, and get ready to bring a little sparkle to your holiday season. 🌟🎄
Similar recipes :
🎄 Christmas Trifle Dessert Recipe: A Stunning, Festive Showstopper for Your Holiday Table
White Chocolate Christmas Puffcorn Munch – A Holiday Classic in the Making
FAQs About Christmas Tree Meringue Cookies
1. Can I make these cookies ahead of time for a party?
Absolutely! These cookies can be made up to two weeks in advance if stored in an airtight container. Just avoid humidity to keep them crisp.
2. What can I use if I don’t have cream of tartar?
You can substitute it with 1 teaspoon of lemon juice or white vinegar, but cream of tartar gives the most reliable results for stiff peaks.
3. Can I color the meringue a different color than white or green?
Yes! You can use any gel food coloring to create red, blue, or even pastel meringue trees. Just don’t overmix after adding the color.
4. How do I know if my meringue is over-whipped?
Over-whipped meringue will look grainy and start to separate. It won’t pipe smoothly and may crack while baking. Stop as soon as it forms glossy, stiff peaks.
5. Can I freeze meringue cookies?
Not recommended. Meringue tends to absorb moisture in the freezer and becomes chewy or sticky when thawed. Stick to room temperature storage.