Is there anything more comforting than the smell of warm peanut butter cookies baking in the oven? Now, imagine that soft, golden cookie fresh out of the oven—just cool enough to hold—but still warm enough to melt a chocolate kiss gently into its center. That’s the magic of Classic Peanut Butter Blossoms.
Whether it’s the holidays, a weekend treat, or a nostalgic bake from childhood, these cookies always bring a sense of joy. They’re soft, sweet, a little nutty, and perfectly chocolaty on top. One bite and you’ll understand why these little beauties disappear from cookie platters faster than you can say “Who took the last one?”
Why These Cookies Are a Holiday Classic
Peanut Butter Blossoms were first introduced in the 1950s and won second place in a Pillsbury Bake-Off Contest. That’s right—they weren’t even meant to have the kiss on top originally! But that small addition transformed them into a household staple during the holidays.
Today, they show up on almost every festive cookie tray. They’re bite-sized, easy to make, and feel like pure holiday magic. That soft cookie with the surprise chocolate center? It’s like a gift in every bite. If nostalgia had a flavor, this would be it.
What Makes This Recipe Special
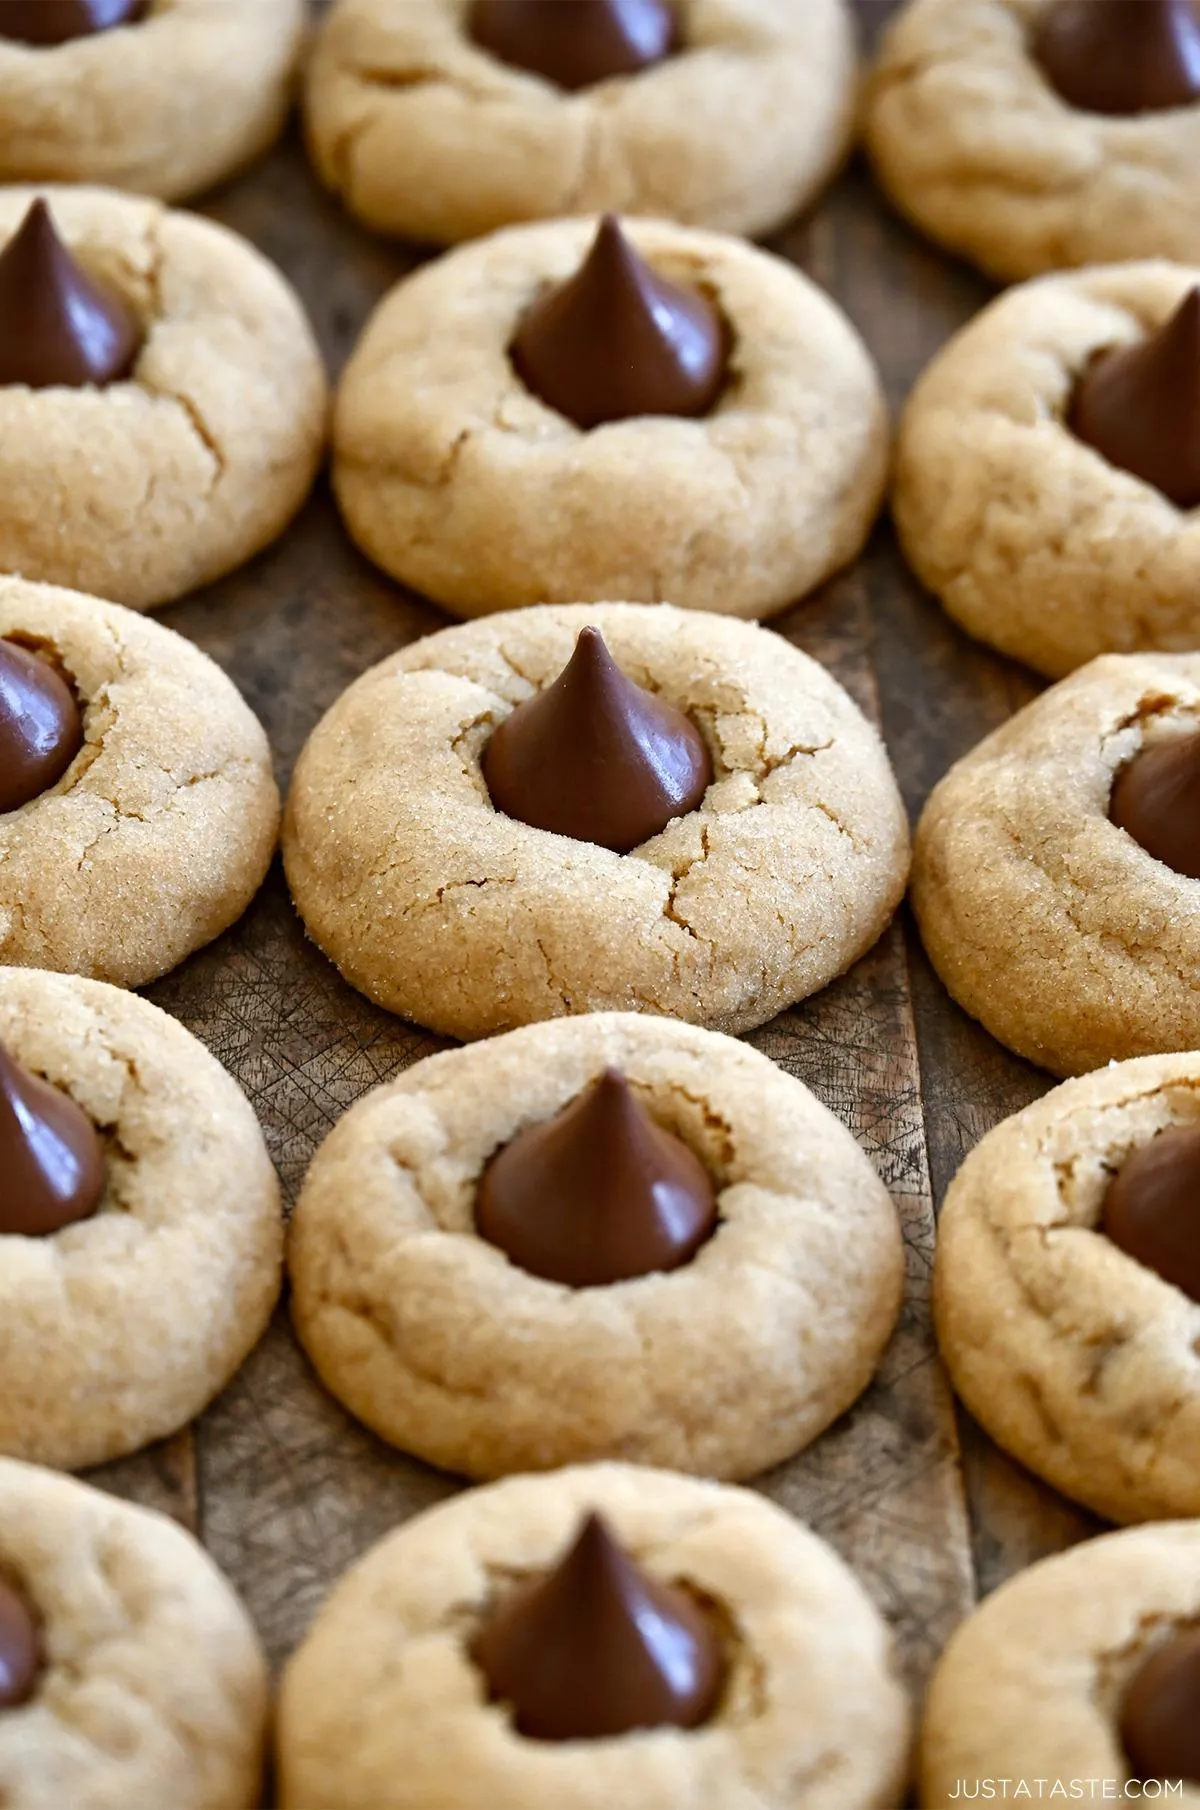
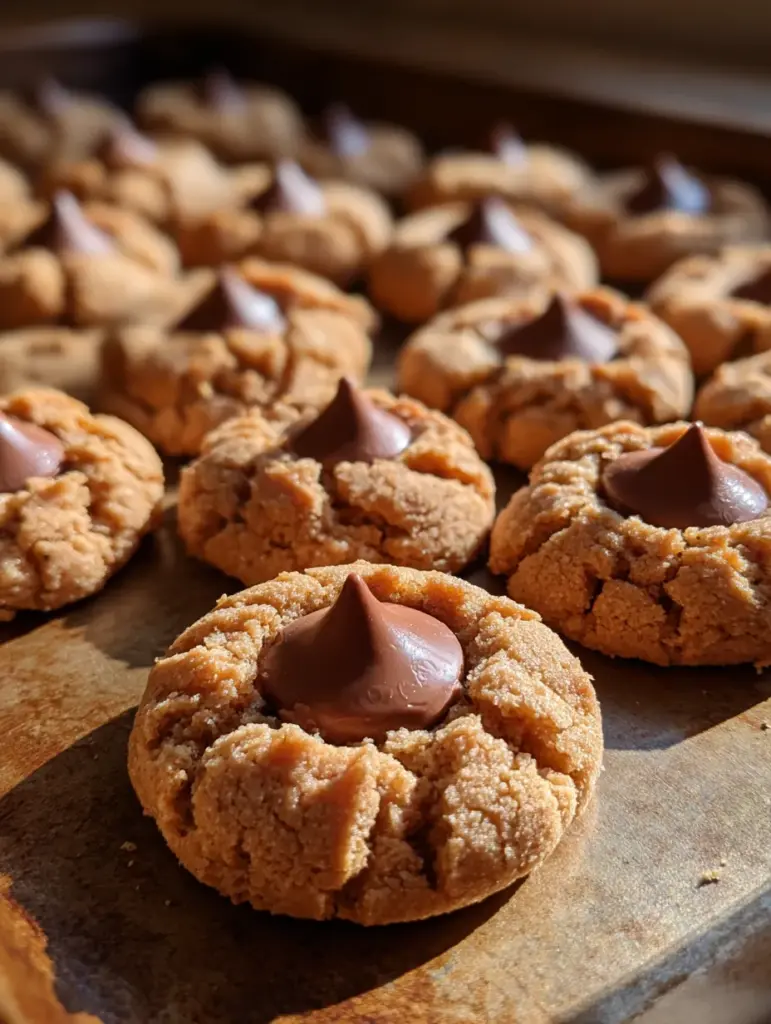
While there are tons of peanut butter blossom recipes floating around, this one nails the balance between chewy, soft, and melt-in-your-mouth delicious. The texture is key. Too dry? It crumbles. Too dense? It doesn’t puff right. But this recipe creates that perfect pillowy cookie with just the right golden color and the signature crackled top you see in the photo.
We’re also using both granulated and brown sugar—which gives a deeper flavor and that slight chewy edge. Oh, and don’t forget the final sugar roll before baking. That tiny sparkle on the outside is what makes them bakery-level good.
Ingredients Breakdown
Let’s break this cookie down, ingredient by ingredient, so you know exactly what’s going into your perfect batch.
Butter & Peanut Butter
- ½ cup unsalted butter – softened, not melted. This creates a smooth base.
- ½ cup creamy peanut butter – classic is best here. Avoid the natural kind that separates—use a traditional creamy peanut butter for that uniform, rich flavor and smooth texture.
Sugars – Granulated & Brown
- ½ cup granulated sugar
- ½ cup brown sugar (light or dark)
The mix of sugars gives your cookies a slight crunch on the outside and a chewy softness inside. Brown sugar also adds depth thanks to the molasses content.
The Egg & Vanilla Combo
- 1 large egg – it holds everything together and gives structure.
- 1 teaspoon vanilla extract – adds warmth and enhances the peanut butter flavor beautifully.
Dry Ingredients – Flour, Baking Soda, Salt
- 1 ¾ cups all-purpose flour
- 1 teaspoon baking soda
- ¼ teaspoon salt
These three work together to give the cookie its puff and signature crackle on top.
The Chocolate Kiss Topping
- 24 chocolate kiss candies, unwrapped
The real stars of the show. They melt just enough when pressed into the warm cookies, keeping their iconic shape while going slightly gooey inside.
Kitchen Tools You’ll Need
- Mixing bowls (large and medium)
- Electric mixer or stand mixer
- Measuring cups and spoons
- Baking sheet
- Parchment paper or silicone baking mat
- Cookie scoop or spoon
- Cooling rack
Prepping Like a Pro: Mise en Place
Before you begin, take a few minutes to prep everything. Trust me, it makes a huge difference. Softened butter, unwrapped kisses, pre-measured ingredients—these small steps save a ton of time later and help prevent mistakes.
Unwrap your chocolate kisses before you start baking—that way, you’re ready to go as soon as the cookies come out of the oven. Timing is everything here.
Step-by-Step Recipe Instructions
Let’s dive into the fun part—baking!
Creaming the Fats & Sugars
In a large bowl, use an electric mixer to cream together the softened butter, peanut butter, granulated sugar, and brown sugar. Beat on medium speed for about 3 minutes until the mixture is light and fluffy.
This step adds air to the dough and ensures a soft cookie texture.
Adding Eggs and Vanilla
Next, add the egg and vanilla extract, and beat again until smooth and fully combined. The dough should now look thick, creamy, and cohesive.
Mixing the Dry Ingredients
In a separate bowl, whisk together the flour, baking soda, and salt. Slowly add this dry mix to the wet mix, beating on low until a soft dough forms.
Don’t overmix! Just blend until the flour disappears. Overworking the dough can lead to tough cookies.
Forming the Dough Balls
Use a cookie scoop or tablespoon to form small balls (about 1 inch). Roll each ball between your palms to smooth it out.
Rolling in Sugar for the Perfect Finish
This part is simple but makes all the difference—roll each dough ball in granulated sugar before placing them on the baking sheet. It gives them that sweet, crackly exterior.
Place them 2 inches apart on a parchment-lined or silicone-lined baking sheet.
Baking to Golden Perfection
Bake at 375°F (190°C) for 8 to 10 minutes. Watch for the edges to turn lightly golden and the tops to puff. Don’t overbake—they’ll finish setting on the tray.
The Signature Kiss Press
As soon as the cookies come out of the oven, press one unwrapped chocolate kiss into the center of each cookie. Press down gently but firmly. The cookies will crack slightly around the edges—this is exactly what you want.
Let them cool on the tray for about 10 minutes before transferring to a wire rack.
Cool Down – The Secret to Perfectly Set Cookies
That short cooling time lets the chocolate kisses soften just enough to sink into the cookie and begin to set without melting all the way down. The result? That beautiful, glossy Hershey’s Kiss top like you see in the image.
Avoid moving them too early. If the cookies are still too warm, the chocolate may smear. If they cool properly, they’ll firm up and hold their perfect shape.
Troubleshooting Common Mistakes
Let’s be real—sometimes things don’t go as planned in the kitchen. But don’t worry, here’s how to avoid the most common pitfalls with Peanut Butter Blossoms:
- Cookies are too dry or crumbly?
This usually means too much flour. Be sure to spoon and level your flour rather than scooping directly from the bag. Overbaking can also dry them out—remember, they continue cooking a bit after coming out of the oven. - Cookies spread too much?
This can happen if your butter was too soft or melted. It’s also possible the dough was too warm. If this happens, chill the dough for 20–30 minutes before baking. - Chocolate kisses melting or falling off?
Press the kiss gently but immediately after baking while the cookie is still hot. If the cookies are too cool, the chocolate won’t adhere properly. Also, don’t press too hard or it may sink in too far. - Cookies not puffing or cracking on top?
Make sure your baking soda is fresh and active. Expired leaveners are a silent cookie killer.
Classic Peanut Butter Blossoms
- Prep Time: 15 minutes
- Total Time: 35 minutes
- Category: Holiday Cookies • Classic American Desserts • Christmas Baking
Description
🍫🥜 Soft, warm peanut butter cookies crowned with a rich chocolate kiss—these timeless treats disappear fast for a reason. Sweet, cozy, and full of holiday nostalgia, every bite feels like a comforting hug straight from the oven. ✨💖
Ingredients
1/2 cup unsalted butter, softened
1/2 cup creamy peanut butter
1/2 cup granulated sugar
1/2 cup brown sugar, packed
1 large egg
1 teaspoon vanilla extract
1 3/4 cups all-purpose flour
1 teaspoon baking soda
1/4 teaspoon salt
1/4 cup granulated sugar (for rolling)
24 chocolate kiss candies, unwrapped
Instructions
Preheat oven to 375°F (190°C) and line a baking sheet with parchment paper. ⏱️ 1 minute
In a large bowl, cream together butter, peanut butter, granulated sugar, and brown sugar until light and fluffy. 🥄✨ ⏱️ 3 minutes
Add the egg and vanilla extract, mixing until smooth and fully combined. 🥚🌼 ⏱️ 2 minutes
Gently stir in flour, baking soda, and salt until a soft dough forms. 🍪 ⏱️ 3 minutes
Roll dough into small balls and coat each one evenly in granulated sugar. ✋🍬 ⏱️ 4 minutes
Place dough balls on the prepared baking sheet, spacing them evenly. 🧺 ⏱️ 1 minute
Bake until lightly golden and puffed. 🔥 ⏱️ 8–10 minutes
Immediately press a chocolate kiss into the center of each warm cookie. 🍫💋 ⏱️ 2 minutes
Allow cookies to cool slightly so the chocolate sets but stays soft. ❄️ ⏱️ 10 minutes
Notes
For best results, use creamy peanut butter—not natural—to keep the texture soft and consistent 🥜
Press the chocolate kisses in while the cookies are still hot so they stick perfectly 🍫
Cookies will look slightly underbaked when removed; they firm up as they cool for a tender center ✨
Store in an airtight container at room temperature for up to 5 days, or freeze without kisses for longer storage ❄️
Nutrition
- Serving Size: 24 cookies
- Calories: 120 kcal
Peanut Butter Tips: Creamy vs. Crunchy Debate
Here’s the great debate: Should you use creamy or crunchy peanut butter?
For that classic texture and smooth flavor, creamy peanut butter is the gold standard. It gives you that soft, uniform dough that bakes into a pillowy cookie.
But if you’re feeling adventurous, crunchy peanut butter can add some texture. Just be prepared for a slightly different look and feel. Also, avoid natural peanut butters that separate—they’ll mess with your dough consistency and can lead to oily, flat cookies.
You may like also :
White Chocolate Peanut Marshmallow Clusters – The Easiest, Creamiest No-Bake Holiday Treat!
Caramel Peanut Ritz Cracker Bars Recipe: Sweet, Salty, and Seriously Addictive
Make-Ahead and Freezing Tips
Wanna prep ahead for the holidays? You totally can!
- Make the Dough Ahead:
After mixing the dough, cover it tightly and refrigerate for up to 3 days. Let it sit at room temp for 15 minutes before rolling into balls. - Freezing Unbaked Dough Balls:
Form the balls (don’t roll in sugar yet), freeze them on a tray, and once frozen, store them in a zip-top bag. When you’re ready to bake, let them thaw slightly, roll in sugar, and bake as usual. - Freezing Baked Cookies:
Yes, even baked blossoms freeze great. Just make sure the chocolate is fully set. Store in a single layer or separate layers with wax paper in an airtight container for up to 3 months.
How to Store Your Peanut Butter Blossoms
Freshly baked cookies should be stored in an airtight container at room temperature for up to 5 days.
Pro tip: Add a slice of bread to the container—it keeps them soft longer! The cookies will pull moisture from the bread, leaving the bread dry but your cookies perfectly chewy.
Fun Variations to Try
Want to shake things up while keeping that classic Blossom shape? Try these fun twists:
Dark Chocolate Kiss
Use dark chocolate kisses instead of milk chocolate for a more sophisticated flavor. It balances beautifully with the sweetness of the cookie.
Sprinkled Sugar Coating
Before baking, roll the cookie dough balls in colored sanding sugar—red, green, or gold—for a holiday-themed sparkle!
Gluten-Free Option
Swap all-purpose flour with a gluten-free 1:1 baking blend. Most peanut butters are naturally gluten-free, so you’re almost there already!
You could also try almond butter or sunflower butter for allergy-friendly alternatives.
Serving Suggestions for Maximum Yum
Peanut Butter Blossoms are delicious straight from the cookie tin, but if you want to get fancy, try:
- Serving with hot cocoa or coffee ☕
- Stacking them on a dessert board with fudge, pretzels, and peppermint bark
- Wrapping them in treat bags for holiday gifts
- Pairing with ice cream (warm the cookie slightly, place on a scoop of vanilla—thank us later)
These cookies also make the perfect bake sale or cookie exchange recipe. They’re crowd-pleasers through and through.
Final Thoughts: The Cookie That Feels Like a Hug
There’s something almost magical about Classic Peanut Butter Blossoms. Maybe it’s the way the soft peanut butter cookie pairs so perfectly with that little chocolate kiss. Or maybe it’s the memories they bring—of winter mornings, messy kitchens, and sneaking cookies off the tray before they cool.
No matter when or why you bake them, these cookies have a way of making people smile. They’re simple, nostalgic, and feel like the edible version of a warm hug.
So next time you’re looking to share a little sweetness—whether it’s with family, friends, or just your future self—bake a batch of these, and watch them disappear one by one.
Similar recipes :
Peanut Butter Rice Krispie Treats with M&M’s and Chocolate Chips: A No-Bake Dessert Everyone Will Crave
Peanut Butter Rice Krispie Balls – Your New Favorite No-Bake Treat
FAQs
1. Can I use natural peanut butter in this recipe?
It’s best not to. Natural peanut butter tends to separate and can make the dough too oily or crumbly. Stick to regular creamy peanut butter for the best results.
2. Can I double the recipe for a big batch?
Absolutely! Just be sure to mix thoroughly and work in batches when baking so you don’t overcrowd your cookie sheets.
3. My cookies didn’t crack on top—why?
It could be due to overmixing, old baking soda, or the dough being too cold. Make sure your leavening agents are fresh and don’t overwork the dough.
4. What’s the best way to keep the chocolate kiss from melting?
Allow the cookies to cool undisturbed after pressing the kiss in. Don’t cover or stack them until fully set.
5. Can I use a different chocolate topping?
Sure! You can try mini peanut butter cups, chocolate stars, or even truffles if you’re feeling creative.