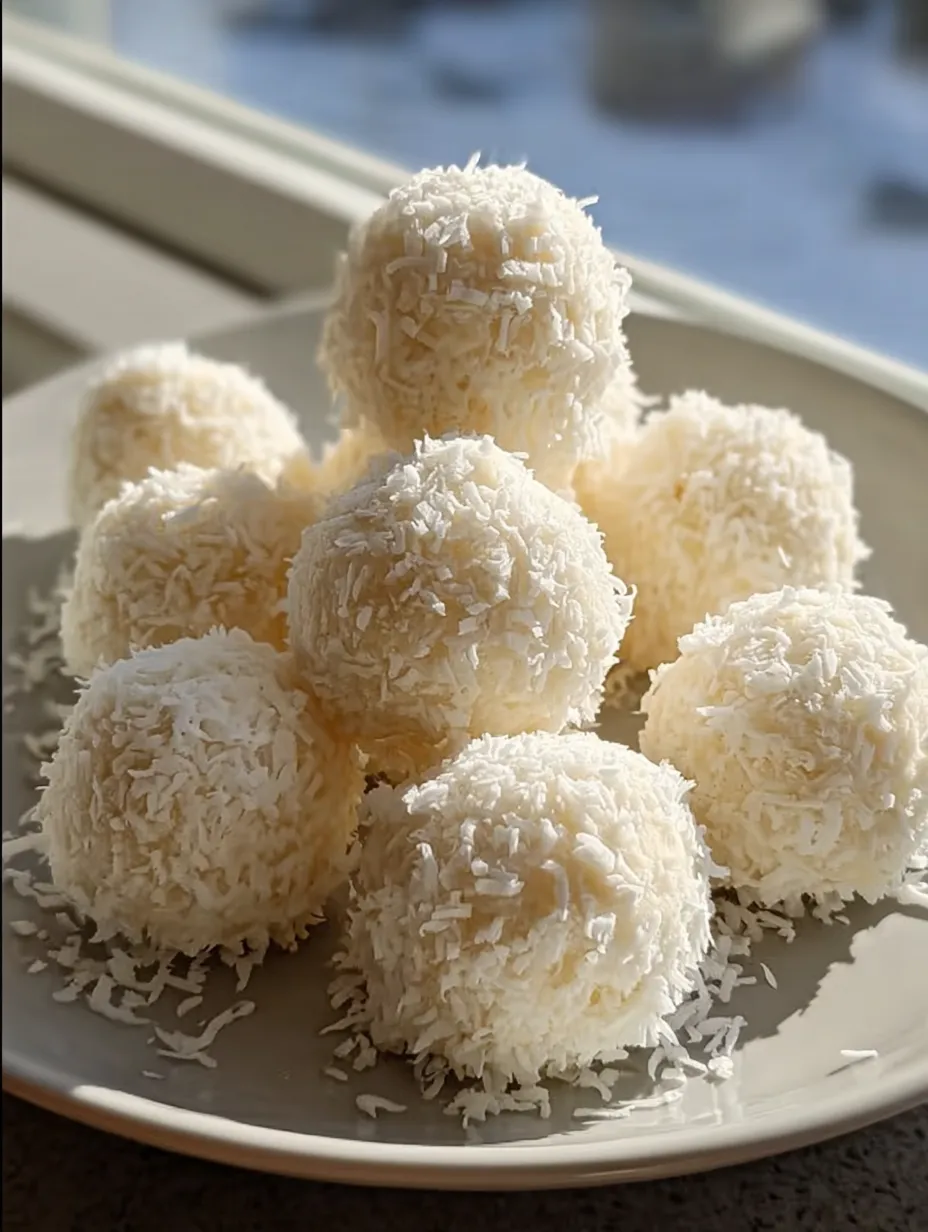
Picture a tray of snowy white treats, delicately dusted in coconut, looking like they were rolled straight out of a winter fairy tale. That’s exactly what these no-bake Cream-Cheese Coconut Snowballs are — a magical dessert that’s as easy to make as it is beautiful to look at. With a soft, creamy inside and a snowy, sweet exterior, they are the perfect holiday (or anytime!) bite-sized indulgence. Whether you’re whipping these up for a party, a cozy family gathering, or just because you’ve got a sweet craving, these little snowballs deliver all the charm and flavor without ever turning on the oven.
Why You’ll Love These Cream-Cheese Coconut Snowballs
Let’s be real — the holidays get busy, and the last thing anyone wants is to fuss over complicated desserts. These snowballs are a dream for so many reasons. First off, they’re no-bake, which means no oven, no sweat, and no stress. Second, they only require a few simple ingredients you probably already have in your kitchen. Third, they look like a million bucks. You’ll impress guests with their elegant appearance, but no one needs to know they only took you 15 minutes to put together.
These coconut snowballs hit the perfect balance: not too sweet, delightfully creamy inside, with a light crunch from the coconut on the outside. They’re the ultimate melt-in-your-mouth kind of treat. And hey, if you’re a coconut lover, you’re about to fall in love!
The Magic of No-Bake Desserts
What’s the secret sauce behind the popularity of no-bake desserts like this one? Time and simplicity. No-bake recipes skip the baking step entirely, which eliminates the guesswork of cook times, oven temperatures, or burnt edges. These desserts often rely on refrigeration to set, which also gives them a unique, chilled texture that’s perfect for cream-based recipes like these snowballs.
Plus, they’re kid-friendly and foolproof. If you’re not a seasoned baker, no problem — this recipe is as beginner-friendly as it gets.
Key Ingredients Overview
Let’s break down the dream team behind these snowy beauties:
Cream Cheese: The Creamy Base
This is where the smooth texture and slight tang come from. Cream cheese makes up the base of the snowball and gives it that rich, creamy bite that balances out the sweetness of the coconut and sugar. Make sure it’s softened to room temperature for easy mixing — no one likes a lumpy snowball!
Shredded Coconut: The Snowy Coating
Coconut is the star of the show here. We’re using sweetened shredded coconut, which not only adds texture and sweetness but also gives these treats their snow-like appearance. It’s what makes these look like they were made in Santa’s kitchen.
Confectioners’ Sugar: Sweetness Simplified
Also known as powdered sugar, this is what sweetens the mixture while keeping it soft and smooth. Unlike granulated sugar, it dissolves easily into the cream cheese, giving you that perfect consistency.
Unsalted Butter: Adds a Velvety Touch
A touch of melted butter helps to blend everything together. It adds depth, a subtle richness, and improves the texture, making the mixture easier to roll into balls.
Vanilla Extract & Salt: Flavor Enhancers
Vanilla rounds out the flavor profile, giving warmth and subtle complexity, while a pinch of salt keeps the sweetness from becoming overwhelming. Don’t skip the salt — it’s the secret ingredient that makes everything taste better.
Tools You’ll Need
You really don’t need much here, which makes this recipe even better:
- Mixing bowl
- Electric hand mixer or spatula
- Measuring cups/spoons
- Small cookie scoop or tablespoon
- Plate or tray (lined with parchment paper)
- Your hands!
How to Choose the Right Cream Cheese
For best results, always go for full-fat cream cheese. Reduced-fat versions can be watery or grainy, which can affect the texture of your snowballs. You want them creamy and rich — like a cheesecake in a bite. Also, don’t use whipped cream cheese in a tub; stick with the brick style.
Let the cream cheese soften at room temperature before you begin. If you’re in a rush, you can microwave it in 10-second intervals until soft, but not melted.
Sweetened vs Unsweetened Coconut – Which Is Best?
For this recipe, sweetened shredded coconut is ideal. It provides a better stick factor when rolling the balls and gives the snowballs that lightly sweet, satisfying chew. Unsweetened coconut tends to be drier and won’t hold together as well or taste quite as indulgent. If you’re aiming for the fluffy white look like in the image, sweetened coconut is the way to go.
Step-by-Step Instructions
Let’s roll (literally)! Here’s how to make these snowy bites of heaven:
Mixing the Cream Cheese Base
Start by placing your softened cream cheese in a large mixing bowl. Using a hand mixer or a sturdy spatula, beat it until it’s totally smooth and creamy — no lumps allowed. This is the base of your snowball, so take your time to make sure it’s velvety.
Combining Sugar, Vanilla, and Butter
Next, add in your confectioners’ sugar and vanilla extract, and continue mixing until it’s all incorporated. You should see a soft, sweet, and fragrant mixture forming. Now pour in the melted butter and a pinch of salt. Mix again until fully blended. The butter adds that extra luscious texture.
Folding in the Coconut
Now for the magic — the coconut! Add about 1 1/2 cups of the shredded coconut (reserving 1/2 cup for coating). Use a spatula or your hands to gently fold it in until the mixture thickens and holds together. It should feel a bit sticky but moldable.
Shaping into Perfect Balls
Grab a small cookie scoop or tablespoon, scoop out the mixture, and gently roll it between your palms into 1-inch balls. This part is actually pretty fun and a great step for kids to help with.
Coating for That Snowball Look
Take each ball and roll it in the reserved shredded coconut, pressing gently so it sticks well. You want these to be fully coated — like mini snow-covered mountains.
Chill and Serve
Place the finished snowballs on a parchment-lined tray, making sure they’re not touching. Pop the tray into the refrigerator for at least 2 hours so they firm up. This chilling time helps the flavors meld and gives the balls a more solid, satisfying texture when bitten into.
Serve cold and store any extras in the fridge in an airtight container.
Visual Appearance: Matching the Photo
If you’re aiming to replicate the exact look of the snowballs in the image provided — soft, fluffy, and snowy white — here’s the trick: use finely shredded sweetened coconut. Coarser coconut can make the balls look spiky or uneven, while fine shreds create that soft, uniform “snowball” texture you see in the photo.
Also, make sure to roll them generously in the coconut after shaping — don’t be shy! Gently press the coconut into the surface to ensure good coverage. The smoother you roll the balls initially, the more polished they’ll look when finished. Placing them on a white or neutral-colored plate also enhances the snowy, elegant vibe of the final presentation.
Tips for Success
Want to take your snowballs from good to totally irresistible? Try these tried-and-true tips:
- Use Soft Cream Cheese: If it’s too cold, it won’t mix properly and you’ll get lumps.
- Lightly Butter Your Hands: If the mixture is sticking to your hands while rolling, a tiny dab of butter or coconut oil will do wonders.
- Let Them Chill Fully: Don’t rush the fridge time. Let them set completely to get that dense, truffle-like texture.
- Use a Cookie Scoop: This ensures evenly sized snowballs and a neater presentation.
These tiny details make a big difference in the final result — especially when you’re serving guests or prepping for the holidays!
Flavor Variations to Try
Feeling adventurous? This base recipe is super flexible, so don’t hesitate to mix things up!
Chocolate-Dipped Snowballs
After chilling, dip the bottoms or drizzle the tops of your snowballs with melted white or dark chocolate. It adds a pop of flavor and an elegant finish.
Almond-Coconut Snowballs
Add a few drops of almond extract to the cream cheese mixture and place a roasted almond in the center of each ball for a nutty surprise!
Lemon-Zest Coconut Balls
Brighten things up with some freshly grated lemon zest added to the mixture. It adds a refreshing citrus note that cuts through the sweetness.
Storage and Shelf Life
These coconut snowballs keep really well — if they don’t disappear first! Store them in an airtight container in the fridge for up to 7 days. For longer storage, you can freeze them for up to 2 months. Just thaw in the fridge overnight before serving.
Make sure to layer them with parchment paper if you’re stacking them, to prevent sticking or crushing.
Serving Suggestions
These little delights aren’t just tasty — they’re gorgeous too. Here’s how to present them like a pro:
- Holiday Platter: Serve them on a white tray with sprigs of rosemary or holly berries for a festive winter look.
- Dessert Gift Box: Pack a dozen snowballs in a pretty tin or bakery box lined with wax paper. Perfect for gifting!
- Party Dessert Table: Stack them like a mini snowball mountain on a tiered cake stand with powdered sugar dusted over top.
NO BAKE – Cream-Cheese Coconut Snowballs Recipe
- Prep Time: 15 minutes
- Cook Time: 0 minutes
- Total Time: 2 hours 15 minutes
- Category: Dessert / Sweet Salad
Description
❄️ These melt-in-your-mouth snowball bites are creamy, coconutty, and unbelievably easy! A festive no-bake treat perfect for holidays, parties, or anytime you need a sweet snowy delight. ⛄💙✨
Ingredients
8 oz cream cheese, softened
1/2 cup confectioners’ sugar
1 tsp vanilla extract
2 cups sweetened shredded coconut (reserve 1/2 cup for rolling)
1/4 cup unsalted butter, melted
1 pinch salt
Instructions
In a large bowl, beat the softened cream cheese until smooth and creamy. 😍
⏱️ Duration: 2 minutesAdd confectioners’ sugar and vanilla extract, mixing until fully combined and silky. ✨
⏱️ Duration: 1 minuteStir in the melted butter and salt until smooth. 🥄
⏱️ Duration: 1 minuteFold in shredded coconut, reserving 1/2 cup for rolling. 🌴
⏱️ Duration: 1–2 minutesShape the mixture into 1-inch balls using your hands or a small scoop. 🤲
⏱️ Duration: 5 minutesRoll each ball in the reserved shredded coconut for a snowy coating. ❄️
⏱️ Duration: 3 minutesPlace on a parchment-lined tray and refrigerate to set.
⏱️ Chill Time: 2 hoursServe chilled and enjoy these soft, dreamy snowballs! ⛄✨
Notes
Light, fluffy, and perfect for potlucks or family gatherings
Kid-friendly and crowd-pleasing
Can be made ahead and chilled for best texture
Nutrition
- Serving Size: 12 servings
- Calories: 150 kcal
Health and Nutrition Info
Each snowball contains approximately 150 calories, depending on the exact portion size. They’re naturally gluten-free and can be made keto-friendly by using unsweetened coconut, monk fruit sweetener, and keto-approved cream cheese.
Here’s a basic nutritional breakdown (per serving):
| Nutrient | Amount |
|---|---|
| Calories | 150 kcal |
| Fat | 12g |
| Carbohydrates | 9g |
| Sugar | 6g |
| Protein | 2g |
While not exactly diet food, these are a much lighter option compared to most baked holiday treats.
Why This Recipe Works for Everyone
This recipe is the unicorn of holiday desserts: simple, elegant, no baking required, and totally adaptable. Whether you’re a seasoned baker or a kitchen newbie, you’ll find this easy and rewarding.
Plus, they’re ideal for:
- Potlucks and office parties
- Last-minute desserts
- DIY edible gifts
- Kid-friendly treats
- Gluten-free guests
They’re fun to make, beautiful to serve, and impossible to resist.
Kid-Friendly Kitchen Fun
Want a fun activity for the kids on a snowy afternoon? Get them involved in rolling and coating the snowballs. It’s messy, yes — but it’s also a blast. Let them get creative with their own coatings: rainbow sprinkles, chocolate chips, or even crushed candy canes.
You can also turn this into a little food art project. Shape the snowballs into snowmen, animals, or even ornaments for extra fun.
Similar recipes :
No-Bake Christmas Coconut Lasagna – A Festive Coconut Cream Holiday Delight
Pineapple Christmas Balls Recipe: A Tropical Holiday Delight with Coconut & Nuts
Common Mistakes to Avoid
Let’s keep those snowballs looking and tasting perfect! Here are a few pitfalls to watch out for:
- Using cold cream cheese: Makes mixing difficult and leads to lumps.
- Adding too much coconut: The mixture will dry out and won’t hold shape.
- Skipping the chill time: You’ll end up with soft, messy snowballs.
- Using unsweetened coconut without adjusting: They’ll lack sweetness and stickiness.
Follow the steps and you’ll have flawless snowballs every time.

Conclusion: A Bite of Bliss in Every Ball
There you have it — a sweet, snowy dessert that’s as easy to make as it is to eat. These No-Bake Cream-Cheese Coconut Snowballs are more than just a recipe — they’re an experience. Soft, dreamy, sweet, and totally holiday-worthy. Whether you’re making a batch to share or hoarding them all for yourself (we won’t judge), these snowballs are bound to be a hit.
Keep this recipe in your back pocket for any time you want to whip up something special without the hassle. It’s cozy, creamy, coconutty goodness in every bite.
You may also like to read :
Coconut Cake
Pineapple Coconut Dream Cake
FAQs
1. Can I make these coconut snowballs ahead of time?
Absolutely! Make them up to 3 days in advance and keep them chilled in the fridge. They actually taste better the next day!
2. Can I freeze these snowballs?
Yes. Freeze them in an airtight container for up to 2 months. Let them thaw in the fridge before serving.
3. Can I use unsweetened coconut instead?
Yes, but the texture and sweetness will be different. You may want to add a bit more sugar to the mix if using unsweetened coconut.
4. What other toppings can I roll them in?
Try cocoa powder, crushed nuts, cookie crumbs, or festive sprinkles for a twist!
5. Are these safe for people with gluten allergies?
Yes! This recipe is naturally gluten-free. Just double-check your cream cheese and coconut packaging to be sure.


