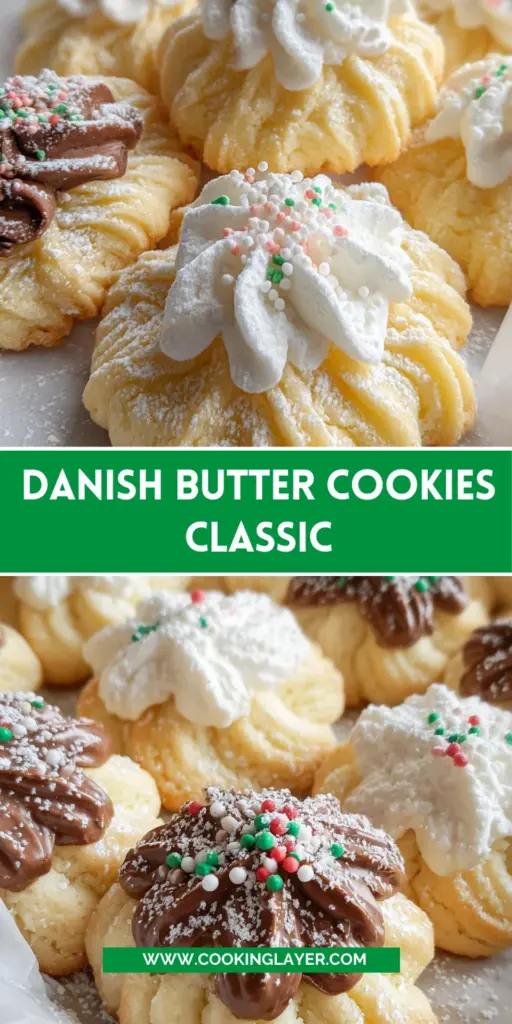
Introduction to Danish Butter Cookies Classic
There’s something truly magical about the aroma of freshly baked cookies wafting through the house. When I think of comfort food, Danish butter cookies classic instantly comes to mind. They’re delightful, melt-in-your-mouth treats that can brighten any day. Whether you’re juggling a busy schedule or planning a special occasion, this quick and simple recipe is a true lifesaver. The best part? You don’t need to be a bakery pro to impress your loved ones with these classic beauties. Let’s embark on this delicious adventure together, shall we?
Why You’ll Love This Danish Butter Cookies Classic
Life can get hectic, but treating your family to homemade treats doesn’t have to be a chore. These Danish butter cookies classic are not only easy to whip up but also incredibly satisfying. In just a little over half an hour, you’ll have a batch of buttery, delightful cookies that everyone will adore. They’re perfect for snacking or sharing at gatherings, leaving a lasting impression without the stress!
Ingredients for Danish Butter Cookies Classic
Gathering the right ingredients is the first step in creating your own Danish butter cookies classic. Let’s take a closer look at what you’ll need:
- Unsalted butter – The star of the show! It gives the cookies their rich flavor and tender texture. Be sure to let it soften at room temperature for easy mixing.
- Powdered sugar – This adds sweetness without the graininess of regular sugar, ensuring a smooth and velvety finish.
- Vanilla extract – A touch of this aromatic extract brightens the flavor, making your cookies taste simply irresistible.
- All-purpose flour – The main structure of your cookies, providing that lovely crumb we all adore.
- Cornstarch – This helps to create a delicate texture. It lightens the cookies, making them melt in your mouth!
- Heavy cream – Optional but useful! If your dough is too stiff, just a teaspoon or two of this can help achieve the perfect piping consistency.
- Chocolate chips or almond bark – These are optional but oh-so-decadent! Dipping your cookies in melted chocolate adds another layer of flavor.
- Candied sprinkles – Also optional, but who doesn’t love a little color? They make your cookies look festive and fun!
You can find the exact quantities for these ingredients at the end of the article, ready for easy printing. Happy baking!
How to Make Danish Butter Cookies Classic
Prepare Your Baking Sheet
Start by lining your baking sheet with parchment paper. This little step is essential! It prevents the cookies from sticking and makes cleanup a breeze. Trust me, nobody wants a cookie tragedy, right? You can also use a silicone baking mat if you have one handy. Either way, a well-prepared baking sheet ensures your delightful Danish butter cookies classic come off easily and maintain their beautiful shape!
Cream the Butter and Sugar
Now it’s time to cream the softened butter and powdered sugar together. In a medium bowl, beat the butter for 2-3 minutes until it’s pale and creamy. You want it to resemble a fluffy cloud! Then, add the powdered sugar and mix for another 2 minutes. The mixture should be light, airy, and just begging to be turned into cookies. This step lays the foundation for your delicious Danish butter cookies classic.
Combine Dry Ingredients
Next, sift together the all-purpose flour and cornstarch in a separate bowl. Gently fold this dry mixture into your butter and sugar blend. It’s important not to over-mix here; just stir until everything is combined. Keep mixing to a minimum to achieve that tender texture we adore in Danish butter cookies classic. Your dough should be soft but not sticky—it should come together beautifully!
Pipe the Cookies
Transfer your lovely dough to a piping bag fitted with a large open star tip. This will help create those charming cookie shapes. If the dough feels too thick when piping, don’t panic! Just mix in 1-2 teaspoons of heavy cream until the consistency is perfect—smooth but firm enough to hold its shape. Pipe onto your prepared baking sheet, leaving space between each cookie for growth.
Chill and Bake
Chill your piped cookies in the refrigerator for 30 minutes. This step is crucial! It helps the cookies maintain their shape during baking. While they chill, preheat your oven to 350°F (175°C). Once ready, bake the cookies for 8-10 minutes until their edges are lightly golden. Keep an eye on the tops; they should stay pale to keep that classic look.
Decorate the Cookies
Once cooled, the fun begins! Melt your chocolate in a microwave-safe bowl, heating in twenty-second intervals and stirring until smooth. If you want to be truly creative, dip your cooled cookies halfway into the melted chocolate. Then, sprinkle with candied sprinkles for an extra touch of flair! Let the chocolate set before serving your beautiful Danish butter cookies classic to friends and loved ones.
Tips for Success
- Always use room-temperature butter for easy creaming.
- Chill your dough for at least 30 minutes to keep shapes intact.
- Don’t over-mix your dough to maintain that melt-in-your-mouth texture.
- If your piping bag feels too stiff, add heavy cream gradually until it’s perfect.
- Experiment with chocolate and sprinkles for a personal touch!
Equipment Needed
- Baking sheet – A regular or non-stick one works, but a silicone baking mat is great too.
- Parchment paper – This is essential for easy cleanup and preventing sticking.
- Piping bag – If you don’t have one, a plastic zip-top bag with a corner cut off can do the trick.
- Mixing bowls – Use medium and large bowls for mixing wet and dry ingredients.
- Electric mixer – A hand mixer is fine, but a stand mixer makes it easier!
Variations
- Citrus Zest: Add a teaspoon of orange or lemon zest to the dough for a refreshing twist on flavor.
- Nutty Delight: Incorporate chopped nuts like almonds or pecans into the dough for a crunchy texture.
- Spiced Cookies: Mix in a pinch of cinnamon or nutmeg for a warm, cozy flavor perfect for the holidays.
- Gluten-Free Option: Substitute all-purpose flour with a 1:1 gluten-free flour blend for a delicious gluten-free version.
- Vegan Adaptation: Replace butter with a vegan alternative like coconut oil and use a plant-based cream for a vegan treat!
Serving Suggestions
- Pair your Danish butter cookies classic with a warm cup of tea or coffee for a cozy afternoon treat.
- Serve on a decorative platter, garnished with fresh fruit or edible flowers for an elegant presentation.
- Consider adding a side of whipped cream or fruit preserves for dip-worthy indulgence!
FAQs about Danish Butter Cookies Classic
Let’s tackle some common questions about making these Danish butter cookies classic. I know that diving into a new recipe sometimes comes with a few uncertainties!
Can I make the dough ahead of time?
Absolutely! You can prepare the dough and refrigerate it for up to 2 days. Just remember to let it sit at room temperature for a few minutes before piping.
Can I freeze the baked cookies?
Yes, these cookies freeze wonderfully! Just store them in an airtight container for up to two months. When you’re ready to enjoy, thaw at room temperature.
What if my dough is too soft?
If your dough becomes too soft to pipe, simply chill it for a short while. This should help firm it up, making it easier to work with for your Danish butter cookies classic.
Can I use different chocolate for dipping?
Certainly! You can use milk chocolate, dark chocolate, or white chocolate, depending on your preference. Each offers a distinct flavor that complements the cookies beautifully.
How long do the cookies stay fresh?
These delicious cookies can be stored in an airtight container for about a week. But trust me, they won’t last that long! Enjoy them while they’re fresh for the best taste.
Final Thoughts
Creating Danish butter cookies classic is not just about whipping up a batch of treats; it’s about sharing joy and love through baking. Each bite transports you to a cozy kitchen filled with laughter and memories. I hope this recipe brightens your days and adds a sprinkle of happiness to your family’s table. So grab your piping bag, let your creativity shine, and enjoy the heartwarming experience of making these classic cookies. Trust me, the smiles on your loved ones’ faces will be the sweetest reward of all!
Print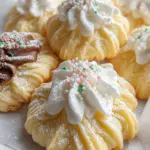
Danish Butter Cookies Classic
- Prep Time: 15 minutes
- Cook Time: 10 minutes
- Total Time: 55 minutes
- Yield: Approximately 30 cookies 1x
- Category: Dessert
- Method: Baking
- Cuisine: Danish
- Diet: Vegetarian
Description
Delicious and classic Danish butter cookies that are easy to make and perfect for any occasion.
Ingredients
- 255 g unsalted butter, softened
- 30 g powdered sugar
- 1 teaspoon vanilla extract
- 160 g all-purpose flour
- 8 g cornstarch
- 1–2 teaspoons heavy cream, as needed
- 170 g dark chocolate chips or chocolate almond bark, melted (optional)
- 170 g white chocolate chips or white almond bark, melted (optional)
- Candied sprinkles (optional)
Instructions
- Line a baking sheet with parchment paper to prevent sticking.
- In a medium bowl, beat softened butter for 2-3 minutes until pale and creamy. Add powdered sugar and continue mixing for another 2 minutes until light and fluffy. Incorporate vanilla extract and mix thoroughly.
- Add all-purpose flour and cornstarch to the butter mixture. Mix just until the flour is incorporated and a soft dough forms.
- Transfer dough to a piping bag fitted with a large open star tip. Test the consistency; if the dough is too stiff, return to bowl and mix in 1–2 teaspoons heavy cream to achieve proper piping texture. Pipe desired shapes onto the prepared baking sheet.
- Chill piped cookies in the refrigerator for 30 minutes. Meanwhile, preheat the oven to 175°C (350°F).
- Bake cookies for 8–10 minutes until edges are lightly golden. Avoid browning the tops to preserve classic appearance. Allow cookies to cool completely on a rack.
- If desired, melt chocolate or almond bark in a microwave-safe bowl, heating in 20-second intervals and stirring until smooth. Avoid overheating to prevent seizing.
- Dip cooled cookies halfway in melted chocolate, then place on parchment-lined tray. Decorate with candied sprinkles before chocolate sets. Let set until firm before serving.
Notes
- Ensure the butter is properly softened for easy mixing.
- Chilling the piped cookies helps maintain their shape during baking.
- Experiment with different chocolate or sprinkles for decoration.
Nutrition
- Serving Size: 1 cookie
- Calories: 100
- Sugar: 5g
- Sodium: 10mg
- Fat: 6g
- Saturated Fat: 4g
- Unsaturated Fat: 2g
- Trans Fat: 0g
- Carbohydrates: 10g
- Fiber: 0g
- Protein: 1g
- Cholesterol: 15mg