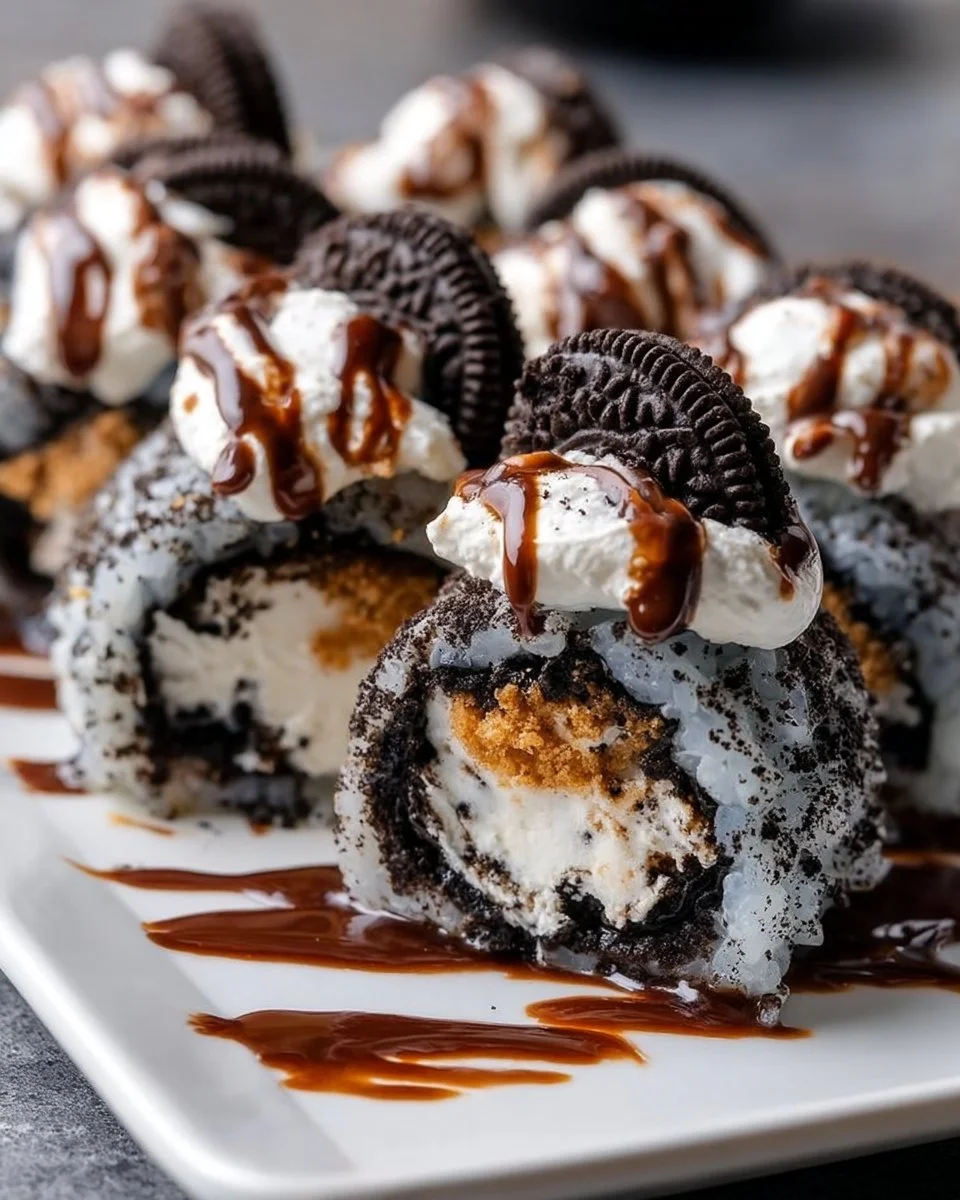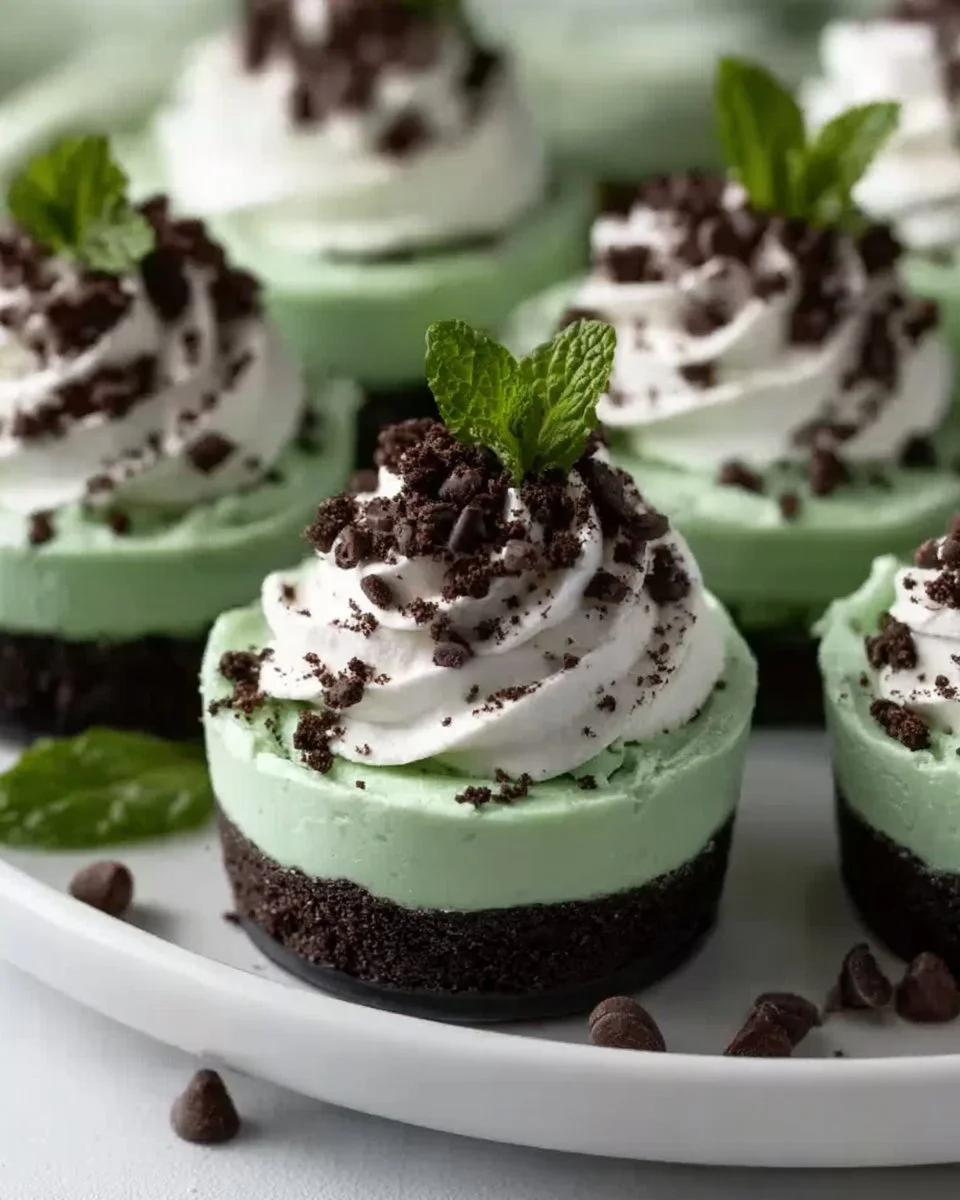
The first bite of these mint cheesecake cups greets you with a crisp cocoa crunch, followed by a cool, silky rush of minty cream that melts across your tongue. Bright from a whisper of peppermint and flecked with tiny chocolate chips, each spoonful feels celebratory—perfect for St. Patrick’s Day or any moment you want a little festive indulgence. I love how the crushed Oreo base snaps and settles beneath the airy cheesecake, creating a contrast that makes you pause, smile, and dig in for another bite.
These little cups come together in minutes, yet they look like something from a bakery window lined with green sprinkles. If you enjoyed the texture and charm of other cheesecake cookie cups, you’ll find a familiar comfort here—see my take on a strawberry swirl version for inspiration: Strawberry Swirl Cheesecake Cookie Cups recipe. The mint version swaps jammy sweetness for a refreshing, garden-fresh coolness that pairs beautifully with chocolate, and it delivers big flavor without fuss.
Why You’ll Love These Deliciously Simple St Paddy’s Mint Cheesecake Cups
You’ll love these cheesecake cups because they balance simplicity and decadence effortlessly. A buttery Oreo crust gives a deep cocoa note and satisfying texture, while the whipped cream and cream cheese filling create a cloudlike richness that’s never too heavy. A hint of peppermint brightens the whole dessert, making it feel both nostalgic and refreshingly modern.
These cups shine at parties. They arrive pre-portioned, look impossibly cute, and require no slicing—perfect for potlucks, holiday gatherings, or an intimate dinner for two. They also adapt easily: skip the green food coloring for a more natural look, add mini chocolate chips for a pleasant crunch, or swap peppermint for spearmint or white chocolate extract to change the mood.
Preparation Phase & Tools to Use
Good tools make this recipe faster and more consistent. Here’s what matters and why:
- Mixing bowls: Use a large bowl for the crust and a separate bowl for the filling to avoid overworking the cream cheese. A chilled bowl keeps whipped cream at its best.
- Electric mixer or stand mixer: You achieve the silkiest, lump-free cream cheese filling with an electric hand mixer or stand mixer. Whipping by hand works, but it takes extra time and elbow grease.
- Food processor or heavy zip-top bag and rolling pin: A food processor crushes Oreo cookies to a fine, even crumb. If you don’t have one, seal the cookies in a bag and smash them with a rolling pin—firm, controlled pressure prevents big chunks and uneven texture.
- Measuring cups and spoons: Accurate measurements keep the sweetness balanced; powdered sugar especially affects texture.
- Dessert cups, ramekins, or muffin tin liners: Individual cups make presentation effortless. Clear cups show the layers and add charm.
- Rubber spatula: Scrape the bowl clean and fold ingredients gently to preserve whipped cream volume. Practical prep tips:
- Soften cream cheese to room temperature for 30–60 minutes so it blends smoothly.
- Chill the mixing bowl and beaters for the whipped cream to speed whipping and improve volume.
- Measure ingredients ahead in small bowls (mise en place) so assembly flows quickly.
Ingredients for Deliciously Simple St Paddy’s Mint Cheesecake Cups
20 cookies Oreo Cookies (crushed), 4 tablespoons Butter (melted), 8 ounces Cream Cheese (softened), 1 cup Powdered Sugar (adjust based on taste), 1 cup Heavy Cream (whipped), 1 teaspoon Peppermint Extract (adjust quantity to preference), 1 teaspoon Vanilla Extract (or almond extract), few drops Green Food Coloring (optional), 1 cup Mini Chocolate Chips (optional)
Key ingredient notes and substitutions:
- Oreo Cookies: The classic flavor adds chocolate and crunch; use chocolate wafer cookies or gluten-free sandwich cookies if needed.
- Butter: Melted butter binds the crust. For a dairy-free option, use vegan butter or coconut oil (crust may be slightly firmer).
- Cream Cheese: Full-fat yields the creamiest texture. Neufchâtel lightens calories but softens structure slightly.
- Powdered Sugar: Dissolves smoothly into the filling. Swap with a smaller amount of granulated sugar if you prefer less sweetness, but blend thoroughly to avoid graininess.
- Heavy Cream: Whipped to soft peaks, it lightens the filling. If you want a lighter version, fold in cool whipped topping, but texture will differ slightly.
- Peppermint Extract: Powerful and concentrated; start with 1 teaspoon and taste, then add a few drops if you want a brighter mint note. Alternatively, use 1–2 teaspoons of crème de menthe for a boozy twist.
- Vanilla or Almond Extract: Rounds the flavor and balances the peppermint; almond adds a subtle, nutty warmth.
- Green Food Coloring: Purely decorative—omit for natural color or use a few drops of spinach juice for natural tinting (small quantity).
- Mini Chocolate Chips: Add texture and chocolate flecks; use chopped dark chocolate for a richer mouthfeel or white chocolate chips for contrast.
How to Make Deliciously Simple St Paddy’s Mint Cheesecake Cups
Prepare the Cheesecake Cups
- Crush the Oreos: Place 20 Oreo cookies into a food processor and pulse until you have fine crumbs. If you don’t have a food processor, seal cookies in a sturdy zip-top bag and crush them with a rolling pin until evenly ground. (Tip: reserve a tablespoon of crumbs for garnish.)
- Make the crust: Pour the cookie crumbs into a bowl and stir in 4 tablespoons melted butter until the mixture holds together when pressed. The butter binds the crumbs and gives the crust that pleasing, sandy texture.
- Press into cups: Spoon about 1–2 tablespoons of the crust mixture into each serving cup or ramekin. Press firmly with the back of a spoon or the bottom of a small glass to create an even layer. Chill the cups in the refrigerator for 10–15 minutes to set the crust.
- Soften and beat the cream cheese: In a clean bowl, beat 8 ounces softened cream cheese with an electric mixer until smooth and creamy, about 1–2 minutes. Scrape the bowl with a rubber spatula to ensure no lumps remain.
- Sweeten and flavor: Add 1 cup powdered sugar, 1 teaspoon peppermint extract, and 1 teaspoon vanilla or almond extract to the cream cheese. Beat again on low speed until combined, then increase speed briefly until silky. Taste and add a few more drops of peppermint if you prefer a stronger mint flavor.
- Whip the cream: In a chilled bowl, whip 1 cup heavy cream to soft peaks. It should hold shape but still fold smoothly.
- Fold gently: Fold the whipped cream into the cream cheese mixture in two additions, using a spatula to keep as much air as possible. If you want green color, add a few drops of green food coloring at this stage and fold until evenly tinted.
- Add mix-ins: If using, stir in up to 1 cup mini chocolate chips, or sprinkle them into the cups after filling for a decorative top.
- Assemble the cups: Spoon or pipe the cheesecake filling over the chilled crusts, filling each cup nearly to the top. Smooth the surface or leave a textured swirl for a homemade look.
- Chill to set: Refrigerate the filled cups for at least 2 hours, ideally 4 hours or overnight, so the filling firms and flavors meld. For a quicker treat, place them in the freezer for 30–45 minutes, but don’t forget them—freezing too long alters texture.
- Garnish and serve: Right before serving, sprinkle reserved cookie crumbs, extra mini chips, a small mint leaf, or a dusting of cocoa for contrast.
Small tips embedded in steps:
- When pressing the crust, compact firmly but avoid squeezing too much or the crust becomes dense.
- Taste the filling before folding in whipped cream; flavors mellow when chilled, so slightly stronger seasoning works well.
Chef’s Notes & Helpful Tips
Make-ahead tips:
- Assemble the cups up to 24 hours in advance and keep refrigerated. They actually taste more cohesive the next day once flavors have settled.
- For longer storage, unassembled crusts freeze well; store crumbs in an airtight container and assemble when ready.
Cooking alternatives:
- No oven required for these cups—everything sets in the fridge or freezer.
- If you want to bake a sturdier crust, press the crumbs into a tart pan and bake at 350°F (175°C) for 8–10 minutes; then cool before filling.
- An air fryer isn’t needed here, but you can crisp individual pre-pressed tart shells for 3–4 minutes at 320°F if you prefer a warm crust contrast—cool completely before adding filling.
Customization ideas:
- Swap peppermint extract for mint chocolate extract, or add 1 tablespoon of finely chopped Andes mints.
- Layer in jam or chocolate ganache for a decadent surprise.
- Make vegan: use dairy-free cream cheese, coconut cream whipped until firm, and vegan biscuits for the crust.
- Turn them into parfaits by adding crushed peppermint candies or a drizzle of hot fudge between layers.
Common Mistakes to Avoid
- Using cold cream cheese: Cold cream cheese lumps and yields a grainy filling. Always bring it to room temperature before mixing.
- Over-whipping the cream: If you whip heavy cream to stiff peaks, it becomes prone to curdling when folded into the cream cheese. Aim for soft peaks.
- Adding too much peppermint: Peppermint extract concentrates quickly; add cautiously and taste. Too much masks the cheesecake’s delicate sweetness.
- Skipping chilling time: The filling needs time to set. Serving too soon results in a runny texture that won’t hold presentation.
- Overpacking or underpacking the crust: Pressing too hard yields a dense base; not pressing enough makes the cups crumble when you scoop. Aim for firm, even pressure.
What to Serve With Deliciously Simple St Paddy’s Mint Cheesecake Cups
- Fresh berries (strawberries, raspberries): Their bright acidity contrasts the sweet, creamy mint.
- Espresso or dark coffee: The roast cuts through sweetness and enhances chocolate notes.
- Irish cream liqueur: Matches the holiday vibe; add a splash to coffee or serve on the side for an adult pairing.
- Crushed peppermint candies: Add crunch and extra festive flair when sprinkled on top.
- Shortbread cookies: Buttery and mild, they provide a neutral vehicle for enjoying the mousse-like filling.
- Vanilla bean ice cream: Serve a small scoop for a cool, complementary dairy pairing.
- Hot chocolate with a dash of sea salt: For a cozy, chocolate-forward experience that echoes the Oreo crust.
- Sparkling water with lime: A palate-cleansing, non-alcoholic counterpoint between bites.
Storage & Reheating Instructions
Fridge:
- Store assembled cups in the refrigerator covered with plastic wrap or in an airtight container for up to 4 days. The texture remains creamy and pleasant for several days. Freezer:
- To freeze, place assembled cups on a tray until firm, then wrap individually in plastic and store in a freezer-safe container for up to 1 month. Thaw in the refrigerator overnight before serving. Reheating:
- These are best served chilled. If you prefer a slightly softer filling, allow cups to sit at room temperature for 10–15 minutes before serving—avoid heat, which breaks the emulsion and makes the filling separate.
Estimated Nutrition Information
Approximate per serving (based on 8 servings): Calories 380–450, Fat 26–30 g, Saturated Fat 15–18 g, Carbohydrates 34–40 g, Sugar 24–30 g, Protein 4–6 g, Sodium 150–220 mg.
Nutrition varies with ingredient brands, portion sizes, and optional add-ins. Use this as a rough guide only.
FAQs
Q: Can I make this recipe sugar-free?
A: Yes — substitute powdered sugar with a powdered erythritol blend designed for baking (such as Swerve Confectioners). Taste as you go because sweetness perception changes when chilled. Keep in mind that some sugar substitutes affect texture; powdered blends tend to mimic powdered sugar best.
Q: How can I get a smoother filling if I don’t have a mixer?
A: Warm the cream cheese longer at room temperature and beat vigorously with a sturdy whisk or fork. Sift powdered sugar to remove lumps before adding. Whip the cream separately with a chilled whisk and fold carefully. It takes more effort, but patience yields a surprisingly smooth result.
Q: My filling tastes weak after chilling. How do I prevent this?
A: Flavors often mellow when cold. Build flavor slightly stronger than you think is necessary before chilling—especially extracts. Also, ensure your extracts are fresh; stale extracts lose potency.
Q: Can I use reduced-fat cream cheese and still get a good texture?
A: Reduced-fat cream cheese works, but the filling will be less rich and may feel slightly less creamy. Whipping a bit more heavy cream into the mixture can compensate, but don’t overdo it or the structure will soften.
Q: How many cups does this recipe make and how should I portion them?
A: This recipe makes roughly 8 medium-sized cheesecake cups depending on how much crust and filling you use. For smaller portions, aim for 12 mini cups by using less crust (about 1 tablespoon) and less filling per cup. Adjust chilling time slightly for smaller sizes.
Q: Can I layer these in a jar for gifting?
A: Absolutely. Use airtight mason jars and layer crust, filling, and toppings. Keep refrigerated and label with a “consume within 3 days” note. For freezing gifts, wrap jars tightly and include thawing instructions.
Conclusion
These Deliciously Simple St Paddy’s Mint Cheesecake Cups offer the ideal blend of crunchy chocolate, cloudlike creaminess, and a refreshing mint finish—an easy showstopper for holiday tables or casual evenings when you want something special. They look gorgeous, require no baking, and invite creative variations that suit every taste and dietary need. If you’re planning a St. Patrick’s Day spread or want new dessert ideas, explore this curated list of festive options for more inspiration: 30 Delicious St. Patrick’s Day Desserts You NEED to Make. Give these cups a try—you’ll find they disappear faster than you expect.
Print
Deliciously Simple St Paddy’s Mint Cheesecake Cups
- Prep Time: 15 minutes
- Cook Time: 0 minutes
- Total Time: 120 minutes
- Yield: 8 servings 1x
- Category: Dessert
- Method: No Bake
- Cuisine: American
- Diet: Vegetarian
Description
Mint cheesecake cups with a crisp cocoa crunch, filled with silky mint cream and topped with chocolate chips.
Ingredients
- 20 Oreo Cookies (crushed)
- 4 tablespoons Butter (melted)
- 8 ounces Cream Cheese (softened)
- 1 cup Powdered Sugar (adjust based on taste)
- 1 cup Heavy Cream (whipped)
- 1 teaspoon Peppermint Extract (adjust quantity to preference)
- 1 teaspoon Vanilla Extract (or almond extract)
- few drops Green Food Coloring (optional)
- 1 cup Mini Chocolate Chips (optional)
Instructions
- Crush the Oreos: Place 20 Oreo cookies into a food processor and pulse until you have fine crumbs.
- Make the crust: Pour the cookie crumbs into a bowl and stir in 4 tablespoons melted butter until it holds together.
- Press into cups: Spoon about 1–2 tablespoons of the crust mixture into each cup and press firmly.
- Chill the cups in the refrigerator for 10–15 minutes to set the crust.
- Soften and beat the cream cheese: In a clean bowl, beat 8 ounces softened cream cheese until smooth, about 1–2 minutes.
- Sweeten and flavor: Add powdered sugar, peppermint extract, and vanilla extract to the cream cheese, and beat until silky.
- Whip the cream: In a chilled bowl, whip 1 cup heavy cream to soft peaks.
- Fold gently: Fold the whipped cream into the cream cheese mixture, adding food coloring if desired.
- Add mix-ins: Stir in mini chocolate chips or sprinkle them on top for decor.
- Assemble the cups: Spoon or pipe the cheesecake filling over the chilled crusts.
- Chill to set: Refrigerate the cups for at least 2 hours before serving.
- Garnish and serve: Right before serving, sprinkle with reserved cookie crumbs or chocolate chips.
Notes
Make-ahead tips and customization ideas included. Suitable for various dietary preferences.
Nutrition
- Serving Size: 1 cup
- Calories: 400
- Sugar: 25g
- Sodium: 180mg
- Fat: 28g
- Saturated Fat: 16g
- Unsaturated Fat: 8g
- Trans Fat: 0g
- Carbohydrates: 35g
- Fiber: 1g
- Protein: 5g
- Cholesterol: 60mg