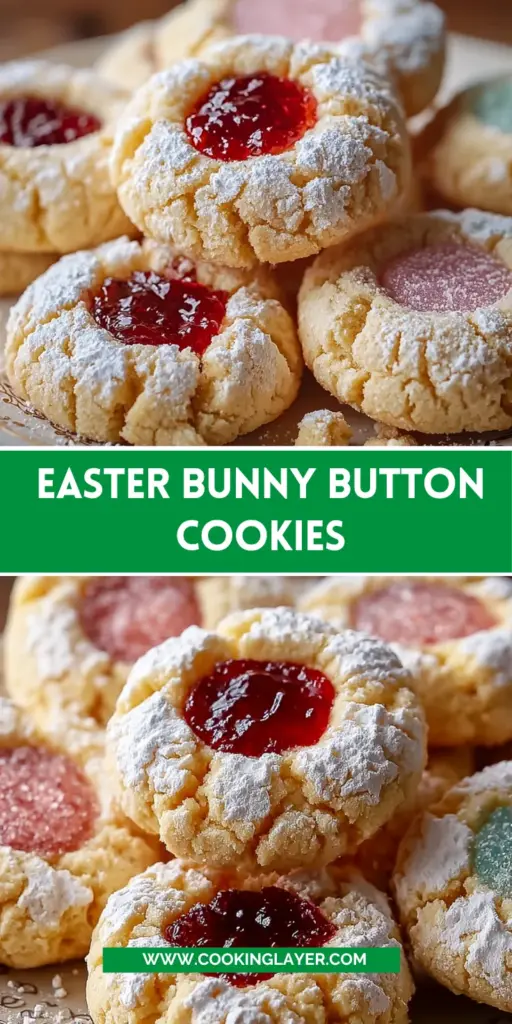
What Are Easter Bunny Button Cookies?
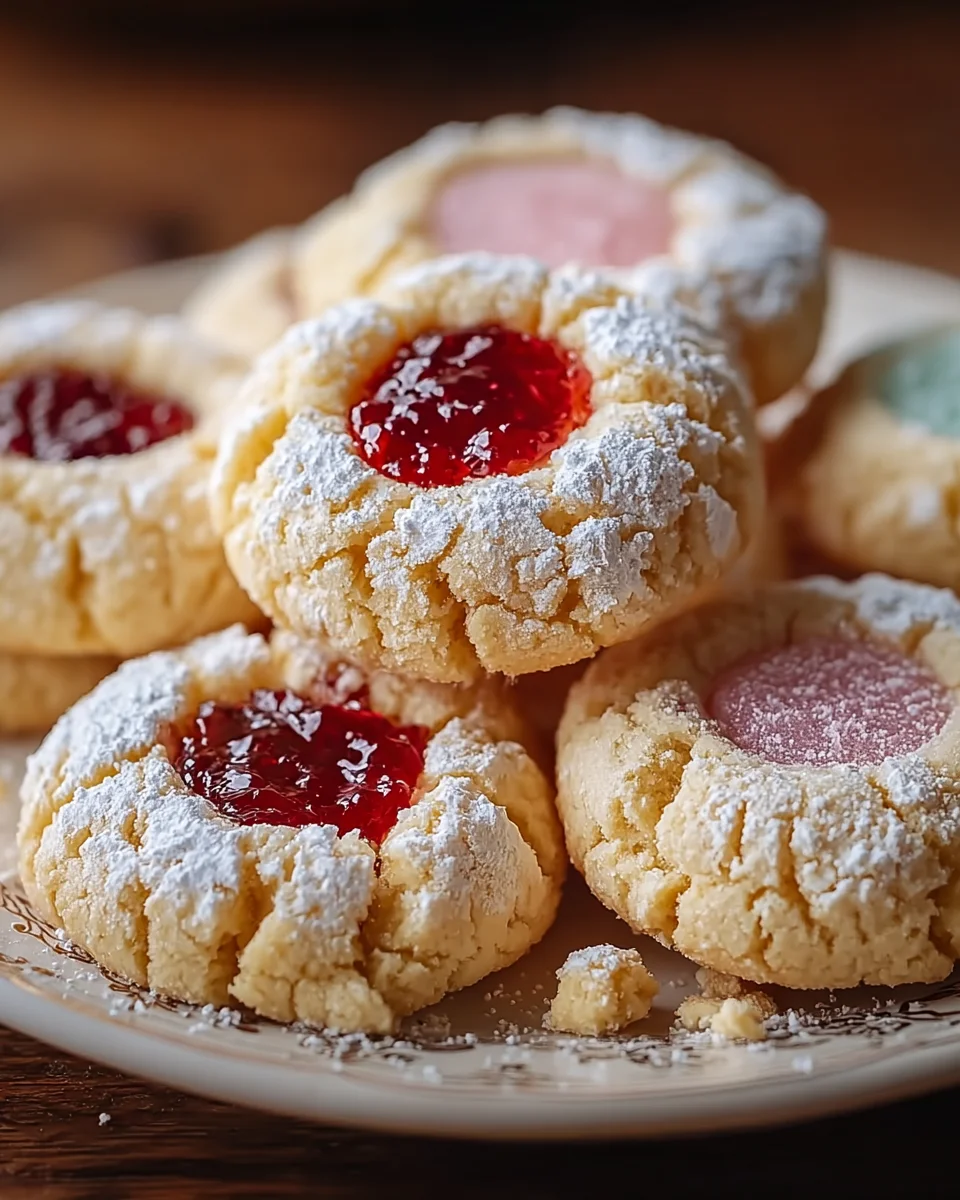
Easter Bunny Button Cookies are one of those desserts that instantly bring a sense of fun and warmth to your kitchen. Small, round, and filled with colorful jam centers, they look like tiny edible buttons—hence the name. But around Easter, they take on an even more charming identity, often associated with pastel colors, playful presentations, and that cozy, homemade feel that defines holiday baking.
At their core, these cookies are a variation of classic thumbprint cookies, known for their buttery base and soft, melt-in-your-mouth texture. The addition of pastel jams transforms them into something festive and eye-catching, making them perfect for Easter gatherings, dessert tables, or even as edible gifts.
What makes them especially appealing is their simplicity. You don’t need complicated techniques or fancy equipment. It’s just a matter of mixing, shaping, and filling—yet the end result looks thoughtful and decorative. It’s the kind of recipe that feels both nostalgic and creative at the same time.
And let’s not ignore the texture. The cookie itself is soft and slightly crumbly, almost like shortbread, while the jam center adds a sweet, slightly tangy contrast. Every bite gives you that balance of buttery richness and fruity brightness.
These cookies aren’t just treats—they’re little bites of spring.
The Inspiration Behind Button Cookies
Button cookies have been around for quite a while, often appearing in European baking traditions as simple, jam-filled treats. The idea is straightforward: create a soft dough, press a small indentation, and fill it with something sweet. But over time, bakers started playing with colors, shapes, and fillings, turning a simple cookie into something more decorative.
The “button” look comes from the small, round shape and the centered filling, which resembles the holes or design of a button. It’s a subtle detail, but it adds personality.
For Easter, this concept fits perfectly. The pastel colors of jam mimic dyed Easter eggs, and the small size makes them ideal for sharing or displaying in baskets.
Why They’re Perfect for Easter
Easter desserts tend to lean toward light, colorful, and playful—and these cookies check all those boxes. The soft pastel jams (like strawberry, raspberry, or apricot) create a palette that feels right at home alongside Easter eggs and spring decorations.
They’re also incredibly versatile. You can make them ahead of time, package them as gifts, or serve them as part of a dessert spread. Kids especially love them—not just for the taste, but for the fun of helping shape and fill them.
And because they’re bite-sized, they’re easy to enjoy without feeling too heavy. After a big Easter meal, that’s exactly what you want.
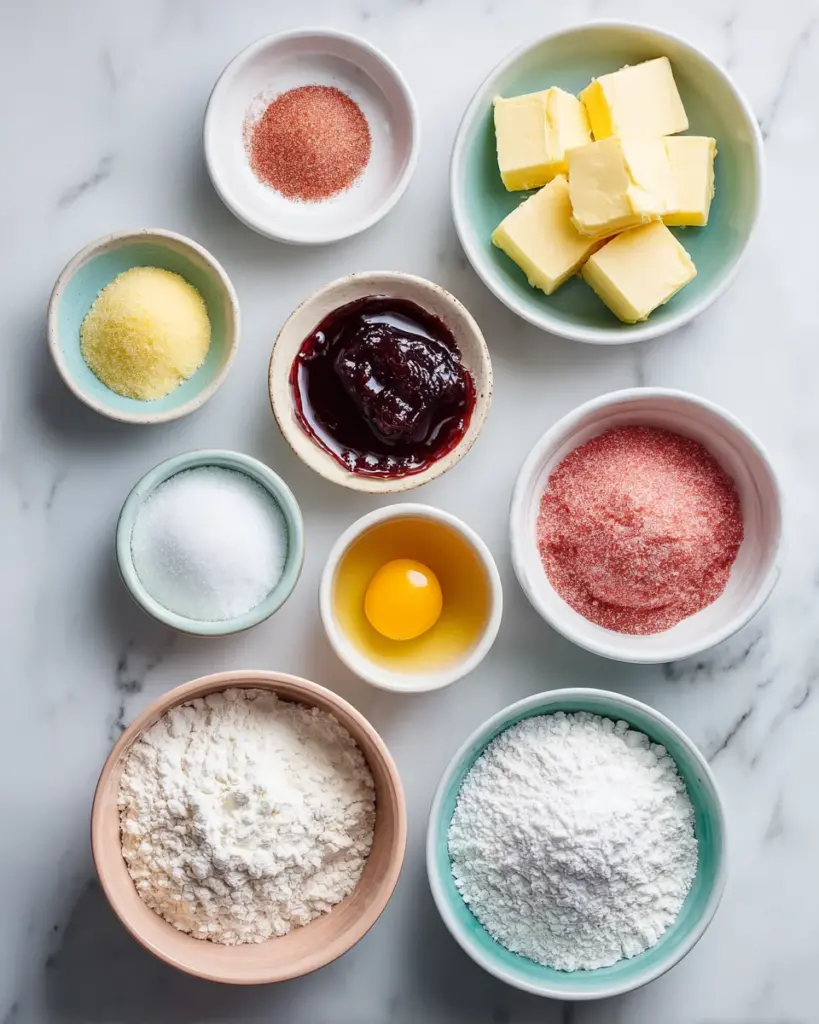
Ingredients for Easter Bunny Button Cookies
Creating these delightful Easter Bunny Button Cookies requires some simple yet essential ingredients that come together to create a buttery masterpiece. Here’s what you’ll need:
- Unsalted butter: This is the star that gives the cookies their rich, melt-in-your-mouth texture. Make sure it’s softened for easy mixing!
- Powdered sugar: Sweet and fine, this sugar lends a lovely sweetness and helps achieve that fluffy dough. You can use granulated sugar if that’s all you have; just blend it until fine.
- Vanilla extract: A splash of this fragrant extract adds warmth and depth to the cookies, making each bite feel extra special.
- All-purpose flour: The base of our dough. It gives structure to these soft cookies, ensuring they hold their shape during baking.
- Salt: Just a pinch enhances the flavors, balancing the sweetness nicely.
- Pastel-colored jam: This sweet filling comes in flavors like strawberry, raspberry, or apricot. Choose your favorite for a fun, colorful surprise!
- Powdered sugar for dusting: Optional, but this finishing touch adds a picture-perfect sweetness and a whimsical presentation.
You’ll find the precise measurements for these ingredients towards the bottom of the article, making it easy to print and use while baking! So gather your ingredients and get ready to create some cookie magic!
How to Make Easter Bunny Button Cookies
Step 1: Preheat the Oven
Before diving into the mixing bowl, preheat your oven to 350°F (175°C). This step is crucial as it ensures that your Easter Bunny Button Cookies bake evenly. While the oven heats up, line a baking sheet with parchment paper. This will prevent sticking and give your cookies a lovely golden bottom. I recommend using parchment paper over greasing for easier cleanup and a perfect bake!
Step 2: Cream the Butter and Sugar
In a large mixing bowl, start by creaming your softened butter and powdered sugar together. Use an electric mixer for a smooth blend, beating the mixture until it’s light and fluffy. This process incorporates air, giving your cookies that wonderful texture. Aim for about 3 minutes until the color lightens and it feels like a fluffy cloud. Trust me, it makes a difference when baking these delightful treats!
Step 3: Add Vanilla Extract
Now it’s time to bring in the magic of flavor! Add that fragrant vanilla extract to your creamed mixture. This simple step enhances the sweetness and infuses your cookies with a lovely aroma. Mix it in well until combined, ensuring every bite of your Easter Bunny Button Cookies shares that warm, comforting taste.
Step 4: Combine Flour and Salt
Next, gradually add in the all-purpose flour and a pinch of salt. This is where you create the structure of your cookies. Mix just until the dough starts to come together; be careful not to overmix. Overworking the dough can lead to tougher cookies. We want them soft and buttery, just like a hug from a loved one. The ultimate goal is to keep it gentle and tender!
Step 5: Form the Cookie Dough
Once your dough is ready, it’s time for some fun! Roll the dough into 1-inch balls and space them about 2 inches apart on the baking sheet. Give each cookie room to spread, because those soft centers need a little space to fluff up while baking. Plus, this spacing helps keep everyone happy by ensuring no cookie is lost in the crowd!
Step 6: Create Indentations
With your dough balls placed, use your thumb—or the back of a spoon—to press a gentle indentation into the center of each cookie. The indentation should be deep enough to hold a dollop of jam, but not so deep that it breaks through the bottom. It’s like making a little nest for your colorful jam to shine in each cookie!
Step 7: Add Pastel-Colored Jam
Now comes the highlight—adding the pastel-colored jam! Use a teaspoon to carefully spoon a small amount of jam into each indentation. Choose your favorite flavor to make these cookies truly pop. This bit of jam not only provides a delightful burst of flavor but also gives your cookies a cheerful, festive touch that perfectly symbolizes the joy of Easter!
Step 8: Bake the Cookies
With everything in place, it’s time to pop those cookies in the oven! Bake them for about 12 to 14 minutes, or until the edges turn lightly golden brown. Keep an eye on your cookies toward the end, as every oven is a little different. The aroma will fill your kitchen, and you’ll know they’re getting close!
Step 9: Cool and Dust with Powdered Sugar
Once baked, let your cookies cool completely on the baking sheet. After they’ve cooled down, feel free to sprinkle them with a dusting of powdered sugar for that extra touch of sweetness. Trust me, this final touch brings these Easter Bunny Button Cookies to life, making them festive and simply irresistible!
Tips for Success
- Always use softened butter for a smooth, well-blended dough.
- For perfectly round cookies, ensure even dough ball sizes when rolling.
- Experiment with different jam flavors to suit your family’s taste.
- Don’t skip chilling the dough for 10-15 minutes if it’s too soft—it helps cookies hold their shape.
- Use a toothpick to test the cookies if unsure about doneness—shouldn’t be wet!
Equipment Needed
- Baking sheet: A standard one works well; a silicone baking mat is a great alternative.
- Mixing bowl: A large bowl for combining ingredients is essential.
- Electric mixer: You can also use a whisk if you’re feeling extra strong!
- Measuring cups and spoons: Necessary for precision in baking.
- Parchment paper: This keeps cookies from sticking; foil can work in a pinch.
Variations for Easter Bunny Button Cookies
- Nutty Twist: Add finely chopped nuts like walnuts or almonds to the dough for a delightful crunch.
- Gluten-Free Option: Substitute all-purpose flour with a gluten-free flour blend, ensuring the texture remains soft and tasty.
- Chocolate Lovers: Replace some of the flour with cocoa powder for a delicious chocolate version, and try chocolate jam for a fun twist!
- Citrus Zing: Add the zest of lemon or orange to the dough for a bright, fresh flavor that complements the jams beautifully.
- Sugar Alternatives: Use coconut sugar or a sugar substitute for a healthier option without sacrificing sweetness.
Serving Suggestions
- Pair these Easter Bunny Button Cookies with a chilled glass of milk for a nostalgic treat.
- Serve alongside a fresh fruit salad for a colorful and refreshing contrast.
- Add a cute, decorative platter to elevate the festive presentation.
- For a special touch, set up a cookie decorating station for family fun!
FAQs about Easter Bunny Button Cookies
Can I use different flavors of jam for the Easter Bunny Button Cookies?
Absolutely! Feel free to experiment with various flavors of pastel-colored jam. Strawberry, raspberry, and apricot are popular choices, but you can use your favorites to create unique combinations!
How can I store leftover Easter Bunny Button Cookies?
Store your cookies in an airtight container at room temperature. They’ll stay fresh for several days—if they even last that long!
Can I freeze the dough for later use?
Yes! You can freeze the cookie dough before baking. Just roll it into balls, place them on a baking sheet to freeze for a bit, then transfer to a freezer bag. When you’re ready, simply bake from frozen—just add a couple of extra minutes to the baking time.
What can I substitute for unsalted butter?
If you’re out of unsalted butter, use salted butter; just be cautious with adding extra salt. Alternatively, coconut oil or margarine can substitute, although they may slightly alter the taste and texture.
Are these Easter Bunny Button Cookies suitable for children to help make?
Definitely! These cookies are easy and fun to make, making them a fantastic project for kids. From rolling dough to adding jam, it’s a perfect way to spend quality time together while baking up some joy!
Final Thoughts
Baking these Easter Bunny Button Cookies brings a delightful blend of nostalgia and joy to any kitchen. It’s a simple way to create lasting memories with loved ones, especially when the fragrance of soft, buttery cookies wafts through your home. Each colorful jam-filled bite captures the essence of spring and the spirit of togetherness. Whether you’re celebrating Easter or simply indulging on a sunny afternoon, these cookies remind us that sweet moments are meant to be shared. So, gather your loved ones, roll up your sleeves, and let the joy of baking fill your hearts and home!
Print
Easter Bunny Button Cookies: Delightful and Easy Recipe
- Prep Time: 20 minutes
- Cook Time: 14 minutes
- Total Time: 34 minutes
- Yield: 24 cookies 1x
- Category: Dessert
- Method: Baking
- Cuisine: American
- Diet: Vegetarian
Description
These delightful Easter Bunny Button Cookies are soft, buttery treats filled with pastel-colored jam, perfect for celebrating the holiday season.
Ingredients
- 1 cup unsalted butter, softened
- 3/4 cup powdered sugar
- 1 teaspoon vanilla extract
- 2 cups all-purpose flour
- 1/4 teaspoon salt
- 1/2 cup pastel-colored jam (strawberry, raspberry, or apricot)
- 1/4 cup powdered sugar for dusting (optional)
Instructions
- Preheat the oven to 350°F (175°C) and line a baking sheet with parchment paper.
- Cream the butter and sugar by beating the softened butter and powdered sugar together until the mixture is light and fluffy.
- Add vanilla extract and mix until well combined.
- Gradually add the flour and salt, mixing until a soft dough forms without overmixing.
- Roll the dough into 1-inch balls and place them on the prepared baking sheet about 2 inches apart.
- Press an indentation into the center of each cookie using your thumb or the back of a spoon.
- Spoon a small amount of pastel-colored jam into each indentation.
- Bake the cookies for 12–14 minutes, or until the edges are lightly golden.
- Allow the cookies to cool completely, then dust with powdered sugar if desired.
Notes
- Ensure that the jam is pastel-colored for a festive appearance.
- These cookies can be stored in an airtight container for several days.
Nutrition
- Serving Size: 1 cookie
- Calories: 110
- Sugar: 6g
- Sodium: 50mg
- Fat: 6g
- Saturated Fat: 4g
- Unsaturated Fat: 2g
- Trans Fat: 0g
- Carbohydrates: 14g
- Fiber: 0g
- Protein: 1g
- Cholesterol: 30mg