What Makes These Easter Cookies So Special?
There’s something about Easter desserts that just feels different. Maybe it’s the soft pastel colors, maybe it’s the lighter, more playful vibe of spring—but whatever it is, these Easter Chocolate Chip Cookies capture that feeling perfectly. They take a classic, universally loved cookie and give it a bright, cheerful twist that instantly makes them stand out.
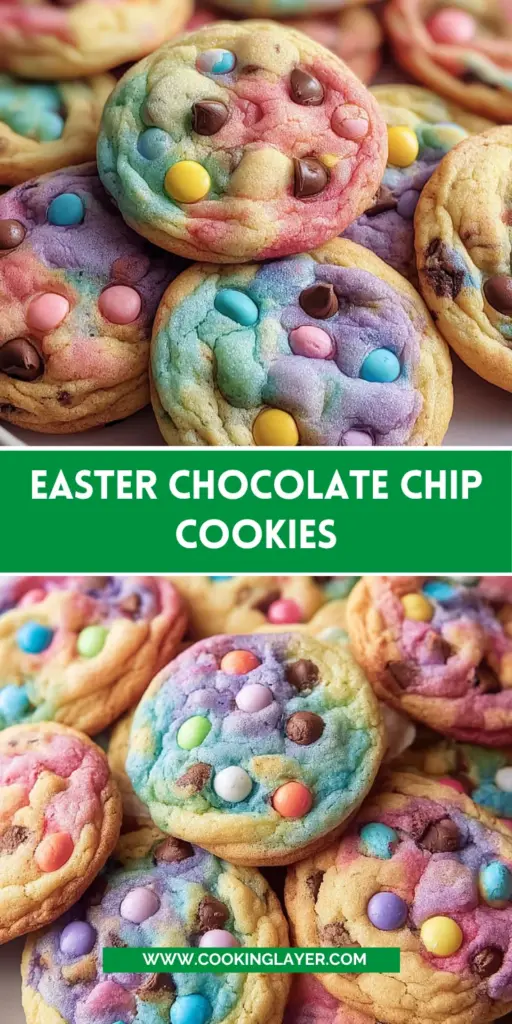
At first glance, these cookies almost look too pretty to eat. The swirls of pink, blue, yellow, and purple create a marbled effect that feels more like art than baking. But here’s the thing—these cookies aren’t just about looks. Underneath that colorful exterior is a perfectly balanced chocolate chip cookie: soft in the center, slightly crisp at the edges, and packed with rich, melty chocolate.
What really makes these cookies special is the experience of making them. It’s not just mixing ingredients and baking—it’s hands-on, creative, and honestly a little therapeutic. Dividing the dough, coloring each portion, and gently pressing them together feels more like crafting than cooking. And because each cookie is shaped by hand, no two turn out exactly the same. That unpredictability? That’s part of the charm.
There’s also a nostalgic element to it. Chocolate chip cookies are something almost everyone grew up with. By adding color and creativity, you’re not replacing that comfort—you’re enhancing it. It’s familiar, but with a fresh, seasonal twist.
These cookies are perfect for Easter gatherings, school events, or just a fun weekend baking session. They’re simple enough for beginners but creative enough to feel exciting.
The Joy of Pastel Swirl Cookies
Pastel colors have a way of instantly changing the mood of a dessert. They make things feel lighter, softer, and more playful. When you incorporate them into cookie dough, something interesting happens—you’re no longer just baking, you’re designing.
The swirl effect is what really brings these cookies to life. Instead of fully mixing the colors, you gently combine them so they stay distinct. When baked, those colors soften slightly and blend just enough to create a marbled pattern.
It’s a balance—you want the colors to interact, but not disappear into each other. That’s what makes each cookie look unique.
Why Classic Chocolate Chip Never Fails
At the end of the day, no matter how creative the design is, flavor still matters most. And that’s where the classic chocolate chip base comes in.
It’s reliable, comforting, and universally loved. The buttery dough, the sweetness from the sugars, and the richness of the chocolate create a combination that’s hard to beat.
By building on that foundation, you’re guaranteed a cookie that not only looks amazing—but tastes just as good.
Ingredients Breakdown
Great cookies don’t happen by accident. Each ingredient plays a specific role, and understanding that role is what helps you consistently get the best results.
The Science Behind the Perfect Cookie Dough
Let’s start with the basics. Flour provides structure—it’s what holds everything together. Too much flour, and your cookies become dry. Too little, and they spread too much.
Baking soda acts as a leavening agent. It helps the cookies rise slightly and creates that soft interior.
Salt might seem minor, but it’s essential. It enhances the sweetness and balances the flavors, making everything taste more complete.
Butter is where richness comes from. When creamed with sugar, it creates tiny air pockets that help the cookies bake evenly. This step is crucial—skip it or rush it, and your cookies won’t have the right texture.
Then you’ve got two types of sugar: granulated and brown. Granulated sugar helps with crispness, while brown sugar adds moisture and chewiness. The combination is what gives you that perfect soft-center, slightly crisp-edge texture.
Eggs bind everything together and add richness, while vanilla extract enhances all the flavors.
The Role of Food Coloring and Texture
Gel food coloring is key here. Unlike liquid coloring, it doesn’t thin out the dough. This means your cookie texture stays exactly how it should be.
When you divide the dough and color each portion, you’re essentially creating separate “flavors” visually—even though they taste the same. The trick is to mix the color evenly within each portion, but not mix the portions together too much afterward.
That’s how you get those clean, vibrant swirls.
Choosing the Right Chocolate Chips
Chocolate chips might seem straightforward, but they can actually change the overall experience of the cookie.
Semi-sweet chips are the classic choice—they balance sweetness with a slight bitterness. Milk chocolate is sweeter and creamier, while dark chocolate adds intensity.
You can even mix different types for a more complex flavor.
Step-by-Step Instructions
Mixing the Dough Properly
Start by whisking your dry ingredients together. This ensures everything is evenly distributed before mixing.
In another bowl, cream the butter and sugars until light and fluffy. This step takes a few minutes, but it’s worth it—it creates the base texture of your cookies.
Add eggs one at a time, then mix in vanilla. Gradually add the dry ingredients and mix just until combined.
Coloring and Dividing the Dough
Divide the dough into four equal parts. Add a different pastel color to each and mix until evenly colored.
Take your time here—you want smooth, consistent color.
Creating the Perfect Swirl Effect
This is where things get fun. Take small portions from each colored dough and gently press them together.
Roll into a ball, then slightly flatten. Don’t overwork it—the less you mix, the better the swirl.
Baking for Soft Centers and Crisp Edges
Bake at 350°F (175°C) until the edges are lightly golden but the centers still look soft.
They’ll continue cooking slightly after you take them out, so don’t overbake.
Pro Tips for Perfect Results
Texture Control Techniques
Chill the dough for 30 minutes if you want thicker cookies. This prevents spreading and enhances flavor.
Maintaining Vibrant Colors
Avoid overmixing after combining colors. That’s the fastest way to lose the swirl effect.
Creative Variations to Try
Stuffed Easter Cookies
Add a chocolate egg or marshmallow inside for a surprise center.
Candy-Filled Spring Cookies
Mix in pastel candies for extra crunch and color.
Storage and Serving Suggestions
Store in an airtight container for up to 4 days. For longer storage, freeze the dough or baked cookies.
Serve slightly warm for the best texture.
Conclusion
Easter Chocolate Chip Cookies are more than just a dessert—they’re a fun, creative way to celebrate the season. They combine everything you love about classic cookies with a colorful twist that makes them truly unforgettable.
FAQs
1. Can I make these ahead of time?
Yes, the dough can be refrigerated or frozen.
2. Why are my cookies flat?
Butter may be too soft or dough not chilled.
3. Can I skip food coloring?
Yes, but you’ll lose the Easter look.
4. How do I keep them soft?
Store with bread in the container.
5. Can I use white chocolate?
Absolutely—it adds a sweeter twist.
Print
Easter Chocolate Chip Cookies
Description
These Easter Chocolate Chip Cookies are soft, chewy, and bursting with fun pastel colors! A classic cookie recipe with a festive twist, perfect for Easter parties, kids, or just adding a little spring magic to your baking. 🌸💛
Ingredients
- 2 ½ cups all-purpose flour
- 1 teaspoon baking soda
- ½ teaspoon salt
- 1 cup unsalted butter, softened
- ¾ cup granulated sugar
- ¾ cup brown sugar, packed
- 2 large eggs
- 2 teaspoons vanilla extract
- Gel food coloring (pink, purple, yellow, blue)
- 2 cups chocolate chips
Instructions
1. Prep the Oven
- Preheat oven to 350°F (175°C).
- Line a baking sheet with parchment paper.
2. Mix Dry Ingredients
- In a bowl, whisk together flour, baking soda, and salt. Set aside.
3. Cream Butter & Sugar
- In another bowl, beat butter, granulated sugar, and brown sugar until light and fluffy.
4. Add Eggs & Vanilla
- Add eggs one at a time, mixing well after each.
- Stir in vanilla extract.
5. Combine
- Gradually mix dry ingredients into the wet mixture until just combined.
6. Color the Dough 🎨
- Divide dough into 4 equal parts.
- Add different pastel food coloring to each portion and mix.
7. Shape Cookies
- Take small pieces of each color and gently press together into a ball.
- Place on baking sheet and slightly flatten.
- Sprinkle chocolate chips on top.
8. Bake
- Bake for 10–12 minutes until edges are lightly golden.
9. Cool & Serve 🍪
- Let cookies cool on the tray for 5 minutes.
- Transfer to a wire rack to cool completely.