Introduction to Easter Jell-O Pie
What Is Easter Jell-O Pie?
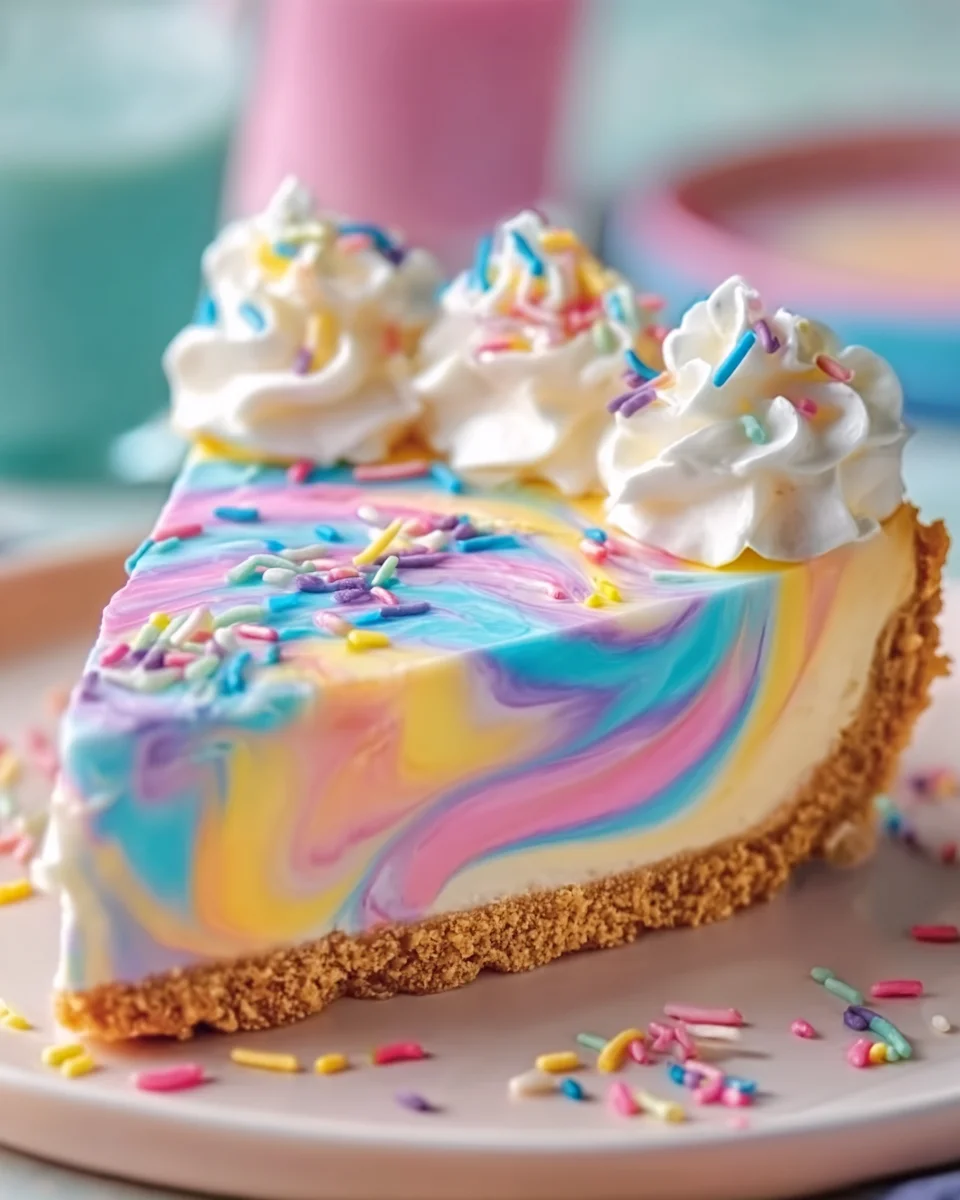
Easter Jell-O Pie is one of those desserts that instantly brings a smile before you even take a bite. With its bright pastel layers, creamy texture, and refreshing fruity flavors, it’s practically springtime served on a plate. If you’ve ever wanted a dessert that looks impressive but doesn’t require hours in the kitchen, this is it. No baking, no complicated techniques—just simple steps that come together into something visually stunning and delicious.
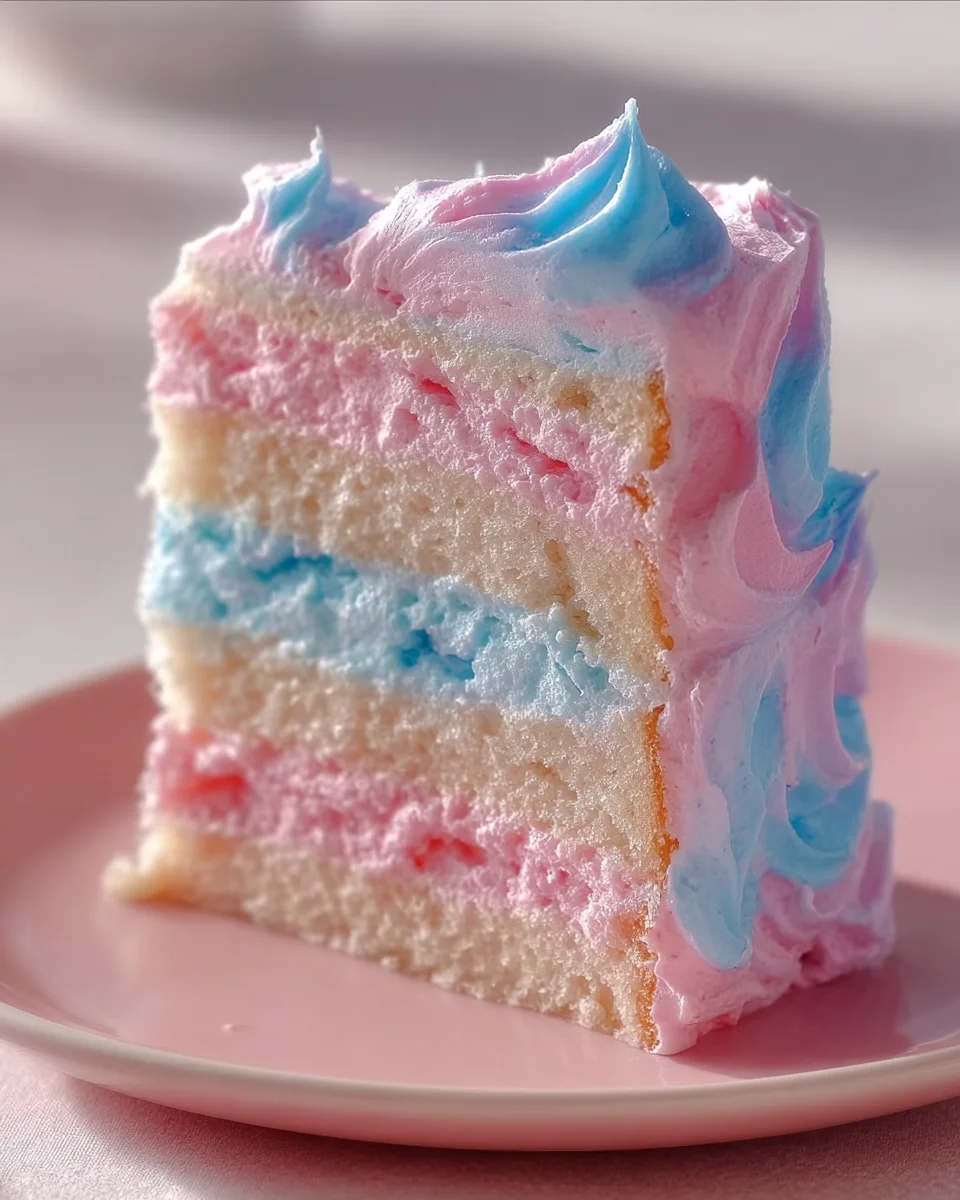
At its core, this pie is a layered gelatin dessert made with flavored Jell-O, blended with cream cheese and whipped topping to create a light, mousse-like consistency. Each layer is carefully set before adding the next, resulting in a beautiful striped effect when sliced. The graham cracker crust adds a buttery crunch that perfectly balances the creamy filling, making every bite a mix of textures and flavors.
What makes this pie especially popular during Easter is its color palette. Think soft yellows, pastel blues, and gentle purples—colors that mirror Easter eggs, spring flowers, and sunny skies. It’s not just dessert; it’s part of the holiday table décor.
And here’s the best part: you don’t need to be an experienced baker to pull this off. Whether you’re making it with family, friends, or on your own, Easter Jell-O Pie is approachable, fun, and incredibly rewarding.
Why You’ll Love This Easter Jell-O Pie
This Easter Jell-O Pie is a game changer for dessert! It comes together quickly, making it ideal for busy days when time is short. Plus, the layers of vibrant colors and flavors will enchant your guests and family alike.
It’s the perfect sweet addition to your spring celebrations, and with an effortless preparation, you’ll find more time to relax and enjoy those precious moments with your loved ones. Trust me; this pie will quickly become a favorite!
Ingredients for Easter Jell-O Pie
Let’s gather our vibrant ingredients! You’ll need a pre-made graham cracker crust, which offers a crunchy foundation for our colorful layers. For the show-stopping colors and flavors, grab a box each of lemon, grape, and berry blue Jell-O.
You’ll also want boiling water to dissolve the Jell-O, along with cold water to help the layers set beautifully. Now, no Jell-O pie is complete without that creamy texture, so pick up some softened cream cheese and fluffy whipped topping.
- 1 pre-made graham cracker crust
- 1 (3 oz) box lemon Jell-O
- 1 (3 oz) box grape Jell-O
- 1 (3 oz) box berry blue Jell-O
- 3 cups boiling water (1 cup per Jell-O flavor)
- 3 cups cold water (1 cup per Jell-O flavor)
- 8 oz cream cheese, softened
- 1 ½ cups whipped topping
- Whipped cream, pastel sprinkles, and candy eggs for decoration
Looking to add some flair? Consider using pastel sprinkles or candy eggs for decoration; they make lovely additions that bring a festive touch!
If you’re feeling adventurous, swap in your favorite Jell-O flavors or make a homemade crust to suit dietary needs. Specific quantities for each ingredient can be found at the bottom of this article, making it super easy to print out and take along!

How to Make Easter Jell-O Pie
Creating this Easter Jell-O Pie is not only fun but also a delightful way to spend a little quality time in the kitchen. Follow these easy steps, and soon you’ll have a stunning dessert that friends and family will love!
Prepare the Lemon Layer
Let’s dive right into the first layer! Start by boiling one cup of water. Once it’s bubbling away, pour it over the lemon Jell-O in a mixing bowl. Stir until the Jell-O completely dissolves—it should be bright and inviting!
Next, add one cup of cold water to cool it down a bit. Here’s where the magic begins! Take about one-third of your softened cream cheese, blending it into the warm Jell-O mixture. Make sure there are no lumps; a smooth consistency is key.
Now, gently fold in half a cup of whipped topping. This adds a lightness that’s simply irresistible. Carefully pour this luscious lemon layer into your graham cracker crust. Be patient and let it chill in the fridge for about 30 minutes until it’s set. This initial layer forms a bright foundational taste that prepares the palate for what’s to come!
Prepare the Blue Layer
Once your lemon layer is nice and firm, it’s time to create the vibrant blue layer. Boil another cup of water and stir in the berry blue Jell-O until it’s fully dissolved. Just like the lemon layer, add in a cup of cold water afterward to cool it down.
Once cooled, take the other third of your cream cheese and blend it into the berry blue mixture until silky smooth. You can choose to fold in a bit more whipped topping, making it even fluffier! Gently spoon this blue magic on top of your already set lemon layer.
Refrigerate this layer for another 30 minutes. The key is to layer these colors slowly; you’ll want them to be distinct but perfectly aligned. This process is almost like painting a canvas—taking care to avoid any drips!
Prepare the Grape Layer
Now onto the last layer, the grape. Heat another cup of water and dissolve the grape Jell-O into this once it’s boiling. Again, add in a cup of cold water to bring the temperature down.
After that, mix in the remaining portion of cream cheese for a lovely creaminess. If you enjoy a more whipped texture, feel free to add a bit more whipped topping here too. With the mixture ready, carefully pour it over the blue layer. Don’t rush this step; slowly drizzle helps maintain the layers without mixing.
Chill the entire pie in your refrigerator for at least four hours. This long waiting time ensures your pie sets beautifully and all the flavors meld together perfectly! A little patience goes a long way!
Final Touches and Refrigeration
With your pie now fully chilled and set, it’s time to add those festive final touches! Generously dollop whipped cream across the top, creating a fluffy cloud of delight.
For that Easter charm, sprinkle pastel-colored sprinkles across the surface like confetti. And of course, no Easter Jell-O Pie is complete without those adorable candy eggs! Arrange them on top to bring a cheerful vibe.
Make sure to keep your pie refrigerated until you’re ready to serve it. This delightful treat is not just a feast for the eyes; each slice delivers layers of flavor that invite everyone to indulge! Enjoy this colorful creation with family and friends for a celebration that feels effortless and festive!
Tips for Success
- Always use boiling water to dissolve Jell-O for the best flavor and texture.
- Gently pour layers using a spoon to prevent mixing.
- Feel free to fold in extra whipped topping for a fluffier texture.
- Allow each layer to chill sufficiently before adding the next.
- Keep the pie decorated and refrigerated until serving for optimal freshness.
Equipment Needed
- Mixing bowls – any size will do, or you can use a large pot.
- Whisk or electric mixer – for smooth mixing; a fork works too!
- Measuring cups – essential for accuracy.
- Spatula – a must for gentle folding and serving.
- Refrigerator – to set your masterpiece.
Variations
- Experiment with different flavors of Jell-O, like orange or strawberry, for a unique twist.
- Try using a gluten-free graham cracker crust to cater to gluten-sensitive friends.
- Add fresh fruit slices between layers for a refreshing touch.
- Swap whipped topping for a dairy-free option if needed.
Serving Suggestions
- Pair your Easter Jell-O Pie with a refreshing glass of lemonade or iced tea for a perfect spring vibe.
- Serve alongside fresh fruit salad to bring even more vibrancy to your dessert table.
- Consider a light whipped cream topping for added indulgence or mint leaves for a burst of freshness!
FAQs about Easter Jell-O Pie
How long can I store Easter Jell-O Pie?
You can store this delightful dessert in the refrigerator for up to five days. Just cover it with plastic wrap to keep it fresh!
Can I make Easter Jell-O Pie ahead of time?
Absolutely! In fact, making it a day ahead helps the flavors meld beautifully. Just ensure it’s well refrigerated until you’re ready to serve.
Is there a way to make this pie lower in calories?
Yes, you can use sugar-free Jell-O and low-fat cream cheese to lighten it up. It still retains all the festive flavor!
What if I don’t have a graham cracker crust?
No worries! You can use any pre-made crust you like, or even a homemade cookie crust for a fun twist!
Can I use fresh fruit in the layers?
Sure! Incorporating thin slices of fresh fruit adds an exciting twist and more color to your Easter Jell-O Pie.
Final Thoughts
As I whip up this Easter Jell-O Pie, I can’t help but feel the love and joy it brings to my family gatherings. Each vibrant layer tells a story, sparking laughter and delight around the table. This colorful dessert is more than just a treat; it’s a way to create lasting memories with loved ones, celebrating the beauty of spring together.
I hope this recipe adds a touch of fun to your celebrations. So grab your ingredients, get the family involved, and enjoy sharing this delightful creation—all while cherishing those special moments that make life so sweet!
Print
Easter Jell-O Pie
- Prep Time: 15 minutes
- Total Time: 4 hours 45 minutes
- Yield: 8 slices 1x
- Category: Dessert
- Method: Refrigeration
- Cuisine: American
- Diet: Vegetarian
Description
Easter Jell-O Pie is a colorful and delicious dessert that features layers of flavored gelatin and cream cheese, all nestled in a graham cracker crust. It’s perfect for spring celebrations and will impress your friends and family!
Ingredients
- 1 pre-made graham cracker crust
- 1 (3 oz) box lemon Jell-O
- 1 (3 oz) box grape Jell-O
- 1 (3 oz) box berry blue Jell-O
- 3 cups boiling water (1 cup per Jell-O flavor)
- 3 cups cold water (1 cup per Jell-O flavor)
- 8 oz cream cheese, softened
- 1 ½ cups whipped topping
- Whipped cream, pastel sprinkles, and candy eggs for decoration
Instructions
- Prepare the lemon layer: Dissolve lemon Jell-O in 1 cup boiling water, then add 1 cup cold water. Let it cool slightly, then mix in ⅓ of the cream cheese and ½ cup whipped topping. Pour into the graham cracker crust and refrigerate for 30 minutes.
- Prepare the blue layer: Repeat the process with berry blue Jell-O, layering it gently over the set lemon layer. Refrigerate for another 30 minutes.
- Prepare the grape layer: Repeat the process with grape Jell-O, pouring it on top of the blue layer. Chill for at least 4 hours or until fully set.
- Decorate with whipped cream, pastel sprinkles, and candy eggs before serving.
Notes
- Use a spoon to gently pour each layer to prevent mixing.
- For a lighter texture, fold extra whipped topping into each layer.
Nutrition
- Serving Size: 1 slice
- Calories: 250