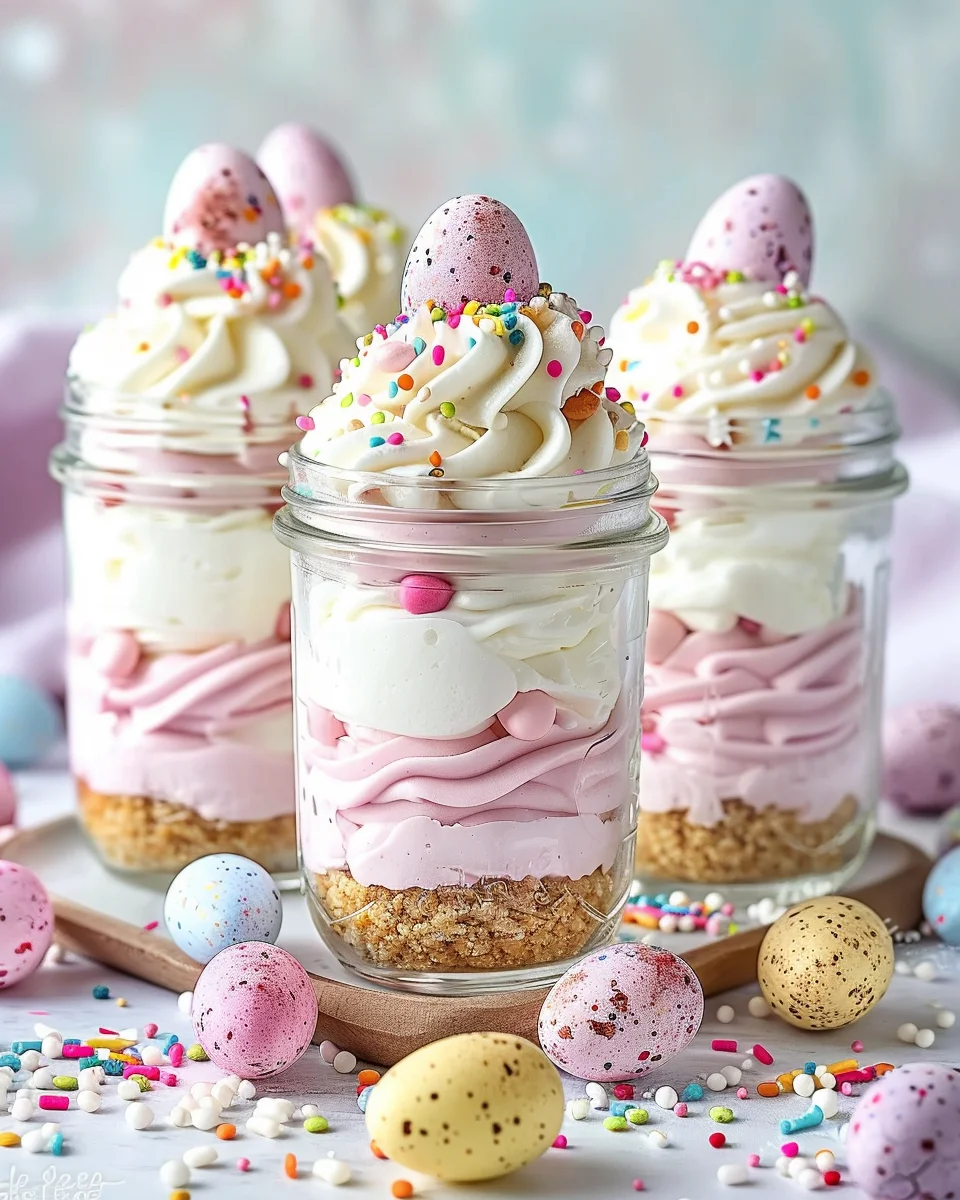
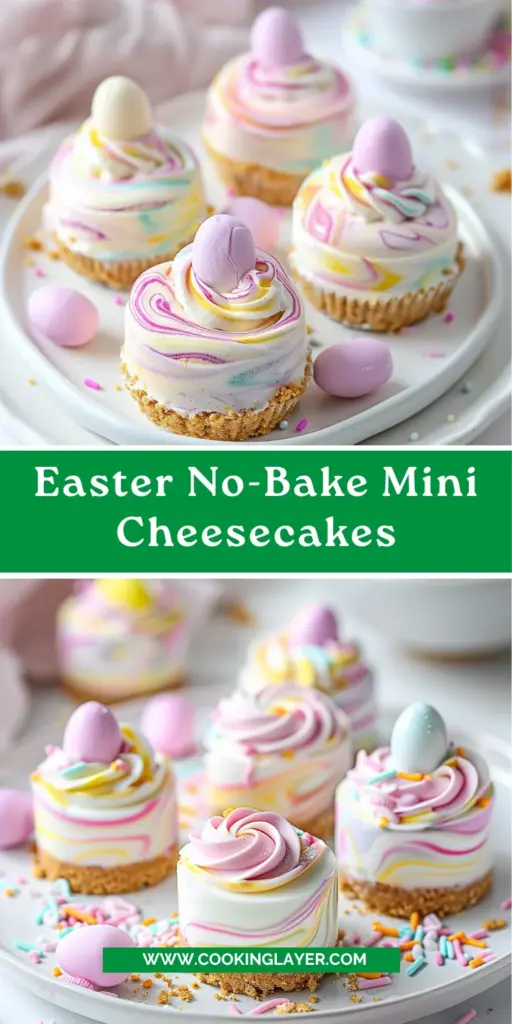
Introduction to Easter No-Bake Mini Cheesecakes
As the days grow warmer and flowers start to bloom, I can’t help but get excited about Easter. This season brings joy, family gatherings, and perhaps a bit of magical chaos in the kitchen! That’s where my Easter No-Bake Mini Cheesecakes come in. These delightful treats are perfect for busy moms and professionals like us, who want to impress loved ones without spending hours slaving over the stove. They’re quick, easy, and a guaranteed crowd-pleaser. So grab your mixing bowl, and let’s dive into this colorful world of mini cheesecakes that scream spring!
Why You’ll Love This Easter No-Bake Mini Cheesecakes
These Easter No-Bake Mini Cheesecakes are a dream come true for busy kitchens. They require no baking, which means you can skip the oven juggling act on a hectic day. Plus, they’re quick to whip up—perfect for those last-minute dessert decisions. The creamy filling and crisp graham cracker crust make for a heavenly combination, ensuring that every bite tastes like springtime magic. Trust me, everyone will love them!
Ingredients for Easter No-Bake Mini Cheesecakes
Gathering ingredients for my Easter No-Bake Mini Cheesecakes feels like collecting treasures from the kitchen. Each one adds a unique touch, making the final product irresistible. Here’s what you’ll need:
- Graham cracker crumbs: The crunchy base for your cheesecakes. Feel free to use store-bought crumbs or crush your own graham crackers.
- Granulated sugar: This adds just the right sweetness to the crust. You can swap it for coconut sugar if you’re looking for a healthier option.
- Unsalted butter: It brings everything together, creating a rich and smooth crust. Use melted coconut oil for a dairy-free alternative.
- Cream cheese: This creates the luscious filling that makes these cheesecakes so delightful. For a lighter version, consider using low-fat cream cheese.
- Powdered sugar: This sweetener gives the filling that dreamy smoothness. It’s perfect for balancing flavors without the graininess of granulated sugar.
- Vanilla extract: A splash of this adds warmth and depth to your filling. Opt for pure vanilla for the best flavor.
- Lemon juice: Just a hint of acidity brightens up the filling, making it refreshing. If you prefer, lime juice works too!
- Cold heavy whipping cream: This will be whipped into fluffy perfection, lending the cheesecakes their airy texture.
- White chocolate chips: Melted for drizzling, they add luxurious creaminess. For a twist, consider using dark chocolate chips.
- Pastel food coloring: A few drops transform these cheesecakes into a vibrant Easter treat. Feel free to get artistic with the colors!
- Mini candy eggs: These adorable toppings add a fun, festive touch. Use speckled or pastel-colored eggs for that perfect Easter vibe.
- Whipped cream: Whether store-bought or homemade, it’s a delightful finishing touch that adds lightness. It’s also great for decoration!
- Rainbow sprinkles: They bring joy and color, making the cheesecakes even more festive. Plus, who can resist sprinkles?
You can find the exact quantities for each ingredient at the bottom of the article, ready for you to print and conquer your kitchen! Happy baking!
How to Make Easter No-Bake Mini Cheesecakes
Creating Easter No-Bake Mini Cheesecakes is a delightful adventure. Just follow these simple steps, and let your inner chef shine! Trust me, once you see those colorful mini cheesecakes, you’ll understand why this recipe is a springtime favorite.
Step 1: Prepare Your Muffin Tin or Silicone Mold
First things first, let’s get your weekend project rolling! If you’re using a muffin tin, line it with cupcake liners for easy removal later. If you have a silicone mold, you can skip this step since nothing sticks to silicone. Give yourself a high five for getting this far!
Step 2: Make the Crust
Now, it’s time for the crunchy base! In a medium bowl, mix together the graham cracker crumbs, granulated sugar, and melted butter. It should feel like damp sand. Press about 1½ tablespoons of this mixture firmly into each prepared mold to create a solid crust. Remember, a well-pressed crust means a sturdy cheesecake later on—this is not the time to be shy!
Step 3: Create the Cream Cheese Filling
Next up, let’s whip that cream cheese into creamy perfection! In a large bowl, beat your softened cream cheese until smooth and fluffy. Add in the powdered sugar, vanilla extract, and lemon juice. Mix until all ingredients are combined and the filling is creamy! It should taste like a dream! Resist the temptation to eat it all right now—save some for the cheesecakes!
Step 4: Whip the Cream
Now for the magic touch! In a separate bowl, whip the cold heavy cream until stiff peaks form. This is crucial for that delightful lightness in your cheesecakes. Gently fold the whipped cream into your cream cheese mixture, being careful not to deflate it. Think of it as introducing two friends—be gentle but enthusiastic!
Step 5: Assemble Your Cheesecakes
With both components ready, it’s assembly time! Spoon or pipe the fluffy cream cheese filling over each crust in your molds, smoothing the tops with a spatula. Take a moment to admire your work! Each little cheesecake should be as full and vibrant as your family celebrations.
Step 6: Add Color and Decorate
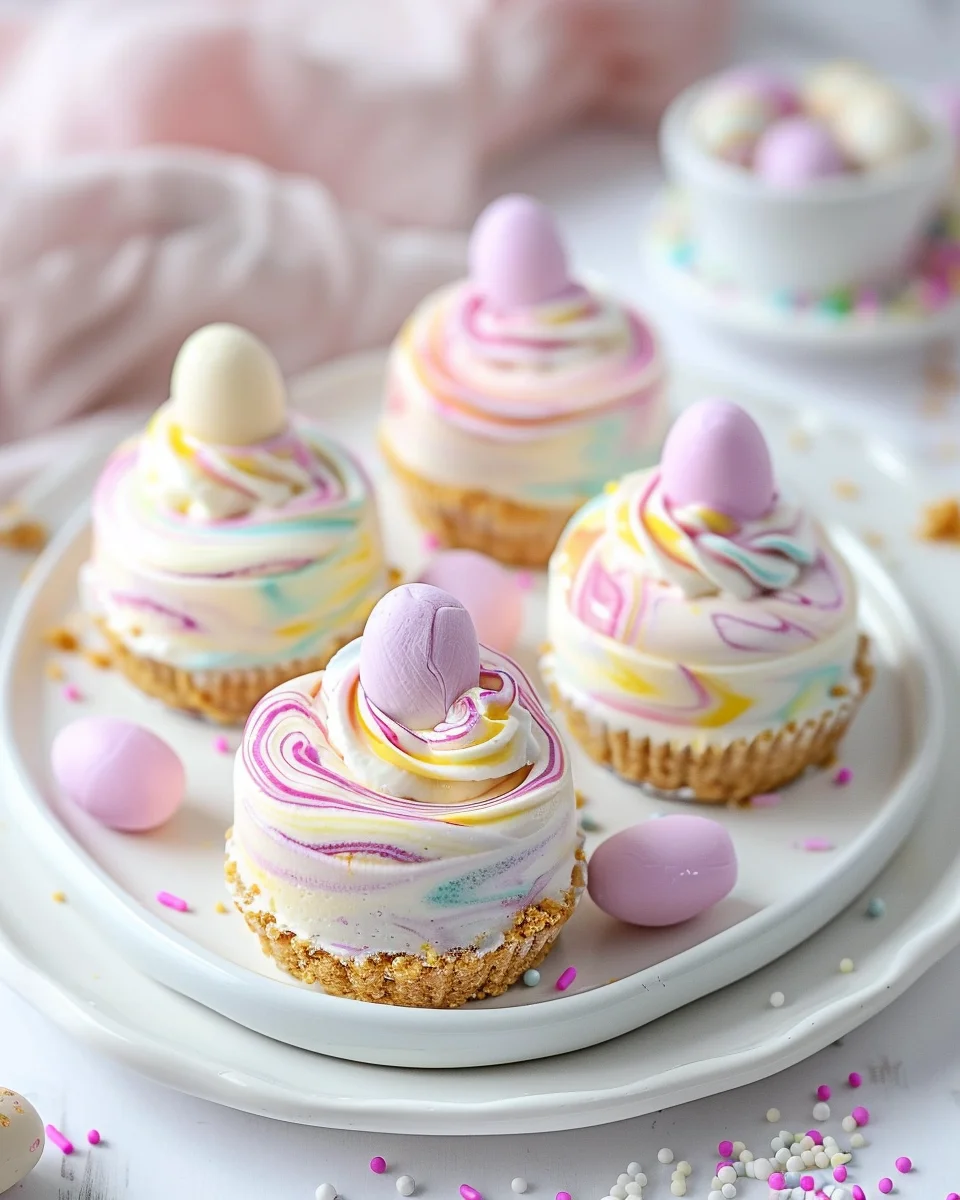
Let’s get colorful! Divide the melted white chocolate into small bowls. Add a drop of pastel food coloring to each bowl, mixing gently to combine. Using a toothpick, swirl small amounts of the colored chocolate on top of each cheesecake. Don’t worry about perfection—unique, whimsical tops make these cheesecakes even more charming!
Step 7: Chill and Serve
Patience is key here! Chill your cheesecakes in the fridge for at least 4 hours or until set. This step helps them firm up and allows all those delicious flavors to meld together. When you’re ready to serve, add a generous dollop of whipped cream, a mini candy egg, and those sprinkles for extra festivity. Watch your family’s faces light up when they see these beauties!
Tips for Success
- Always use room temperature ingredients for a smoother filling.
- Chill your mixing bowl and beaters before whipping the cream for better results.
- Press the crust firmly to avoid a crumbly base once set.
- Be creative with colors! Let your kids help add the food coloring for fun.
- Make these a day ahead to save time on Easter!
Equipment Needed
- Muffin tin: For traditional cheesecake shapes. Silicone molds are an easy alternative since nothing sticks.
- Mixing bowls: A couple of medium to large bowls for mixing and whipping. Any mixing bowl will do!
- Hand mixer or whisk: A hand mixer makes it quick and easy, while a whisk gives you a good workout!
- Spatula: For smooth assembly and folding, ensuring no delicious filling is left behind.
Variations of Easter No-Bake Mini Cheesecakes
- Fruit on Top: Swap out mini candy eggs with fresh berries or sliced fruits like strawberries or peaches for a refreshing twist.
- Chocolate Lovers: Stir in cocoa powder or melted dark chocolate into the cream cheese filling for a rich chocolate flavor.
- Nutty Delight: Add crushed nuts like walnuts or almonds to the crust for extra texture and flavor.
- Gluten-Free Option: Use gluten-free graham crackers or crushed nuts as a crust alternative to make these mini cheesecakes gluten-free.
- Vegan Version: Substitute cream cheese with vegan cream cheese, heavy cream with coconut cream, and use a dairy-free butter alternative for a delicious vegan treat.
Serving Suggestions for Easter No-Bake Mini Cheesecakes
- Fresh Fruit Salad: Pair these mini cheesecakes with a colorful salad of seasonal fruits for a refreshing contrast.
- Springtime Punch: Serve with a lightly sweetened berry punch or sparkling lemonade for a festive touch.
- Elegant Plating: Arrange the cheesecakes on a beautiful platter, garnished with mint leaves or edible flowers for a charming presentation.
- Individual Serve: Present each mini cheesecake on a small dessert plate for a personal touch that delights your guests.
FAQs about Easter No-Bake Mini Cheesecakes
Wondering about some details or tips for these delightful Easter No-Bake Mini Cheesecakes? Here are some frequently asked questions that might help you navigate your baking journey!
Can I make these cheesecakes ahead of time?
Absolutely! In fact, they taste even better after chilling overnight. Just prepare them a day in advance to save time on Easter and enjoy the flavors blending together.
What can I use instead of cream cheese?
If you’re looking for a lighter option, you can try low-fat cream cheese. For a dairy-free version, opt for vegan cream cheese or silken tofu blended until smooth.
Can I use different flavors of food coloring?
Definitely! Feel free to experiment with different colors. Whether you go bold with bright hues or keep it pastel, it’s all about what makes you smile when you see them!
How should I store leftover mini cheesecakes?
Store any leftovers in an airtight container in the refrigerator. They will keep well for up to three days—if they last that long!
What if I don’t have a muffin tin or silicone molds?
No worries! You can easily use small ramekins or any decorative cups. Just make sure to adjust the chilling time since the size might be different.
Final Thoughts
Whipping up these Easter No-Bake Mini Cheesecakes has been a joyous journey filled with creativity and anticipation. They’re more than just a dessert; they’re a way to bring smiles to faces and add color to any spring celebration. Every bite bursts with creamy goodness, and the festive decorations make them a feast for the eyes, too! Whether it’s for brunch with family or an elegant spring gathering, these mini cheesecakes are sure to steal the show and create lasting memories. So, let’s celebrate this season of renewal with delicious treats that spark joy!
Print
Easter No-Bake Mini Cheesecakes
- Prep Time: 30 minutes
- Cook Time: 0 minutes
- Total Time: 4 hours 30 minutes
- Yield: 12 mini cheesecakes 1x
- Category: Dessert
- Method: No-Bake
- Cuisine: American
- Diet: Vegetarian
Description
Delightful mini cheesecakes perfect for Easter, featuring a graham cracker crust and a creamy filling topped with pastel colors.
Ingredients
- 1 ½ cups graham cracker crumbs
- ¼ cup granulated sugar
- 6 tablespoons unsalted butter, melted
- 16 oz (2 blocks) cream cheese, softened
- ½ cup powdered sugar
- 1 teaspoon vanilla extract
- 1 tablespoon lemon juice
- 1 cup heavy whipping cream, cold
- ½ cup white chocolate chips, melted
- A few drops of pastel food coloring (pink, yellow, lavender, teal)
- 12 mini candy eggs (speckled or pastel)
- Whipped cream (store-bought or homemade)
- Rainbow sprinkles
Instructions
- Line a muffin tin with cupcake liners or use a silicone mini cheesecake mold.
- Mix graham cracker crumbs, sugar, and melted butter in a bowl. Press about 1½ tablespoons into each mold. Chill while you make the filling.
- In a large bowl, beat softened cream cheese until smooth. Add powdered sugar, vanilla extract, and lemon juice. Mix until creamy.
- In a separate bowl, whip cold heavy cream until stiff peaks form. Gently fold into the cream cheese mixture until light and fluffy.
- Spoon or pipe the filling over the crusts, smoothing the tops with a spoon or spatula.
- Divide melted white chocolate into small bowls. Add a drop of pastel food coloring to each. Swirl small amounts on top of each cheesecake using a toothpick.
- Chill for at least 4 hours or until set.
- Once set, top with whipped cream, a mini candy egg, and rainbow sprinkles.
Notes
- Make sure all ingredients are at room temperature before starting.
- Store in the refrigerator and consume within 3 days for best taste.
Nutrition
- Serving Size: 1 mini cheesecake
- Calories: 220
- Sugar: 15g
- Sodium: 150mg
- Fat: 15g
- Saturated Fat: 9g
- Unsaturated Fat: 4g
- Trans Fat: 0g
- Carbohydrates: 23g
- Fiber: 1g
- Protein: 3g
- Cholesterol: 55mg