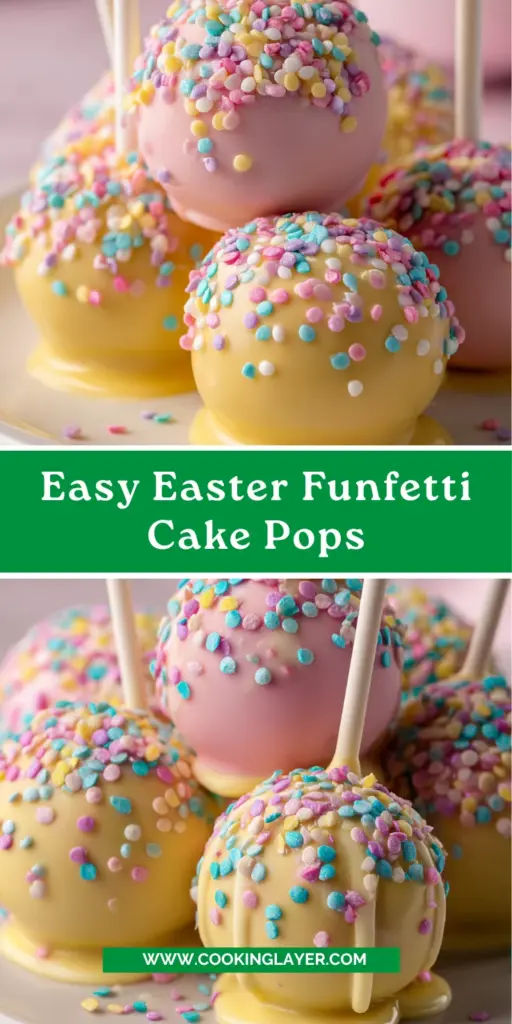
Introduction to Easy Easter Funfetti Cake Pops
Spring is here, and with it comes the joy of Easter celebrations! I’ve always found that the best memories are made around sweet treats, and these Easy Easter Funfetti Cake Pops are no exception. Imagine a colorful cake, lovingly coated in delightful melting chocolate, and adorned with cheerful sprinkles. Whether you’re a busy mom or a professional on-the-go, this recipe is a fantastic way to bring a little festive flair to your family gatherings without breaking a sweat. Trust me, these pops will bring smiles to faces old and young, making them a must-try for your Easter festivities!
Why You’ll Love This Easy Easter Funfetti Cake Pops
These Easy Easter Funfetti Cake Pops are not only a delight to the eyes but also a breeze to make! With minimal prep time and straightforward steps, you’ll have a festive treat ready in no time. The vibrant colors make them visually appealing, while the funfetti flavor brings a taste of nostalgia. Perfect for busy schedules, these pops are a stress-free way to celebrate Easter with family and friends!
Ingredients for Easy Easter Funfetti Cake Pops
Before we dive into the delightful world of Easy Easter Funfetti Cake Pops, let’s gather our colorful ingredients! Here’s what you’ll need:
- White cake mix: The base for our cake pops, ensuring a light and fluffy texture. Any brand will do, but I prefer one that doesn’t require additional ingredients.
- Rainbow jimmies: Adds that essential pop of color and fun to each bite. Feel free to use sprinkly varieties with larger shapes for a different texture!
- Water: A key player in blending our cake mix perfectly. Always use room temperature water for best results.
- Vegetable oil: This helps keep our cake moist and tender. If you’re looking for a healthier option, coconut oil can work as a tasty substitute.
- Large whole eggs: They provide structure and richness to our cake pops. For a vegan twist, consider using a flax egg instead!
- Canned frosting: The secret to binding those cake crumbs together. I love using cream cheese frosting for a bit of tanginess, but vanilla works just as well.
- Vanilla melting chocolate or almond bark: This will coat our cake pops, providing a sweet, smooth finish. You can swap it for dark chocolate if that’s your jam!
- Pastel colored food coloring gels: These brighteners transform your cake pops into seasonal masterpieces. Mixing them can create custom shades—get creative!
- Easter sprinkles: These little gems make our pops truly festive. Whether you choose bunnies or eggs, they’ll sprinkle joy on every cake pop!
For the exact quantities of each ingredient, check out the bottom of this article—they’re neatly listed for printing. Happy gathering!
How to Make Easy Easter Funfetti Cake Pops
Step 1: Prepare the Cake
To kick things off, mix the white cake mix with water, vegetable oil, and eggs as instructed on the package. But here’s my favorite tip: before pouring the batter into the pan, fold in those vibrant rainbow jimmies. This simple step adds a burst of color and fun to your cake, ensuring each bite is a joyous surprise.
Step 2: Bake and Cool
Now that the batter is ready, pour it into a greased 9×13-inch pan and bake as directed. Once your kitchen fills with that sweet aroma, bake the cake until a toothpick comes out clean. It’s crucial to let it cool completely on a wire rack before crumbling; this prevents excess moisture from ruining our cake pops.
Step 3: Crumble and Mix
Once your cake is cool, crumble it into a large mixing bowl until it resembles fine crumbs. Take a moment to appreciate the colorful flecks! Next, introduce two tablespoons of frosting to the cake crumbs. Mix well until it binds together; this will hold our cake pops beautifully, making them easier to form.
Step 4: Form the Cake Pops
Grab a cookie scoop or your hands and roll the mixture into uniform 1-inch balls. Setting them on a lined baking sheet makes it easy to handle them later. It’s like creating little spheres of happiness that will soon become stunning cake pops!
Step 5: Insert Lollipop Sticks
Here comes the fun part! Melt a small amount of your vanilla candy melts. Dip the tip of each lollipop stick into the melted chocolate, then gently insert them into the cake balls. This helps secure the sticks in place, ensuring your cake pops stay intact during the next steps.
Step 6: Chill the Pops
Now it’s time to chill! Place your baking sheet with the cake pops in the fridge for at least one hour. This chilling helps them firm up, making the next steps easier and ensuring the sticks remain secure.
Step 7: Melt and Color the Coating
While your pops chill, melt the remaining candy melts in separate bowls to create a rainbow of pastel colors. Add food coloring gels to achieve the desired shades and stir until smooth. A little tip: make sure your melting chocolate isn’t too hot. This keeps your coating smooth and perfect for dipping!
Step 8: Dip and Decorate
Once your cake pops are chilled, remove them from the fridge. Dip each cake pop into the melted candy coating until fully covered. A quick tap to remove excess chocolate is key! While the coating is still wet, sprinkle with Easter sprinkles—this adds a delightful festive touch and makes your pops irresistible!
Step 9: Allow to Set
Place the dipped cake pops upright in a cake pop stand or a Styrofoam block. Allow the coating to dry completely. Patience is a virtue here; waiting for the coating to harden will ensure each pop looks perfect and is ready for a delightful bite!
Tips for Success
- Ensure your cake is completely cool before crumbling to avoid clumping.
- Using a cookie scoop helps to create uniform cake balls for even baking.
- Chill the cake pops adequately to secure the sticks and shape before coating.
- For neater dipping, tap off excess coating gently instead of swirling.
- Let each coating dry fully before stacking or transporting the cake pops.
Equipment Needed
- 9×13-inch baking pan: Any baking dish works; just ensure it’s oven-safe.
- Mixing bowls: A large bowl for crumbling and a few smaller ones for melting chocolate.
- Parchment paper: Lining the baking sheet makes cleanup a breeze; aluminum foil can be used in a pinch.
- Lollipop sticks: If you don’t have these, try using pretzel sticks for a fun alternative.
- Cake pop stand or Styrofoam block: You can use a simple cardboard box to hold the pops upright.
Variations of Easy Easter Funfetti Cake Pops
- Gluten-Free: Swap the white cake mix for a gluten-free variety. These can be found at most grocery stores and work just as well.
- Dairy-Free: Use dairy-free cake mix and substitute almond milk for the water. This way, everyone can enjoy a cake pop!
- Chocolate Cake Version: Trade the white cake mix for chocolate cake mix for a rich and delicious twist. Pair it with chocolate frosting to amplify the flavor.
- Decorative Variations: Instead of typical Easter sprinkles, use themed decorations like bunny or chick decorations for a fancier presentation.
- Flavor Infusions: Add a few drops of almond or lemon extract to the cake mix for a unique flavor profile that surprises the palate!
Serving Suggestions
- Pair your Easy Easter Funfetti Cake Pops with a light, refreshing fruit salad for a delightful contrast.
- Serve alongside a chilled glass of lemonade or iced tea for a festive touch that everyone will love.
- For presentation, arrange the cake pops in a decorative basket or on a colorful plate, adding some springtime flowers for that extra flair.
- Consider offering a selection of dipping sauces, like chocolate or caramel, for an interactive dessert experience!
FAQs about Easy Easter Funfetti Cake Pops
Can I make these Easy Easter Funfetti Cake Pops ahead of time?
Absolutely! You can prepare the cake pops a day in advance, store them in the fridge, and coat them just before serving. Their flavor actually deepens with a little time!
How do I store leftover cake pops?
Store your cake pops in an airtight container in the refrigerator for up to a week. Just be sure they don’t touch each other to keep their beautiful coatings intact!
Can I use different flavors of cake mix?
Yes! Feel free to experiment with various cake mix flavors according to your preference. Chocolate or vanilla cake mix can add a delightful twist to these cake pops!
What if I don’t have lollipop sticks?
No worries! You can use pretzel sticks or even cut-up straws as a fun alternative. They’ll still look adorable and taste amazing!
How can I make these cake pops more festive for Easter?
To amp up the festive vibes, use themed sprinkles or colored coatings. You can even paint on little bunny faces using edible food markers for a fun touch!
Final Thoughts
Making Easy Easter Funfetti Cake Pops isn’t just about creating a delicious treat; it’s about creating memories with loved ones. The joy of biting into a colorful pop, bursting with flavor, brings smiles that echo through the room. As busy moms and professionals, these cake pops are a reminder that celebrations don’t have to be complicated. They’re simple yet delightful, bringing the essence of Easter to life in a fun, engaging way. So, roll up your sleeves, gather your supplies, and indulge in the heartwarming experience of baking these little treasures with your family. Happy Easter!
Print
Easy Easter Funfetti Cake Pops
- Prep Time: 30 minutes
- Cook Time: 30 minutes
- Total Time: 1 hour 30 minutes
- Yield: Approximately 24 cake pops 1x
- Category: Dessert
- Method: Baking and dipping
- Cuisine: American
- Diet: Vegetarian
Description
Easy Easter Funfetti Cake Pops are a delightful and colorful treat perfect for celebrating the holiday with friends and family. Each bite is filled with funfetti goodness and decorated with vibrant pastel colors.
Ingredients
- 1 package white cake mix
- 1/2 cup rainbow jimmies for the cake batter
- 1 cup water
- 1/2 cup vegetable oil
- 3 large whole eggs
- 2 tablespoons canned frosting (white, vanilla, or cream cheese)
- 40 ounces vanilla melting chocolate or almond bark (divided)
- Pastel colored food coloring gels (yellow, pink, purple, green, and blue)
- Easter sprinkles
Instructions
- Prepare the white cake mix according to the package directions using the water, oil, and eggs. Fold in the rainbow jimmies before pouring into a 9×13-inch pan.
- Bake as directed and allow to cool completely on a wire rack.
- Crumble the cooled cake into a large mixing bowl until fine and uniform.
- Add two tablespoons of cream cheese frosting to cake crumbs and mix until combined.
- Roll the mixture into uniform 1-inch balls and place them on a baking sheet lined with parchment paper.
- Melt a small amount of vanilla candy melts and dip the tips of lollipop sticks into it before inserting them into the cake balls.
- Chill the baking sheet of cake pops in the refrigerator for at least one hour.
- Melt the remaining candy melts, dividing them into separate bowls for each pastel color. Add food coloring and stir until smooth.
- Remove chilled cake pops from the fridge and dip each into the melted candy coating until fully covered. Tap off excess.
- Add Easter sprinkles while coating is still wet. Allow to dry in a cake pop stand or Styrofoam block.
Notes
- Ensure the cake is completely cool before crumbling to avoid excess moisture.
- Use a cookie scoop for uniform cake balls.
- Chill the cake pops long enough to ensure the sticks are secure.
- Allow the coating to harden before drizzling additional colors.
Nutrition
- Serving Size: 1 cake pop
- Calories: 150
- Sugar: 12g
- Sodium: 75mg
- Fat: 7g
- Saturated Fat: 3.5g
- Unsaturated Fat: 3g
- Trans Fat: 0g
- Carbohydrates: 20g
- Fiber: 0g
- Protein: 1g
- Cholesterol: 30mg