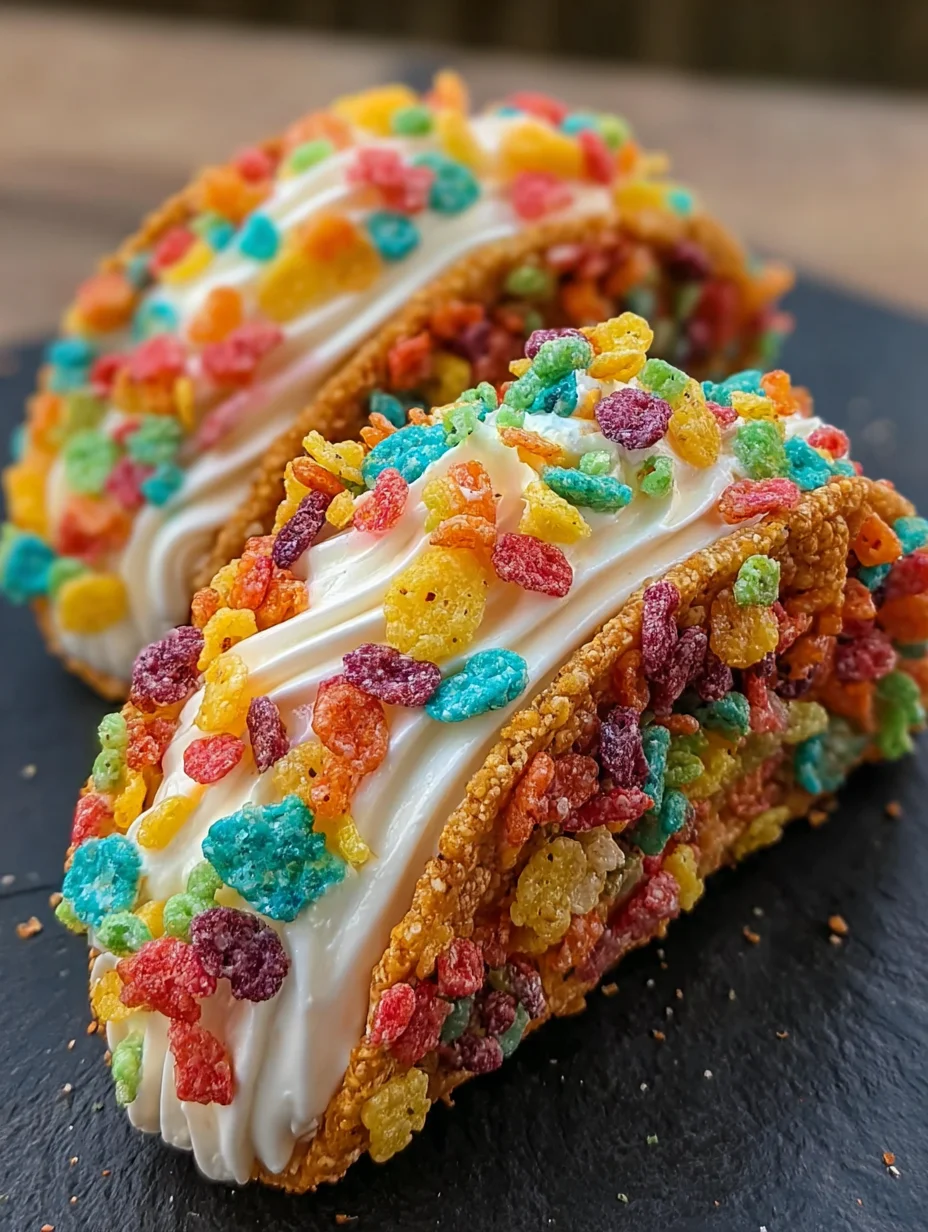
Introduction to Fruity Pebbles Cheesecake Tacos
Hey there, fellow dessert lovers! If you’re on the lookout for a fun twist on traditional treats, look no further than these irresistible Fruity Pebbles Cheesecake Tacos. Trust me, this vibrant dessert will not only tickle your taste buds but also brighten up your day. Whether you’re wrangling a bunch of kids or aimlessly juggling work tasks, this no-bake recipe is like a sweet hug in taco form! It’s a delightful solution for busy days or a surprise for your loved ones that shows just how much you care.
Why You’ll Love This Fruity Pebbles Cheesecake Tacos
Let me tell you why these Fruity Pebbles Cheesecake Tacos will become your new favorite dessert! First off, they’re incredibly easy to make, so even on your busiest days, whipping these up is a breeze. They’re no-bake, meaning little mess in the kitchen. Plus, the burst of fruity flavors combined with creamy cheesecake is like a party in your mouth! Perfect for kids and adults alike, this treat is a true crowd-pleaser!
Ingredients for Fruity Pebbles Cheesecake Tacos
Before diving into this colorful culinary adventure, let’s gather our ingredients for these Fruity Pebbles Cheesecake Tacos. I find that having everything prepped makes the cooking process smoother, especially when you’re busy!
- Fruity cereal: The star of our show! This adds a burst of color and crunch.
- Unsalted butter: Melting this will help bind the cereal together and create our crispy taco shell.
- Cream cheese: The creamy base of our cheesecake filling. Make sure it’s softened for easy mixing!
- Powdered sugar: This adds sweetness to our cheesecake, making it delightful and sugary.
- Vanilla extract: A hint of this pure flavor enhances our filling, making it extra delicious.
- Whipped cream: This is what adds airiness and lightness to our cheesecake mixture.
- Additional fruity cereal for garnish: It not only enhances the visual appeal but adds extra crunch!
You may find specific quantities for each ingredient at the bottom of this article, perfect for printing out to have on hand while cooking. Feel free to get creative! Add mini marshmallows or sprinkles as toppings for even more festive flair.
How to Make Fruity Pebbles Cheesecake Tacos
Now that we have our ingredients ready, let’s jump into creating these mouthwatering Fruity Pebbles Cheesecake Tacos. Follow these simple steps, and soon you’ll have a dessert that’s sure to impress!
Step 1: Prepare the Cereal Mixture
First things first, let’s mix our fruity cereal with melted butter.
In a large mixing bowl, combine the fruity cereal and melted butter.
Stir thoroughly until every piece is evenly coated. This will help hold our taco shells together. Trust me, it’s important to master this step!
Step 2: Form the Taco Shells
Next, it’s time to shape those taco shells! Grab your small taco-shaped molds or muffin tins.
Press the cereal mixture firmly into the molds, making sure to compact it tightly.
This will create a sturdy shell for the cheesecake filling.
Once done, pop them in the refrigerator and chill for at least 30 minutes. This helps the shells firm up perfectly!
Step 3: Make the Cheesecake Filling
While your taco shells are chilling, let’s whip up the delicious cheesecake filling.
Using a hand mixer, beat the cream cheese until it’s light and fluffy.
Gradually add the sifted powdered sugar and vanilla extract, blending until everything is smooth.
You can almost taste the creamy goodness already! Don’t rush this step; smooth is key for flavor!
Step 4: Fold in the Whipped Cream
Next up, we want to keep the filling airy.
Gently fold the whipped cream into the cream cheese mixture using a spatula.
The goal is to maintain that light texture because nobody wants a dense cheesecake!
Step 5: Fill the Taco Shells
Your taco shells should be firm now.
Spoon the cheesecake filling into each shell generously, being careful not to overflow them.
This is where you can really show off your dessert assembly skills! Each shell deserves a hearty helping of that creamy goodness.
Step 6: Garnish and Serve
Lastly, let’s add a little pizzazz!
Sprinkle additional fruity cereal over the filled taco shells for that extra pop of color and crunch.
Serve these delightful treats immediately or chill them a bit longer for a firmer texture. Enjoy the oohs and aahs of everyone who tries them!
Tips for Success
- Make sure your cream cheese is at room temperature for easy mixing.
- Press the cereal mixture tightly to avoid crumbling shells.
- Use a rubber spatula for folding in whipped cream; it helps maintain airiness.
- Chill the taco shells for the full 30 minutes for optimal firmness.
- Feel free to customize toppings to suit your taste!
Equipment Needed
- Mixing bowl: A large bowl to combine your cereal and butter. Any size will do!
- Taco-shaped molds or muffin tins: These help form the taco shells. Muffin tins work great in a pinch!
- Hand mixer: This makes whipping the cream cheese a breeze; a whisk can be used but takes longer.
- Rubber spatula: Perfect for folding in whipped cream and ensuring no lumps!
Variations of Fruity Pebbles Cheesecake Tacos
- Chocolate Delight: Add cocoa powder to the cheesecake filling for a chocolatey twist. Pair it with chocolate-flavored cereal for a decadent experience.
- Nutty Crunch: Mix in crushed nuts like almonds or pistachios into the cereal for added crunch. This will also enhance the flavor profile!
- Fruit Fusion: Swap out some of the fruity cereal for real fruit pieces like sliced strawberries or bananas. They add a fresh touch!
- Gluten-Free Option: Use gluten-free cereal to make these delicious treats suitable for those with gluten sensitivities.
- Dairy-Free Option: Substitute cream cheese with a dairy-free alternative and use coconut whipped cream instead for a completely dairy-free delight.
Serving Suggestions
- Pair with fresh fruit: Serve alongside sliced strawberries or blueberries for a refreshing contrast.
- Pour a glass of milk: This classic drink perfectly complements the sweetness of the tacos.
- Presentation matters: Arrange on a colorful platter and sprinkle with extra Fruity Pebbles for a fun visual!
- For a splash of decadence: Drizzle a bit of chocolate syrup on top for an indulgent touch.
FAQs about Fruity Pebbles Cheesecake Tacos
Can I make Fruity Pebbles Cheesecake Tacos ahead of time?
Absolutely! You can prepare the taco shells a day in advance and store them in an airtight container. Just fill them with the cheesecake mixture when you’re ready to serve to keep everything fresh and crunchy.
How do I store leftovers?
Store any leftover Fruity Pebbles Cheesecake Tacos in the refrigerator. They’re best enjoyed within two days for optimal freshness. Just be careful, as the shells may soften over time!
What if I don’t have taco molds?
No worry! Muffin tins work well as an alternative. You can also use individual silicone cups to shape your taco shells. The goal is to form them into that fun, taco shape!
Can I customize the cheesecake filling?
Of course! You can add different extracts, like almond or coconut, for a unique flair. Mixing in flavored cream cheese can also give a delightful twist to your filling!
What are some good toppings for these tacos?
Get creative! Besides extra fruity cereal, consider using mini marshmallows, chocolate chips, or sprinkles for added texture and fun. You can also add a drizzle of chocolate or caramel sauce for a touch of indulgence!
Final Thoughts
Creating Fruity Pebbles Cheesecake Tacos is more than just following a recipe; it’s about making sweet memories. As I watched my kids’ faces light up with excitement when they saw these vibrant treats, I realized how a simple dessert can bring joy to our hectic lives. This dessert is easy to whip up, and the smiles it brings are priceless. Whether you’re celebrating a special occasion or simply making after-school snacks, these tacos add a splash of fun to any moment. Remember, the best recipes are meant to be shared, and this one is sure to delight everyone!
Print
Fruity Pebbles Cheesecake Tacos
- Prep Time: 20 minutes
- Cook Time: 0 minutes
- Total Time: 50 minutes (including chill time)
- Yield: 12 taco desserts 1x
- Category: Dessert
- Method: No-bake
- Cuisine: American
- Diet: Vegetarian
Description
A fun and delicious dessert that combines the flavors of Fruity Pebbles and cheesecake in a taco-shaped treat.
Ingredients
- 3 cups fruity cereal
- 1/2 cup unsalted butter, melted
- 8 oz cream cheese, softened to room temperature
- 1/2 cup powdered sugar, sifted
- 1 tsp pure vanilla extract
- 1 cup whipped cream
- Additional fruity cereal for garnish
Instructions
- Combine the fruity cereal and melted butter in a mixing bowl. Stir thoroughly until every piece is evenly coated.
- Press the cereal mixture firmly into small taco-shaped molds or muffin tins. Compact tightly and chill in the refrigerator for at least 30 minutes.
- Using a hand mixer, beat the cream cheese until light and fluffy. Gradually add powdered sugar and vanilla extract, blending until smooth.
- Gently fold whipped cream into the cream cheese mixture, using a spatula to maintain a light texture.
- Once the cereal shells are firm, spoon the cheesecake filling into each shell generously.
- Sprinkle additional fruity cereal over the filled shells. Serve immediately or chill for a firmer texture.
Notes
- For a more colorful presentation, you can use mini marshmallows or sprinkles as additional toppings.
- Make sure the cheese is at room temperature for easier mixing.
Nutrition
- Serving Size: 1 taco
- Calories: 230
- Sugar: 10g
- Sodium: 150mg
- Fat: 12g
- Saturated Fat: 7g
- Unsaturated Fat: 3g
- Trans Fat: 0g
- Carbohydrates: 27g
- Fiber: 1g
- Protein: 3g
- Cholesterol: 30mg