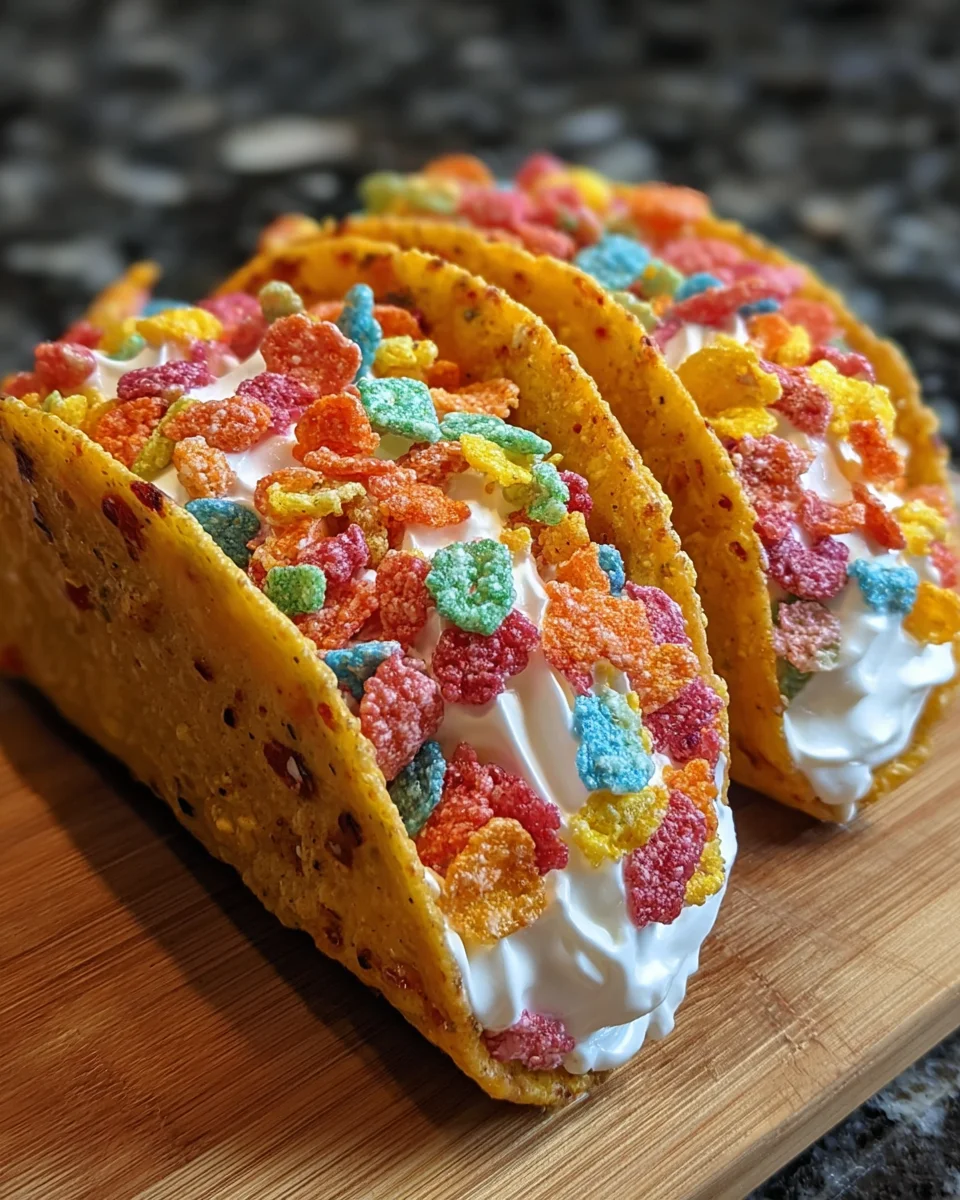
Introduction to Fruity Pebbles Cheesecake Tacos
Hey there, fellow kitchen adventurers! If you’re anything like me, you know that life can get hectic, especially when you’re juggling busy days and family responsibilities. That’s where these delightful Fruity Pebbles Cheesecake Tacos come into play! They’re a playful twist on dessert that’s not just easy, but also absolutely stunning. Imagine a vibrant, crunchy shell filled with creamy cheesecake goodness—it’s the perfect surprise for your family or a fun treat for yourself. Trust me, everyone will be asking for seconds, and you’ll enjoy every moment of this whimsical culinary creation!
Why You’ll Love This Fruity Pebbles Cheesecake Tacos
Let’s be real—making desserts should feel like playtime, not a chore! These Fruity Pebbles Cheesecake Tacos are not only quick to whip up, but they’re also a guaranteed hit with both kids and adults. The vibrant colors and sweet crunch will light up any table. Plus, they require no baking, which means less mess and more time for hugs and laughter!
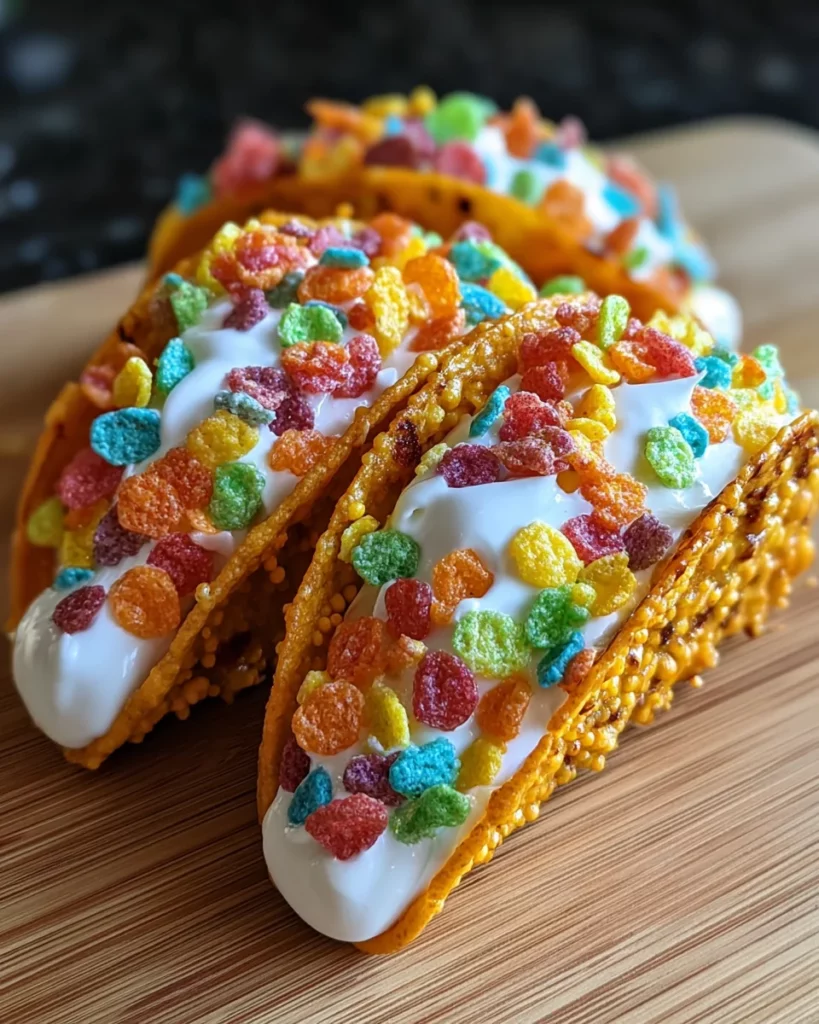
Ingredients for Fruity Pebbles Cheesecake Tacos
Gathering your ingredients for these Fruity Pebbles Cheesecake Tacos is half the fun! Here’s what you’ll need to create this colorful dessert:
- Colorful fruity cereal: This is the star of the show! Choose a vibrant brand that adds a playful touch to your taco shells.
- Unsalted butter: For binding and flavor. Melt it just enough to coat the cereal without turning it into a melted rainbow.
- Cream cheese: The base of the luscious cheesecake filling. Make sure it’s softened to blend easily and create that creamy texture!
- Powdered sugar: For just the right amount of sweetness. Trust me; you’ll want to sift it for smoothness.
- Pure vanilla extract: A splash of vanilla elevates all the flavors, making each bite irresistible.
- Whipped cream: To fold into the cheesecake filling, adding a light, airy texture. Feel free to use store-bought or homemade!
- Additional fruity cereal for garnish: This adds a finishing touch on top and extra crunch with every bite!
Remember, detailed measurements are at the bottom of this post for easy printing. Feel free to swap out the fruity cereal for a different variety or experiment with flavored cream cheese! The possibilities are endless!
How to Make Fruity Pebbles Cheesecake Tacos
Ready to dive into the magical world of Fruity Pebbles Cheesecake Tacos? Let’s turn up the fun as we piece together this sweet adventure, one step at a time. Below, I’m sharing how easy it is to create these colorful delights that will wow your taste buds!
Step 1: Prepare the Cereal Shells
Start by grabbing your large mixing bowl. Combine the colorful fruity cereal with the warm melted butter, mixing until every piece is coated. This is crucial: you want the butter warm, not hot. If the butter is too hot, the vibrant colors of your fruity cereal may fade away. We’re aiming for a beautiful blend of crunch and color here!
Step 2: Mold the Taco Shells
Next, it’s time to mold those taco shells. Press the cereal mixture firmly into taco-shaped molds or into the curved sections of a muffin tin. Aim for a thickness of about 1/4 inch to ensure a sturdy shell. Once you’ve got them shaped, pop them in the refrigerator. Let them chill for at least 30 minutes. This cooling time helps firm up the shells, making them easier to fill later.
Step 3: Create the Cheesecake Filling
Now, let’s whip up the creamy filling! In another bowl, beat the softened cream cheese with an electric mixer for about 2 minutes until it’s smooth and fluffy. Gradually add in the sifted powdered sugar and vanilla extract. Keep scraping the bowl sides often to ensure a silky, luscious texture. This filling is bound to be irresistible!
Step 4: Fold in Whipped Cream
For the pièce de résistance, gently fold in the whipped cream. Use a rubber spatula to carefully incorporate it into the cream cheese mixture. Gently folding is key here; we want to preserve that light, airy texture while making the mixture super fluffy. Think of it as giving your filling a soft hug!
Step 5: Fill the Taco Shells
It’s time for the fun part—filling those taco shells! Using a spoon or piping bag, generously fill each chilled taco shell with the cheesecake filling. Don’t be shy! Let it slightly overflow for an inviting presentation. Imagine the happy faces of your family when they see these colorful beauties!
Step 6: Add the Finishing Touch
Finally, top off each taco with additional fruity cereal. Sprinkle it on gently, pressing little bits into the filling to help it stick. If you’re feeling fancy, serve them immediately for maximum crunch. Or, if you want to make them ahead, refrigerate them for up to 2 hours before serving. Just remember, the sooner you serve, the crunchier they stay!
Tips for Success
- Always use warm butter to preserve the vibrant colors of the fruity cereal.
- Press the cereal mixture firmly for sturdy shells; they should hold their shape.
- Don’t overmix the cream cheese filling; keep it light and fluffy.
- Fill the taco shells just before serving for the ultimate crunch experience.
- Experiment with different flavored whipped creams for a twist!
Equipment Needed
- Large mixing bowl: Any bowl will do; just make sure it’s big enough to mix your cereal.
- Taco molds or muffin tin: You can also use a baking sheet with rolled-up aluminum foil shapes for the shells.
- Electric mixer: A handheld mixer works perfectly, but a whisk can do if you’re feeling ambitious!
- Rubber spatula: Essential for folding ingredients together without losing airiness.
- Spoon or piping bag: For filling those taco shells—both work like a charm!
Variations
- Gluten-free version: Substitute the fruity cereal with a gluten-free option to make these tacos suitable for everyone!
- Chocolate lovers: Swap out some of the fruity cereal for chocolate cereal for a delightful chocolate-fruity fusion.
- Lower sugar: Use a sugar-free whipped cream and a natural sweetener instead of powdered sugar for a lighter treat.
- Add fruit: Mix in finely chopped strawberries, blueberries, or bananas into the cheesecake filling for an extra fruity twist.
- Dairy-free option: Opt for a dairy-free cream cheese alternative and coconut whipped cream to enjoy this dessert vegan style!
Serving Suggestions
- Pair it with fresh fruit: Serve alongside sliced strawberries or a fruit salad for a vibrant contrast!
- Perfect for parties: Display them on a colorful platter to brighten up any gathering.
- Compliment with beverages: These tacos go wonderfully with a fruity smoothie or a light sparkling drink.
- Garnish elegantly: Drizzle with a bit of chocolate sauce for an extra touch of decadence.
- Share the joy: These are fun treats that beg to be shared, making them perfect for family get-togethers!
FAQs about Fruity Pebbles Cheesecake Tacos
Can I make these Fruity Pebbles Cheesecake Tacos ahead of time?
Absolutely! You can prepare the taco shells and filling in advance. Just fill them up right before serving for that fresh crunch. They can sit in the fridge for about 2 hours without losing their delightful texture.
What if I can’t find fruity cereal?
No worries! You can swap the fruity cereal with another colorful cereal or even try using some granola for a different texture. Just make sure it’s something fun that will still capture that lovely essence.
How long do these tacos last?
Once filled, it’s best to enjoy them within a few hours for optimal freshness. However, if you need to store them, pop them in an airtight container and refrigerate them for up to one day, though they might lose some crunch.
Is there a way to make these tacos healthier?
Certainly! You can use low-fat cream cheese and sugar alternatives to cut some calories. Plus, incorporating fresh fruit chunks into the filling adds flavor and nutrition!
Can I change the flavor of the cheesecake filling?
Yes! Feel free to get creative! You could add lemon zest for a refreshing citrus twist or mix in cocoa powder for a chocolate version. The possibilities are endless!
Final Thoughts
Creating Fruity Pebbles Cheesecake Tacos is more than just making dessert; it’s about bringing joy and whimsy into your kitchen. Each colorful taco is a little piece of happiness that invites creativity and playfulness, perfect for enjoying with family or friends. Imagine the laughter and smiles as everyone takes their first bite, savoring the delightful crunch mixed with creamy sweetness. This recipe inspires us to have fun while cooking, reminding us that even in our busy lives, we can carve out time for joy and creativity. So grab your ingredients and let the culinary adventure begin!
Print
Fruity Pebbles Cheesecake Tacos
- Prep Time: 20 minutes
- Cook Time: 0 minutes
- Total Time: 50 minutes
- Yield: 12 tacos 1x
- Category: Dessert
- Method: No-bake
- Cuisine: American
- Diet: Vegetarian
Description
Delicious tacos made with a crunchy fruity cereal shell filled with creamy cheesecake, topped with extra fruity cereal for a delightful dessert.
Ingredients
- 3 cups colorful fruity cereal
- 0.5 cup unsalted butter, melted
- 8 oz cream cheese, softened
- 0.5 cup powdered sugar, sifted
- 1 tsp pure vanilla extract
- 1 cup whipped cream
- Additional fruity cereal for garnish
Instructions
- Combine fruity cereal with melted butter in a large bowl until every piece is thoroughly coated, ensuring the butter is warm but not hot to preserve cereal colors.
- Press the coated mixture firmly into taco-shaped molds or curved muffin tin sections, creating shells about 1/4 inch thick. Refrigerate for at least 30 minutes until firm.
- Beat softened cream cheese with an electric mixer for 2 minutes until smooth and fluffy. Gradually add powdered sugar and vanilla extract, scraping the bowl sides frequently for a silky texture.
- Gently fold whipped cream into the cream cheese mixture using a rubber spatula, folding lightly from bottom up to maintain airiness without deflating the mixture.
- Fill each chilled shell generously with the cheesecake filling using a spoon or piping bag, slightly overflowing for a generous presentation.
- Sprinkle additional fruity cereal atop each taco, pressing gently to adhere. Serve immediately for maximum crunch or refrigerate up to 2 hours before serving.
Notes
- Ensure the butter is warm but not hot to keep the colorful coating of the cereal.
- The shells can be refrigerated for up to 2 hours before serving to maintain texture.
Nutrition
- Serving Size: 1 taco
- Calories: 180
- Sugar: 10g
- Sodium: 150mg
- Fat: 9g
- Saturated Fat: 5g
- Unsaturated Fat: 3g
- Trans Fat: 0g
- Carbohydrates: 24g
- Fiber: 1g
- Protein: 2g
- Cholesterol: 30mg

