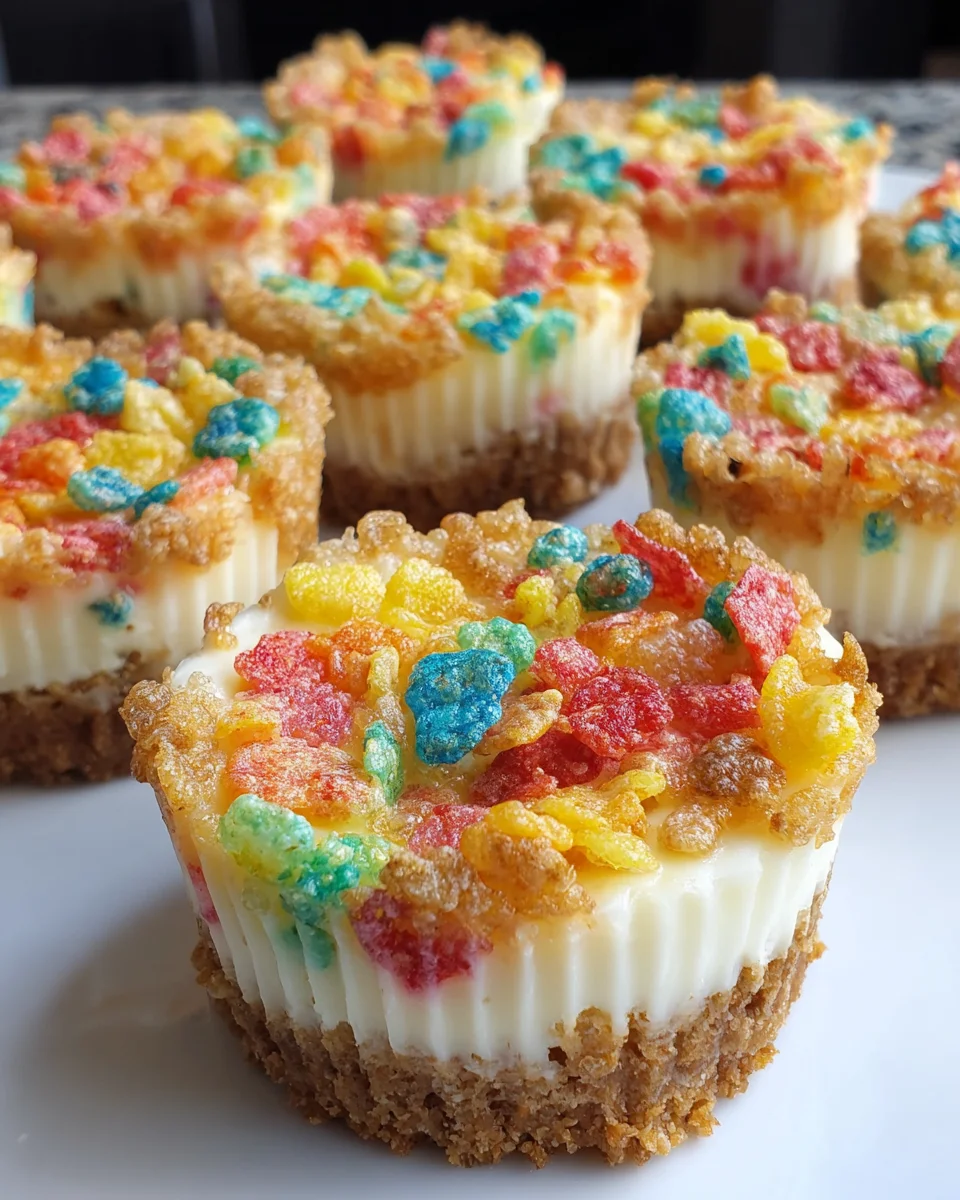
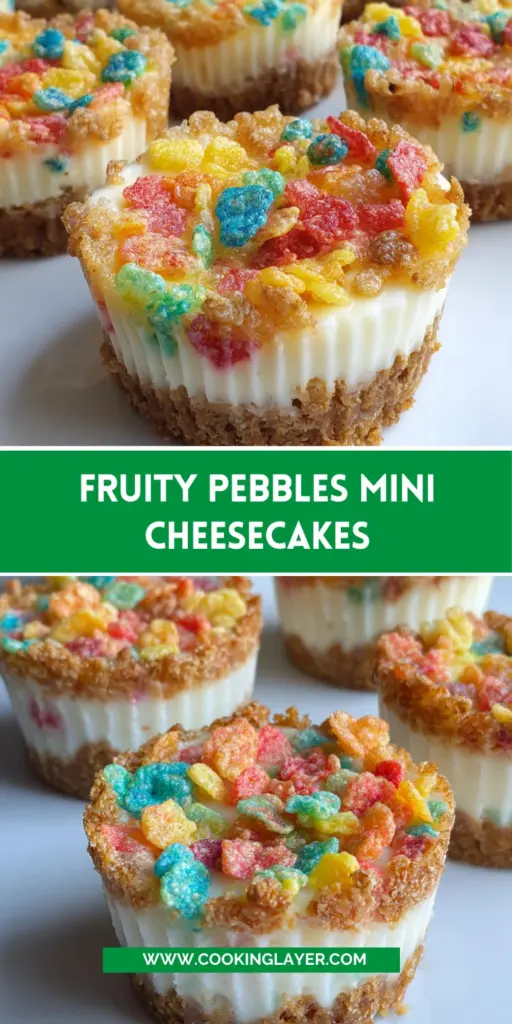
Introduction to Fruity Pebbles Mini Cheesecakes
I know how important it is to whip up something delicious without spending all day in the kitchen. That’s where these Fruity Pebbles Mini Cheesecakes come to the rescue! These little delights combine the nostalgic crunch of Fruity Pebbles with the creamy richness of cheesecake. They’re not just a treat for the taste buds but also a feast for the eyes. Perfect for celebrations or just a fun family dessert, these mini cheesecakes are both easy to make and absolutely delightful. Trust me, you’ll want to keep this recipe close at hand!
Why You’ll Love This Fruity Pebbles Mini Cheesecakes
These Fruity Pebbles Mini Cheesecakes are a dream come true for any busy kitchen! They’re not only quick to prepare but also incredibly satisfying. The vibrant colors and fruity flavor bring joy to every bite, making them perfect for any occasion. Plus, with a simple list of ingredients, you’ll spend less time shopping and more time savoring the delightful taste. Trust me; your family will absolutely adore them!
Ingredients for Fruity Pebbles Mini Cheesecakes
Gathering the right ingredients is the first step to creating these delightful Fruity Pebbles Mini Cheesecakes. Each element plays a role in achieving that perfect balance of flavor and texture. Here’s what you’ll need:
- Fruity Pebbles cereal: This fruity, colorful cereal gives your cheesecake its signature taste and also forms the base of the crust.
- Graham cracker crumbs: A classic cheesecake crust ingredient, these crumbs add sweetness and texture, complementing the Fruity Pebbles beautifully.
- Unsalted butter: Melted butter binds the crust ingredients together and adds richness to the overall flavor.
- Salt: Just a pinch is necessary to enhance the sweetness and balance flavors in both the crust and filling.
- Cream cheese: The star of the show! Softened creamy cheese creates the smooth base that is essential for any cheesecake.
- Granulated sugar: This sweetens the filling, making each bite a delightful experience, while keeping your cheesecakes light and airy.
- Sour cream: For an extra layer of richness, sour cream lends a lovely tang that cuts through the sweetness.
- Vanilla extract: A splash of vanilla adds warmth and depth to the flavors, making the filling even more enticing.
- Eggs: Essential for binding and adding structure, eggs help create that classic cheesecake texture.
- Additional Fruity Pebbles cereal: Use these for garnish to offer a fun crunch and make your cheesecakes look extra appealing.
For exact measurements, please refer to the bottom of the article where this recipe is available for printing. Feel free to get creative with these ingredients! You can experiment using different flavor profiles or even substitute with gluten-free graham crackers if needed. Enjoy the adventure in your kitchen!
How to Make Fruity Pebbles Mini Cheesecakes
Making Fruity Pebbles Mini Cheesecakes is a straightforward process, perfect for anyone seeking a sweet adventure in the kitchen! I’ll walk you through each step to ensure success. Let’s get baking!
Step 1: Preheat the Oven
First things first! Preheat your oven to 325°F (165°C). Preheating is crucial because it ensures even baking. It’s like warming up your muscles before a workout — your cheesecakes will be grateful for it!
Step 2: Prepare the Crust
In a medium bowl, combine Fruity Pebbles cereal, graham cracker crumbs, melted unsalted butter, and a pinch of salt. Mix these ingredients until they’re evenly moistened. This mixture should hold together when you squeeze it in your hand. Press it firmly into the bottom of each muffin cup to form a compact base. This crust is going to add a delightful crunch!
Step 3: Bake the Crust
Now, pop that muffin tin into your preheated oven and let it bake for about 5 minutes. Once you’re done, remove it and cool completely. This quick bake creates a sturdy foundation for your cheesecakes!
Step 4: Mix the Cheesecake Filling
In another bowl, grab your mixer and blend the cream cheese and granulated sugar at low speed until smooth. Scrape down the sides of the bowl to ensure everything is combined. Then, add the sour cream, vanilla extract, and a touch of salt, mixing until fully incorporated. The texture should be smooth and creamy, like a soft cloud!
Step 5: Combine and Fold in Fruity Pebbles
With your mixer still on low, add the eggs one at a time, mixing just until blended. Now comes the fun part! Gently fold in the remaining Fruity Pebbles cereal using a spatula. You want to incorporate them without crushing them too much. We’re aiming for pops of color and texture in every bite!
Step 6: Fill the Muffin Cups
Carefully spoon the cheesecake filling over the baked crusts, distributing it evenly. Fill each cup almost to the top; these beauties will puff up slightly while baking. Keep the spoon steady as you pour – it’s all about that perfect distribution!
Step 7: Bake the Mini Cheesecakes
Return the muffin tin to the oven and bake for about 15 to 20 minutes. You’ll know they’re done when the centers are set but still have a slight wobble. Checking for doneness is key to achieving that perfect texture!
Step 8: Cool and Refrigerate
Once baked, remove your cheesecakes from the oven and let them cool completely at room temperature. It’s important to give them that cooling time to prevent excess moisture. After they’ve cooled, pop them in the fridge for at least 4 hours to chill. This step helps in achieving that classic cheesecake creaminess!
Tips for Success
- Always ensure cream cheese is fully softened for easy mixing.
- Press down the crust firmly to avoid crumbling later on.
- Don’t rush the cooling process; it’s key to achieving the right texture.
- Feel free to add colorful sprinkles along with the Fruity Pebbles for extra fun!
- For a creamier filling, mix on low and avoid overmixing.
Equipment Needed
- Muffin tin: A standard 12-cup tin works great, but you can use silicone molds for easier removal.
- Mixing bowls: Nesting bowls are handy for saving space.
- Hand or stand mixer: A hand mixer is perfect for quick mixing if you don’t have a stand mixer.
- Spatula: A silicone spatula helps with folding and scraping.
- Measuring cups and spoons: Essential for accurate ingredient measurements.
Variations of Fruity Pebbles Mini Cheesecakes
- Chocolate Chip Fruity Pebbles Cheesecakes: Mix in mini chocolate chips for that irresistible chocolatey touch.
- Healthy Twist: Use Greek yogurt instead of sour cream for a lighter option that’s still creamy delicious.
- Gluten-Free Version: Swap graham cracker crumbs with gluten-free alternatives or ground nuts for those with dietary restrictions.
- Fruit Add-Ins: Fold in fresh diced strawberries or banana for added sweetness and flavor.
- Mini Cheesecakes with a Citrus Zing: Add a teaspoon of lemon or lime zest to the filling for a refreshing citrus hint.
Serving Suggestions
- Pair these mini cheesecakes with a dollop of whipped cream for an elegant touch.
- Serve them alongside fresh berries like strawberries or raspberries for a fruity balance.
- For drinks, consider a light lemonade or sparkling water to cleanse the palate.
- Garnish with extra Fruity Pebbles on top for fun presentation!
- Use colorful plates to enhance the visual appeal of your dessert table.
FAQs about Fruity Pebbles Mini Cheesecakes
Got questions about these delightful Fruity Pebbles Mini Cheesecakes? You’re not alone! Here are some answers to common inquiries that might pop into your mind while whipping up this sweet treat.
Can I make the cheesecake filling in advance?
Absolutely! You can prepare the cheesecake filling a day ahead and store it in the fridge. Just make sure to fold in the Fruity Pebbles right before you fill your crusts to keep that fresh crunch!
What’s the best way to store leftovers?
Store any leftover Fruity Pebbles Mini Cheesecakes in an airtight container in the fridge. They’ll stay fresh for about 3-4 days. Just be sure to add extra Fruity Pebbles on top for that crunch just before serving!
Can I freeze these mini cheesecakes?
Yes, you can! After they’ve cooled completely, wrap each cheesecake in plastic wrap and then place them in a freezer-safe container. They’ll keep well for up to a month. Thaw them in the fridge before enjoying!
What can I serve with these mini cheesecakes?
These Fruity Pebbles Mini Cheesecakes pair beautifully with whipped cream, fresh berries, or even a drizzle of chocolate sauce! They add an extra layer of fun to your dessert experience.
Are there any dietary substitutions I can make?
Definitely! You can opt for gluten-free graham cracker crumbs and substitute Greek yogurt for sour cream for a lighter option. The recipe is versatile enough to accommodate various dietary preferences!
Final Thoughts
Creating these Fruity Pebbles Mini Cheesecakes has truly been a joyful experience! Each bite is a delightful burst of flavor and nostalgia, reminding me of carefree mornings spent enjoying cereal. These mini treats are not just sweets; they’re a way to bring smiles to my family’s faces, making every occasion feel special. With their vibrant colors and creamy texture, they spice up any dessert table and are so easy to prepare. Trust me, you’ll feel that warm sense of satisfaction as you share these delightful mini desserts with your loved ones. Happy baking!
Print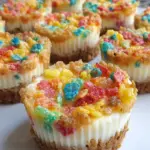
Fruity Pebbles Mini Cheesecakes
- Prep Time: 30 minutes
- Cook Time: 20 minutes
- Total Time: 4 hours 50 minutes (including refrigeration)
- Yield: 12 mini cheesecakes 1x
- Category: Dessert
- Method: Baking
- Cuisine: American
- Diet: Vegetarian
Description
Delicious mini cheesecakes featuring the fruity cereal flavor of Fruity Pebbles, perfect for any dessert lover.
Ingredients
- 80 grams Fruity Pebbles cereal (for crust)
- 60 grams graham cracker crumbs
- 42 grams unsalted butter, melted
- 1.25 grams salt (for crust)
- 450 grams cream cheese, softened to room temperature
- 135 grams granulated sugar
- 80 grams sour cream, at room temperature
- 5 millilitres vanilla extract
- 1.25 grams salt (for filling)
- 2 large eggs, at room temperature
- 80 grams Fruity Pebbles cereal (for filling)
- Extra Fruity Pebbles cereal for topping
Instructions
- Preheat oven to 165°C. Line 12-cup muffin tin with paper liners and set aside.
- In a medium bowl, combine Fruity Pebbles cereal, graham cracker crumbs, melted butter, and salt. Mix until evenly moistened.
- Divide crust mixture evenly among muffin cups. Press down firmly in each cup to create compact bases. Bake for 5 minutes, then remove and let cool.
- Using a mixer on low speed, blend cream cheese and granulated sugar until smooth. Scrape down bowl. Add sour cream, vanilla extract, and salt; mix until fully incorporated.
- With mixer on low, add eggs one at a time, mixing just until each egg is incorporated. Gently fold in Fruity Pebbles cereal.
- Spoon filling onto baked crusts, distributing evenly and filling each muffin cup nearly to the top.
- Bake for 15 to 20 minutes or until centers are set. Remove from oven and cool completely at room temperature.
- Refrigerate cheesecakes for at least 4 hours. Just before serving, garnish with additional Fruity Pebbles cereal if desired.
Notes
- Ensure cream cheese is at room temperature for easy mixing.
- Let cheesecakes cool completely before refrigerating to help prevent moisture buildup.
- Garnish with extra Fruity Pebbles right before serving for additional crunch.
Nutrition
- Serving Size: 1 mini cheesecake
- Calories: 220
- Sugar: 14 grams
- Sodium: 300 milligrams
- Fat: 12 grams
- Saturated Fat: 7 grams
- Unsaturated Fat: 3 grams
- Trans Fat: 0 grams
- Carbohydrates: 23 grams
- Fiber: 1 gram
- Protein: 4 grams
- Cholesterol: 60 milligrams