There are some foods that don’t just feed you — they ground you. They slow you down, make you linger at the table, and somehow taste like memory even if you’re making them for the very first time. Golden skillet cornbread is one of those foods.
If you’ve ever pulled a cast-iron skillet from a hot oven and heard that gentle sizzle around the edges, you already know the feeling. The crust is deep golden, almost caramelized. The center is tender, moist, and just crumbly enough to fall apart under your fork. It’s not flashy. It doesn’t beg for attention. But once it’s on the table, everything else fades into the background.
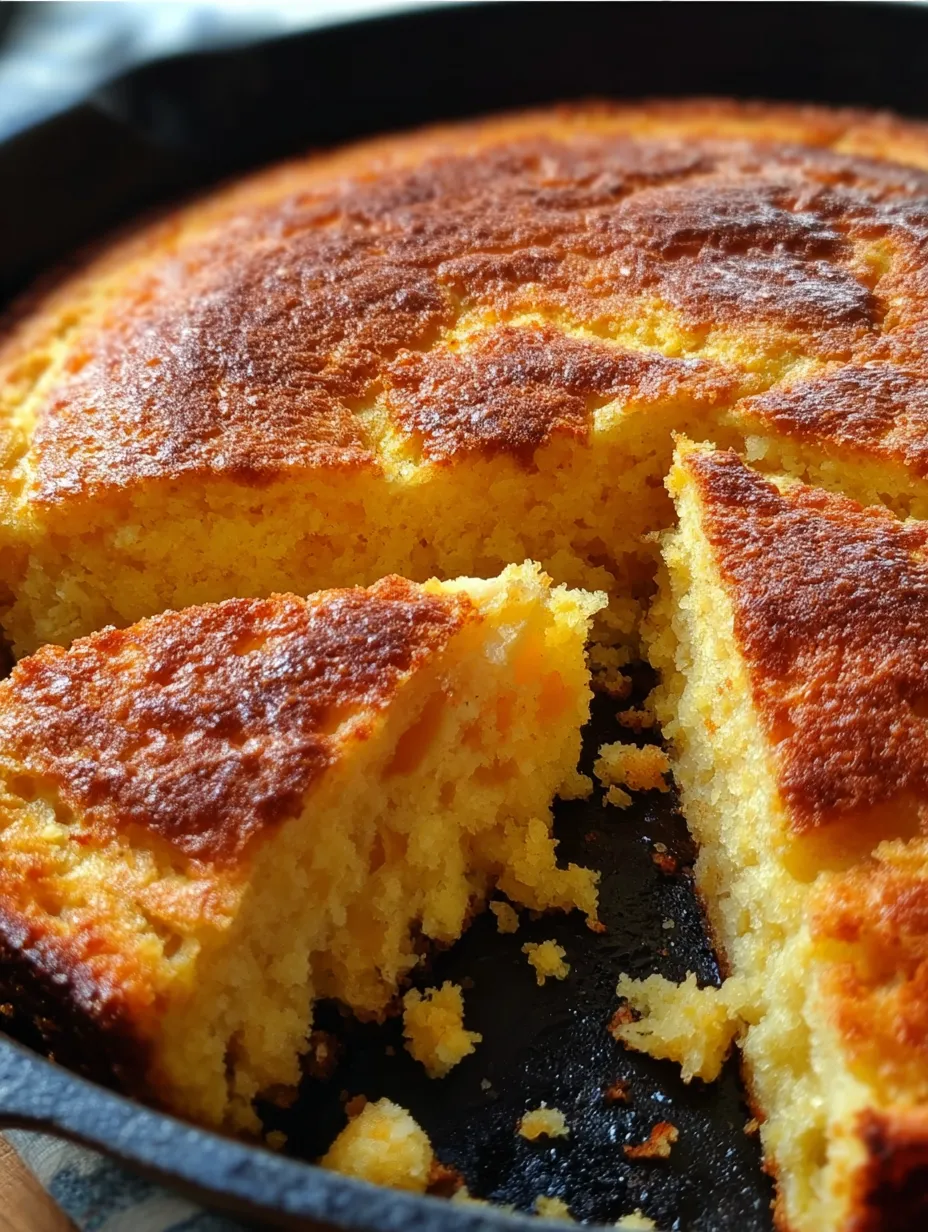
This is the kind of cornbread that looks exactly like the image you shared — thick, rustic, deeply golden on top, with a slightly cracked surface and a buttery sheen. A wedge is cut out, crumbs scattered casually in the skillet, because nobody waits long enough for perfection. It’s warm. It’s inviting. It’s real.
This article isn’t just about how to make Golden Skillet Cornbread. It’s about why this recipe works, how to get that unmistakable crust, how to make small adjustments so it fits your kitchen and your taste, and how this simple bread earns its place at the table again and again.
Why Skillet Cornbread Is Different (and Better)
Cornbread can be made in many ways, but skillet cornbread stands apart. The cast-iron skillet isn’t just a pan — it’s a partner in the recipe.
When you preheat the skillet in a hot oven, you’re setting the stage for that signature crust. The moment the batter hits the melted butter in the pan, it sizzles. That sound isn’t just satisfying; it’s science at work. The heat immediately begins forming a crisp edge, sealing in moisture while building flavor.
Unlike cornbread baked in a glass dish or metal pan, skillet cornbread has:
- Crispy, buttery edges
- A tender, moist center
- A rustic, old-fashioned appearance
- Deeper flavor from the cast iron
The image you attached shows all of this perfectly — a thick, evenly baked cornbread with a rich golden color and a crumb that’s soft but structured. That’s not an accident. That’s technique.
A Cornbread That Balances Tradition and Comfort
Cornbread can spark strong opinions. Some people insist it should never be sweet. Others grew up with a hint of sugar and wouldn’t have it any other way. This Golden Skillet Cornbread lives comfortably in the middle.
The small amount of sugar in this recipe doesn’t turn it into cake. Instead, it balances the natural earthiness of the cornmeal and enhances the golden crust. If you prefer a fully savory cornbread, you can reduce or omit the sugar — the structure of the recipe will still hold beautifully.
This flexibility is part of what makes this recipe feel so personal. It adapts to your table without losing its soul.
Ingredients That Create the Perfect Texture and Flavor
Let’s talk about what goes into this cornbread and why each ingredient matters. This isn’t about fancy additions — it’s about using simple pantry staples in the right way.
Cornmeal: The Heart of the Recipe
- Yellow cornmeal gives this cornbread its color, flavor, and structure.
- Fine or medium grind works well here. Fine produces a smoother crumb, while medium gives a slightly more rustic texture — both match the final product shown in the image.
All-Purpose Flour: The Softener
- Flour tempers the cornmeal, preventing the bread from becoming too crumbly or dry.
- It helps the cornbread slice cleanly while still feeling tender.
Sugar (Optional but Recommended)
- A small amount adds balance and enhances browning.
- It helps achieve that deep golden top without making the bread sweet.
Baking Powder: The Lift
- This gives the cornbread its height and lightness.
- The result is a thick slice that holds together but doesn’t feel dense.
Salt: The Flavor Anchor
- Salt brings out the natural sweetness of the corn and butter.
- Without it, the cornbread tastes flat.
Buttermilk: Moisture and Tang
- Buttermilk adds richness and a gentle tang that keeps the bread from tasting heavy.
- Its acidity works with the baking powder for a soft, airy crumb.
Eggs: Structure and Richness
- Eggs bind the batter and contribute to that custard-like interior texture.
Butter: Flavor, Moisture, and Crust
- Melted butter in the batter adds richness.
- Butter in the hot skillet creates the crisp, golden edges seen in the photo.
Every ingredient here serves a purpose. Together, they create a cornbread that feels intentional, not accidental.
The Importance of Preheating the Skillet
If there’s one step you should never skip, it’s preheating the skillet.
Placing the cast-iron skillet in a 425°F (220°C) oven before adding the batter does three crucial things:
- Creates Instant Crust
The hot surface begins cooking the batter immediately, forming a crisp edge. - Prevents Sticking
The melted butter coats the pan evenly, making release effortless. - Enhances Flavor
That initial sizzle caramelizes the batter slightly, deepening the corn flavor.
When you pour the batter into the skillet and hear that soft sizzle, you know you’re on the right track. That sound is the beginning of the crust you see in the final image — deeply golden, slightly crunchy, and irresistible.
Step-by-Step: Making Golden Skillet Cornbread
Let’s walk through the process in a way that feels natural and unhurried, because this recipe deserves your attention.
1. Heat the Oven and Skillet
Set your oven to 425°F (220°C). Place a 10-inch cast-iron skillet inside while it heats. This gives the pan time to get fully hot, not just warm.
2. Mix the Dry Ingredients
In a large bowl, whisk together:
- 1 ½ cups yellow cornmeal
- ½ cup all-purpose flour
- ¼ cup granulated sugar (optional)
- 1 tablespoon baking powder
- 1 teaspoon salt
Whisking evenly distributes the baking powder and salt, ensuring consistent texture throughout.
3. Combine the Wet Ingredients
In another bowl, whisk:
- 1 ¼ cups room-temperature buttermilk
- 2 large room-temperature eggs
Slowly whisk in:
- ½ cup melted unsalted butter
Adding the butter gradually prevents the eggs from scrambling and keeps the mixture smooth.
4. Bring It All Together
Pour the wet ingredients into the dry mixture. Stir gently, just until combined.
The batter should look thick and slightly grainy — not smooth like cake batter. Overmixing will make the cornbread tough, so stop as soon as there are no dry pockets.
5. Butter the Hot Skillet
Carefully remove the hot skillet from the oven. Add 1 tablespoon of butter, swirling it around until fully melted and bubbling.
This step is where the magic starts.
6. Pour and Listen
Pour the batter into the skillet. You should hear a soft sizzle. That sound means the crust is forming exactly as it should.
7. Bake to Golden Perfection
Bake for 20–25 minutes, until:
- The top is deeply golden
- The center is set
- A toothpick comes out clean
The cornbread should look like the image: evenly baked, rich in color, with a slightly cracked top.
8. Rest Before Slicing
Let the cornbread rest for 5–10 minutes. This allows the crumb to settle and makes slicing cleaner.
Then cut a wedge, because nobody ever waits longer than that.
This recipe aligns perfectly with that final product. The high oven temperature ensures browning. The butter-rich batter creates moisture. The skillet delivers structure and crust.
If your cornbread looks like the photo, you’ve done it right.
You may like as well :
Cranberry Honey Butter (Whipped & Festive)
Honey Butter Sweet Potato Cornbread Recipe
How This Cornbread Fits Into Everyday Meals
Golden Skillet Cornbread isn’t reserved for holidays or special occasions. It shows up wherever comfort is needed.
It pairs beautifully with:
- Chili or stew
- Barbecue and grilled meats
- Beans and greens
- Fried chicken
- A simple bowl of soup
It also stands on its own. Warm slices with butter, a drizzle of honey, or even just as-is are more than enough.
Leftovers (if there are any) reheat well and make an excellent breakfast the next morning.
Print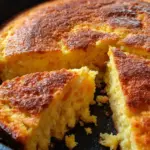
Golden Skillet Cornbread
- Prep Time: 15 minutes
- Cook Time: 25 minutes
- Total Time: 40 minutes
- Category: Breads & Quick Breads (Southern Classics / Comfort Food)
Description
🌽 Warm, crackly-edged, and deeply comforting — this golden skillet cornbread is everything a classic should be. Baked in a sizzling cast-iron skillet, it delivers a crisp crust with a tender, buttery crumb inside. Perfect with soups, stews, or enjoyed warm with melting butter and a drizzle of honey 🧈✨
Ingredients
1 ½ cups yellow cornmeal (fine or medium grind)
½ cup all-purpose flour
¼ cup granulated sugar (optional, for balance)
1 tablespoon baking powder
1 teaspoon salt
1 ¼ cups buttermilk, room temperature
2 large eggs, room temperature
½ cup unsalted butter, melted
1 tablespoon unsalted butter (for the skillet)
Instructions
Preheat oven to 425°F (220°C) and place a 10-inch cast-iron skillet inside to heat (10 minutes). 🔥
In a large bowl, whisk together cornmeal, flour, sugar, baking powder, and salt until evenly combined (2 minutes). 🥣
In another bowl, whisk buttermilk and eggs until smooth, then slowly whisk in the melted butter (2–3 minutes). 🧈
Add the wet ingredients to the dry ingredients and stir gently just until combined; do not overmix (1–2 minutes). 🌽
Carefully remove the hot skillet from the oven and add 1 tablespoon butter, swirling until melted and bubbling (1 minute). ⚠️
Pour the batter into the hot skillet — it should sizzle softly — and spread evenly (1 minute). ✨
Bake until deeply golden and a toothpick inserted in the center comes out clean (20–25 minutes). 🍞
Let rest before slicing so the crumb sets and flavors deepen (5–10 minutes). ❤️
Notes
This cornbread leans toward a traditional Southern-style texture, with a crisp crust and tender interior rather than a cake-like crumb.
Heating the cast-iron skillet is essential — it’s what creates those golden, crackly edges everyone reaches for first.
For a less sweet version, the sugar can be reduced or omitted without affecting structure.
Fine or medium-grind cornmeal works best for a smooth yet hearty bite.
Letting the cornbread rest before slicing helps the crumb set and keeps it beautifully moist.
This pairs especially well with chili, beans, braised greens, or simply warm butter and honey — the kind of side that quietly steals the spotlight at the table.
Nutrition
- Serving Size: 8 servings
- Calories: 280 kcal
Small Adjustments You Can Make Without Losing the Soul
This recipe is sturdy. You can make small changes without compromising the final result.
- No sugar: Leave it out for a fully savory version.
- Extra richness: Replace ¼ cup of buttermilk with heavy cream.
- Corn-forward flavor: Use stone-ground cornmeal for more texture.
- Thicker crust: Add an extra tablespoon of butter to the skillet.
Each adjustment keeps the spirit of the cornbread intact.
Why This Recipe Becomes a Habit
Some recipes impress once. Others become routine. This one becomes part of your rhythm.
You make it on busy weeknights because it’s simple.
You make it on slow Sundays because it feels right.
You make it for guests, and they always ask for the recipe.
It doesn’t try to be trendy. It doesn’t need embellishment. It earns its place quietly, slice by slice.
That’s why it disappears so fast. That’s why the crumbs in the skillet tell the story.
Conclusion: A Cornbread Worth Remembering
Golden Skillet Cornbread is more than a side dish. It’s a small ritual — the preheated skillet, the sizzle, the wait, the first warm slice. It connects past and present, busy nights and quiet mornings, simple ingredients and deep satisfaction.
This is the kind of recipe that doesn’t shout. It whispers. And once it becomes part of your kitchen, it stays there.
Make it once, and you’ll understand why it never lasts until the next day.
Similar recipes :
Ultimate Cinnamon Swirl Apple Fritter Bread 🍎 – A Cozy Slice of Fall Comfort
Creamy Pecan Streusel Cobbler: A Cozy Dessert You’ll Fall in Love With
Frequently Asked Questions
1. Can I make this cornbread without a cast-iron skillet?
Yes, but you’ll lose some of the crust. If needed, use a heavy oven-safe pan and preheat it the same way.
2. Why does my cornbread turn out dry sometimes?
Overbaking or overmixing are the usual culprits. Remove it as soon as the center is set and mix gently.
3. Can I use milk instead of buttermilk?
Buttermilk is best, but you can substitute milk with a teaspoon of vinegar or lemon juice added.
4. How do I store leftovers?
Wrap tightly and store at room temperature for one day or refrigerate for up to three days.
5. Can I double this recipe?
Yes, but use a larger skillet or two pans to maintain proper thickness and baking time.


