You know that feeling when you walk into a kitchen and smell warm cinnamon, sweet apples, and buttery goodness wafting from the oven? That’s exactly what you get when Grandma’s Apple Crumb Bars are baking. These bars aren’t just dessert—they’re a memory, a hug, a little piece of home wrapped in every golden, crumbly bite.
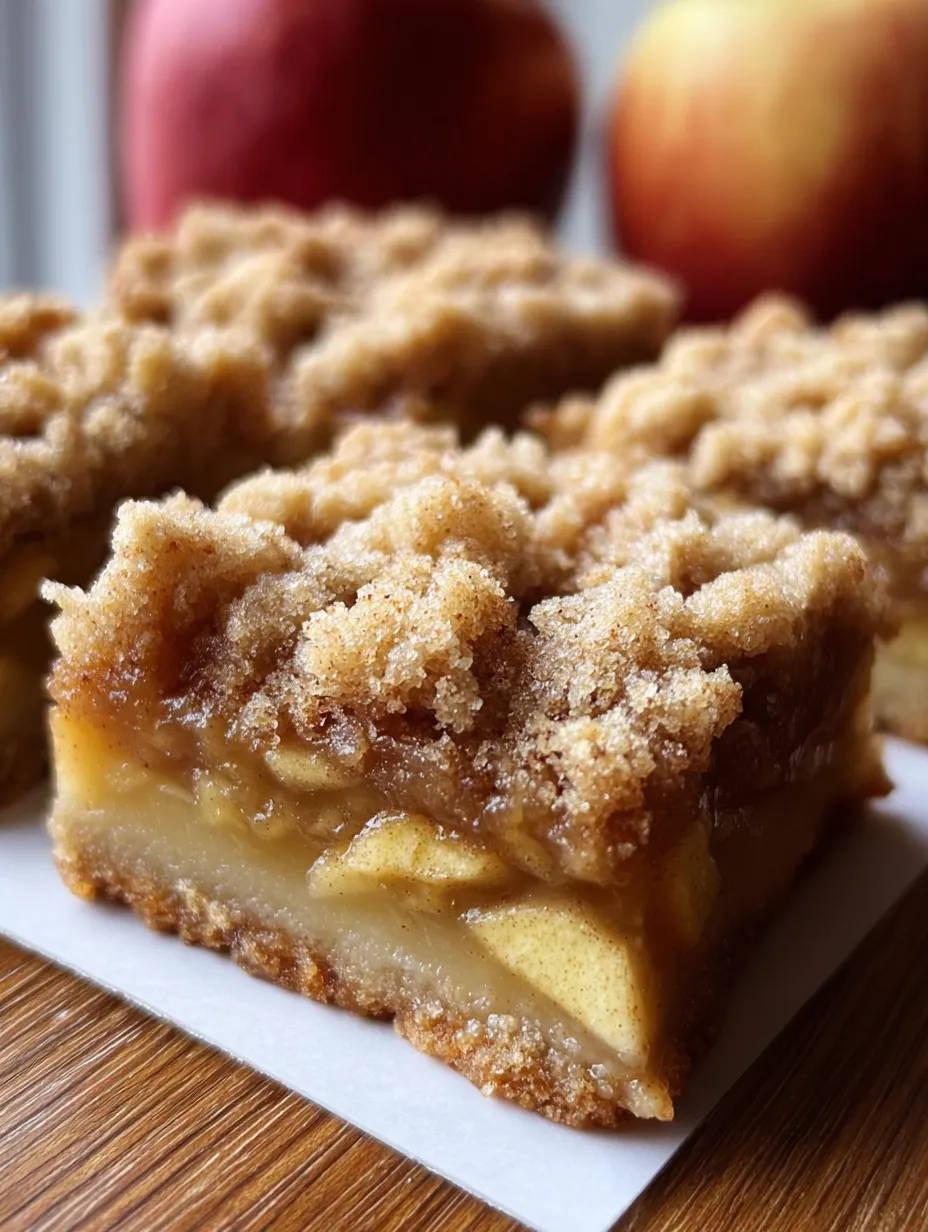
Whether it’s the crisp buttery base, the cinnamon-sugar spiced apples, or the crumbly topping that melts in your mouth, every element in this recipe plays its role to perfection. Best of all, they look just as amazing as they taste—thick, juicy layers and a rustic crumble top just like in the photo. So, let’s roll up our sleeves and start baking something truly special.
Table of Contents
Why These Apple Crumb Bars Are So Special
There are apple desserts, and then there are Grandma’s apple desserts. What makes these bars so special is their simplicity and balance. You get three layers in one bite:
- A rich, shortbread-like base that holds everything together.
- A juicy, spiced apple filling that’s neither too sweet nor too tart.
- A crumbly, buttery topping that’s baked to golden perfection.
They’re the kind of treat that makes you want to wrap up in a blanket with a warm drink and watch the leaves fall outside. They’re not fussy, and they don’t try to be fancy. But oh, they deliver flavor in the most nostalgic way.
Ingredients You’ll Need
Let’s break down what goes into making these delicious apple crumb bars. Simple pantry staples come together in the most magical way.
For the Crust and Crumble:
- 2 cups all-purpose flour
- 1/2 cup granulated sugar
- 1/4 teaspoon salt
- 3/4 cup unsalted butter, cold and cubed
This mixture pulls double duty. Two-thirds go on the bottom to make a soft yet sturdy crust, while the rest gets crumbled on top for that irresistible texture.
For the Apple Filling:
- 4 large apples, peeled, cored, and thinly sliced
- 1/4 cup light brown sugar
- 1/2 teaspoon ground cinnamon
- 1/4 teaspoon ground nutmeg
- 1 teaspoon lemon juice
- 1 tablespoon cornstarch
The filling is sweet, tart, warm, and cozy—all thanks to that dreamy combo of cinnamon, nutmeg, and lemon juice. And let’s not forget the cornstarch—it helps everything hold together without turning the crust soggy.
Choosing the Right Apples for the Perfect Bars
Not all apples are created equal—especially when it comes to baking. You want an apple that holds its shape and offers that tartness to balance the sweetness. Granny Smith apples are the gold standard here. Their tartness punches through the sweet layers like a bright ray of fall sunshine.
Other good choices? Honeycrisp, Braeburn, or Pink Lady. Want to mix things up? Use a combo of two varieties to create layers of flavor and texture.
Let’s Talk Butter – The Secret to That Buttery Crumb
Butter is the heart of these crumb bars. Cold, cubed, and ready to work its magic, it creates that soft, tender base and the crumbly, golden topping. The trick? Don’t let it melt! You want small, pea-sized bits of butter blended into the flour. This is what gives that melt-in-your-mouth texture.
Pro tip: After making the crumb mixture, pop it in the fridge while prepping the apples. Cold crumb equals better texture.
The Importance of Lemon Juice in Fruit Desserts
You might wonder why just one teaspoon of lemon juice is in the filling. Trust me—it matters. Lemon juice brings brightness and keeps the apples from browning, but more importantly, it enhances the flavor. It’s like flipping on a light switch in a dark room. Suddenly, everything tastes fresher, cleaner, and more vibrant.
The Role of Cornstarch: Keeping Things Thick and Juicy
Ever bitten into a fruit bar and found a soggy bottom or a runny middle? Cornstarch prevents that. When the apples release their juices, cornstarch thickens them just enough to keep the filling gooey without soaking into the crust. It also helps the bars hold their shape once cooled—no messy slices here!
Step-by-Step Instructions to Make Apple Crumb Bars
This recipe is beginner-friendly, and once you do it once, you’ll want to bake it over and over again.
Making the Crumb Base
- Preheat the oven to 350°F (175°C). Line a 9×13-inch baking pan with parchment paper or grease it lightly.
- In a large bowl, combine flour, sugar, and salt.
- Cut in the cold, cubed butter using a pastry cutter or your fingers until the mixture looks like coarse crumbs.
- Take two-thirds of this mixture and press it firmly into the bottom of the prepared pan. This is your crust.
Preparing the Apple Filling
- In another bowl, toss the sliced apples with the brown sugar, cinnamon, nutmeg, lemon juice, and cornstarch.
- Mix until the apple slices are well-coated. Don’t rush this step—you want those flavors to soak into the apples.
Layering Everything Together
- Spread the apple filling evenly over the crust.
- Sprinkle the remaining crumb mixture over the top. Make sure it covers all the apples—it’ll bake into that glorious golden crumble.
Baking It to Golden Perfection
- Bake for 45–50 minutes or until the top is golden brown and the apples are tender when poked with a fork.
- Your kitchen will smell like a cozy fall bakery—promise!
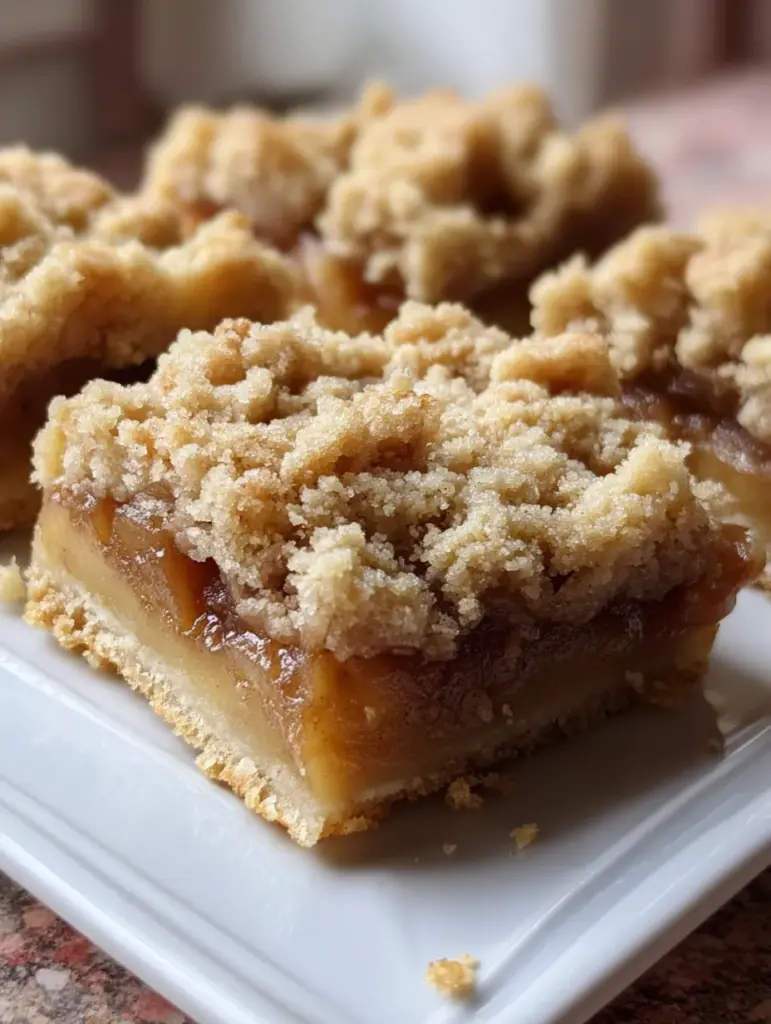
Cooling and Cutting – The Final Touch
Let the bars cool completely in the pan before slicing. This step is key. If you cut too soon, the filling won’t set properly, and the bars could fall apart. Patience pays off here!
Once cool, slice into 12 generous bars or smaller squares if you’re sharing at a party.
Texture, Flavor, and Aroma – What to Expect
Biting into one of these bars is like walking through an apple orchard with a warm cinnamon breeze. The base is soft and slightly chewy, the apples are tender but not mushy, and the topping is buttery, sweet, and perfectly crisp.
That combination of sugar, cinnamon, nutmeg, and apple? It’s basically autumn in dessert form.
Grandma’s Baking Tips You Don’t Want to Miss
Grandma didn’t follow trends—she followed flavor and feel. Her baking was always spot on, and here are a few timeless tips that make all the difference:
- Always use cold butter for crumb toppings. Warm butter melts too quickly and gives you a greasy topping instead of a crumbly one.
- Chill the crust before baking for a flakier texture.
- Don’t overbake. The bars will continue to set as they cool, so once the top is golden and the apples are soft, you’re done.
- Use parchment paper for easy removal and cleaner slices.
- Let them sit overnight. The flavors deepen and meld together for an even better bite the next day.
It’s those little things that take these bars from good to just like Grandma’s.
How to Store Apple Crumb Bars (And Freeze Them Too!)
Made a big batch? Lucky you—these bars store like a dream.
- Room Temperature: Store in an airtight container for up to 2 days.
- Fridge: Keep them fresh for up to 5 days—just make sure they’re sealed tightly.
- Freezer: Yes, you can freeze them! Wrap individual bars in plastic wrap, then place in a freezer bag. They’ll stay good for up to 3 months. Thaw in the fridge overnight or pop in the microwave for a warm treat.
Pro tip? These bars taste amazing cold and warm. So whether you’re sneaking one from the fridge or heating it with a scoop of vanilla ice cream, you’re winning.
Make It Ahead – Perfect for Parties and Holidays
Planning ahead for Thanksgiving or a cozy fall get-together? These bars are the ultimate make-ahead dessert.
- Bake them a day or two early.
- Let them cool completely.
- Store in the fridge until you’re ready to serve.
- Warm slightly before serving if you like (or not—they’re just as dreamy chilled).
They’re easy to slice, easy to serve, and don’t need fancy plating. Just cut and go.
Serving Suggestions – Add a Scoop of This!
You could just eat them as-is (and they’re amazing), but if you want to elevate them? Try this:
- Warm a bar and top it with vanilla bean ice cream.
- Drizzle with warm caramel sauce.
- Sprinkle some sea salt on top for that sweet-salty hit.
- Pair with whipped cream and a hot mug of cider.
It’s like taking something already amazing and giving it a little crown.
A Twist on Tradition – Variations You Can Try
Want to mix things up a bit while keeping that cozy apple base? Try these fun additions.
Add Nuts
Chopped walnuts or pecans in the crumble topping add a rich crunch and nutty warmth. Just mix 1/2 cup into the crumb mixture before sprinkling it over the apples.
Mix in Berries
Apples pair beautifully with berries like blueberries or raspberries. Add 1/2 cup fresh or frozen berries to the apple filling for a fruity twist.
Try a Caramel Drizzle
Once the bars are baked and cooled, drizzle with caramel sauce for a gooey, indulgent finish. Bonus points if you make the caramel from scratch!
Print
Grandma’s Apple Crumb Bars
- Prep Time: 20 minutes
- Cook Time: 50 minutes
- Total Time: 1 hour 10 minutes
- Category: 12 bars
Description
A cozy, old-fashioned treat straight from Grandma’s kitchen! ❤️ Buttery crumb layers, spiced apples, and that golden crunch on top — these apple bars bring all the warmth and nostalgia of homemade comfort baking. Perfect with a scoop of vanilla ice cream or a drizzle of caramel! 🍏🥧
Ingredients
2 cups all-purpose flour
1/2 cup granulated sugar
1/4 teaspoon salt
3/4 cup unsalted butter, cold and cubed
4 large apples, peeled, cored, and thinly sliced
1/4 cup light brown sugar
1/2 teaspoon ground cinnamon
1/4 teaspoon ground nutmeg
1 teaspoon lemon juice
1 tablespoon cornstarch
Instructions
Preheat the Oven (5 minutes) 🔥
Preheat oven to 350°F (175°C). Grease or line a 9×13-inch baking pan with parchment paper.Make the Crumb Mixture (10 minutes) 🧈
In a large bowl, combine flour, granulated sugar, and salt.
Cut in cold butter using a pastry cutter or your fingers until the mixture resembles coarse crumbs.Form the Crust (5 minutes) 🍰
Press about two-thirds of the crumb mixture evenly into the prepared pan to form the crust base.Prepare the Apple Filling (10 minutes) 🍎
In another bowl, toss sliced apples with brown sugar, cinnamon, nutmeg, lemon juice, and cornstarch until well coated.Assemble the Layers (5 minutes) 🍯
Spread the apple mixture evenly over the crust.
Sprinkle the remaining crumb mixture over the apples to cover completely.Bake to Perfection (50 minutes) ⏲️
Bake for 45–50 minutes or until the top is golden brown and the apples are tender.Cool & Serve (5 minutes) ❄️
Let the bars cool completely in the pan before slicing. Serve warm or chilled.
Notes
These Grandma’s Apple Crumb Bars are the perfect nostalgic dessert — buttery, crumbly, and filled with spiced apple goodness. 🍂 The combination of cinnamon, nutmeg, and brown sugar gives them that comforting homemade warmth that pairs beautifully with a cup of coffee or a scoop of vanilla ice cream. For best results, use Granny Smith apples for their tartness and structure. You can also drizzle salted caramel sauce on top for an extra indulgent touch. 😋
Nutrition
- Serving Size: 12 bars
- Calories: 315 kcal
Troubleshooting: Avoid These Common Mistakes
Here’s how to make sure your bars come out perfectly every time:
- Don’t overwork the crumb mixture. You want a light, crumbly texture—not dough.
- Slice your apples thinly. Thick chunks take longer to bake and can lead to uneven layers.
- Don’t skip the cornstarch. It thickens the juices so you don’t end up with soggy bars.
- Let it cool completely. This isn’t optional. The bars need time to firm up for clean slices.
You may read as well :
3-Ingredient Apple Pie Dump Cake
Why Homemade Always Tastes Better
There’s just something magical about homemade desserts. No preservatives, no shortcuts—just real, honest ingredients mixed with love and maybe a little bit of nostalgia. These apple crumb bars remind us of slowing down, of baking from scratch, of handing down recipes that taste like home.
Each bite is a reminder that the best things in life are often the simplest.
Healthier Options – Can You Make These Guilt-Free?
Sure thing! You can lighten these up without losing too much of that rich, comforting flavor.
- Swap some of the all-purpose flour for whole wheat flour.
- Cut the sugar slightly in both the crust and filling.
- Use less butter and supplement with Greek yogurt or coconut oil (texture will vary).
- Add oats to the crumble for a fiber boost and heartier texture.
Remember, it’s dessert—enjoying it in moderation is part of the joy.
Final Thoughts – A Family Favorite That Never Fails
There’s a reason Grandma’s Apple Crumb Bars have stood the test of time. They’re simple to make, packed with warm fall flavors, and always a crowd-pleaser. Whether you’re baking for a holiday, a potluck, or just because the apples on your counter need a purpose, this recipe never disappoints.
Make them once, and they’ll be on your repeat list forever. Share them with someone you love—or keep them all to yourself. (We won’t tell.)
Happy baking!
Similar recipes :
Slow Cooker Apple Crisp
Easy Caramel Apple Dump Cake
Chicago Style Bakery Apple Slices
FAQs About Apple Crumb Bars
Q1: Can I use apple pie filling instead of fresh apples?
Yes, but fresh apples offer better texture and flavor. If you’re using pie filling, reduce the sugar and skip the cornstarch.
Q2: What’s the best way to reheat these bars?
Microwave each bar for 15–20 seconds or pop them in a 300°F oven for 10 minutes to re-crisp the top.
Q3: Can I make these gluten-free?
Absolutely! Use a gluten-free flour blend in a 1:1 ratio. Just make sure it includes xanthan gum for structure.
Q4: My crumb topping is too dry—what went wrong?
It could be too much flour or not enough butter. Make sure your butter is cold and evenly cut into the flour mixture.
Q5: Can I double the recipe for a larger crowd?
Yes! Use a sheet pan (13×18 inch) and double all ingredients. Baking time may need a slight increase—just watch for a golden top.