Introduction to Halloween Sugar Cookie Bars
As the leaves turn and the air gets crisp, it’s that magical time of year again—Halloween! I don’t know about you, but I adore whipping up treats that not only celebrate the season but also bring a smile to family and friends. That’s why I’m excited to share my Halloween Sugar Cookie Bars with you. They’re not just easy to make; they’re a delightful way to indulge your sweet tooth without spending hours in the kitchen. Perfect for busy moms like us, these bars make a festive and spooktacular treat that’ll impress everyone who takes a bite!
Why You’ll Love This Halloween Sugar Cookie Bars
These Halloween Sugar Cookie Bars are a home cook’s dream! They come together in no time, making them perfect for those busy weeknights or last-minute parties. The flavors are spot-on, balancing sweetness with a touch of holiday spice. Plus, the vibrant colors wow both kids and adults alike. With minimal mess and maximum enjoyment, these bars are the perfect treat for your Halloween festivities, allowing you to celebrate without the stress!
Ingredients for Halloween Sugar Cookie Bars
Gathering the right ingredients is half the fun of baking these Halloween Sugar Cookie Bars! Let’s take a close look at what you’ll need.
- Salted Butter: This adds richness and flavor to your bars. Softened butter ensures easy mixing and a light texture.
- White Sugar: Classic sweetener that contributes to the overall flavor and texture.
- Egg: This binds your ingredients together, helping achieve that chewy texture we love in cookie bars.
- Vanilla Extract: A splash enhances the sweetness of the bars and adds depth to the flavor profile.
- Sour Cream: Adds a subtle tanginess and moisture, keeping the bars soft and delicious.
- All-Purpose Flour: The base for our bars, creating a tender structure.
- Salt: Just a pinch amplifies the flavors and balances the sweetness.
- Baking Powder: This helps your bars rise, giving them the perfect softness.
- Food Coloring (Black and Orange): Makes these treats visually stunning! You can adjust the colors to suit your festive spirit.
For the frosting, you’ll need:
- Salted Butter: Again, for that rich flavor.
- Confectioner’s Sugar: This gives your frosting a sweet and fluffy texture.
- Half & Half: A splash creates a smooth, spreadable frosting.
- Vanilla Extract: Just like in the bars, it adds that delightful aromatic essence.
- Purple Food Coloring: A fun twist to make your frosting pop! Go wild with your creativity!
Exact quantities for each ingredient can be found at the bottom of the article, ready for you to print. Happy baking!
How to Make Halloween Sugar Cookie Bars
Now that we have all our ingredients in a delightful pile, let’s dive into the fun part—making these Halloween Sugar Cookie Bars! Follow these simple steps, and I promise you’ll have a treat that will enchant your family and friends.
Step 1: Preheat and Prepare
First things first, preheat your oven to 375°F.
While it’s warming up, grab your trusty 9×13 inch baking dish and grease it with a little butter or cooking spray. This will ensure your delicious cookie bars slide right out with no sticky situation!
Step 2: Creaming Ingredients Together
In a large mixing bowl, add the softened salted butter and white sugar. Using an electric mixer, cream them together.
Beat the mixture on medium speed for about 3 minutes until it becomes light and fluffy. It should look like a cloud of sweetness!
Step 3: Incorporating Wet Ingredients
Add in the egg, vanilla extract, and sour cream. Mix until everything is well combined.
Make sure you work it until the mixture is smooth. It should be a lovely, creamy blend that looks good enough to eat (but let’s save that for after baking!).
Step 4: Combine Dry Ingredients
In a separate medium bowl, whisk together the all-purpose flour, salt, and baking powder.
Gradually add this dry mixture to the wet mixture, half a cup at a time. This step is crucial to avoid any flour clouds. Mix until everything is just combined, but don’t overmix; we want soft bars, after all!
Step 5: Coloring the Dough
Now comes the fun part—let’s get colorful! Divide the dough into two equal parts.
In one part, add the black food coloring, and in the other, add the orange. Use your hands to knead the colors in. Feel free to add more food coloring until you achieve a color that screams Halloween!
Step 6: Baking the Cookie Bars
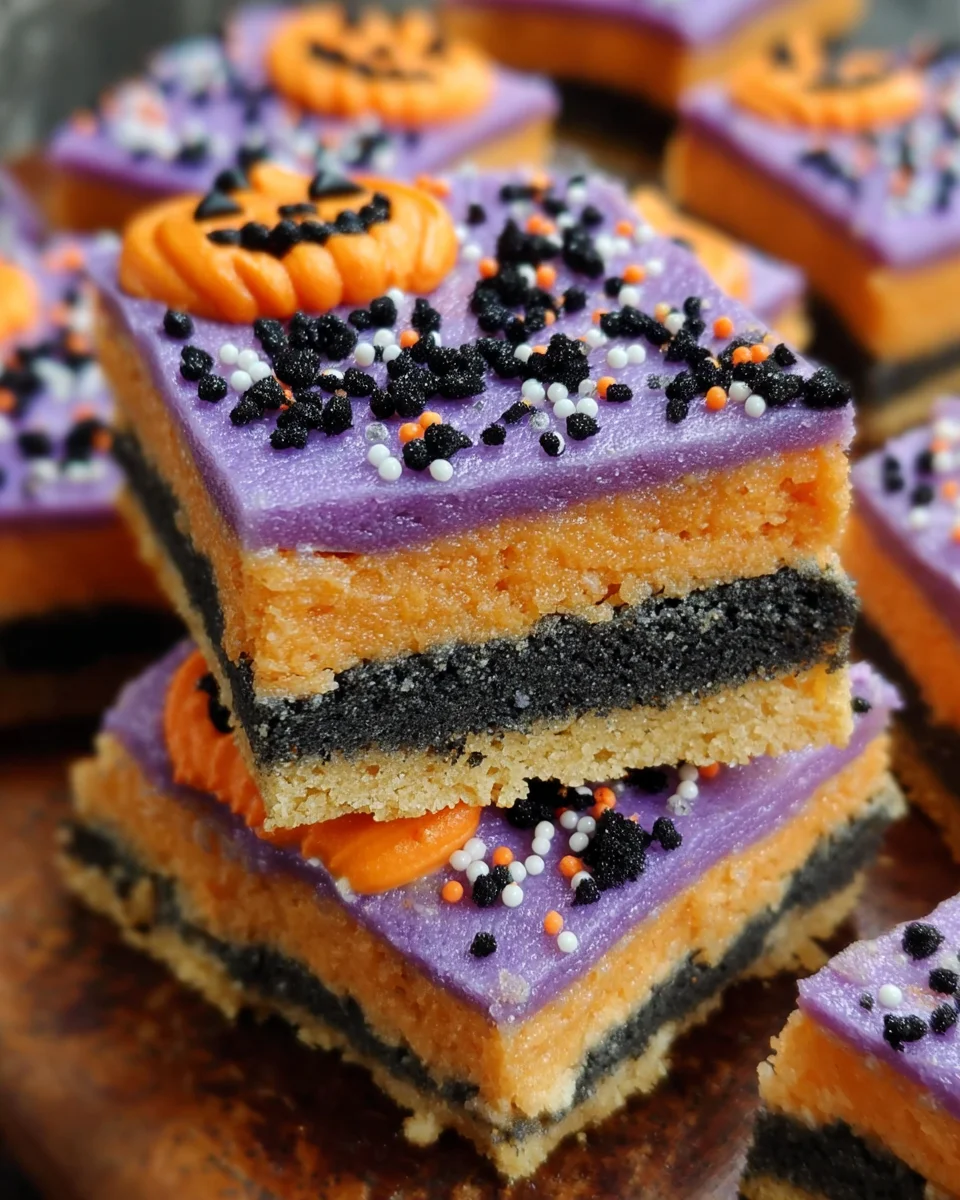
Take the black dough and press it evenly into the bottom of your greased baking dish. This forms the first layer.
Next, spread the orange dough over the black one, smoothing it out with your fingers all the way to the edges.
Bake in the preheated oven for 22-24 minutes. You’ll know they’re done when the edges turn lightly golden. Patience is key here; it’ll be worth the wait!
Step 7: Making the Frosting
Once your bars have cooled completely, it’s time to whip up that scrumptious frosting. In a medium bowl, cream the softened butter until it’s smooth.
Gradually add in a cup of confectioner’s sugar, alternating with a splash of half-and-half until you reach your desired consistency. Mix in vanilla for flavor.
Finally, add purple food coloring until you achieve a spooky shade perfect for Halloween!
Step 8: Frosting and Decorating
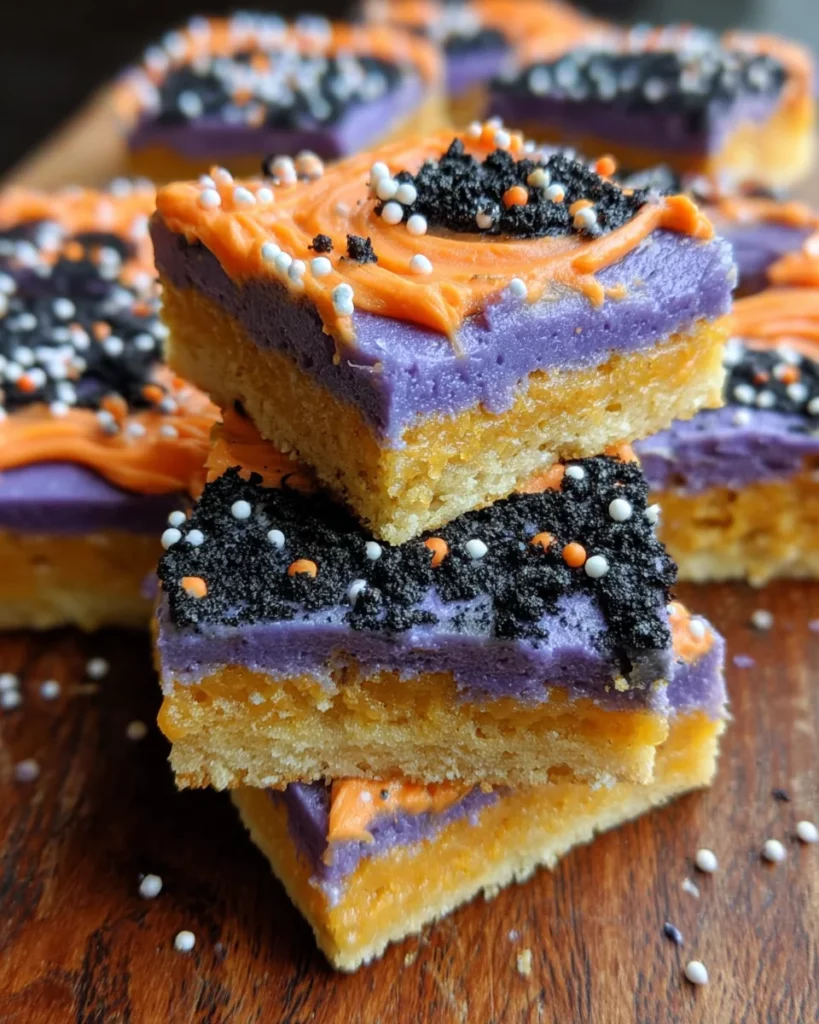
With your frosting ready, spread it evenly over the cooled cookie bars.
While the frosting is still wet, sprinkle your favorite Halloween sprinkles on top. They’ll stick wonderfully and create a festive masterpiece!
Let your bars set a bit, and then it’s time to enjoy your homemade Halloween Sugar Cookie Bars!
Tips for Success
- Always use room temperature butter for easier mixing and fluffiness.
- Don’t rush the baking! Keep an eye on those edges to avoid overbaking.
- Let your cookie bars cool completely before frosting—this prevents melting.
- Feel free to get creative with food colors to match your Halloween theme!
- Store leftovers in an airtight container to keep them fresh and soft.
Equipment Needed for Halloween Sugar Cookie Bars
- Baking Dish: A 9×13 inch dish is ideal, but a large oven-safe pan can work too.
- Mixing Bowls: Use medium and large bowls for easy mixing—avoid plastic if possible for easier cleaning.
- Electric Mixer: A stand mixer or handheld mixer will save you time and effort.
- Spatula: A silicone spatula is perfect for scraping down the sides and spreading frosting.
- Measuring Cups and Spoons: Essential for getting your ingredient ratios just right.
Variations of Halloween Sugar Cookie Bars
- Gluten-Free Flour: Substitute regular flour for a 1:1 gluten-free blend to cater to gluten sensitivities.
- Nut Butter Swirl: Add a drizzle of peanut butter or almond butter on top before baking for a nutty twist.
- Chocolate Chips: Fold in some mini chocolate chips into the dough for an extra delightful surprise in each bite.
- Spiced Pumpkin Bars: Add pumpkin puree and a dash of cinnamon to the dough for a festive fall flavor.
- Vegan Option: Use vegan butter and replace the egg with flaxseed meal mixed with water for a dairy-free version.
Serving Suggestions for Halloween Sugar Cookie Bars
- Pair with Milk: A classic glass of cold milk perfectly complements the sweetness of the bars.
- Festive Platter: Arrange the bars on a spooky-themed platter for a delightful presentation at Halloween parties.
- With Ice Cream: Serve warm bars topped with a scoop of vanilla ice cream for an indulgent treat.
- Coffee Delight: A slice alongside a cozy cup of pumpkin spice latte makes for a perfect afternoon pick-me-up.
- Share with Friends: Wrap them in cute packaging for thoughtful, homemade gifts to delight neighbors and friends.
FAQs about Halloween Sugar Cookie Bars
Here are some frequently asked questions about making these delightful Halloween Sugar Cookie Bars. I hope these answers help you as you whip up your spooktacular treats!
Can I make Halloween Sugar Cookie Bars ahead of time?
Absolutely! You can bake and frost the bars a day in advance. Just keep them in an airtight container at room temperature. They taste just as delicious the next day!
What if I don’t have black and orange food coloring?
No problem! You can achieve a spooky look using any color you have on hand. Consider mixing purple, green, or even using edible glitter for a fun design. Use your creativity!
How should I store leftover cookie bars?
Keep your leftover Halloween Sugar Cookie Bars in an airtight container. Stored this way, they’ll stay fresh for about a week, but trust me, they probably won’t last that long!
Can I freeze these cookie bars?
Yes! Once fully cooled, wrap the cookie bars tightly in plastic wrap and then in aluminum foil. They can last up to three months if frozen, making them perfect for holiday prep!
What are some good toppings for Halloween Sugar Cookie Bars?
Sprinkles are a must! You can also try adding mini chocolate chips, candy corn, or even crushed-up Halloween candies. Just be sure to add them when the frosting is still wet for the best adhesion!
Final Thoughts
Every bite of these Halloween Sugar Cookie Bars embodies the joy, nostalgia, and excitement of the season. As a passionate home cook, I find immense satisfaction in creating sweet treats that bring everyone together, whether it’s sharing them at family gatherings or with friends. The vibrant colors and delightful flavors spark laughter and makes memories that linger long after the treats are gone. So, roll up your sleeves, make a mess, and let the magic of baking fill your home. Trust me, these bars will quickly become a cherished tradition in your Halloween celebrations!
Print
Halloween Sugar Cookie Bars
- Prep Time: 30 minutes
- Cook Time: 24 minutes
- Total Time: 54 minutes
- Yield: 12–15 servings 1x
- Category: Dessert
- Method: Baking
- Cuisine: American
- Diet: Vegetarian
Description
Delicious and festive Halloween Sugar Cookie Bars, perfect for a spooktacular treat!
Ingredients
- 3/4 cup salted butter, softened
- 1 & 1/2 cup white sugar
- 1 egg
- 1 & 1/2 tsp. vanilla extract
- 2 Tbsp sour cream
- 3 & 3/4 cup all-purpose flour
- 1/2 tsp. salt
- 1 tsp. baking powder
- Black food coloring
- Orange food coloring
- 1/2 cup salted butter, softened
- 4 cups confectioner’s sugar
- 1/4 cup half & half
- 1 tsp. vanilla extract
- Purple food coloring
Instructions
- Preheat oven to 375°F and grease a 9×13 inch baking dish.
- Using an electric mixer, cream together the butter and sugar in a large bowl until light and fluffy; about 3 minutes.
- Add the egg and mix well.
- Add the vanilla and the sour cream and mix until completely blended.
- In a medium bowl, combine the flour, salt, and baking powder.
- Add the dry mixture to the wet mixture 1/2 cup at a time until all of it is added.
- Separate the dough into two equal parts and color one of the parts black and one of the parts orange.
- Press the black dough into the baking dish and spread it all the way out to the edges with your hands.
- Spread the orange dough out a little bit in your hands and then spread it over the black dough. Smush it out evenly, pushing it all the way to the edges as well.
- Bake for 22-24 minutes or until the edges are just lightly golden.
- Set aside to cool completely.
- In a medium bowl, cream the butter until smooth.
- Alternate adding a cup of powdered sugar and a little bit of half and half until it is all used and the frosting has formed.
- Stir in the vanilla and combine well.
- Add the purple food coloring until the desired color is achieved.
- Frost your cooled cookie bars evenly.
- Add the sprinkles while the frosting is still wet.
Notes
- Make sure to use softened butter for easy mixing.
- You can adjust the amount of food coloring based on your coloring preference.
- Store cookie bars in an airtight container to keep them fresh.
Nutrition
- Serving Size: 1 bar
- Calories: 250
- Sugar: 20g
- Sodium: 150mg
- Fat: 10g
- Saturated Fat: 5g
- Unsaturated Fat: 3g
- Trans Fat: 0g
- Carbohydrates: 35g
- Fiber: 1g
- Protein: 2g
- Cholesterol: 30mg


