Why Lemon Blueberry Mousse Cake Is So Popular
The Perfect Balance of Sweet and Tangy
There’s something almost addictive about the combination of lemon and blueberry. It’s like a perfectly choreographed dance one brings the sharp, citrusy zing while the other softens everything with natural sweetness. When you take your first bite of a lemon blueberry mousse cake, you immediately notice how the flavors don’t compete they complement each other beautifully. The lemon cuts through the richness of the cream, while the blueberries add juicy bursts that keep every spoonful interesting.
Think about it: desserts can often feel heavy or overly sweet, especially after a full meal. This one doesn’t. It feels light, refreshing, and almost cleansing on the palate. That’s one of the biggest reasons why it has become such a go-to dessert for warm weather or special occasions. It satisfies your sweet tooth without making you feel weighed down.
Another reason people love this combination is its natural appeal. Lemon and blueberries are both associated with freshness and health, even when used in desserts. According to nutrition data, blueberries are rich in antioxidants like anthocyanins, while lemons provide vitamin C. While this dessert is still indulgent, it carries a subtle “feel-good” factor that makes it even more enjoyable.
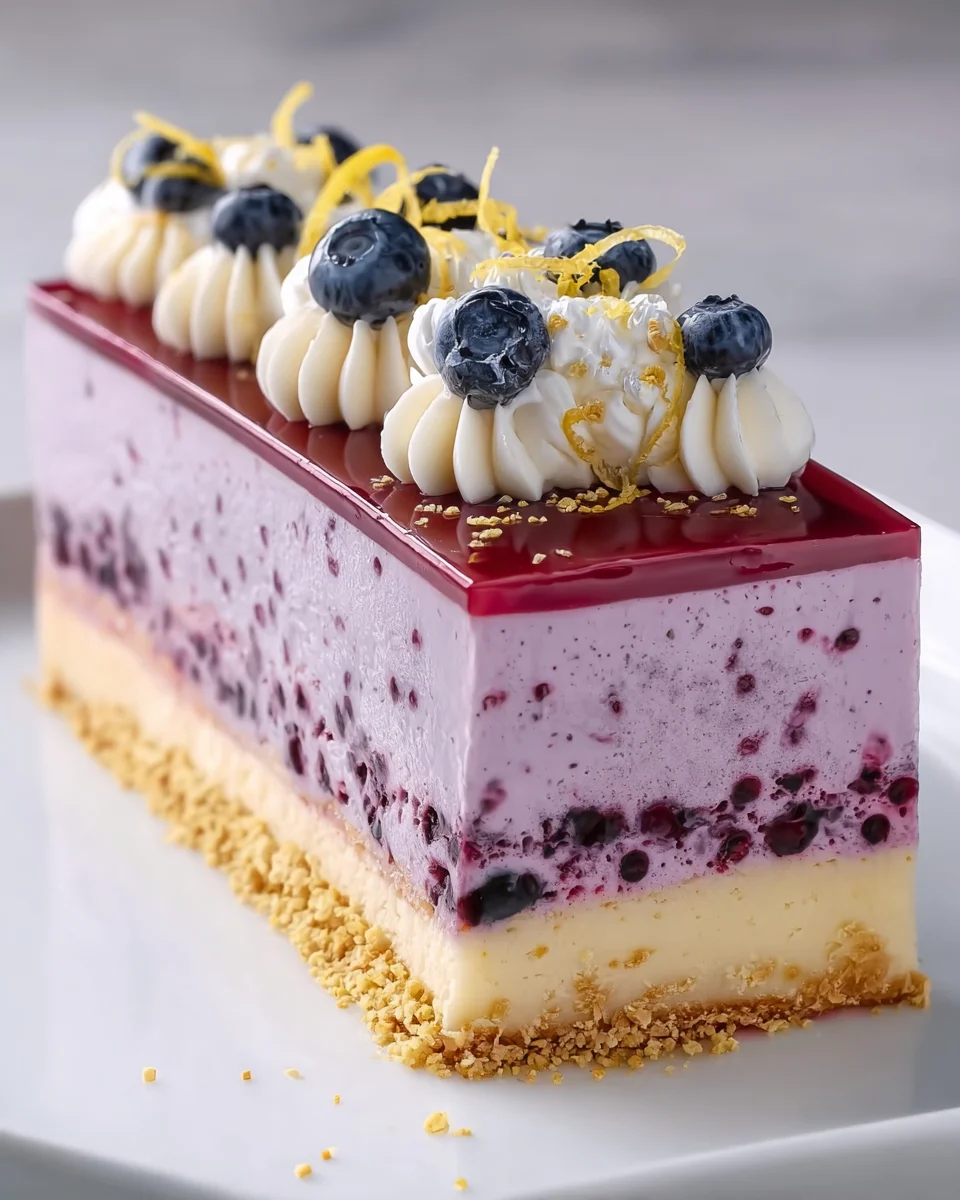
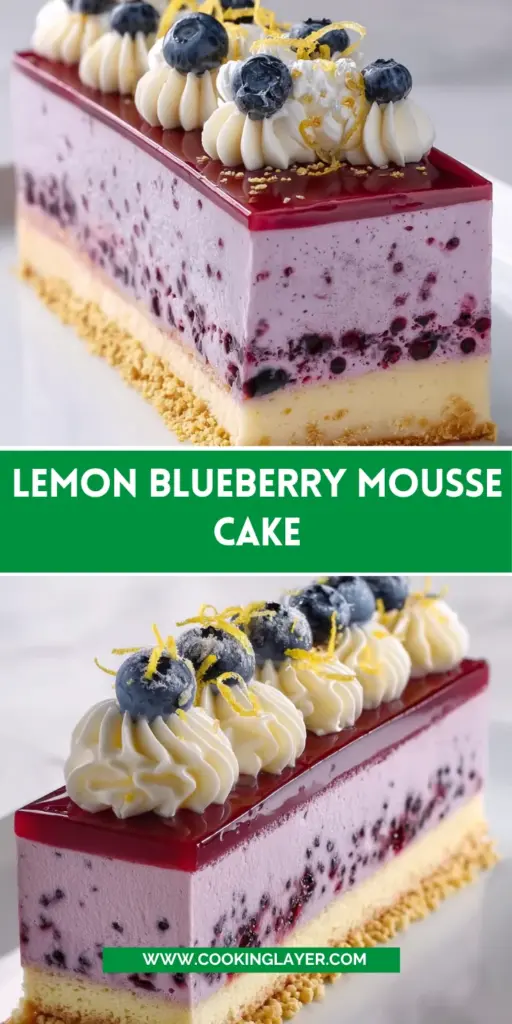
And let’s not ignore the visual factor. The soft yellow hue of lemon mousse paired with deep blue-purple berries creates a stunning contrast. Whether you’re serving it at a party or just making it for yourself, it looks as good as it tastes—which, honestly, is half the experience.
A No-Bake Dessert That Feels Gourmet
One of the most appealing aspects of this dessert is that it feels fancy without actually requiring advanced baking skills. You don’t need an oven, complicated tools, or professional training to pull it off. Yet somehow, when it’s done, it looks like something you’d order at a high-end café.
No-bake desserts have gained massive popularity in recent years, especially among home cooks who want impressive results with minimal effort. In fact, search trends consistently show spikes in interest for “no-bake cakes” during summer months. Why? Because nobody wants to turn on the oven when it’s already hot outside.
This mousse cake fits perfectly into that category. It’s simple, forgiving, and surprisingly versatile. You can make it as a full cake for slicing or portion it into elegant dessert cups for individual servings. Either way, it delivers that smooth, airy texture that feels luxurious with every bite.
What really sets it apart, though, is the texture. A good mousse is all about lightness—it should feel like it melts the moment it hits your tongue. This recipe achieves that effortlessly by folding whipped cream into the lemon mixture, creating a cloud-like consistency. If you choose to add gelatin, you get a slightly firmer structure that holds its shape beautifully when sliced.
It’s the kind of dessert that makes people ask, “Did you really make this?” And the best part? You can confidently say yes—without breaking a sweat.
Key Ingredients That Make This Dessert Shine
Fresh Lemon Juice: The Zesty Backbone
If this dessert had a personality, lemon juice would be its bold, energetic voice. It’s the ingredient that wakes everything up and gives the mousse its signature brightness. Without it, you’d just have a sweet cream dessert—and let’s be honest, that would be missing the whole point.
Fresh lemon juice is absolutely worth using here. Bottled juice might seem convenient, but it often lacks the vibrant aroma and complexity that fresh lemons bring. When you squeeze a real lemon, you’re not just adding acidity—you’re layering in subtle floral and citrus notes that make the dessert feel alive. That difference becomes especially noticeable in a no-bake recipe where every ingredient stands out.
There’s also a bit of chemistry happening behind the scenes. The acidity in lemon juice helps balance the richness of the whipped cream, preventing the dessert from feeling too heavy. It creates that clean, refreshing finish that makes you want another bite instead of pushing the plate away.
When mixing the lemon juice with sugar, take your time to ensure the sugar fully dissolves. This step matters more than it seems. Undissolved sugar can create a grainy texture, which disrupts the silky smoothness you’re aiming for. Stir patiently until the mixture feels completely uniform.
If you want to elevate things even further, a little lemon zest can be added alongside the juice. It intensifies the citrus flavor without adding extra liquid, giving your mousse a slightly more complex profile. Think of it as turning up the volume without distorting the sound.
Blueberries: Bursts of Natural Sweetness
Blueberries are the quiet heroes of this dessert. While lemon grabs your attention immediately, blueberries step in to round everything out. They add sweetness, color, and texture in a way that feels effortless yet essential.
Fresh blueberries work best because they hold their shape and provide those satisfying little pops when you bite into them. Each berry acts like a tiny pocket of juice, breaking up the smoothness of the mousse with moments of fruity intensity. It keeps the dessert from becoming monotonous and adds a playful element to every spoonful.
There’s also a visual charm to blueberries that’s hard to ignore. Scattered throughout pale lemon mousse, they create a beautiful contrast that looks almost artistic. If you’re serving guests, this alone can elevate the presentation from simple to stunning.
If fresh blueberries aren’t available, frozen ones can work—but with a small caveat. They tend to release more moisture as they thaw, which can slightly alter the texture of the mousse. To avoid this, pat them dry and fold them in gently while still partially frozen.
For those who like experimenting, you can also layer the blueberries instead of mixing them all in. This creates distinct pockets of fruit throughout the dessert, giving it a more structured and visually layered look. It’s a small tweak, but it changes the entire eating experience.
And here’s a little insider tip: saving a handful of blueberries for topping adds a finishing touch that makes the dessert feel complete. It’s like putting the final brushstroke on a painting.
Whipped Cream: Lightness and Volume
Whipped cream is what transforms this dessert from a simple mixture into a true mousse. It’s responsible for that airy, cloud-like texture that defines the entire experience. Without it, you’d end up with something dense and far less exciting.
The key here is to use properly whipped cream—not over-whipped, not under-whipped. You’re aiming for soft peaks that hold their shape but still feel smooth and pliable. If you overdo it, the cream can become grainy and harder to fold, which affects the final texture. If you under-whip, the mousse won’t hold its structure as well.
Folding is where the magic happens. Instead of stirring aggressively, you gently incorporate the whipped cream into the lemon mixture. This preserves the air you’ve whipped into the cream, which is what gives the mousse its lightness. Think of it like handling something delicate—you want to combine, not collapse.
Another thing to keep in mind is temperature. Cold cream whips better and holds its structure longer. If your kitchen is warm, it might help to chill your bowl and whisk beforehand. It’s a small step, but it can make a noticeable difference.
The richness of the cream also plays an important role in balancing the tartness of the lemon. It softens the sharp edges and creates a smooth, cohesive flavor profile. This balance is what makes the dessert feel indulgent without being overwhelming.
Optional Ingredients That Elevate Texture
Gelatin for Stability
Gelatin is one of those optional ingredients that quietly changes everything. You don’t have to use it, but once you do, you’ll notice a more structured and sliceable mousse. It’s especially helpful if you’re planning to serve this as a cake rather than in cups.
When properly dissolved and incorporated, gelatin helps the mousse set firmly while still maintaining its softness. It gives you clean slices and a more professional-looking presentation. Without it, the dessert will still taste amazing, but it may have a softer, more scoopable consistency.
The trick is to follow the packet instructions carefully. Gelatin needs to be dissolved fully before being added, and it should be mixed into the lemon base while still warm to avoid clumping. Timing matters here, but once you get the hang of it, it becomes second nature.
Graham Cracker Crust for Crunch
Adding a graham cracker crust introduces a completely different dimension to the dessert. Suddenly, you’re not just dealing with soft and creamy textures—you’ve got a buttery crunch at the base that contrasts beautifully with the mousse.
The crust is simple to make: crushed graham crackers mixed with melted butter until the texture resembles damp sand. Press it firmly into your pan, chill it briefly, and you’ve got a solid foundation that holds everything together.
What makes this crust so effective is the way it complements the flavors above it. The slight sweetness and toasted notes of the graham crackers pair perfectly with the bright lemon and juicy blueberries. It’s a classic combination for a reason.
If you want to experiment, you can swap graham crackers for digestive biscuits or even vanilla cookies. Each option brings its own subtle twist, allowing you to customize the dessert without complicating the process.
Step-by-Step Preparation Guide
Preparing the Optional Graham Cracker Crust
Creating the crust is like laying the groundwork for a great dessert—it sets the stage for everything that follows. Start by combining graham cracker crumbs with melted butter until the mixture holds together when pressed. You’re aiming for a texture similar to wet sand, not overly greasy or dry.
Once mixed, press the crumbs firmly into the bottom of your pan or serving dish. Use the back of a spoon or the bottom of a glass to create an even layer. This step is more important than it seems because an uneven crust can lead to inconsistent slices later on.
After pressing, refrigerate the crust for about 10 minutes. This helps it firm up and prevents it from crumbling when you add the mousse. It’s a quick step, but it makes a big difference in the final result.
Creating the Lemon Mousse Base
The mousse base is where all the flavor begins. Combine the lemon juice and sugar in a bowl, stirring until the sugar completely dissolves. This might take a few minutes, but patience pays off here.
If you’re using gelatin, prepare it according to the instructions and mix it into the lemon mixture while it’s still warm. This ensures it blends smoothly without forming lumps.
At this stage, you’ll have a bright, tangy liquid that smells incredibly fresh. It might not look like much yet, but this is the foundation of your mousse.
Folding Techniques for Perfect Texture
Now comes the most delicate part of the process—folding in the whipped cream. Instead of stirring, use a gentle folding motion. Scoop from the bottom and lift the mixture over itself, rotating the bowl as you go.
This technique helps maintain the airiness of the whipped cream, which is essential for achieving that light mousse texture. Rushing or mixing too aggressively can deflate the mixture, resulting in a denser dessert.
Once the mixture is smooth, carefully fold in the blueberries. Try not to crush them, as you want them to remain whole for both texture and appearance.
Assembling the Cake or Dessert Cups
Pour the mousse over the chilled crust or spoon it into individual serving cups. Smooth the top if needed, then refrigerate for at least two hours.
During this time, the mousse sets and develops its final texture. It’s a waiting game, but one that’s absolutely worth it.
When ready, serve chilled and, if you like, garnish with extra blueberries or a touch of lemon zest for a polished finish.
Pro Tips for a Perfect Mousse Cake
Avoiding Common Mistakes
Even though this dessert is surprisingly simple, a few small missteps can affect the final result more than you’d expect. The good news? Once you know what to watch for, it becomes almost foolproof. Think of these tips as your safety net—they’ll help you avoid the little pitfalls that can turn a silky mousse into something less impressive.
One of the most common mistakes is rushing the sugar dissolution step. If the sugar isn’t fully dissolved in the lemon juice, you’ll end up with a slightly gritty texture. That might not sound like a big deal, but in a dessert that’s all about smoothness, it stands out immediately. Take an extra minute or two and stir until the mixture feels completely uniform.
Another issue people run into is overmixing the whipped cream. It’s tempting to stir everything quickly to “get it done,” but that defeats the purpose of a mousse. Overmixing collapses the air you’ve worked so hard to incorporate, leaving you with a denser, heavier texture. Gentle folding is the key—treat the mixture like something delicate, not something you need to wrestle into submission.
Temperature also plays a bigger role than most realize. If your whipped cream is too warm, it won’t hold its structure well. On the flip side, if your gelatin mixture (if using) is too hot when added, it can deflate the cream. The sweet spot is a slightly cooled gelatin mixture and well-chilled cream.
Another subtle but important mistake is crushing the blueberries while folding them in. It’s easy to press too hard with your spatula, especially if you’re trying to mix quickly. But those whole berries are what give the dessert its bursts of flavor and visual appeal. Slow down and fold carefully—it’s worth it.
Lastly, don’t cut the chilling time short. Two hours is the minimum, not a suggestion. If you try to serve it too early, the mousse won’t have fully set, and you’ll lose that beautiful structure. Patience here is part of the recipe.
Getting the Ideal Texture Every Time
Texture is what separates a “good” mousse from one that people remember. You’re aiming for something that feels light, airy, and almost cloud-like—but still stable enough to hold its shape when scooped or sliced.
The balance starts with the whipped cream. Soft peaks are your best friend here. If you lift your whisk and the cream gently folds over itself without collapsing completely, you’re in the perfect zone. This consistency allows the mousse to stay fluffy without becoming stiff.
Folding technique is equally important. Instead of thinking of it as mixing, imagine you’re layering the ingredients together. Each fold should be slow and intentional, preserving as much air as possible. It might take a little longer, but the payoff is a noticeably lighter texture.
If you’re using gelatin, the amount matters. Too little and the mousse may not set properly; too much and it can feel slightly rubbery. Stick to the recommended quantity on the packet for best results. When done right, gelatin should be invisible in both taste and texture—it just quietly does its job in the background.
Another trick for perfect texture is letting the mousse rest undisturbed while chilling. Avoid moving the dish around too much in the fridge. A stable environment helps it set evenly, giving you that consistent, smooth finish throughout.
And here’s a small but powerful detail: the ratio of ingredients. Too much lemon juice can make the mixture overly thin, while too much cream can dull the flavor. The balance in this recipe is what makes it work, so try not to stray too far unless you’re comfortable experimenting.
Variations and Creative Twists
Making It Vegan or Dairy-Free
You might be wondering—can this dessert still work without dairy? Absolutely. With a few thoughtful swaps, you can create a version that’s just as satisfying, while catering to different dietary needs.
Instead of traditional whipped cream, you can use coconut cream. When chilled and whipped, coconut cream creates a similar airy texture with a slightly tropical undertone. Interestingly, that hint of coconut pairs surprisingly well with both lemon and blueberries, adding a new layer of flavor rather than feeling like a compromise.
For the gelatin, plant-based alternatives like agar-agar can be used. It behaves a bit differently—it sets more firmly and requires heating to activate—but once you get the hang of it, it’s a great substitute. Just be mindful of the quantity, as agar tends to set more strongly than gelatin.
The crust can also be adapted easily. Many store-bought graham crackers contain honey, so if you’re aiming for a fully vegan version, look for plant-based biscuits or make your own crumb base using vegan cookies.
What’s interesting about these substitutions is that they don’t just replicate the original—they create a slightly different dessert experience. The flavors shift subtly, the texture may be a bit firmer, but the essence of the mousse remains intact.
Adding Layers or Extra Flavors
Once you’ve mastered the basic recipe, it opens the door to all kinds of creative variations. Think of it as a blank canvas—you can keep it simple or build something more elaborate depending on your mood.
One popular twist is adding layers. Instead of mixing all the blueberries into the mousse, you can create alternating layers of mousse and berries. This not only looks visually stunning when sliced but also creates a more dynamic eating experience, with distinct flavor zones in each bite.
You can also introduce complementary flavors. A thin layer of blueberry compote, for example, intensifies the fruitiness and adds a slightly jammy texture. Or consider adding a hint of vanilla to the whipped cream—it softens the citrus edge and makes the dessert feel a bit more rounded.
For those who enjoy a bit of crunch beyond the crust, crushed nuts like almonds or pistachios can be sprinkled between layers or on top. It’s a small addition, but it adds contrast that makes the dessert more interesting.
Another fun idea is turning this into a layered parfait in clear glasses. It transforms the dessert into an individually portioned treat that looks elegant without extra effort. Perfect for gatherings where presentation matters just as much as taste.
Serving, Storage, and Presentation Tips
How to Serve for Maximum Appeal
Serving this dessert is where you get to show off a little. After all, you’ve put in the effort—why not make it look as good as it tastes?
If you’ve made it as a full cake, use a sharp knife dipped in warm water to get clean slices. Wipe the blade between cuts for that neat, professional look. It’s a small detail, but it makes a big difference when presenting to guests.
For individual servings, dessert cups or glasses work beautifully. The layers (if you’ve added them) become visible, turning each portion into something visually appealing. It’s one of those cases where the container becomes part of the presentation.
Garnishing is your finishing touch. A few fresh blueberries, a sprinkle of lemon zest, or even a light dusting of powdered sugar can elevate the entire look. Think of it like accessorizing an outfit—it doesn’t need much, just the right details.
Serving temperature matters too. This dessert is best enjoyed chilled, straight from the fridge. That’s when the texture is at its peak and the flavors feel most refreshing.
Storage and Shelf Life
One of the practical advantages of this mousse cake is how well it stores. You can make it ahead of time, which makes it perfect for events or busy schedules.
Stored in the refrigerator, it typically stays fresh for up to 2–3 days. Just make sure it’s covered היט to prevent it from absorbing any odors from the fridge. The texture remains stable, especially if you’ve used gelatin.
Freezing is possible, but it changes the texture slightly. The mousse becomes firmer and less airy once thawed. If you do freeze it, let it thaw slowly in the fridge rather than at room temperature to maintain as much of the original texture as possible.
Interestingly, some people actually enjoy it slightly frozen, almost like an ice cream cake. It’s a different experience, but still delicious in its own way.
Conclusion
Lemon blueberry mousse cake is one of those desserts that manages to feel both effortless and impressive at the same time. It doesn’t rely on complicated techniques or hard-to-find ingredients, yet the end result feels refined and thoughtfully crafted. From the bright citrus notes of lemon to the juicy sweetness of blueberries and the airy softness of whipped cream, every element works together in harmony.
What makes it truly special is its versatility. You can keep it simple for a quick treat or dress it up for a special occasion. You can tweak the ingredients, experiment with layers, or adapt it to different dietary needs without losing its core appeal.
It’s the kind of dessert that invites creativity while still delivering consistent results. And once you’ve made it once, it’s likely to become a regular in your rotation—not just because it’s easy, but because it genuinely delivers every single time.
FAQs
1. Can I make lemon blueberry mousse cake without gelatin?
Yes, you can skip the gelatin entirely. The mousse will still set thanks to the whipped cream, but it will have a softer, more scoopable texture rather than a firm, sliceable one.
2. Can I use frozen blueberries instead of fresh ones?
Absolutely. Just make sure to thaw and pat them dry to remove excess moisture, or fold them in while slightly frozen to minimize bleeding into the mousse.
3. How long does it take for the mousse to fully set?
Typically, it takes at least 2 hours in the refrigerator. For best results, letting it chill for 4 hours or overnight gives an even better texture.
4. Can I make this dessert ahead of time?
Yes, it’s actually ideal for making ahead. Prepare it a day in advance and store it in the fridge until ready to serve.
5. What can I use instead of graham crackers for the crust?
You can substitute digestive biscuits, vanilla wafers, or even crushed cookies. Each option adds a slightly different flavor but works just as well structurally.
Print
Lemon Blueberry Mousse Cake
Description
If you’re looking for a dessert that feels light, creamy, and bursting with fresh flavor, this lemon blueberry mousse cake is exactly what you need. It’s one of those recipes that looks impressive but is actually very simple to make. No oven, no complicated steps—just a few ingredients coming together to create something smooth, airy, and seriously delicious.
Ingredients
For the Mousse Filling
1 cup fresh lemon juice
1 cup blueberries (fresh preferred)
2 cups whipped cream
1/2 cup sugar
1 packet gelatin (optional, for firmness)
For the Optional Crust
1 cup graham cracker crumbs
Melted butter (enough to bind crumbs)
Instructions
Start by mixing the graham cracker crumbs with melted butter until the texture feels like wet sand. Press this mixture firmly into the bottom of your pan or serving dish. Place it in the refrigerator for about 10 minutes so it can firm up. This step gives your dessert a nice crunchy base, but you can skip it if you prefer a lighter mousse-only version.
In a mixing bowl, combine the lemon juice and sugar. Stir well until the sugar completely dissolves. This step is important because it ensures your mousse turns out smooth and not grainy.
If you’re using gelatin, prepare it according to the package instructions, then mix it into the lemon mixture while it’s still warm. This will help your mousse set more firmly later.
Gently fold the whipped cream into the lemon mixture. Don’t rush this step—use slow, soft movements to keep the mixture light and airy. This is what gives the mousse its soft, fluffy texture.
Carefully add the blueberries and fold them into the mixture. Try not to crush them—you want whole berries for that juicy burst of flavor in every bite.
Pour the mousse mixture over the chilled crust, or spoon it into individual cups if you prefer single servings. Smooth the top if needed.
Place the dessert in the refrigerator for at least 2 hours. This allows the mousse to set properly and develop its texture.
Notes
Gelatin helps the mousse hold its shape better, especially if slicing as a cake
For a smoother look, mix only part of the blueberries inside and use the rest as topping
Works perfectly as both a full cake or mini dessert cups
Best enjoyed within 2–3 days when refrigerated