A Bite-Sized Christmas Miracle
Is it really the holiday season without something sweet, cute, and just a little bit nostalgic? If you’re anything like me, you’re always on the hunt for fun, festive desserts that don’t require hours in the kitchen. That’s where these Little Debbie Christmas Cake Balls come in. They’re basically your childhood favorite snack—those iconic Little Debbie Christmas Tree Cakes—transformed into creamy, dreamy, no-bake cake balls dipped in white chocolate and topped with holiday cheer.
Seriously, these are dangerously good. You get all the soft, sweet goodness of the cakes, the creaminess from the cream cheese, and a crisp outer shell of white chocolate that gives way to a melt-in-your-mouth center. Oh, and did I mention how ridiculously cute they are? Red and green sprinkles make them the most adorable addition to any Christmas dessert tray.
Whether you’re whipping these up for a party, wrapping them in cute boxes for gifts, or hoarding them for your next holiday movie marathon (no judgment), this recipe is going to be your new holiday go-to.
What Are Little Debbie Christmas Cake Balls?
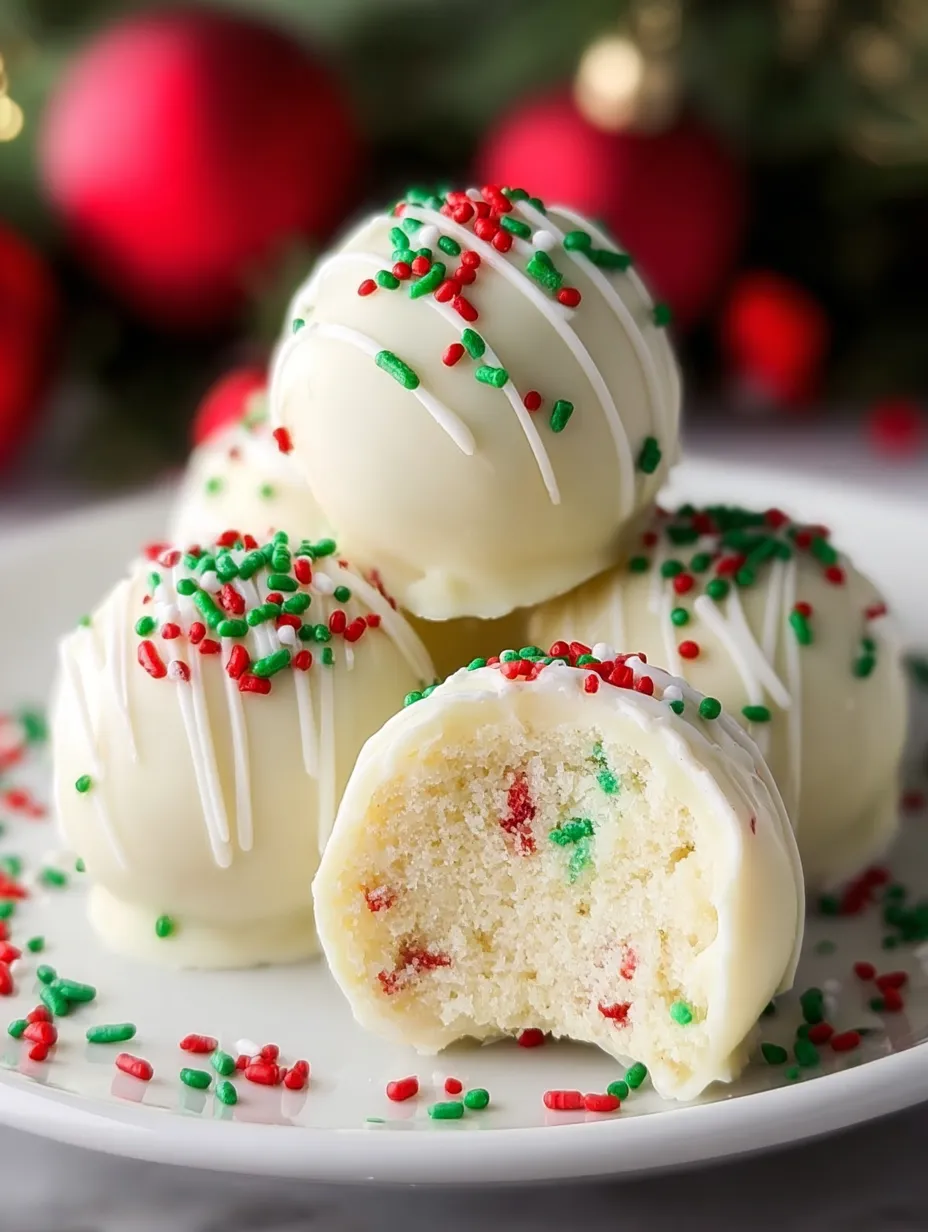
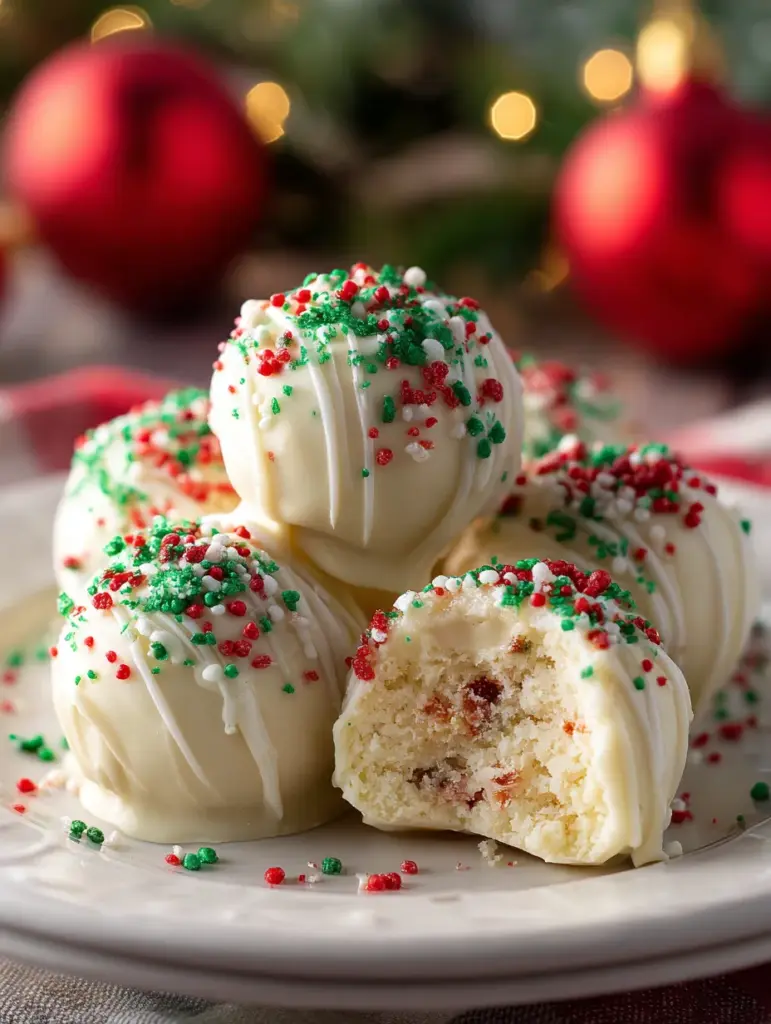
Let’s break it down. If you haven’t had the joy of biting into a Little Debbie Christmas Tree Cake, let me paint a picture: it’s a soft vanilla or chocolate cake, layered with a light cream filling, and coated in a thin shell of sweet white frosting. Sprinkle on some red sugar and green stripes, and boom—instant Christmas nostalgia.
Now take that magic, crumble it up, mix it with cream cheese, roll it into bite-sized balls, dip in silky white chocolate, and finish with festive sprinkles. What you get is a treat that looks like a truffle, tastes like a cake-pop, and delivers pure holiday happiness in one bite.
They’re bite-sized, festive, rich, and seriously addictive.
Why You’ll Love This Recipe
Here’s the real question: what’s NOT to love?
- No oven required – Yep, that’s right. These are totally no-bake. Perfect for when you’re too busy wrapping presents or watching Elf for the hundredth time.
- Super easy to make – Even if you’ve never baked a thing in your life, you can pull these off.
- Kid-friendly – Kids love to help roll the balls and sprinkle the toppings.
- Great for gifts – Pop a few into a festive tin or treat bag, and you’ve got the cutest edible present ever.
- Nostalgic AF – If you grew up with Little Debbie, these will hit you right in the holiday feels.
Ingredients Overview
Here’s what you’ll need to create these magical bites of joy:
- 5 Little Debbie Christmas Tree Cakes – Use vanilla or chocolate depending on your vibe. Vanilla gives that classic look, like in the photo.
- 4 oz cream cheese (softened) – This adds creaminess and helps bind everything together.
- 10 oz white chocolate melting wafers or almond bark – Go for smooth-melting, high-quality chocolate. Ghirardelli or Merckens are great.
- Red and green sprinkles – This is where you bring the holiday magic to life.
Optional:
- Toothpicks or dipping tools
- Parchment paper for easy cleanup
Tools You’ll Need
You probably have most of this already:
- Large mixing bowl
- Fork or hands (for crumbling)
- Spoon or spatula (for mixing)
- Baking sheet
- Parchment paper
- Microwave-safe bowl (for melting chocolate)
- Fork or toothpick (for dipping)
- Fridge space (don’t forget to clear some out!)
Step-by-Step Instructions
Let’s make some holiday magic happen!
1. Crumble the Cakes (5 minutes) 🍰
Start by unwrapping 5 Little Debbie Christmas Tree Cakes and placing them into a large mixing bowl. Now, using a fork (or your hands if you’re feeling rustic), break them apart until they’re fine and crumbly. You want the mixture to be soft and even, with no big chunks.
💡 Pro Tip: Some cakes have a thicker frosting coating. Don’t worry about it—it’ll mix in just fine!
2. Mix in the Cream Cheese (5 minutes) 🧈
Add 4 oz of softened cream cheese to the crumbled cakes. Using a spoon, spatula, or your hands (honestly, hands work best here), mix until everything is combined into a thick, slightly sticky dough. You’ll know it’s ready when it holds together easily and isn’t too crumbly.
It’s kinda like edible playdough—but way tastier.
3. Shape into Balls (10 minutes) 🎄
Roll the mixture into 1-inch balls using your hands. Don’t stress about perfection—rustic is charming! Place each ball on a parchment-lined baking sheet. Once they’re all rolled, pop the tray into the fridge for 30 minutes to firm up.
❄️ Chilling helps them hold their shape during dipping.
4. Dip in White Chocolate (15 minutes) 🍫
Melt your white chocolate according to the package directions. Pro tip: microwave in 30-second bursts, stirring between each. Once smooth, it’s dipping time!
Use a fork or toothpick to lower each chilled ball into the chocolate, turning to coat evenly. Let the excess drip off before placing it back on the parchment paper.
This part can get messy—but in the best way.
5. Decorate (5 minutes) ✨
Immediately sprinkle red and green sprinkles over each dipped ball while the chocolate is still wet. Don’t wait too long or the chocolate will harden and nothing will stick!
Once decorated, let them chill in the fridge for 10–15 more minutes until fully set.
🎉 Done! That’s it. You’ve got about 18–20 adorable, festive, crowd-pleasing cake balls that look like they came from a fancy bakery.
Tips for Perfect Cake Balls
Even though these are super easy to make, here are some pro tips to make your Little Debbie Christmas Cake Balls even better:
- Chill twice for best results – First after rolling (so they firm up), and again after dipping (so the chocolate sets perfectly). Don’t skip chilling — it’s key!
- Use good quality white chocolate – Melting wafers or almond bark are easier to work with than regular chocolate chips. If using chips, add a little coconut oil to help them melt smoothly.
- Don’t overmix – Once your cream cheese is blended with the cake crumbs and forms a dough, stop. Overmixing can make them too soft.
- Toothpick trick – Stick a toothpick into each ball before dipping to avoid them falling into the chocolate. Just twist it out after placing them on the tray.
- Work in small batches – Only take a few cake balls out of the fridge at a time while dipping. Cold balls dip better and hold their shape.
This little extra effort goes a long way toward making your cake balls look polished and professional.
Flavor Variations to Try
Want to change it up a bit? Here are some fun twists you can try once you’ve mastered the basic version:
- Chocolate Christmas Tree Cakes – Swap vanilla cakes for chocolate ones and use milk or dark chocolate for coating instead of white.
- Peppermint Crush – Mix in crushed candy canes with the cake and cream cheese, or sprinkle peppermint bits on top.
- Oreo Overload – Add crushed Oreos to the cake mixture for extra crunch and flavor.
- Nutty Surprise – Roll your cake balls in chopped pistachios or pecans before the chocolate sets.
- Glitter & Gold – Use edible gold stars, shimmer dust, or gold sprinkles for an elevated, elegant look.
With just a few tweaks, this recipe can transform into countless delicious variations—all equally festive and fabulous.
How to Store Cake Balls
One of the best things about these cake balls? They store beautifully. Here’s how to keep them fresh:
- In the fridge: Place in an airtight container and store in the refrigerator for up to 7 days. Just let them sit out for 5-10 minutes before serving so they soften slightly.
- In the freezer: Freeze in a single layer on a baking sheet, then transfer to a zip-top freezer bag or airtight container. They’ll keep for up to 2 months. Thaw in the fridge overnight before serving.
💡 Storage tip: Place a piece of parchment paper between layers if you’re stacking them to avoid sticking or smudging the decoration.
Print
🎄 Little Debbie Christmas Cake Balls
- Prep Time: 15 minutes
- Total Time: 1 hour
- Category: Dessert 🍬
Description
🎅 A festive, no-bake holiday treat bursting with nostalgia! These creamy, bite-sized cake balls taste just like Little Debbie Christmas Tree Cakes — coated in smooth white chocolate and topped with cheerful red and green sprinkles. Perfect for holiday movie nights, dessert platters, or sweet edible gifts! 🎁❤️
Ingredients
5 Little Debbie Christmas Tree Cakes (vanilla or chocolate)
4 oz cream cheese, softened
10 oz white chocolate melting wafers or almond bark
Red and green sprinkles (for decoration)
Instructions
Crumble the Cakes 🍰
Place the Little Debbie Christmas Tree Cakes in a large bowl. Use a fork or your hands to crumble them until soft and finely textured. (5 minutes)Mix in Cream Cheese 🧈
Add softened cream cheese and mix thoroughly until smooth and dough-like. The mixture should easily hold its shape. (5 minutes)Shape into Balls 🎄
Roll the mixture into 1-inch balls and place them on a parchment-lined baking sheet. Chill in the refrigerator for 30 minutes to firm up. (10 minutes)Dip in Chocolate 🍫
Melt the white chocolate according to package instructions. Using a fork, dip each cake ball into the melted chocolate, coating evenly. Let excess drip off, then place on parchment paper. (15 minutes)
Decorate ✨
Quickly sprinkle red and green decorations over each cake ball before the chocolate hardens. Refrigerate again for 10–15 minutes until set. (5 minutes)
Notes
Use vanilla or chocolate cakes — both versions are delicious! 🎂
For a peppermint twist, add a few drops of peppermint extract to the mix. ❄️
Store in the fridge for up to 5 days — they taste even better the next day!
Great for gifting — just wrap them in mini treat bags with a ribbon! 🎁
Nutrition
- Serving Size: 18–20 cake balls
- Calories: ~160 kcal per ball
Make-Ahead & Freezing Tips
Planning ahead for a big holiday event? Good idea!
- Make the dough early – You can make and roll the cake balls up to 2 days ahead. Just store them in the fridge, covered, until you’re ready to dip.
- Freeze before decorating – If you want to make them way ahead of time, freeze the undipped balls and coat them in chocolate the day of your event for the freshest taste.
- Freeze the final product – Yes, you can freeze the fully dipped and decorated cake balls! Just be sure they’re completely set before stacking or storing.
They’re one of those desserts that’s even better when made ahead. Win-win!
You may like these recipes as well :
Christmas Cherry Bombs: The Ultimate Festive Dessert You Need This Holiday Season
Soft Christmas Cookies Recipe: A Melt-in-Your-Mouth Holiday Delight
How Many Does This Make?
This recipe makes about 18 to 20 cake balls, depending on how big you roll them. That’s the perfect amount for:
- A party tray
- A gift box with 6 in each
- One batch for now, one for later 😉
And if you want more? Just double the recipe! Use 10 cakes and 8 oz of cream cheese — everything else scales easily.
Perfect Occasions to Serve Them
These Little Debbie Christmas Cake Balls are perfect for just about every holiday event you can think of:
- Christmas Eve dessert trays
- Holiday movie marathons
- Classroom parties (kid-approved!)
- Office potlucks
- Christmas brunch or dinner
- Cookie swaps
- Edible gift boxes
They’re festive, adorable, and guaranteed to steal the spotlight wherever you serve them.
Kid-Friendly Baking Fun
Want to make holiday memories while also keeping the little ones entertained? This recipe is perfect for baking with kids.
Let the kiddos:
- Unwrap and crumble the cakes
- Mix in the cream cheese (they’ll love getting messy)
- Roll the dough into balls
- Decorate with sprinkles
You handle the chocolate dipping, and you’ve got a fun family activity that ends with sweet rewards. Plus, kids love that these look like mini snowballs — and taste even better!
Creative Decorating Ideas
Red and green sprinkles are classic, but don’t stop there! Here are a few more creative ways to make your cake balls pop:
- Edible glitter or shimmer spray – Adds a frosty sparkle
- Gold or silver dragées – Fancy and festive
- Mini candy canes – Stick one into each cake ball for a fun twist
- White-on-white – Use snowflake sprinkles for a winter wonderland vibe
- Crushed peppermint or candy cane bits – For a minty crunch
Use your imagination and make them your own. Every batch can look totally unique.
Pairing These Cake Balls With Holiday Drinks
No Christmas treat is complete without a cozy drink on the side! Try pairing your cake balls with:
- Hot cocoa – Classic, especially with marshmallows on top
- Eggnog – Rich and creamy to match the cake’s flavor
- Peppermint mochas – Adds a fun contrast
- Spiced cider – A non-dairy option that still screams holiday
- Christmas cocktails – Think Bailey’s, Kahlua, or spiked hot chocolate for adults
Whether you’re hosting a party or chilling on the couch in fuzzy socks, these pairings will make the moment magical.
Conclusion: Make the Holidays Extra Sweet
There’s something about Little Debbie Christmas Cake Balls that just feels like a warm hug in dessert form. They’re nostalgic, delicious, incredibly easy to make, and ridiculously cute. Whether you’re looking to impress your guests, entertain the kids, or just treat yourself, this recipe checks all the boxes.
They bring back all the childhood joy of tearing into a Little Debbie Christmas Tree Cake — but dressed up for the grown-up dessert table. No baking. No stress. Just pure holiday magic in every bite.
So go ahead, make a batch (or two), share them with loved ones, or stash them away for a secret stash of holiday happiness. You’ve earned it.
Similar recipes :
Never Fail Fruit Cake – The Classic Old-Fashioned Holiday Treat
No-Bake Pumpkin Cheesecake Balls
FAQs
1. Can I use different snack cakes?
Absolutely! While Little Debbie Christmas Tree Cakes are iconic, you can use other snack cakes like Zebra Cakes or even Swiss Rolls. The texture and taste will vary slightly but still be delicious.
2. Do I need a food processor to crumble the cakes?
Nope! Just a fork or your hands will do. The cakes are soft enough to crumble easily.
3. How do I stop the chocolate from cracking?
Make sure the cake balls aren’t too cold when dipping — let them sit out for 2-3 minutes after chilling. Also, don’t overheat the chocolate.
4. What’s the best white chocolate to use?
Melting wafers or almond bark work best for smooth, easy dipping. Avoid white chocolate chips unless you add oil, as they don’t melt as well.
5. Can I make these gluten-free?
Only if you use gluten-free snack cakes and check your chocolate and sprinkles for gluten-containing ingredients.