There’s something deeply comforting about old-fashioned fudge. Not the quick microwave kind or the overly soft versions that melt the second you touch them—but the real deal. The kind that slices cleanly into thick, creamy blocks. The kind that feels dense yet smooth, rich without being heavy, and nostalgic in the best possible way. That’s exactly what this Old-Fashioned Maple Butter Pecan Fudge delivers.
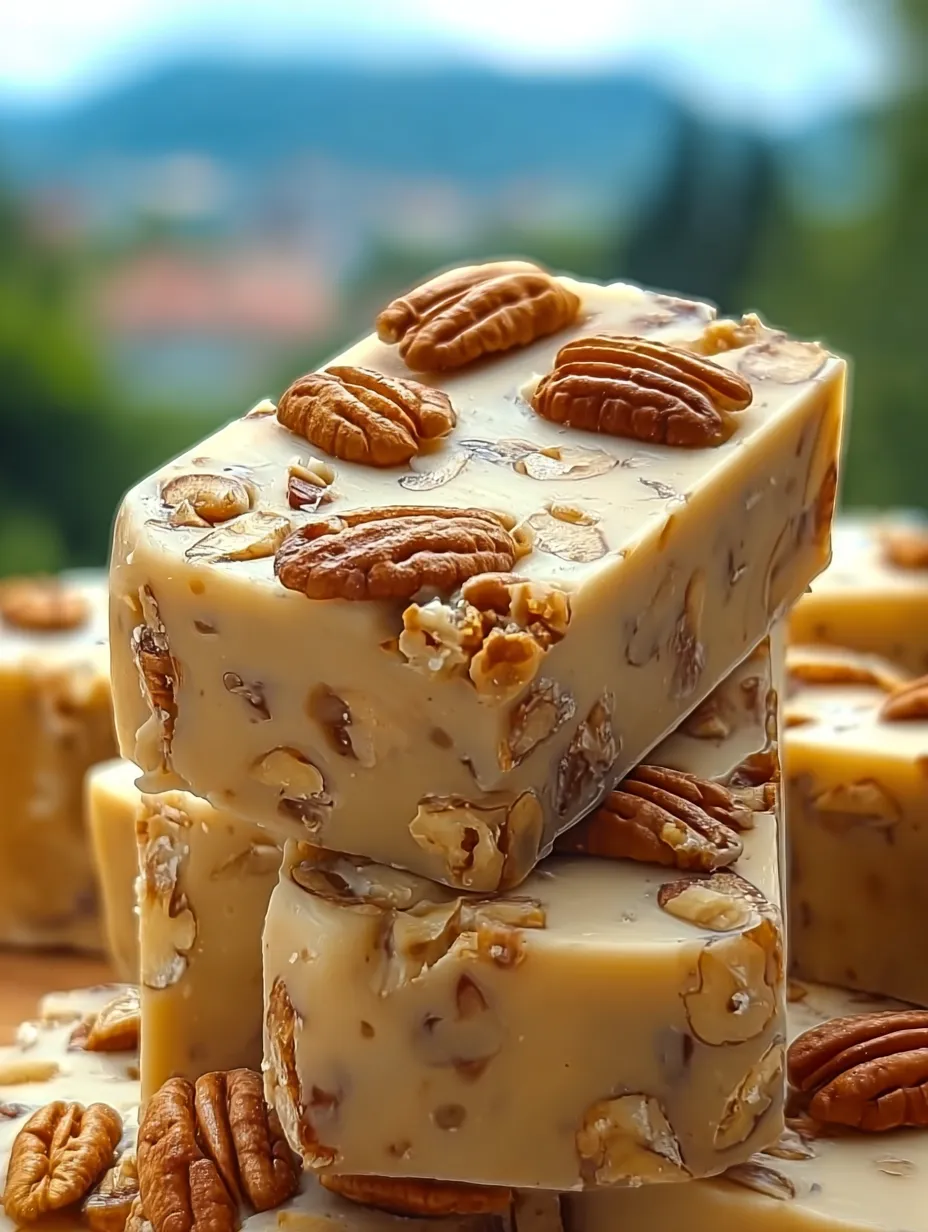
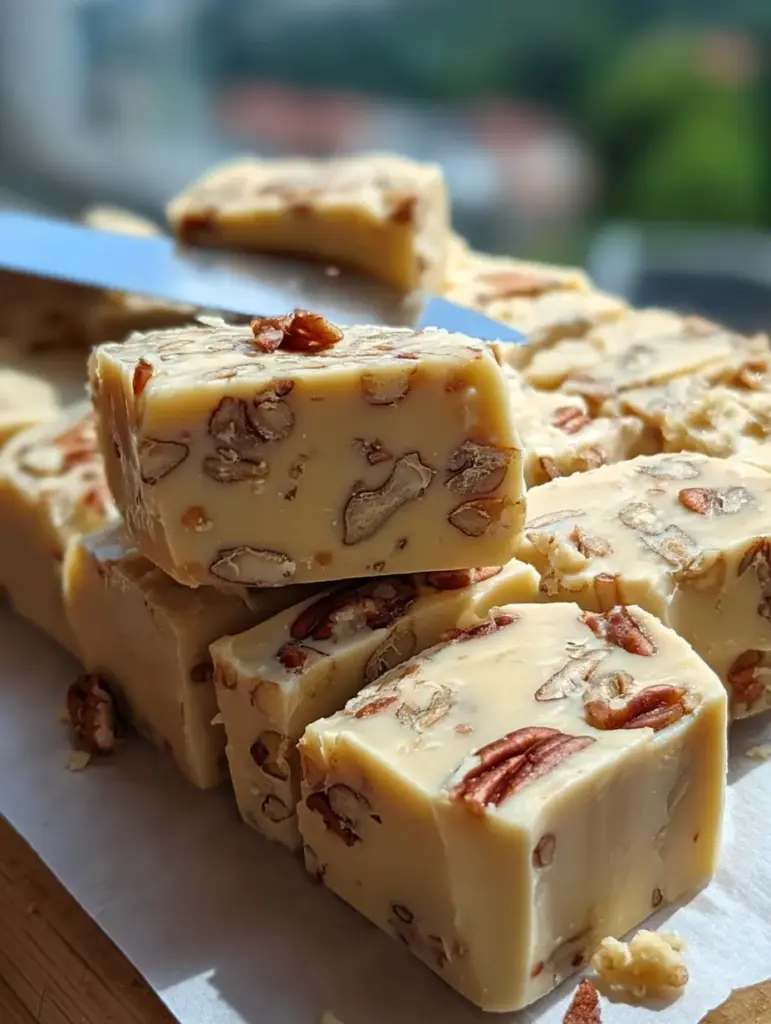
This recipe is rooted in tradition. It uses real butter, real cream, and pure maple syrup to create a fudge that looks just like the photo you shared: smooth, pale maple-colored squares studded generously with pecans—some chopped for texture, some whole for that bakery-style finish. It’s the kind of candy you’d expect to see wrapped in parchment, stacked neatly on a holiday platter, or tucked into a gift tin with care.
What makes this recipe special isn’t just the flavor—it’s the technique. Old-fashioned fudge relies on temperature, timing, and a little patience. No shortcuts. No condensed milk. No marshmallow fluff. Just honest ingredients working together to create something timeless. And don’t worry—while it sounds fancy, this recipe is absolutely doable at home. I’ll walk you through every step in a friendly, no-stress way so you end up with fudge that looks and tastes exactly like the final image.
The Story Behind Old-Fashioned Maple Fudge
Before candy thermometers were common kitchen tools, fudge was made by sight, feel, and experience. Maple fudge, in particular, has deep roots in regions where maple syrup was abundant and treasured. Long before refined sugars were widely available, maple syrup was the sweetener of choice, lending not just sweetness but character.
Old-fashioned maple fudge was often made during cooler months, when candy-making was easier and treats were saved for special occasions. It wasn’t overly sweet. It wasn’t fluffy. It was dense, creamy, and satisfying—meant to be cut into small pieces and savored slowly. Pecans became a natural pairing, adding richness, crunch, and visual beauty.
This recipe honors that tradition. It doesn’t try to modernize the process or mask the maple flavor. Instead, it leans into it. The result is a fudge that feels authentic, tastes luxurious, and looks like it came straight from a classic candy shop window.
What Makes This Maple Butter Pecan Fudge Special
At first glance, this fudge stands out because of its structure. Each piece holds its shape beautifully, with clean edges and a smooth, matte finish. That’s not an accident—it’s the result of proper cooking, cooling, and beating. The color is a soft maple cream, not dark or muddy, which tells you the sugar was cooked just right.
Then there’s the pecans. This recipe uses a mix of chopped and whole pecans, just like the final image. The chopped nuts are folded into the fudge, ensuring every bite has texture, while whole pecans are pressed into the top for that picture-perfect finish. It’s a small detail, but it makes a big difference in presentation.
Flavor-wise, this fudge is rich but balanced. The butter adds depth, the cream smooths everything out, and the maple syrup shines without overpowering. It’s sweet, but not cloying. Decadent, but not heavy. In other words—it’s exactly what old-fashioned fudge should be.
Understanding the Texture: Dense, Creamy, and Sliceable
Texture is everything when it comes to fudge. Too soft, and it feels undercooked. Too grainy, and it feels like a mistake. The goal here is a fudge that’s firm enough to slice cleanly, yet creamy enough to melt gently in your mouth.
That texture comes from controlling sugar crystallization. When the sugar mixture reaches the soft-ball stage (235–238°F), it has just the right concentration of sugar and liquid. Letting it cool undisturbed allows the sugar molecules to settle evenly. Beating the fudge afterward encourages tiny crystals to form, which gives the fudge its smooth, creamy body instead of a gritty one.
This is why patience matters. Stirring too early or skipping the cooling stage can ruin the texture. But when done correctly, the result is exactly what you see in the photo: thick, smooth blocks that hold their shape and feel luxurious.
Ingredients Breakdown: Simple, Honest, and Essential
This recipe proves that you don’t need a long ingredient list to make something incredible. Every ingredient here has a purpose, and removing or substituting any of them changes the final result.
Butter: The Foundation of Flavor
Unsalted butter is essential here. It gives you full control over the salt level and ensures a clean, rich flavor. Butter contributes to the creamy mouthfeel and helps prevent the fudge from becoming too hard or brittle. Make sure it’s real butter—not margarine or butter substitutes.
Granulated Sugar: Structure and Stability
Granulated sugar provides the structure that allows the fudge to set properly. While maple syrup adds flavor, it can’t do this job alone. Sugar ensures the fudge firms up and slices cleanly instead of staying sticky or soft.
Pure Maple Syrup: The Soul of the Recipe
This is non-negotiable: use pure maple syrup, not pancake syrup. Pancake syrup is mostly corn syrup and flavoring, and it will completely change the taste and texture. Pure maple syrup gives the fudge its signature flavor, gentle sweetness, and beautiful color.
Heavy Cream: Creaminess Without Compromise
Heavy cream adds fat, which smooths out the sugar crystals and creates that luscious, creamy texture. Lower-fat dairy just won’t give the same result.
Salt and Vanilla: Small Additions, Big Impact
Salt balances the sweetness and brings out the maple flavor. Vanilla adds warmth and depth, rounding everything out without competing.
Pecans: Toasted, Nutty Perfection
Lightly toasting the pecans before adding them enhances their flavor and keeps them crisp. Using both chopped and whole pecans ensures the fudge looks just like the final image—generous, rustic, and inviting.
Equipment You’ll Need (And Why It Matters)
Old-fashioned fudge doesn’t require fancy tools, but a few basics make all the difference:
- Heavy-bottom saucepan – prevents scorching
- Candy thermometer – ensures accurate temperature
- Wooden spoon – ideal for beating the fudge
- 8×8-inch pan – gives the perfect thickness
Using the right equipment sets you up for success and takes the guesswork out of the process.
Preparing Your Pan for Perfect Release
Line your 8×8-inch pan with parchment paper, leaving an overhang on two sides. This makes it easy to lift the fudge out once it’s set. Lightly butter the parchment if you want extra insurance, but it’s usually not necessary.
Step-by-Step Instructions (Expanded and Foolproof)
Cooking the Fudge Base
In your heavy saucepan, combine the butter, granulated sugar, maple syrup, heavy cream, and salt. Cook over medium heat, stirring constantly, until everything melts together and the mixture comes to a full rolling boil. Stirring at this stage prevents scorching and ensures even heat distribution.
Reaching the Soft-Ball Stage
Once boiling, stop stirring and let the mixture cook until it reaches 235–238°F on a candy thermometer. This takes about 8–10 minutes. This temperature range is crucial—too low and the fudge won’t set, too high and it will be crumbly.
Cooling Without Disturbance
Remove the pan from heat and let it cool undisturbed to about 110°F, which takes roughly 20–25 minutes. Don’t stir, don’t shake the pan—just wait. This step allows the sugar to stabilize.
Beating the Fudge to Perfection
Add the vanilla extract, then beat vigorously with a wooden spoon. The mixture will thicken, lighten in color, and lose its glossy shine. This takes 3–5 minutes and is where the magic happens.
Folding in Pecans for That Classic Look
Fold in the chopped pecans, then pour the fudge into your prepared pan. Smooth the top and press whole pecans gently into the surface for that photo-perfect finish.
Setting, Cutting, and Presentation
Let the fudge set at room temperature for 1–2 hours. Once firm, lift it out using the parchment overhang and cut into thick squares or blocks. A sharp knife wiped clean between cuts gives the neatest edges.
Common Mistakes and How to Avoid Them
- Grainy fudge: Usually caused by stirring too early or overcooking
- Too soft: Temperature didn’t reach soft-ball stage
- Crumbly: Cooked too hot or beaten too long
Take your time, and trust the process.
Print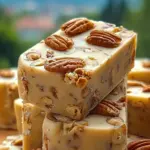
Old-Fashioned Maple Butter Pecan Fudge
- Prep Time: 15 minutes
- Cook Time: 15 minutes
- Total Time: ~2 hours 30 minutes
- Category: Candy & Confections · Old-Fashioned Desserts · Holiday Treats · Homemade Fudge
Description
🍁🍬 A true classic made the traditional way—dense, creamy maple fudge with buttery richness and toasted pecans in every bite. Smooth, sliceable, and perfect for holiday gifting or cutting into beautiful candy blocks ✨🧈
Ingredients
½ cup unsalted butter 🧈
1½ cups granulated sugar 🍚
½ cup pure maple syrup (real maple only) 🍁
½ cup heavy cream 🥛
¼ teaspoon salt 🧂
1 teaspoon vanilla extract 🌼
1½ cups pecans (mix of whole & chopped, lightly toasted) 🌰
Instructions
Line an 8×8-inch pan with parchment paper, leaving an overhang for easy removal (3 minutes) 📄
In a heavy saucepan, combine butter, sugar, maple syrup, cream, and salt over medium heat (2 minutes) 🍯
Cook, stirring constantly, until the mixture reaches a full rolling boil (4–5 minutes) 🔥
Continue boiling without stirring until the temperature reaches 235–238°F (soft-ball stage) on a candy thermometer (8–10 minutes) 🌡️
Remove from heat and let cool undisturbed until the mixture reaches about 110°F (20–25 minutes) ❄️
Add vanilla extract, then beat vigorously with a wooden spoon until the fudge thickens, lightens in color, and loses its glossy shine (3–5 minutes) 🥄
Fold in pecans, reserving a few whole ones to press gently on top for a photo-perfect finish (2 minutes) 🌰
Pour into the prepared pan, smooth the top, and let set at room temperature until firm (1–2 hours) ✨
Lift out using parchment paper and cut into thick squares or candy blocks (5 minutes) 🔪
Notes
Use real pure maple syrup for authentic flavor—pancake syrup will not set correctly.
A candy thermometer is highly recommended to hit the soft-ball stage for perfect texture.
Do not stir while boiling or while cooling to 110°F—this ensures a smooth, creamy fudge.
Beating the fudge until it loses its shine is the key step for proper setting.
Store in an airtight container at room temperature for up to 5 days, or refrigerate for longer storage.
Nutrition
- Serving Size: 16–20 pieces
- Calories: ~220 kcal
Serving Ideas and Holiday Gifting Tips
This fudge shines on a dessert platter, paired with coffee or hot cocoa. For gifting, wrap pieces in parchment and place them in a tin or box. The thick blocks and visible pecans make it look incredibly special.
You may like as well :
🍏 Caramel Apple Swirl Fudge Recipe: A Fall Fantasy in Every Bite 🍮
Paula Deen’s 5-Minute Chocolate Pecan Fudge: Rich, Creamy, and Dangerously Easy to Make!
Storage and Shelf Life
Store at room temperature in an airtight container for up to 1 week, or refrigerate for up to 2 weeks. Bring to room temperature before serving for the best texture.
Why This Recipe Matches the Final Image Perfectly
The color, texture, and structure of this fudge align exactly with the image you shared: dense, creamy blocks with visible pecans throughout and a smooth, matte finish. The balance of chopped and whole nuts ensures every piece looks intentional and beautiful.
Conclusion
Old-Fashioned Maple Butter Pecan Fudge isn’t just a recipe—it’s an experience. It’s about slowing down, trusting simple ingredients, and creating something that feels special. Whether you’re making it for the holidays, gifting it to loved ones, or treating yourself, this fudge delivers on every level: flavor, texture, and timeless charm.
More recipes to discover :
Christmas Chocolate Pecan Pie Balls: The Ultimate No-Bake Holiday Treat
Christmas Cherry Bombs – A Festive No-Bake Delight
FAQs
1. Can I make this without a candy thermometer?
Yes, but it’s riskier. The soft-ball stage test can work, but a thermometer gives the most reliable results.
2. Why does my fudge look glossy instead of matte?
It likely wasn’t beaten long enough. The matte finish comes from proper crystallization during beating.
3. Can I use walnuts instead of pecans?
Yes, but pecans provide a richer, sweeter flavor that pairs best with maple.
4. Should I refrigerate the fudge to set faster?
It’s better to let it set at room temperature to avoid texture issues.
5. Can I double this recipe?
Yes, but use a larger pan and work quickly during the beating stage.