Introduction to No Bake Grinch Pie
Ah, the holiday season! It’s that magical time when kitchens buzz with the warm scents of baked goods. But let’s be honest, not everyone has hours to spare, especially busy moms and professionals like us. That’s where my No Bake Grinch Pie comes swooping in like a jolly elf! This delightful dessert combines the festive spirit with effortless preparation. In just a few simple steps, you can create a stunning pie that will impress family and friends alike. So, roll up your sleeves and let’s spread some holiday cheer without all the fuss!
Why You’ll Love This No Bake Grinch Pie
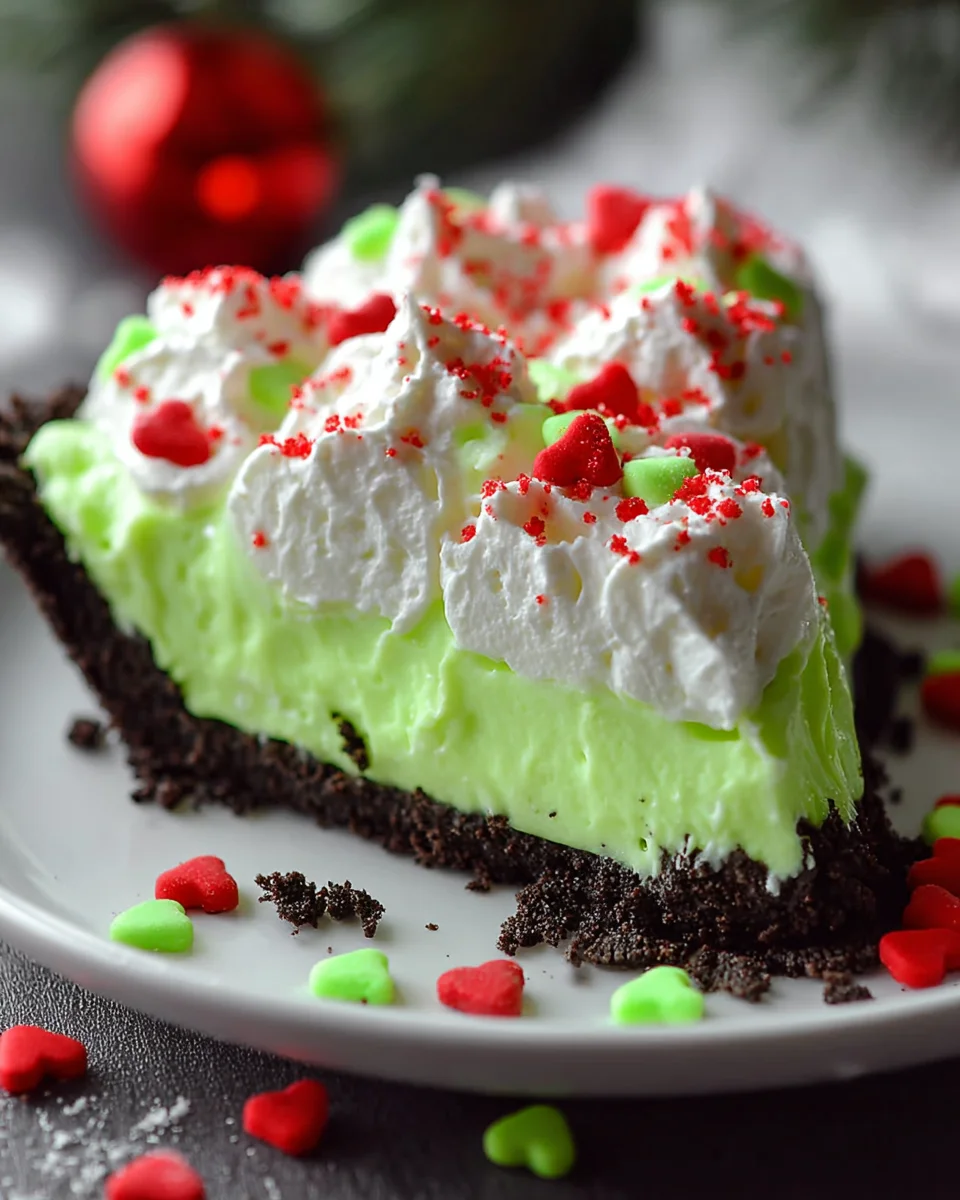
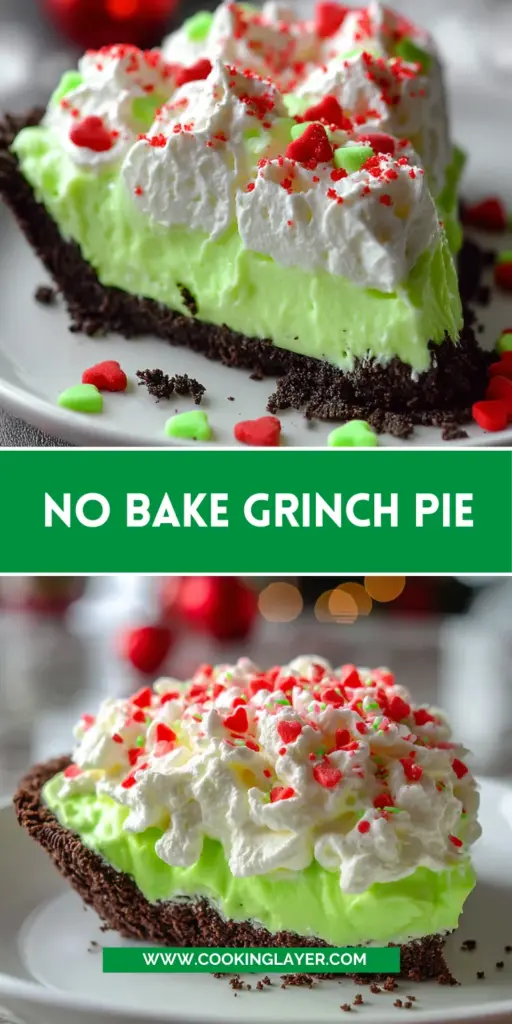
This No Bake Grinch Pie is a holiday dream come true! With its vibrant green hue and playful red sprinkles, it adds a festive flair to any celebration. The best part? It’s super simple to whip up, taking just 15 minutes of your precious time. Plus, the creamy white chocolate flavor is a crowd-pleaser. Impress your guests and make joyful memories without spending all day in the kitchen!
Ingredients for No Bake Grinch Pie
To create your festive No Bake Grinch Pie, you’ll need a few delightful ingredients that come together effortlessly. Start with an Oreo cookie pie crust, providing that sweet chocolatey base. The star of the show is the white chocolate instant pudding mix, which gives a creamy texture. Pair this with cold 2% milk to bring it all together. For that famous Grinchy green hue, we add neon green gel food coloring and a touch of green food coloring. Lastly, dress it up with whipped topping, green sanding sugar, and heart-shaped sprinkles for a festive touch. Exact quantities and printable details can be found at the bottom!
- 1 Oreo cookie pie crust
- 1 box (110 g) white chocolate instant pudding mix
- 480 ml cold 2% milk
- 120 g whipped topping (Cool Whip), divided
- 2–3 drops neon green gel food colouring
- 1–2 drops green food colouring
- 70 g green sanding sugar
- 70 g mini red heart-shaped sprinkles
- 70 g large red heart-shaped sprinkles
How to Make No Bake Grinch Pie
Creating your No Bake Grinch Pie is easier than untangling holiday lights! Let’s break it down step-by-step to make it simple for you.
Step 1: Prepare the Pudding Mixture
First things first, grab a large mixing bowl. Combine the white chocolate pudding mix with cold 2% milk. Using a whisk or hand mixer, blend the mixture for about 2–3 minutes. You’ll notice it thickening nicely. Here’s the fun part! Add 2–3 drops of neon green gel food coloring and 1–2 drops of green food coloring. This will give it that vibrant Grinch look. Keep mixing until the colors are well blended and soft peaks form. Don’t rush—this creamy goodness sets the stage for your pie!
Step 2: Fill the Pie Crust
Next, it’s time to fill your Oreo cookie pie crust. Carefully transfer that beautiful green pudding mixture right into the crust. With a spatula, spread it evenly from the center out toward the edges. Take your time! An even layer is key for a lovely presentation. Plus, it helps ensure each slice is just as scrumptious as the last!
Step 3: Chill the Pie
Now, let’s let the magic happen. Place your pie in the refrigerator and allow it to chill for at least 3 hours. This step is vital as it gives the filling time to set firmly. If you’re curious about doneness, gently poke the pie with a toothpick. It should come out clean when it’s ready! Imagine that anticipation—the longer you wait, the more delicious it will be!
Step 4: Add Whipped Topping
Tada! Once the chilling time is up, it’s time to add the whipped topping. Spoon half of the whipped topping over the set pudding layer. Using the spatula, spread it gently for a smooth, fluffy covering. This layer adds a delightful creaminess that balances all that sweet pudding beneath. How pretty it will look, like a fresh snowy blanket covering a green landscape!
Step 5: Decorate the Pie
Finally, let’s make it festive! Right before serving, sprinkle the green sanding sugar and mini red heart-shaped sprinkles over the topping. This adds a pop of color that’ll make your pie eye-catching! For an extra dash of whimsy, place a large red heart-shaped sprinkle on each slice as a finishing touch. Voilà! Your No Bake Grinch Pie is ready to steal the show!
Tips for Success
- Prep the ingredients ahead of time for a smooth cooking experience.
- Ensure your pudding mixture is thick before pouring it into the crust.
- Be patient during chilling; 3 hours is ideal for a firm filling.
- Use a spatula to create a smooth layer of whipped topping.
- Save extra garnishes until just before serving for a fresh look!
Equipment Needed
- Large mixing bowl – A sturdy bowl is crucial for mixing the pudding.
- Whisk or hand mixer – Choose whichever you’re comfortable with for blending.
- Spatula – Essential for spreading the pudding and topping evenly.
- Refrigerator – For chilling your pie to perfection.
Variations
- Try using chocolate pudding mix for a different flavor twist!
- Substitute the whipped topping with coconut whipped cream for a dairy-free option.
- Add a layer of peppermint swirls by incorporating crushed peppermint candies.
- For a more colorful presentation, use rainbow sprinkles instead of the red hearts.
- Experiment with flavored extracts, like almond or vanilla, in the pudding for extra depth!
Serving Suggestions
- Pair your No Bake Grinch Pie with a warm cup of hot cocoa or spiced apple cider.
- Serve alongside festive cookies for a delightful dessert spread.
- For a colorful touch, garnish the pie with fresh mint leaves or berries.
- Present slices on holiday-themed plates for a cheerful display.
FAQs about No Bake Grinch Pie
Got questions about this delightful No Bake Grinch Pie? Let’s dive in!
Can I make the pie ahead of time? Absolutely! The No Bake Grinch Pie can be made a day in advance. Just cover it tightly and store it in the fridge.
How should I store leftovers? If you have any leftovers, be sure to store them in an airtight container in the refrigerator. They’ll stay fresh for about 3 days.
What if I can’t find white chocolate pudding mix? No worries! You can easily substitute with vanilla pudding mix for a similar flavor.
Can I use a different crust? Sure! Feel free to swap the Oreo cookie crust for a graham cracker crust or even a gluten-free option.
How can I make this pie dairy-free? Use dairy-free milk and coconut whipped cream in place of regular whipped topping to suit your dietary needs!
Final Thoughts
Making this No Bake Grinch Pie isn’t just about whipping up a dessert; it’s about creating joyful memories with your loved ones. Each slice brings a burst of color and flavor to the table, sparking smiles and warm conversations during the holiday season. The ease of preparation means you can spend less time in the kitchen and more time making cherished moments. So gather your family, cut those slices, and revel in the delightful sight of this festive pie. It truly is a sweet way to celebrate togetherness during the most wonderful time of the year!
Print
No Bake Grinch Pie
- Prep Time: 15 minutes
- Cook Time: 0 minutes
- Total Time: 3 hours 15 minutes
- Yield: 8 servings 1x
- Category: Dessert
- Method: No Bake
- Cuisine: American
- Diet: Vegetarian
Description
A festive and easy dessert inspired by the Grinch, perfect for holiday gatherings.
Ingredients
- 1 Oreo cookie pie crust
- 1 box (110 g) white chocolate instant pudding mix
- 480 ml cold 2% milk
- 120 g whipped topping (Cool Whip), divided
- 2–3 drops neon green gel food colouring
- 1–2 drops green food colouring
- 70 g green sanding sugar
- 70 g mini red heart-shaped sprinkles
- 70 g large red heart-shaped sprinkles
Instructions
- In a large mixing bowl, combine white chocolate pudding mix, cold 2% milk, neon green gel food colouring, and green food colouring. Beat together using a whisk or hand mixer for 2–3 minutes, or until the mixture thickens and soft peaks form.
- Transfer the prepared pudding mixture into the Oreo cookie pie crust, spreading it evenly with a spatula.
- Place the pie in the refrigerator and chill for at least 3 hours to allow the filling to set firmly.
- Remove the pie from the refrigerator. Spoon half of the whipped topping over the set pudding layer and spread gently to cover.
- Evenly sprinkle green sanding sugar and mini red heart-shaped sprinkles over the whipped topping.
- Slice the pie and, just before serving, place one large red heart-shaped sprinkle on each slice as a decorative garnish.
Notes
- For a more vibrant green color, feel free to adjust the amount of gel food coloring.
- This pie can be made a day in advance, just keep it covered in the refrigerator.
Nutrition
- Serving Size: 1 slice
- Calories: 250
- Sugar: 16g
- Sodium: 230mg
- Fat: 11g
- Saturated Fat: 7g
- Unsaturated Fat: 2g
- Trans Fat: 0g
- Carbohydrates: 36g
- Fiber: 1g
- Protein: 3g
- Cholesterol: 15mg


