
Introduction to Oreo Ball Truffles
Hey there! If you’re on the lookout for a simple yet scrumptious treat, let me introduce you to Oreo Ball Truffles. These delightful little bites combine the rich flavors of Oreos and cream cheese, all coated in luscious chocolate. Perfect for those busy days when you want something sweet, or an impressive treat to share at gatherings, these truffles tick all the boxes. Whether you’re a busy mom juggling countless tasks or just someone who wants to enjoy a decadent dessert without all the fuss, I promise you’ll fall in love with this easy recipe!
Table of Contents
Table of Contents
Why You’ll Love This Oreo Ball Truffles
These Oreo Ball Truffles are a true lifesaver in the kitchen! They’re incredibly easy to whip up, making them perfect for even the busiest of schedules. Plus, with just a few ingredients and no baking required, you can toss together a batch quickly. Their rich, chocolatey flavor and creaminess will leave your taste buds dancing with joy. You’ll find yourself reaching for seconds—trust me, it’s hard to resist!
Ingredients for Oreo Ball Truffles
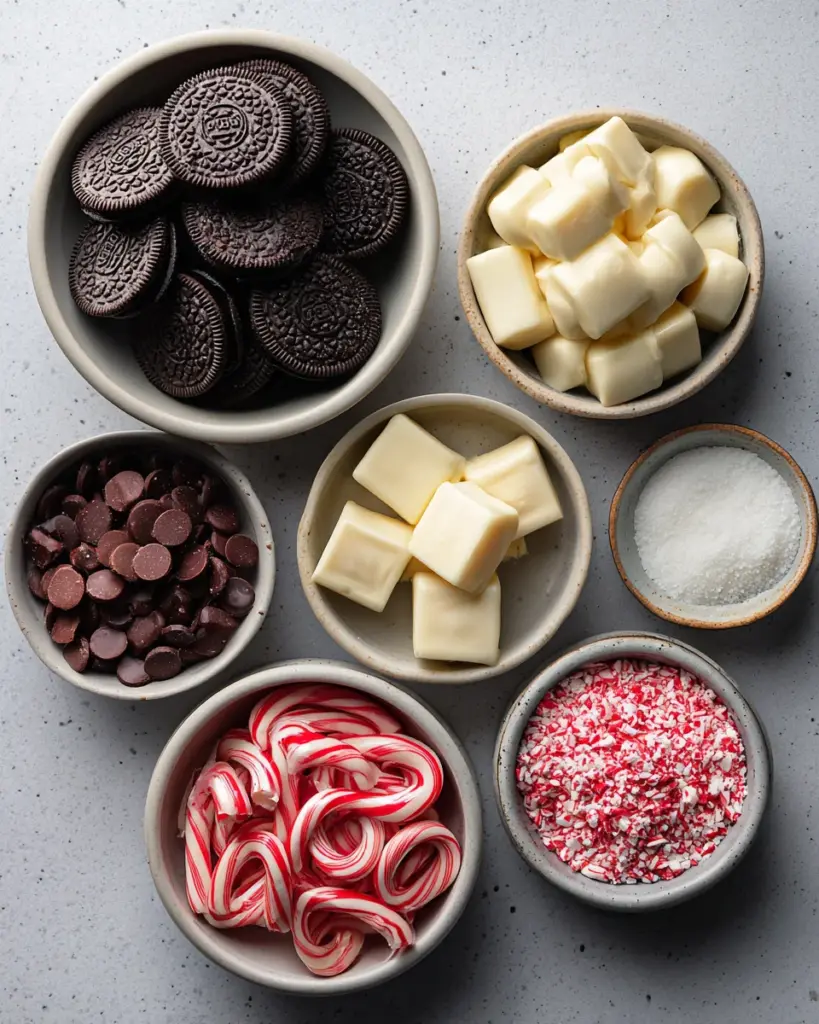
Let’s dive into the ingredient list for these delightful Oreo Ball Truffles. Understanding each ingredient will help you feel confident while making this treat.
- Oreos: The star of the show! These chocolate sandwich cookies add a rich flavor and crumbly texture.
- Cream Cheese: This helps bind the Oreo crumbs together, giving the truffles their creamy interior. Make sure to use softened cream cheese for easier mixing.
- Chocolate Melting Wafers: You’ll need both milk and white chocolate wafers for coating. These melt smoothly and create a beautiful, glossy finish.
- Christmas Sprinkles: Fun and festive! They add a pop of color and make your truffles even more visually appealing.
- Candy Canes: Crushed candy canes serve as a delightful topping. They add a minty crunch, perfect for the holiday season.
- Candy Melts: Use red or green for an extra drizzle on top. These add a splash of color and a fun texture.
For exact quantities, check the bottom of the article where you can easily print the recipe. Feel free to swap out sprinkles, use dark chocolate instead, or even mix in some peanut butter for a different twist!

How to Make Oreo Ball Truffles
Making Oreo Ball Truffles is a fun and rewarding experience! By following these simple steps, you’ll create a batch of delightful treats in no time. Let’s get started on this delicious journey!
Step 1: Prepare Your Baking Sheets
Before diving into the fun part, it’s essential to prepare your baking sheets. Line two large sheets with parchment paper. This prevents sticking and makes cleanup a breeze. Trust me, your future self will thank you for it!
Step 2: Crush the Oreos
Now for the fun part—let’s crush those Oreos! Add 36 Oreos to a food processor and pulse until they turn into fine crumbs. If you don’t have a food processor, it’s perfectly fine to place the Oreos in a resealable bag and crush them with a rolling pin. The goal is no large chunks!
Step 3: Mix with Cream Cheese
This is where the magic happens! Chop your softened cream cheese into small pieces and add it to the Oreo crumbs in the food processor. Blend until the mixture comes together. Room temperature cream cheese mixes better, resulting in a smooth, creamy truffle that’s easy to work with.
Step 4: Form the Truffles
Using a cookie scoop or your hands, roll the Oreo mixture into 1-inch balls. Place them on the lined baking sheet. Once formed, pop them in the fridge for about 30 minutes. Chilling helps them firm up, making them easier to coat later!
Step 5: Melt the Chocolates
While your truffles chill, it’s time to melt the chocolate. In a small saucepan, melt the milk chocolate wafers over medium heat. Stir gently, keeping a close eye to prevent burning. Once halfway melted, remove from heat and let it cool for 1-2 minutes. Repeat this with the white chocolate wafers.
Step 6: Coat the Truffles
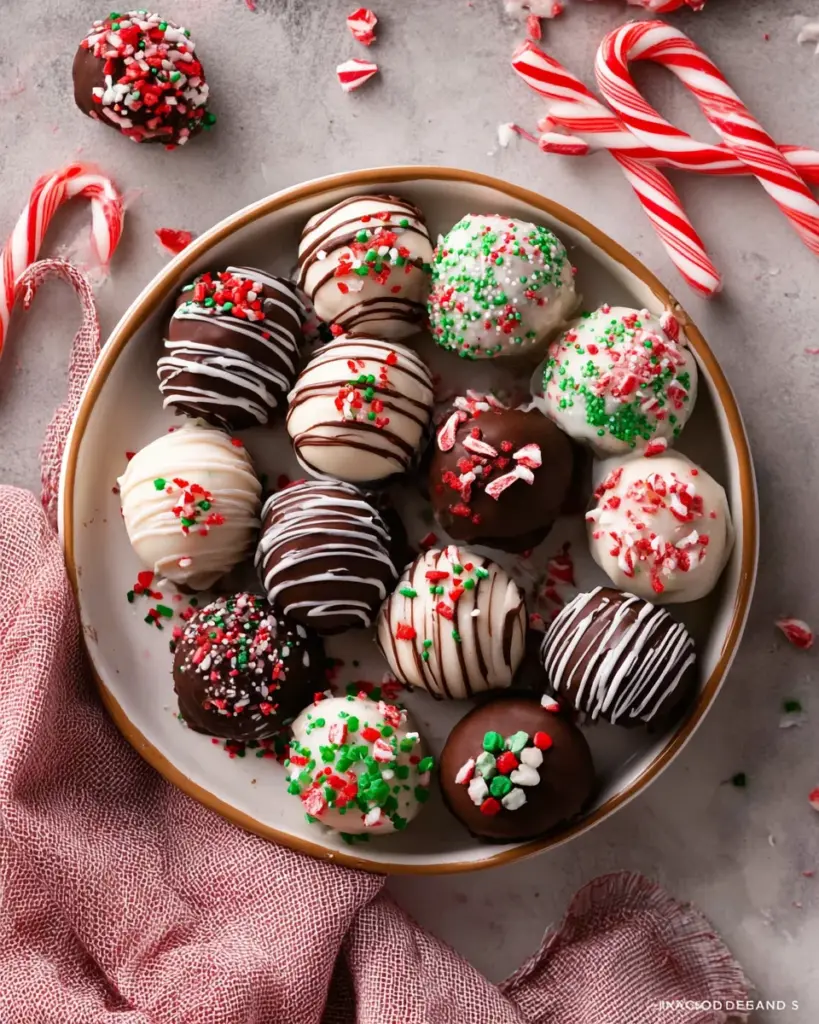
It’s coating time! Using a fork, dip each truffle into the melted chocolate, rolling it around until completely coated. Let excess chocolate drip off before placing it back on the baking sheet. Sprinkle with toppings like Christmas sprinkles or crushed candy canes while the chocolate is still wet for a festive touch!
Step 7: Chill and Store
After coating, return the truffles to the fridge to chill until the chocolate hardens. For storage, keep them in an airtight container in the fridge to maintain freshness. They’ll stay delicious for up to a week!
Tips for Success
- Use room temperature cream cheese for easier mixing and a smoother texture.
- For a fun twist, try using flavored Oreos like mint or birthday cake!
- Don’t rush the cooling process; let the chocolate sit for a couple of minutes before coating.
- Experiment with toppings—feel free to use nuts or other candy for variety.
- Store truffles in a single layer to avoid squishing or sticking together.
Equipment Needed
- Food Processor: Essential for crushing Oreos. A rolling pin and resealable bag work just as well if you don’t have one.
- Baking Sheets: Use two large ones lined with parchment paper. Any flat surface will do in a pinch.
- Heatproof Bowls: Great for melting chocolate in the microwave or over simmering water if you prefer that method.
- Cookie Scoop: Handy for rolling even truffles. Alternatively, just use your hands!
Variations of Oreo Ball Truffles
- Peanut Butter Oreo Balls: Mix in a few tablespoons of creamy peanut butter with your Oreo and cream cheese mixture for a nutty flavor burst.
- Mint Chocolate Truffles: Use mint-flavored Oreos and add a drop of peppermint extract to the cream cheese mixture for a refreshing twist.
- Dark Chocolate Coating: Swap the milk chocolate wafers for dark chocolate for a richer, slightly more sophisticated taste.
- Vegan Version: Replace the cream cheese with a vegan cream cheese alternative and use dairy-free chocolate wafers for a delicious vegan treat.
- Caramel Drizzle: Drizzle a homemade or store-bought caramel sauce on top instead of or in addition to the chocolate for a sweet surprise.
Serving Suggestions for Oreo Ball Truffles
- Pair these sweet treats with a piping hot cup of coffee or a chilled glass of milk for a delightful snack moment.
- Present them on a festive platter or in decorative boxes for holiday parties or gift-giving.
- For a fun twist, serve with a side of fresh strawberries or raspberries to balance the sweetness.
FAQs about Oreo Ball Truffles
As I dive deeper into the delicious world of Oreo Ball Truffles, I know you might have a few questions. Let’s address some common inquiries that will help enhance your truffle-making experience!
Can I use different flavors of Oreos?
Absolutely! Flavored Oreos like mint or birthday cake can add a unique twist to your truffles. Be adventurous and try what you love!
How long do Oreo Ball Truffles last?
These truffles can be stored in the fridge for up to a week. Just keep them in an airtight container to maintain that delicious creaminess!
Can I make Oreo Ball Truffles in advance?
Yes! You can prepare these truffles ahead of time. Just store them in the fridge and pull them out when you’re ready to impress your guests.
What’s a good substitute for cream cheese?
If you’re looking for a dairy-free option, consider using vegan cream cheese or even a thick yogurt. It’ll still yield that lovely creamy texture.
Can I freeze Oreo Ball Truffles?
Definitely! These truffles freeze beautifully. Just ensure they’re in an airtight container, and you can enjoy them later as a little treat anytime!
Final Thoughts
Making Oreo Ball Truffles is more than just whipping up a quick treat; it’s about creating joyful moments. The delightful combination of creamy, chocolatey goodness paired with the sweet crunch of Oreos brings happiness to any occasion. Whether you’re sharing them with family, friends, or savoring a quiet moment to yourself, these truffles are sure to bring smiles all around. Plus, the beauty of this recipe lies in its simplicity. So gather your ingredients, roll up your sleeves, and dive into this sugary adventure. Trust me, you won’t regret it!
Print
Oreo Ball Truffles
- Prep Time: 30 minutes
- Cook Time: 10 minutes
- Total Time: 40 minutes
- Yield: 24 truffles 1x
- Category: Dessert
- Method: No-Bake
- Cuisine: American
- Diet: Vegetarian
Description
Oreo Ball Truffles are a delicious and easy-to-make treat that combines crushed Oreos, cream cheese, and chocolate to create delightful dessert balls.
Ingredients
- 36 Oreos – 10.7 oz (303 g) bag
- 8 oz cream cheese – softened at room temperature
- 8 oz white chocolate melting wafers – approx 1 ¾ cups small size wafers
- 8 oz milk chocolate melting wafers – approx 1 ¾ cups small size wafers
- 2 Tbsp Christmas sprinkles – red, white, and green color
- ½ cup crushed candy canes
- 3 oz candy melts – red or green (for drizzling)
Instructions
- Line two large baking sheets with parchment paper. Set aside.
- Add 36 Oreos to a food processor. Blend until they form fine crumbs with no big chunks left.
- Roughly chop the 8 oz cream cheese into small cubes. Add it to the food processor and blend until it combines with the Oreo crumbs. Use a spatula to mix together more evenly if needed.
- Use a cookie scoop or 1 Tbsp measuring spoon and roll the Oreo batter into balls with your hands. Place on a baking sheet and add to the fridge to chill for 30 minutes.
- Add 8 oz chocolate wafers to a small saucepan over medium heat. Gently stir until the chocolate melts. Remove from heat and let cool for 1-2 minutes.
- In a separate saucepan, repeat by melting the 8 oz white chocolate wafers until fully melted. Remove from heat and let cool for 1-2 minutes.
- Use a fork to lower the Oreo balls into the melted white or milk chocolate. Roll them around to gently coat them. Use a fork to lift them out of the chocolate and place back on to parchment baking sheet.
- Add sprinkles on top while chocolate is still melted. Place some covered in white chocolate in crushed candy canes and roll to coat. For the rest, let the chocolate harden then drizzle melted chocolate or red or green candy melts over the top.
- Place all Oreo balls in the fridge until ready to serve. Store leftovers in the fridge or freezer.
Notes
- Ensure the cream cheese is at room temperature for easier mixing.
- Feel free to customize the toppings based on your preferences.
- These truffles can be stored in the fridge for up to a week.
Nutrition
- Serving Size: 1 truffle
- Calories: 120
- Sugar: 10g
- Sodium: 50mg
- Fat: 7g
- Saturated Fat: 4g
- Unsaturated Fat: 2g
- Trans Fat: 0g
- Carbohydrates: 14g
- Fiber: 1g
- Protein: 1g
- Cholesterol: 15mg


