Introduction to Oreo Pancakes
Picture this: a lazy Sunday morning, the sun streaming through the window, and the smell of something sweet wafting through your kitchen. That’s where Oreo Pancakes come into play! These delightful treats aren’t just breakfast; they blur the lines between comfort food and dessert. Finding a way to brighten your family’s morning can be a tall order, especially for busy moms and professionals. But don’t worry! I’ll walk you through the simple magic of making Oreo Pancakes, and trust me, they’ll be a hit with everyone—yes, even the picky eaters!
Why You’ll Love This Oreo Pancakes
Oreo Pancakes are the ultimate breakfast solution for busy mornings! These fluffy delights come together in just 25 minutes, allowing you to whip up something indulgent without sacrificing time. The rich, chocolatey flavor of Oreos combined with the comforting texture of pancakes makes for a breakfast that feels like a special treat. Plus, leftovers heat up beautifully, so you can enjoy them even on the busiest days!
Ingredients for Oreo Pancakes
Gathering the right ingredients is essential for crafting the perfect Oreo Pancakes. Thankfully, these ingredients are pretty straightforward and often found in most kitchens.
- Unsalted butter: This adds richness and flavor. I prefer unsalted so I can control the saltiness.
- All-purpose flour: The core of any pancake recipe, giving it structure. You can also use whole wheat flour for added nutrition.
- Granulated sugar: Just a touch for that hint of sweetness. You could substitute with brown sugar for a deeper flavor.
- Baking powder: This is your fluffy pancake secret! It helps them rise to perfection.
- Baking soda: Works in tandem with baking powder. More lift for those fluffy bites!
- Salt: Just a pinch to balance out the sweetness. A little goes a long way!
- Buttermilk: This adds a unique tanginess and makes pancakes tender. You can make a quick substitute with milk and vinegar.
- Eggs: These provide structure and moisture to your batter.
- Vanilla extract: A splash of this elevates flavors, adding a hint of sweetness.
- Oreo cookies: The star of the show! Roughly chopped to incorporate into and on top of your pancakes for that iconic flavor.
- Vegetable oil: Just a drizzle for greasing your skillet. It gives the pancakes a lovely golden color.
All quantities for these ingredients are included at the bottom of the article, where you’ll find them ready for printing. So let’s get to whisking!

How to Make Oreo Pancakes
Now that we have our ingredients ready, let’s dive into the fun part: making those irresistible Oreo Pancakes! This process is a breeze, and I’ll guide you every step of the way.
Step 1: Prepare the Ingredients
First things first, let’s melt the unsalted butter. I recommend doing this over low heat. Once it’s melted, set it aside to cool slightly. While that’s happening, grab another bowl and get your dry ingredients ready—this makes mixing smoother later on. Trust me; a bit of prep goes a long way!
Step 2: Mix Dry Ingredients
In a large mixing bowl, whisk together the all-purpose flour, granulated sugar, baking powder, baking soda, and salt. This step ensures that the flavors and leavening agents are evenly distributed. You want your Oreo Pancakes to rise beautifully when they hit the skillet!
Step 3: Combine Wet Ingredients
In a separate bowl, combine the buttermilk, large eggs, and vanilla extract. Whisk them together until smooth. The goal is to create a cohesive mixture that will blend well with the dry ingredients. At this point, your kitchen should start to smell absolutely divine!
Step 4: Blend Wet and Dry Mixtures
Now, gently pour your wet ingredients into the dry mixture. Here’s a little tip: mix just until combined, leaving some lumps in the batter. Overmixing can lead to rubbery pancakes, and nobody wants that! A few lumps are perfectly okay.
Step 5: Add Oreo Cookies
Time to bring in the star of our show—those lovely, crushed Oreo cookies! Gently fold them into the batter, being careful not to overmix it. You’ll want those delightful bits to remain whole, so every bite bursts with that iconic Oreo flavor.
Step 6: Cook the Pancakes
Heat a skillet over medium heat, adding a drizzle of vegetable oil. Once it’s hot, pour about two heaped tablespoons of batter for each pancake. As the pancakes begin to cook, keep an eye out for small bubbles forming on the surface. That’s your cue to flip them over! Aim for a lovely golden brown on each side—a sure sign of perfection!
Step 7: Serve With Toppings
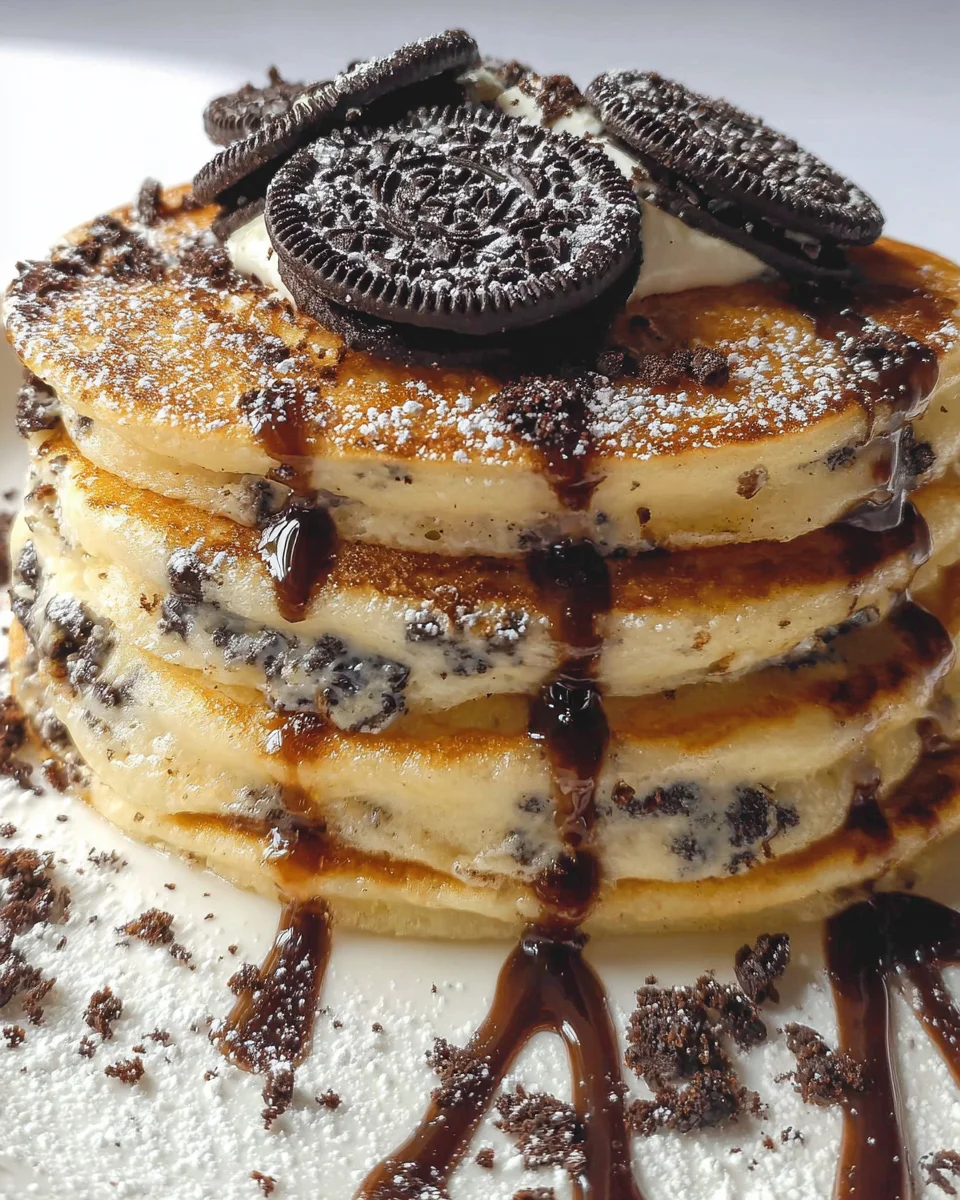
Now for the finishing touch! Serve your pancakes warm with a generous dollop of whipped cream, a drizzle of chocolate sauce, and a sprinkle of extra crushed Oreos for an added crunch. Trust me, this indulgent treat will leave you and your loved ones smiling from ear to ear.
Tips for Success
- Make sure your skillet is hot enough, but not smoking. This keeps pancakes fluffy.
- Use a measuring cup to portion the batter, ensuring consistent pancake sizes.
- Don’t rush the flip! Wait for those bubbles, or your pancakes might break.
- For even fluffier pancakes, let the batter rest for a few minutes before cooking.
- Feel free to mix in chocolate chips for even more sweetness!
Equipment Needed
- Mixing bowls: A set of varying sizes for wet and dry ingredients—comfortable for mixing!
- Whisk: Essential for combining ingredients smoothly. A fork works too in a pinch!
- Skillet or griddle: Non-stick is preferable. If you don’t have one, a regular pan works fine.
- Spatula: For flipping those pancakes with precision.
Variations of Oreo Pancakes
- Gluten-Free: Substitute all-purpose flour with a gluten-free blend to accommodate dietary needs without sacrificing taste.
- Vegan Option: Replace eggs with mashed bananas or applesauce and use non-dairy milk instead of buttermilk for a plant-based twist.
- Mint Chocolate Oreo Pancakes: Add a few drops of peppermint extract to the batter for a refreshing twist reminiscent of mint Oreos.
- Chocolate Chip Oreo Pancakes: Toss in some semi-sweet chocolate chips along with the crushed Oreos for a double-chocolate delight.
- Banana Oreo Pancakes: Mash a ripe banana and mix it into your batter for natural sweetness and a hint of fruity flavor.
Serving Suggestions
- Fresh Fruits: Serve with sliced strawberries, bananas, or blueberries for a refreshing balance.
- Drinks: Pair with a rich coffee or a refreshing glass of orange juice for a delightful contrast.
- Presentation: Stack the pancakes high and dust with powdered sugar for a touch of elegance.
- Fun Additions: Offer a side of bacon or sausage for those who love a savory complement.
FAQs about Oreo Pancakes
Got questions about making these decadent Oreo Pancakes? I’ve got you covered! Here are some common queries that might pop up while you’re in the kitchen.
Can I make Oreo Pancakes ahead of time?
Absolutely! You can prepare the batter the night before and keep it in the fridge. Just stir it gently before cooking in the morning. These pancakes are perfect for busy mornings, all while keeping their delicious taste!
Will the pancakes be too sweet with Oreos?
Not at all! The sweetness is balanced perfectly by the buttermilk and the added salt in the recipe. If you prefer less sweetness, feel free to adjust the sugar in the recipe to your liking.
What can I substitute for buttermilk?
If you don’t have buttermilk on hand, don’t fret! You can mix regular milk with a tablespoon of vinegar or lemon juice, letting it sit for a few minutes before using. It works like magic!
How can I store leftover Oreo Pancakes?
Simply place them in an airtight container in the fridge. For best results, reheat them in a toaster or a skillet. They’ll taste almost as fresh as when you first made them!
Can I freeze Oreo Pancakes?
Yes! Let the pancakes cool completely, then layer them with parchment paper in an airtight container. Frozen pancakes can last up to a month. Just pop them in the toaster for a quick breakfast kick!
Final Thoughts
There’s something utterly joyful about serving a stack of warm Oreo Pancakes to your loved ones. The smiles and satisfied sighs that follow each bite are what make all the effort worthwhile. These pancakes are more than just food; they’re a delightful way to share moments of happiness. Whether you’re enjoying them for breakfast or as a decadent dessert, they’re sure to become a beloved family tradition. So, don your apron, gather your family, and dive into this scrumptious adventure with me! Trust me, you won’t regret it!
Print
Oreo Pancakes
- Prep Time: 15 minutes
- Cook Time: 10 minutes
- Total Time: 25 minutes
- Yield: 4 servings 1x
- Category: Breakfast
- Method: Griddle/Pan Cooking
- Cuisine: American
- Diet: Vegetarian
Description
Indulge in these delicious Oreo Pancakes, perfect for breakfast or dessert!
Ingredients
- 3 tbsp unsalted butter
- 2 cups all-purpose flour
- ¼ cup granulated sugar
- 2 ½ tsp baking powder
- ½ tsp baking soda
- ½ tsp salt
- 1 ¾ cups buttermilk
- 2 large eggs
- 2 tsp vanilla extract
- 10 Oreo cookies roughly chopped, plus extra for garnish
- Vegetable oil for skillet
Instructions
- Melt the butter and set aside to cool.
- Add the flour, sugar, baking powder, baking soda, and salt to a mixing bowl. Whisk together until combined.
- In a separate bowl, add the buttermilk, eggs, and vanilla extract. Whisk until combined.
- Pour the wet ingredients into the dry ingredients, mixing briefly.
- Add the crushed Oreo cookies and gently fold into the batter.
- Pour over the melted butter and mix until just combined. The batter will look lumpy.
- Heat a skillet and then add a drizzle of vegetable oil.
- When the oil is hot, add two heaped tablespoons of pancake batter to the pan. Use a spoon to push the batter into a circular shape. When small bubbles appear on the surface of the pancake (after a minute or so) flip the pancake over and cook for 1 minute on the other side or until lightly golden. Set aside in a warm oven.
- Repeat with the remaining pancake batter.
- Serve with whipped cream, a drizzle of chocolate sauce, and some crushed Oreos.
Notes
- For extra flavor, consider adding more chopped Oreos on top while serving.
- Ensure the skillet is adequately hot before adding the batter for better fluffiness.
- These pancakes can also be stored in the fridge and reheated later.
Nutrition
- Serving Size: 1 pancake
- Calories: 220
- Sugar: 9g
- Sodium: 250mg
- Fat: 9g
- Saturated Fat: 4g
- Unsaturated Fat: 3g
- Trans Fat: 0g
- Carbohydrates: 32g
- Fiber: 1g
- Protein: 6g
- Cholesterol: 50mg