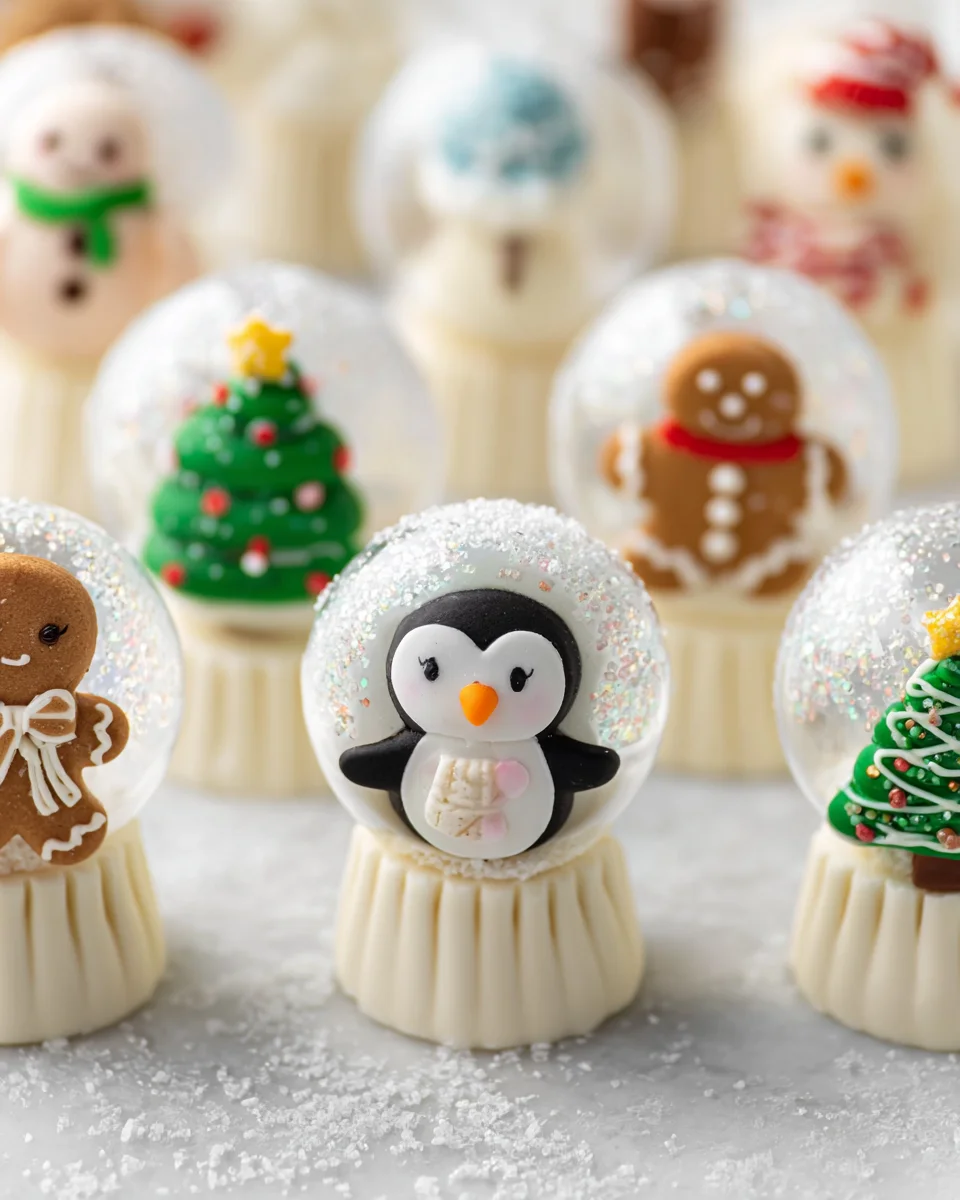
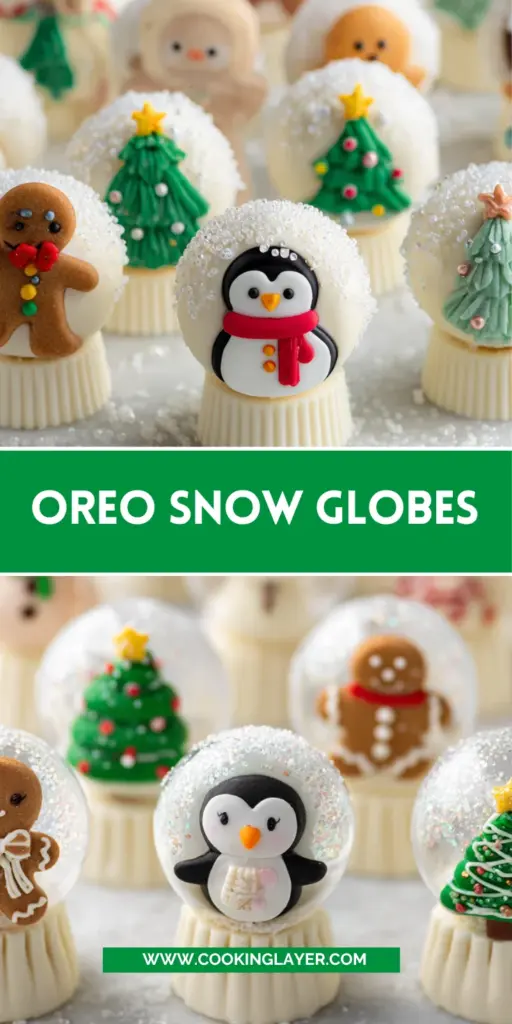
Introduction to Oreo Snow Globes
As the holiday season rolls around, I find myself reminiscing about the sweet flavors and joyful gatherings. One delightful treat that captures that festive spirit is Oreo Snow Globes. They’re not only a sugary sensation but also a fun, creative project to whip up in no time. When life gets hectic, these enchanting little sweets bring a wave of comfort and cheer. Whether you’re entertaining family or looking for a quick dessert solution, Oreo Snow Globes are sure to impress your loved ones, leaving them with smiles that sparkle brighter than the decorations!
Why You’ll Love This Oreo Snow Globes
These Oreo Snow Globes are a holiday miracle for busy lives! They’re incredibly easy to make, meaning you can spend less time in the kitchen and more with your loved ones. Plus, they taste absolutely delightful—sweet, creamy, and oh-so-decadent. The best part? You can customize them to match your holiday spirit. Trust me, they’ll become the highlight of any festive gathering!
Ingredients for Oreo Snow Globes
Gathering the right ingredients is key to making your Oreo Snow Globes truly magical! Here’s what you’ll need:
- White fudge-covered Oreos: These bring the essential cookie crunch and creamy sweetness that makes the base of your snow globes deliciously irresistible.
- Reese’s white creme miniature cups: These serve as the perfect little stands for your snow globes; their rich flavor adds a delightful surprise to every bite.
- White candy melts: Melt these down to create a smooth, sweet coating—ideal for attaching decorations and giving your creations that snowy look.
- White sanding sugar: A sprinkly touch that adds a beautiful shimmer, making your snow globes eye-catching and festive.
- Festive icing decorations: Choose from a variety of holiday shapes to personalize each snow globe, making them as unique as the loved ones you share them with.
- Snowflake sprinkles (optional): If you really want to amp up the winter magic, these add an extra touch of charm and whimsy to your treats.
Don’t worry about exact measurements just yet; I’ve rounded them all up at the bottom of this article for easy printing. Happy gathering!
How to Make Oreo Snow Globes
Let’s embark on the fun journey of creating these delightful Oreo Snow Globes! Each step is simple and rewarding, ensuring that even the busiest of moms can shine in the kitchen. Here’s how to bring your sugary creations to life.
Step 1: Prepare Ingredients
Start by gathering all your ingredients. This makes everything flow smoothly. Lay out your Oreos, Reese’s cups, candy melts, sanding sugar, icing decorations, and those cozy snowflake sprinkles. Having everything ready makes it easy to whip these up! Trust me, it saves you from last-minute scrambling.
Step 2: Melt the Candy Melts
Next up, melt 1/4 cup of the white candy melts. Follow the instructions on the package; be careful to not overheat them. This melting process feels a bit like alchemy—turning solid into a sweet, magical goo! Let the melted candy cool slightly before using. It shouldn’t sizzle when it touches the Oreos!
Step 3: Decorate the Oreos
Now for the fun part! Using a pastry brush, apply a layer of melted candy onto the bottom half of each Oreo. This base will hold our decorations! Immediately sprinkle a little bit of white sanding sugar on top. It gives the illusion of fresh-fallen snow—because who doesn’t love a winter wonderland on their treats? Make sure to coat them lightly but evenly.
Step 4: Attach Icing Decorations
Once you have your Oreos all glammed up, it’s time to add the festive icing decorations. Brush a small amount of melted candy on the back of each decoration, then place them on the front of the Oreo. These little toppers are what make your snow globes shine like the stars on a clear winter night. If you want to take it a step further, now’s the time to add those snowflake sprinkles!
Step 5: Create the Snow Globe Stand
Let’s turn those delicious Oreos into snow globes! Melt the remaining candy melts and dip the narrow, flat end of each Reese’s Miniature Cup into that sweet goo. Attach it to the bottom of an Oreo. This clever trick forms a sturdy stand that makes your creations look even more whimsical. I love how they start looking like tiny globes of joy!
Step 6: Allow to Dry
The last step is to let everything dry completely. Set your treats aside on a tray for a bit—maybe grab a coffee while you wait! Once they’ve hardened, you’re ready to serve. Your festive Oreo Snow Globes will look stunning on any cookie tray, adding a sprinkle of cheer to your holiday spread!
Tips for Success
- Ensure your melted candy is warm, but not too hot to avoid melting the Oreos.
- Feel free to get creative with decorations to reflect your personal holiday style.
- When applying sanding sugar, do it while the candy is wet for perfect adhesion.
- If you have kids, let them help with decorating; it’s a sweet bonding experience!
- Store in a cool, dry place to keep those shapes intact and decorations sparkling.
Equipment Needed
- Pastry brush: Essential for applying candy melts, but a clean paintbrush works too!
- Microwave-safe bowl: For melting candy; a double boiler can be used as an alternative.
- Teaspoon or toothpick: Perfect for applying small amounts of melted candy for garnishing.
- Baking tray: Ideal for letting the snow globes dry; a plate will do in a pinch.
Variations for Oreo Snow Globes
- Chocolate-covered Oreos: Switch things up by using chocolate-covered Oreos for a richer flavor that pairs wonderfully with the decorations.
- Peanut butter filling: Replace the white fudge Oreos with peanut butter-filled versions to create an unexpected twist that peanut butter lovers will adore.
- Gluten-free option: Look for gluten-free Oreos to ensure everyone can enjoy these festive treats without any worries.
- Dairy-free version: Use dairy-free candy melts and alternative treats to create a delicious vegan-friendly snow globe!
- Colorful candy melts: Get creative by using colored candy melts to match specific themes, like red and green for Christmas or pastel shades for spring celebrations.
- Other chocolate candies: Experiment with mini chocolate bars or different flavors of miniature cups as your stands for added variety!
Serving Suggestions for Oreo Snow Globes
- Pair these delightful treats with a warm cup of hot cocoa for the ultimate cozy experience.
- Arrange the snow globes on a festive platter, garnished with holly or evergreen sprigs for a holiday touch.
- Consider serving alongside a selection of holiday cookies to create a dreamy dessert table.
- For an interactive twist, set up a toppings bar where guests can add their flair to each snow globe!
FAQs about Oreo Snow Globes
As I’ve shared this recipe for Oreo Snow Globes with friends and family, I’ve noticed a few common questions pop up. Let’s tackle those so you can create these festive treats with confidence!
Can I make these Oreo Snow Globes ahead of time?
Absolutely! These treats can be made a day or two in advance. Just store them in a cool, dry place to keep their shape and decorations intact.
What can I substitute for the white candy melts?
If white candy melts aren’t handy, you can use softened white chocolate or even yogurt-covered coatings as a sweet alternative. Just remember that melting times might differ.
How long will Oreo Snow Globes stay fresh?
When stored properly, these festive treats should stay fresh for about a week. That is, if they don’t disappear faster—trust me, they’re hard to resist!
Can I use regular Oreos instead of white fudge-covered ones?
Yes, using regular Oreos will still yield delicious results! The flavor profile may shift slightly, but the magic will definitely still be there.
Are Oreo Snow Globes suitable for a gluten-free diet?
Yes, just be sure to choose gluten-free Oreos, and you’re all set to enjoy these sweet creations without the gluten concerns!
Final Thoughts
Creating Oreo Snow Globes truly embodies the joy of the holiday season. As I watch my family’s eyes light up with delight at each sugary globe, I can’t help but feel a warm glow inside. These treats are more than just desserts; they’re a cherished memory in the making. With every sprinkle and swirl of candy, I celebrate creativity and togetherness. This festive recipe captures the spirit of the holidays perfectly, reminding us that sometimes, the simplest joys bring the happiest moments. So, gather your loved ones and dive into this sweet adventure together!
Print
Oreo Snow Globes
- Prep Time: 20 minutes
- Cook Time: 0 minutes
- Total Time: 20 minutes
- Yield: 12 snow globes 1x
- Category: Dessert
- Method: No-bake
- Cuisine: American
- Diet: Vegetarian
Description
Delightful Oreo Snow Globes are a festive treat that combines sweet Oreos and decorative elements, perfect for the holiday season.
Ingredients
- 12 white fudge-covered Oreos (8.5 ounce package)
- 12 Reese’s white creme miniature cups
- 1/2 cup white candy melts
- 1/4 cup white sanding sugar
- 12 festive icing decorations
- snowflake sprinkles (optional)
Instructions
- Melt 1/4 cup of the candy melts according to package directions.
- Using a pastry brush, brush the melted candy onto the bottom half of the front side of each Oreo. Immediately sprinkle with white sanding sugar.
- Brush a small amount of melted candy onto the back of each icing decoration and place it on the front of the Oreo over the sanding sugar.
- If using snowflake sprinkles, dab a small amount of melted candy onto each sprinkle with a toothpick and attach them to the Oreo. Set aside to dry.
- Once the decorations are dry, melt the remaining candy melts.
- Dip the narrow, flat end of each Reese’s Miniature Cup into the melted candy and attach it to the bottom of an Oreo to form a stand.
- Allow the snow globes to dry completely before serving or arranging on cookie trays.
Notes
- For best results, ensure the melted candy is not too hot when applying to Oreos.
- Feel free to customize the decorations to match your holiday theme!
- Store in a cool, dry place to maintain the shape and decorations.
Nutrition
- Serving Size: 1 snow globe
- Calories: 150
- Sugar: 12g
- Sodium: 50mg
- Fat: 7g
- Saturated Fat: 3.5g
- Unsaturated Fat: 2g
- Trans Fat: 0g
- Carbohydrates: 21g
- Fiber: 0g
- Protein: 1g
- Cholesterol: 0mg


