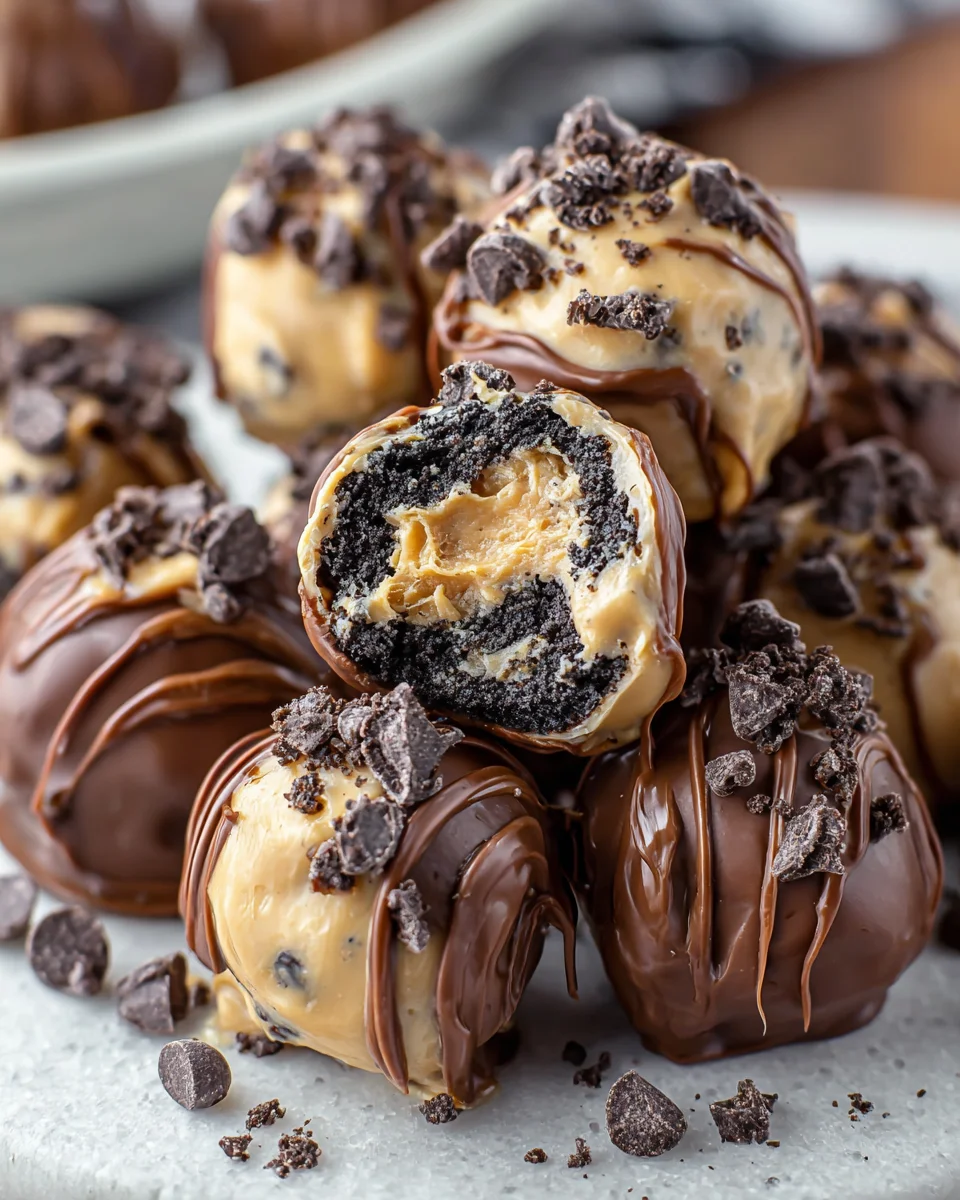
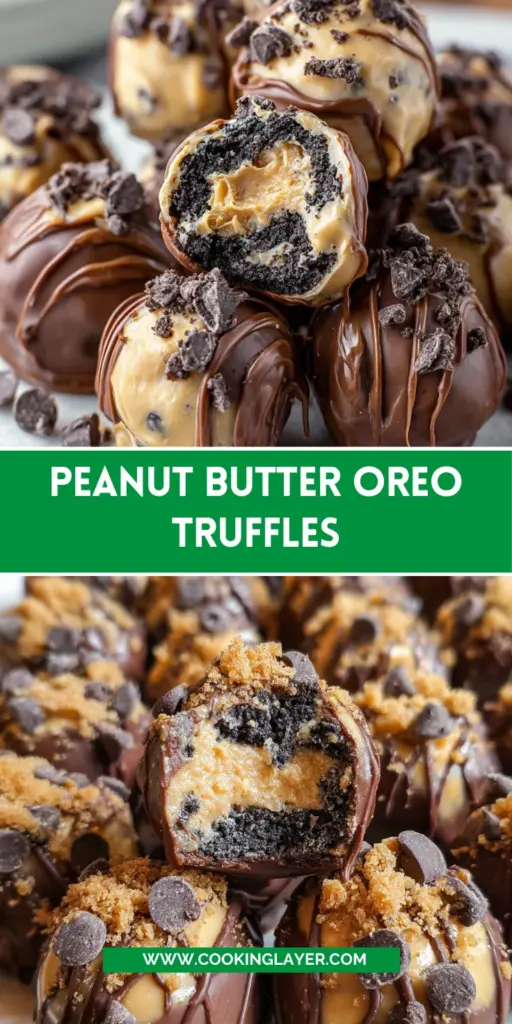
Introduction to Peanut Butter Oreo Truffles
Hey there, fellow dessert lovers! If you’re like me, juggling a busy life but craving something sweet, then these Peanut Butter Oreo Truffles are about to become your new best friend. Not only do they combine the irresistible flavors of creamy peanut butter and chocolate, but they’re also super simple to make. Perfect for a quick treat or to impress guests at your next gathering, these indulgent bites promise to satisfy your sweet tooth without taking up your whole day. Let’s dive in and create some delicious memories!
Why You’ll Love This Peanut Butter Oreo Truffles
You’ll fall in love with these Peanut Butter Oreo Truffles for so many reasons! First off, they require no baking, making them a fantastic choice for busy schedules. They come together in just a little over an hour, allowing you to whip up a delightful treat in no time. Plus, who can resist the rich, creamy combination of peanut butter and chocolate? It’s dessert perfection, and trust me, your family will be begging for more!
Ingredients for Peanut Butter Oreo Truffles
Gathering the right ingredients is essential for crafting these heavenly Peanut Butter Oreo Truffles. Here’s what you’ll need:
- Double Stuf Oreos: The base of our truffle. Their rich flavor and creamy filling create a cookie bliss. Feel free to switch to any favorite Oreo flavor!
- Cream Cheese: This adds a luscious creaminess that blends beautifully with the cookie crumbs. Make sure it’s softened for easy mixing!
- Creamy Peanut Butter: The star ingredient! The natural sweetness and rich flavor bring these truffles to life. You can use chunky peanut butter for added texture.
- Unsalted Butter: It enhances the richness of the peanut butter layer, making it smooth and spreadable. Make sure it’s softened too!
- Powdered Sugar: This sweetens the truffles and helps bind the peanut butter mixture. You can use a sugar substitute if you’re cutting back on sugar.
- Semi-sweet Milk Chocolate Chips: For dipping! These provide a delightful coating that complements the truffles’ flavors perfectly. Use dark chocolate for a bolder taste!
All ingredient measurements are available toward the bottom of the article, ready for you to print out for your convenience. Let’s get ready to create a delicious treat that your friends and family will adore!
How to Make Peanut Butter Oreo Truffles
Getting down to the deliciousness of these Peanut Butter Oreo Truffles is where the excitement happens! Follow these simple steps, and you’ll be on your way to creating a dessert that will have everyone buzzing with delight.
Step 1: Prepare the Baking Tray
First things first! Line a baking tray with wax or parchment paper. This little step is a game changer! It helps keep the truffles from sticking and makes cleanup a breeze. Who doesn’t love less mess?
Step 2: Crush the Oreos
Now to tackle those Oreos! You can crush them in two ways: use a food processor for a quick chop or toss them in a large plastic bag and bring out the rolling pin like a true kitchen warrior. Either way, aim for fine crumbs; these will help create a uniform texture in your truffles.
Step 3: Mix Cream Cheese and Oreo Crumbs
Next, grab a mixing bowl and add your softened cream cheese. Beat it until it’s smooth and creamy. This is the secret to making your truffles rich and delicious! Sprinkle in those Oreo crumbs and mix until everything is well combined. You want a consistent, sweet, and buttery batter here!
Step 4: Form the Balls
Now comes the fun part—forming the balls! Lightly grease your hands, then scoop some mixture and roll it into even balls, about one inch in size. It’s like making tiny edible art pieces! This will help you achieve consistent baking results. Once done, place them on your lined tray.
Step 5: Prepare the Peanut Butter Coating
In a separate bowl, it’s time to create that dreamy peanut butter coating. Combine peanut butter, softened butter, and powdered sugar until smooth. It should be creamy and delicious—like the frosting on a cake! This layer adds richness and flavor that pairs perfectly with the cookie base.
Step 6: Wrap and Chill
Now, take each Oreo ball and wrap a portion of that glorious peanut butter mixture around it. You’re creating a luscious layer that’ll make the truffles irresistible! Once wrapped, return the balls to the tray and pop them in the fridge for about 20 minutes. This makes them firm and easier to dip later.
Step 7: Melt the Chocolate
Let’s talk about that all-important chocolate dip! In a microwave-safe bowl, combine your chocolate chips. Melt them in 30-second intervals, stirring after each session. This careful method helps prevent burning. After about 90 seconds, you should have smooth, melted chocolate ready to embrace your truffles.
Step 8: Dipping the Truffles
Here’s where the real magic happens! Insert a toothpick into each truffle and dip it into the melted chocolate. Let any excess chocolate drip off—don’t worry if a little clumps, it’ll just add character! Place the dipped truffles back on the tray and admire your work.
Step 9: Set and Store
Finally, return those beauties to the fridge for another 20 to 30 minutes. This will set the chocolate coating nicely. Once hard, store them in an airtight container in the fridge. They’ll stay fresh for about a week, but trust me, they’ll be gone long before that!
Tips for Success
- Make sure all ingredients, especially the cream cheese and butter, are at room temperature for easy mixing.
- For a smoother chocolate coating, avoid overheating the chocolate during melting. Stir frequently!
- Feel free to use different toppings like crushed peanuts or sprinkles for a festive touch.
- Don’t skip the chilling steps—they help keep everything firm and easier to work with.
- Enjoy making these truffles with family; it’s a fun way to bond in the kitchen!
Equipment Needed
- Baking Tray: Use any flat surface like a cookie sheet or platter.
- Parchment or Wax Paper: If unavailable, a silicone baking mat can work too.
- Mixing Bowls: Any mixing bowl will do, but a large one is best for the truffle mix.
- Food Processor: A rolling pin and ziplock bag works great for crushing Oreos!
- Microwave-Safe Bowl: Any microwave-safe dish for melting chocolate will suffice.
Variations
- Nut Butter Swap: Try almond or cashew butter in place of peanut butter for a different flavor profile.
- Flavor Infusions: Add a teaspoon of vanilla or almond extract to the peanut butter mixture for a delightful twist.
- Gluten-Free Option: Use gluten-free Oreos to make these truffles suitable for gluten-sensitive friends.
- Healthier Version: Substitute some of the powdered sugar with a natural sweetener like honey or maple syrup.
- Choco-Coconut Truffles: Mix in shredded coconut with the peanut butter for a tropical touch!
Serving Suggestions
- Coffee or Espresso: Pair your Peanut Butter Oreo Truffles with a rich coffee or espresso for a delightful afternoon treat.
- Milkshake: Serve alongside a creamy chocolate or vanilla milkshake for a nostalgic dessert experience.
- Presentation: Arrange the truffles on a decorative plate and sprinkle with crushed Oreos for a stunning visual effect!
FAQs about Peanut Butter Oreo Truffles
As a devoted fan of these delicious Peanut Butter Oreo Truffles, I often get asked a few questions that I’d love to share with you. Here’s a handy FAQ to help clarify any curiosity you might have!
Can I freeze Peanut Butter Oreo Truffles?
Absolutely! These truffles freeze beautifully. Just ensure they’re in an airtight container, and they can last up to three months in the freezer. Just remember to let them thaw in the fridge before you enjoy them!
What if I don’t have cream cheese?
If cream cheese isn’t on hand, you can substitute it with a mixture of Greek yogurt and a bit of powdered sugar. It won’t be quite the same, but it will give you a deliciously creamy texture!
Can I use dark chocolate instead of semi-sweet chocolate?
Yes! Dark chocolate is a fantastic alternative if you prefer a more intense chocolate flavor. It pairs wonderfully with the peanut butter and Oreos for a gourmet twist!
Are there any alternatives to Oreos for this recipe?
Of course! While Oreos provide that beloved flavor, feel free to swap in other sandwich cookies. Just make sure to choose a cookie you already love!
Why is it important to chill the truffles?
Chilling the truffles helps them firm up, making them easier to dip in chocolate. It also enhances the overall texture, so they don’t fall apart during coating. Trust me; it makes a big difference!
Final Thoughts
Making these Peanut Butter Oreo Truffles is more than just a recipe; it’s a delightful experience that brings joy and sweetness to any occasion. Whether it’s a quick treat for your family or a charming dessert for guests, these little bites are sure to spark smiles. The magic of combining crunchy Oreos with rich peanut butter and smooth chocolate creates an irresistible flavor explosion. Plus, they’re a breeze to whip up, making them perfect for busy days. So roll up your sleeves, gather your loved ones, and savor the thrill of creating something truly special together!
Print
Peanut Butter Oreo Truffles
- Prep Time: 30 minutes
- Cook Time: 1 hour
- Total Time: 1 hour 30 minutes
- Yield: 24 truffles 1x
- Category: Dessert
- Method: No bake
- Cuisine: American
- Diet: Vegetarian
Description
Indulge in these delicious Peanut Butter Oreo Truffles, a perfect treat for chocolate and peanut butter lovers!
Ingredients
- 20 Double Stuf Oreos, finely crushed
- 120 grams cream cheese, softened
- 240 grams creamy peanut butter
- 60 grams unsalted butter, softened
- 250 grams powdered sugar
- 270 grams semi-sweet milk chocolate chips
Instructions
- Line a baking tray with wax or parchment paper to prevent sticking.
- Finely crush the Oreos in a large plastic bag using a rolling pin or pulse in a food processor until finely ground.
- In a mixing bowl, blend cream cheese until smooth. Add Oreo crumbs and mix until homogenous.
- With lightly greased hands, roll the mixture into approximately 24 even balls and arrange them on the prepared tray. Refrigerate for 20 minutes until firm.
- In a separate bowl, combine peanut butter, softened butter, and powdered sugar. Stir until smooth and fully incorporated.
- Wrap a portion of the peanut butter mixture around each Oreo ball and roll to ensure a smooth, even layer. Return balls to the tray.
- Refrigerate for 20-30 minutes to allow the coating to set.
- In a microwave-safe bowl, melt chocolate chips in 30-second increments, stirring frequently, until smooth. Total time should not exceed 90 seconds.
- Insert a toothpick into each truffle and dip into the melted chocolate, ensuring a full, even coat. Let any excess chocolate drip off, then place back on the tray.
- Refrigerate truffles for 20-30 minutes or until chocolate is fully set. Store chilled.
Notes
- Ensure all ingredients are at room temperature for easy mixing.
- Use a good quality chocolate for better flavor.
- Keep the truffles stored in the refrigerator to maintain freshness.
Nutrition
- Serving Size: 1 truffle
- Calories: 160
- Sugar: 12g
- Sodium: 80mg
- Fat: 9g
- Saturated Fat: 4g
- Unsaturated Fat: 3g
- Trans Fat: 0g
- Carbohydrates: 18g
- Fiber: 1g
- Protein: 3g
- Cholesterol: 10mg