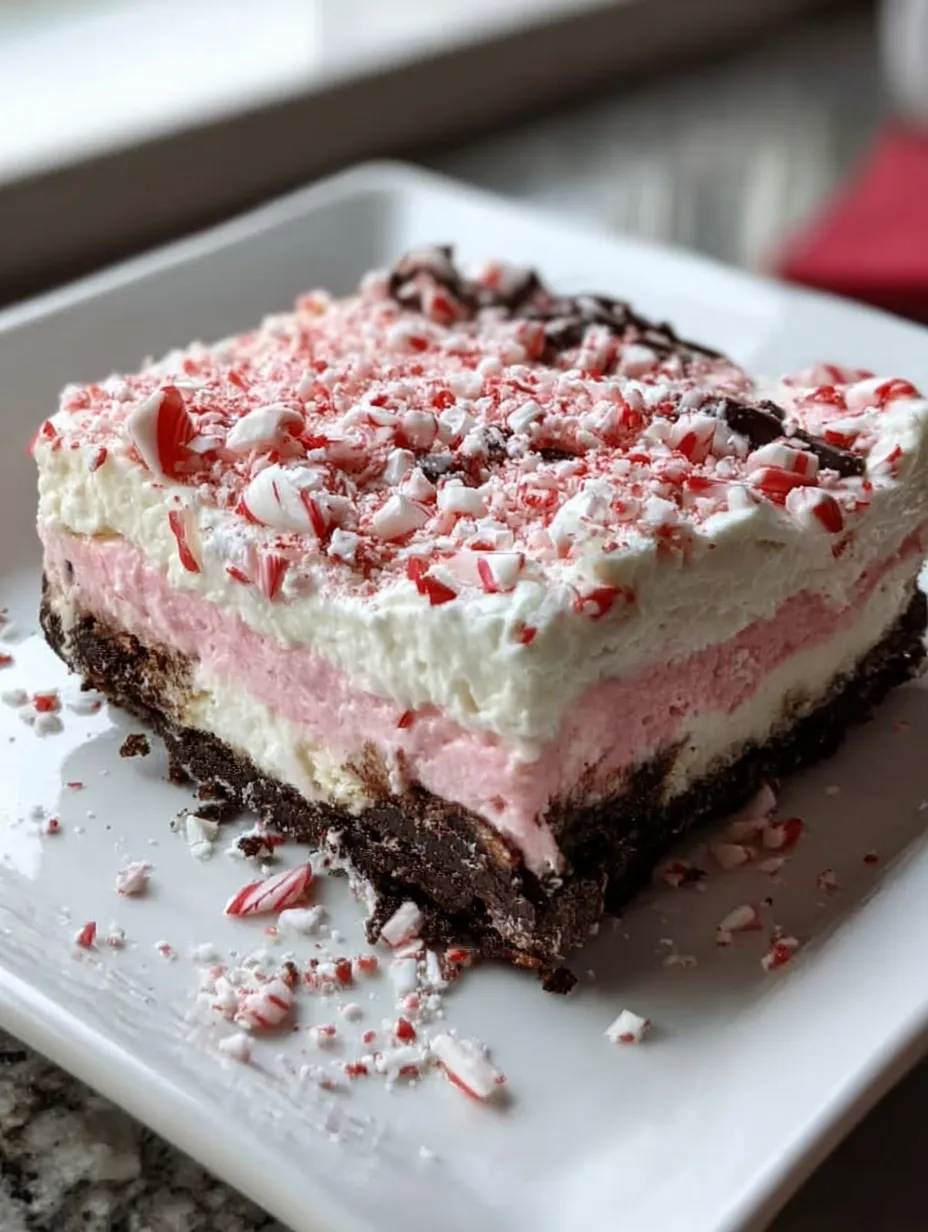
Looking for the perfect festive dessert that screams “Christmas!” with every bite? Say hello to Peppermint Dessert Lasagna – a dreamy, creamy, no-bake delight that’s layered to peppermint perfection. This beauty features a crushed Oreo base, silky smooth cream cheese layers, fluffy Cool Whip, and crushed peppermint candies on top. It’s pretty in pink, irresistibly minty, and absolutely perfect for every holiday table.
Whether you’re throwing a cozy get-together or need a showstopper for your office potluck, this dessert delivers both in looks and taste. Just look at that photo – doesn’t it make you want to grab a fork right now?
Table of Contents
Why This Recipe is Perfect for the Holidays
The holidays are all about comfort, joy, and sweet indulgence – and nothing captures that vibe quite like this layered dessert. From the peppermint candies sparkling like edible snow to the creamy layers that melt in your mouth, every bite feels like a warm holiday hug.
It’s:
- No-bake (no oven needed – yes, please!)
- Super easy to put together
- Visually stunning and festive
- A total crowd-pleaser
- Make-ahead friendly
Whether you’re a beginner in the kitchen or a seasoned baker who just wants something simple yet spectacular, peppermint dessert lasagna has your name all over it.
What is a Dessert Lasagna Anyway?
If you’re hearing “dessert lasagna” for the first time, let me explain – and no, there’s no pasta involved here!
A dessert lasagna is a layered sweet treat, much like its savory cousin, but instead of noodles and meat, we layer cookies, cream, pudding, and whipped topping. Think of it as the dessert version of a trifle, but laid out in neat layers in a 9×13 dish.
For this peppermint version, it’s:
- Crushed Oreo base (instead of noodles)
- A velvety vanilla cream layer
- A pink peppermint cream layer
- Fluffy Cool Whip topping
- A snowfall of crushed peppermint candies
Every layer brings a new texture and flavor, coming together like magic.
Ingredients Overview
Let’s talk about what goes into this dessert wonderland. You’ll be using mostly simple ingredients, many of which are probably already in your pantry!
Crust Ingredients
- 36 Oreo cookies, finely crushed (no need to remove the filling!)
- 6 tablespoons unsalted butter, melted
White Cream Layer
- 8 oz cream cheese, softened to room temp
- 1 cup powdered sugar
- 1 tsp vanilla extract
- 1½ cups Cool Whip, thawed
Peppermint Layer (Pink Layer)
- 8 oz cream cheese, softened
- ¾ cup powdered sugar
- ½ tsp peppermint extract (don’t overdo it!)
- 1–2 drops red food coloring (for that pretty pink hue)
- 1½ cups Cool Whip, thawed
- ½ cup crushed peppermint candies
Top Layer
- 2 cups Cool Whip
- ½–1 cup crushed peppermint candies, for garnish
Simple, right? Yet when layered together, they create holiday dessert magic.
Kitchen Tools You’ll Need
- 9×13 baking dish
- Mixing bowls (at least 2 large ones)
- Electric hand mixer or stand mixer
- Spatula for layering
- Measuring cups & spoons
- Food processor or Ziploc + rolling pin (for crushing Oreos)
- Rubber spatula for even spreading
Optional: Offset spatula for super clean layers
Step-by-Step Recipe Instructions
Ready to build this holiday masterpiece? Let’s take it one delicious layer at a time.
Making the Oreo Crust
- Crush the Oreos (filling and all) until they resemble fine crumbs. You can use a food processor or place them in a bag and crush with a rolling pin.
- Mix in the melted butter until all the crumbs are evenly coated.
- Press the mixture firmly into the bottom of your 9×13 dish to form the crust. Use the back of a spoon or a flat-bottomed cup to really pack it in.
- Refrigerate for 20–30 minutes while you make the cream layers.
This base gives you that rich, chocolatey bite that perfectly balances the minty sweetness on top.
Creating the White Cream Layer
- Beat the cream cheese until smooth and fluffy (about 2 minutes).
- Add in powdered sugar and vanilla, and beat until well combined.
- Gently fold in the Cool Whip – don’t overmix or you’ll deflate it.
- Spread this layer evenly over the chilled Oreo crust. Take your time and smooth it out nicely.
Then pop it back in the fridge to firm up for about 10 minutes.
Whipping Up the Peppermint Layer (Pink Layer)
Now comes the festive pink layer!
- Beat the cream cheese again until smooth.
- Add powdered sugar and peppermint extract – start with ½ tsp. It’s strong stuff!
- Mix in 1–2 drops of red food coloring until the mixture turns a soft pink.
- Fold in the Cool Whip and crushed peppermint candies. This adds flavor AND texture!
- Spread this layer on top of the white cream layer. Make sure it’s even and beautiful.
Chill again for at least 15 minutes before adding the final layer.
Adding the Top Layer
This part’s super simple but makes all the difference visually.
- Spread 2 cups of Cool Whip evenly over the peppermint layer.
- Sprinkle crushed peppermint candies generously across the top.
The red-and-white colors just scream Christmas, and the crunchy candy bits give that perfect holiday sparkle.
Final Chill and Serve
This is the hardest part – waiting!
- Refrigerate the entire dessert for at least 4 hours, or even better, overnight. This allows all the layers to set and makes slicing clean and easy.
- When ready to serve, slice into squares and plate it up!
You’ll get those distinct, beautiful layers just like in the photo – Oreo crust, creamy white, peppermint pink, and a fluffy top with candy crunch. ✨
Pro Tips for a Perfect Dessert Lasagna
Want to take your Peppermint Dessert Lasagna from “yum” to “HOLY WOW!”? Here are some tried-and-true tips:
- Use room-temperature cream cheese – It blends more smoothly and won’t leave lumps.
- Don’t skip the chilling between layers – This helps keep them clean and distinct instead of mushing together.
- Crush your peppermint candies just right – Not too fine, not too chunky. A rolling pin works great. Pro tip: crush them between two sheets of parchment paper to avoid sticky messes!
- Make ahead for parties – This dessert actually tastes better the next day after all the flavors meld.
- Use an offset spatula – It helps smooth out layers evenly without pulling up the one underneath.
Ingredient Substitutions & Variations
Want to customize your dessert? Here are a few fun twists you can try:
- Gluten-free: Use gluten-free chocolate sandwich cookies instead of Oreos.
- Low sugar: Try sugar-free Cool Whip and sugar-free Oreos.
- Mint-chocolate chip vibes: Fold in mini chocolate chips to the pink peppermint layer.
- Extra festive: Add green food coloring to half the topping for a red-and-green holiday theme.
- More chocolate: Drizzle chocolate syrup between layers or top with mini chocolate curls.
This dessert is flexible enough to adapt to your style and diet without losing its festive flair.
How to Store Your Peppermint Lasagna
Keeping this dessert fresh is easy:
- In the fridge: Cover tightly with plastic wrap or use an airtight lid if your dish has one. Keeps well for up to 5 days.
- In the freezer: Yes, you can freeze it! Just wrap it tightly and freeze for up to 1 month. Thaw in the fridge overnight before serving.
- Avoid room temperature: It’s dairy-based and needs to stay chilled, especially with cream cheese layers.
How Far in Advance Can You Make It?
This Peppermint Dessert Lasagna is a make-ahead hero. Here’s how early you can prep:
- Make it 1–2 days ahead of your event.
- In fact, it tastes even better on Day 2 once the flavors meld.
- Don’t add the final peppermint candy topping until the day of serving – they can melt and get sticky if they sit too long.
Serving Suggestions & Pairings
Looking to serve this dessert like a pro? Here’s how to dress it up:
- Add a little whipped cream dollop to each square when serving.
- Serve alongside hot cocoa, peppermint mochas, or spiked eggnog.
- Sprinkle mini chocolate chips or crushed candy canes around the plate.
- Top with a mini candy cane or mint leaf for decoration.
Pair it with other light finger foods at your holiday table and it’ll steal the spotlight!
Why This Dessert Will Impress Your Guests
This is not your average no-bake dessert. Here’s why everyone will rave about it:
- It looks like a million bucks – That neat layered look, the colors, the crushed peppermint on top… it’s Instagram-ready!
- It tastes like a creamy candy cane cloud – Sweet, minty, creamy, and cool.
- It’s nostalgic and festive – Peppermint is the unofficial flavor of the season, and it brings all the holiday feels.
- You can feed a crowd – One pan easily makes 12–15 slices.
Bring this to a party, and you’ll be the dessert MVP.
Print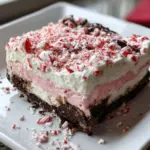
Peppermint Dessert Lasagna
- Prep Time: 15 minutes
- Total Time: 4 hours 15 minutes
- Category: No-Bake Desserts | Holiday Recipes | Peppermint Treats
Description
❄️🎄 A dreamy, layered holiday dessert full of creamy peppermint goodness! 💗🍬 This no-bake Christmas lasagna is festive, fluffy, and absolutely melt-in-your-mouth delicious. Perfect for parties and winter celebrations! ✨🎁
Ingredients
Crust:
36 Oreo cookies (crushed finely)
6 tbsp unsalted butter, melted
White Cream Layer:
8 oz cream cheese, softened
1 cup powdered sugar
1 tsp vanilla extract
1 ½ cups Cool Whip, thawed
Peppermint Layer (Pink Layer):
8 oz cream cheese, softened
¾ cup powdered sugar
½ tsp peppermint extract
1–2 drops red food coloring
1 ½ cups Cool Whip, thawed
½ cup crushed peppermint candies
Top Layer:
2 cups Cool Whip
½–1 cup crushed peppermint candies
Instructions
Make the Crust
Combine the crushed Oreos with melted butter and mix until fully coated. (⏱️ 2 minutes)
Press evenly and firmly into a 9×13 dish. (⏱️ 2 minutes)
Refrigerate to set. (⏱️ 20–30 minutes)
Make the White Cream Layer
Beat the cream cheese until smooth and creamy. (⏱️ 2 minutes)
Add powdered sugar and vanilla; mix well. (⏱️ 1 minute)
Fold in Cool Whip gently until fluffy. (⏱️ 1 minute)
Spread this layer over the chilled crust. (⏱️ 2 minutes)
Chill again. (⏱️ 10 minutes)
Make the Peppermint Layer (Pink Layer)
Beat cream cheese until smooth. (⏱️ 2 minutes)
Add powdered sugar and peppermint extract; blend well. (⏱️ 1 minute)
Add red food coloring until lightly pink. (⏱️ 30 seconds)
Fold in Cool Whip and crushed peppermint candies. (⏱️ 1–2 minutes)
Spread evenly over the white layer. (⏱️ 2 minutes)
Chill. (⏱️ 15 minutes)
Add the Top Layer
Spread Cool Whip evenly over the peppermint layer. (⏱️ 1 minute)
Sprinkle crushed peppermint generously across the top. (⏱️ 1 minute)
Chill and Serve
Refrigerate for at least 4 hours, or overnight for perfect clean slices. (⏱️ 4 hours minimum)
Cut into squares and serve chilled. ❄️🍰 (⏱️ 2 minutes)
Notes
Simple no-bake recipe perfect for Christmas season.
Great for parties, cookie boxes, or quick festive treats.
Peppermint flavor is refreshing and pairs perfectly with the creamy cheesecake.
Freezing helps the bites stay firm for dipping in white chocolate.
Store chilled for the best texture and flavor.
Nutrition
- Serving Size: 12–15 squares
- Calories: ~320 kcal per slice (estimate)
Making it Kid-Friendly & Fun
Got little helpers in the kitchen? This recipe is perfect for getting the kids involved:
- Let them crush the Oreos and candies – it’s loud and fun!
- Have them spread the layers – it doesn’t have to be perfect.
- Use holiday sprinkles or red/green M&Ms for decorating.
- Turn it into mini lasagna cups using cupcake liners for single servings.
It’s a great way to get them into the holiday spirit (and sneak in some quality time).
Similar recipes :
Cinnamon Roll Apple Lasagna Recipe: A Cozy Dessert You’ll Fall in Love With
No-Bake Christmas Oreo Lasagna: A Festive Holiday Dessert Everyone Will Love
No-Bake Christmas Lasagna Recipe: A Festive Dessert Dream Come True
Frequently Asked Mistakes to Avoid
Here are the top slip-ups to steer clear of:
- Not chilling long enough – If you rush the chill time, the layers won’t hold.
- Overmixing Cool Whip – Fold gently to keep it fluffy.
- Too much peppermint extract – It’s strong! Start with ½ tsp and taste.
- Using low-fat cream cheese – It tends to be watery and doesn’t hold shape as well.
- Adding candies too early – They can bleed or melt into the topping. Add just before serving.
Stay on track with these and your dessert will look just like the photo – stunning and sliceable!
Conclusion
If you’ve been looking for a no-bake dessert that’s festive, fun, and foolproof, Peppermint Dessert Lasagna is IT. Every bite is like a creamy peppermint patty layered between clouds of joy. The pink peppermint layer gives it that eye-catching holiday cheer, while the Oreo crust adds just the right crunch.
And the best part? It’s ridiculously easy to make ahead, customizable, and crowd-pleasing. Whether you’re making it for a Christmas party, holiday dinner, or just a cozy night in with the family – this is the kind of dessert that turns “wow, this looks amazing” into “can I get the recipe?”
So go ahead, whip up this peppermint masterpiece, and let your dessert do all the talking this season.
FAQs
1. Can I use whipped cream instead of Cool Whip?
Yes, but make sure it’s stabilized whipped cream. Homemade whipped cream can deflate over time and affect the texture of your layers.
2. How do I crush the peppermint candies without a mess?
Place them in a Ziploc bag, then wrap in a kitchen towel and gently pound with a rolling pin or meat mallet. No sticky shards everywhere!
3. Can I make this with mint instead of peppermint?
Peppermint has a sharper, cleaner taste perfect for this dessert, but if all you have is mint extract, go easy – it can have a spearmint/gum flavor.
4. What if my layers are mixing together?
Make sure each layer is chilled before adding the next. Use an offset spatula and spread gently.
5. Is this safe to leave out during a party?
It’s best kept chilled. You can leave it out for about 1 hour max, but pop it back into the fridge when not serving.