If you’ve ever dreamed of biting into a cloud, this Pink Cloud Marshmallow Fudge might be the closest you’ll get—and trust me, it’s divine. Soft, glossy, pastel-pink squares packed with puffy marshmallows, this no-bake dessert is straight-up magic. Imagine a bite that melts in your mouth like candy floss but holds its form like a creamy dream. It’s the perfect blend of texture and nostalgia, with bubblegum-flavored vibes that throw it back to childhood in the most adorable way possible.
You’ve seen those Instagram-worthy pastel treats that look too pretty to eat, right? Well, this fudge isn’t just a visual feast—it’s incredibly easy to make, with just a few ingredients, no oven, and a prep time that’s shorter than your favorite TV show. Whether you’re hosting a baby shower, creating sweet party favors, or just craving something whimsical and sweet, this is the treat you’ll want on repeat.
The Inspiration Behind Pink Cloud Fudge
The name says it all. Think soft pillows of marshmallows suspended in a silky sea of bubblegum-pink white chocolate. The look? Whimsical. The taste? Like a cotton-candy daydream. The vibe? Pure happiness.
This dessert draws inspiration from pastel aesthetics, those dreamy Pinterest boards filled with soft colors and sweet treats. It’s perfect for anyone who loves cloud-like textures and soft pastel tones. It’s like edible unicorn magic, and when topped with extra marshmallows, it becomes the stuff of dessert fantasies.
But don’t let the beauty fool you—this fudge is incredibly approachable. There’s no candy thermometer, no endless stirring, no complicated technique. Just melt, mix, chill, and slice. Easy enough for beginners but pretty enough to impress your toughest critics.
Why You’ll Love This Recipe
Let’s keep it real: the world is stressful, and we all need a little more pink and fluff in our lives. Here’s why this fudge recipe hits all the sweet spots:
- No baking required – Hallelujah! No oven, no mess.
- Just 6 main ingredients – Minimal effort, max flavor.
- Fast prep time – 10 minutes or less!
- Kid-approved – Safe and fun for little hands to help with.
- Party-perfect – Looks as good on a dessert table as it does in a lunchbox.
- Customizable – Switch up the color, flavor, or marshmallows to suit your vibe.
Once you try it, it’s almost guaranteed to become one of your go-to treats for birthdays, baby showers, holidays, or “just because” kind of days.
Ingredients Breakdown
Let’s break down the magic mix that goes into this dreamy fudge:
White Chocolate Chips
These are the creamy base. Go for high-quality chips that melt smoothly. Cheaper ones may seize or turn grainy.
Sweetened Condensed Milk (14 oz can)
Your key to luscious, silky texture. It keeps everything soft and sweet without crystallizing.
Bubblegum Flavoring (1–1½ tsp)
The secret to that nostalgic candy-shop taste. You can substitute vanilla, cotton candy, or strawberry if you like.
Pink Gel Food Coloring (2–4 drops)
Gel is best—it gives a vibrant pastel pink without watering down your mix.
Mini Marshmallows (1½–2 cups + extra)
These bring the “cloud” in Pink Cloud. Fold them in at the end so they stay whole and pillowy.
Tools You’ll Need
Keep it simple, but make sure you’re prepped:
- Saucepan (non-stick recommended)
For melting your white chocolate and condensed milk. - Rubber spatula
Perfect for gentle folding and smoothing. - 8×8-inch square pan
The ideal size for thick, square slices. - Parchment paper
Prevents sticking and makes it easy to lift the fudge out. - Sharp knife
A hot knife (dipped in warm water) helps make clean cuts.
Flavor Tips: Bubblegum vs. Vanilla
Bubblegum gives this fudge a nostalgic twist—sweet, slightly fruity, and totally reminiscent of old-school bubble tape or gumballs. But if that’s not your thing, vanilla is a solid substitute. You can even try:
- Strawberry or raspberry extract for a fruity twist
- Cotton candy flavoring for an extra sweet ride
- Almond extract for a more subtle, nutty note
Remember to start with less and taste-test. Flavorings can be strong!
Choosing Your Food Coloring
Gel food coloring is the way to go. Liquid drops can mess with your consistency, but gel gives you rich color with just a drop or two. To match the image perfectly—go for 3 drops of pink gel and stir well. You’re aiming for soft, bubblegum pink, not neon!
Step-by-Step Instructions
1. Line your pan.
Start by lining your 8×8 pan with parchment paper, leaving a bit of overhang for easy lifting. Trust me, this makes life easier later.
2. Melt white chocolate and condensed milk.
In a saucepan over low heat, combine 2 cups of white chocolate chips and the full can of sweetened condensed milk. Stir constantly until it’s smooth and glossy. Don’t crank up the heat—low and slow keeps things creamy!
3. Add flavoring and color.
Once smooth, remove from heat and stir in 1 to 1½ teaspoons of bubblegum flavoring. Add 2–4 drops of pink gel food coloring and stir until evenly colored.
4. Cool slightly, then fold in marshmallows.
Let the mixture cool for 1–2 minutes (so you don’t melt your marshmallows). Then gently fold in 1½–2 cups of mini marshmallows. Don’t overmix—you want them to stay whole and fluffy.
5. Pour and decorate.
Pour the fudge mixture into your lined pan. Smooth the top with a spatula and press a few extra marshmallows on top for that “cloud” finish.
6. Chill.
Pop it into the fridge for 2–3 hours, or until fully set.
7. Slice and serve.
Lift the fudge out using the parchment overhang, and cut into 16 thick, satisfying squares.
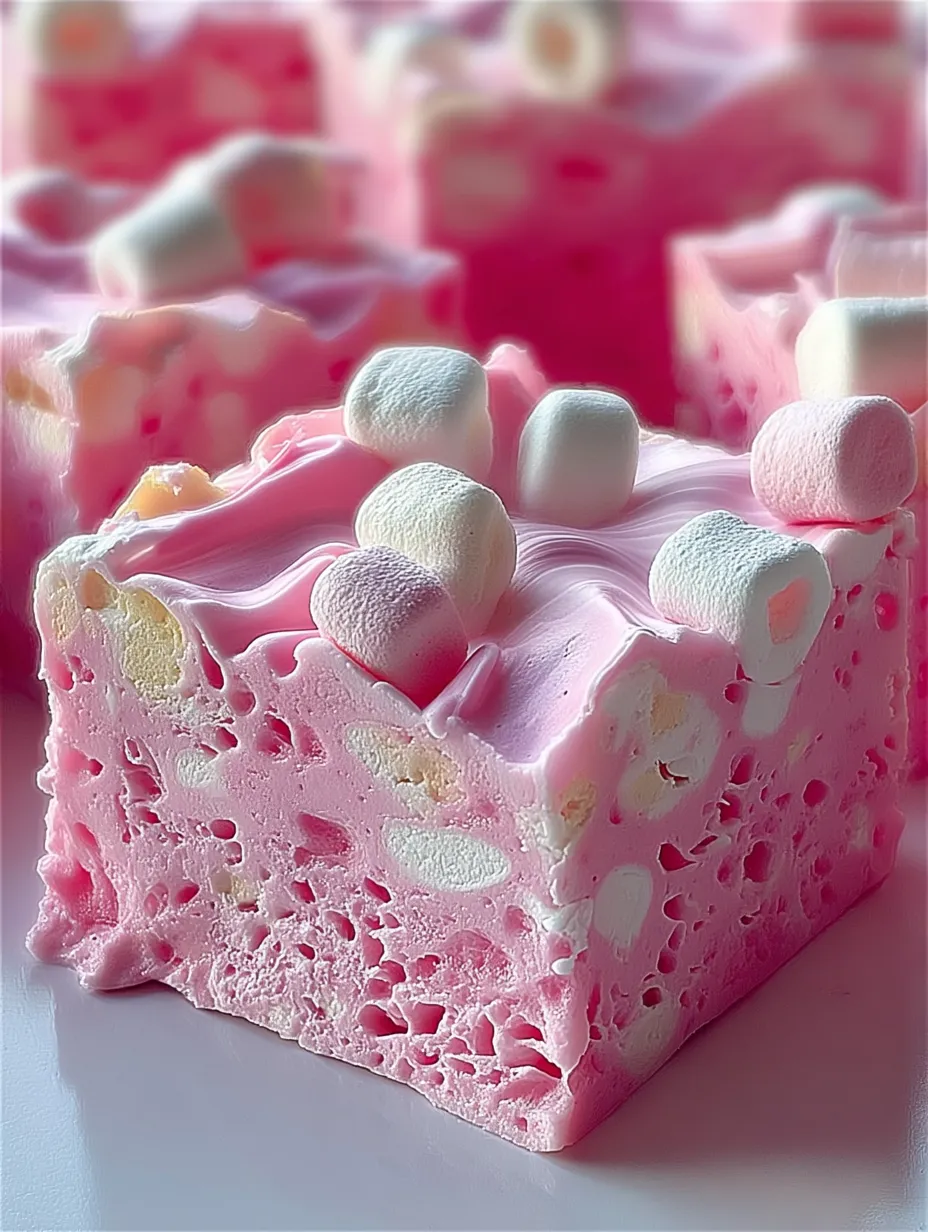
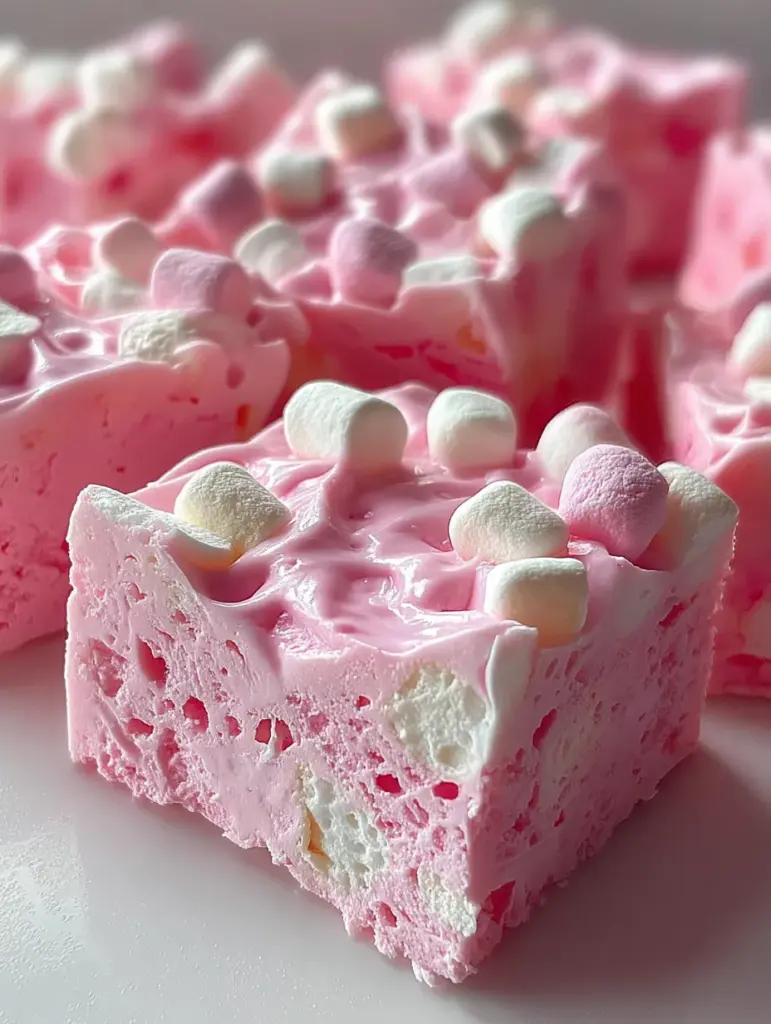
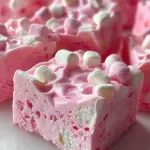
How to Get That Swirled Glossy Top
This part is where your fudge goes from “yum” to “YUMMM, what bakery did you buy this from?”. That glossy, swirled top that looks like pink marble frosting? Totally doable at home with a few tricks.
- Don’t overstir once you add food coloring. Gentle folds give you natural swirls instead of a fully blended look.
- Use the back of a spoon to create light swirls on the top layer once it’s in the pan. Think soft “S” shapes and little circular motions.
- Let it settle for a minute before chilling to keep that glossy finish intact.
- Extra marshmallows on top give it that puffy, dreamy cloud vibe.
Just take a look at the image again—see those glistening peaks and soft curves? That’s what you’re aiming for!
Chilling and Cutting
Once your fudge is chilled and set (give it a solid 2–3 hours), it’s time to slice. But don’t just grab a knife and start hacking—treat this baby like the dessert royalty it is:
- Use a hot knife. Dip your knife into hot water, dry it off, and then slice. This gives you clean, pro-level cuts.
- Wipe the blade between slices to avoid smudging the pink perfection.
- Cut into 16 even squares—or more if you want bite-sized pieces for party trays.
You’ll see that perfect soft texture when you slice: glossy, smooth top, cloud-like marshmallows inside, and that candy-shop color throughout.
Serving Suggestions
Let’s be honest—this fudge doesn’t need much to shine. But here are a few ways to level it up:
- Party platters: Pair it with strawberries, cookies, and white chocolate truffles for a pastel dessert board.
- Gift boxes: Wrap squares in parchment and tie with pink string for the cutest edible gifts.
- Tea party vibes: Serve with herbal tea, floral china, and tiny spoons for full aesthetic effect.
This fudge belongs wherever there’s magic, sparkle, or sweetness happening—so bring it to birthdays, baby showers, or even just a rainy Tuesday in need of cheer.
Make It Your Own: Variations
Once you’ve mastered the classic pink version, it’s time to play:
Color Variations:
- Baby blue with vanilla = Cotton Cloud Fudge
- Lavender with raspberry = Fairy Dust Fudge
- Pale yellow with lemon = Lemon Dream Fudge
Fun Add-ins:
- Rainbow sprinkles: Adds a confetti effect
- Crushed Oreos: Hello, cookies & cream cloud
- Mini M&Ms: For colorful crunch
- Freeze-dried strawberries: Fruity and chewy surprise bites
Pink Cloud Marshmallow Fudge
- Prep Time: 10 minutes
- Total Time: ~3 hours
- Category: Dessert – No-Bake Candy / Fudge
Description
💗 Soft, glossy, pastel-pink sweetness! ☁️🍬 Every bite feels like sinking into a little marshmallow cloud—creamy, dreamy, and impossibly cute. A true melt-in-your-mouth treat that brings a sprinkle of joy with every square. ✨💞
Ingredients
2 cups white chocolate chips
1 can (14 oz) sweetened condensed milk
1–1½ tsp bubblegum flavoring (or vanilla)
Pink gel food coloring (2–4 drops for pastel pink)
1½–2 cups mini marshmallows (plus extra for topping)
Instructions
Line an 8×8-inch square pan with parchment paper, leaving an overhang for easy lifting.
⏱️ Prep: 2 minutesMelt the white chocolate chips and sweetened condensed milk together in a saucepan over low heat, stirring constantly until smooth and glossy.
⏱️ 5–7 minutesRemove from heat and mix in the bubblegum flavoring and pink gel coloring until the mixture turns a soft pastel pink.
⏱️ 1 minuteAllow it to cool slightly for 1–2 minutes, then gently fold in the mini marshmallows—keeping them whole for those fluffy cloud pockets.
⏱️ 2 minutesPour the mixture into the prepared pan and smooth the top. Press a few extra marshmallows on top for the cutest cloud finish.
⏱️ 1 minuteRefrigerate until firm, about 2–3 hours.
⏱️ Chill: 2–3 hours
Lift from the pan, slice into thick, dreamy squares, and enjoy their cloud-soft texture! ☁️💗
⏱️ 1 minute
Notes
Nutrition
- Serving Size: 16 squares
- Calories: ~210 kcal per square
Storage Tips
This fudge keeps surprisingly well—if you don’t eat it all the first day.
- In the fridge: Store in an airtight container for up to 7–10 days.
- At room temp: Okay for 2–3 days if your home is cool.
- Freezing? Possible! Wrap tightly and store up to 1 month. Thaw in fridge overnight before serving.
Stack parchment paper between layers to keep them from sticking together.
Perfect for Special Occasions
This dessert is made for moments that matter:
- Baby showers: Perfect pastel pink
- Valentine’s Day: Sweet, soft, and pretty in pink
- Bridal showers: Luxuriously feminine
- Birthdays: A crowd-pleaser for all ages
- Holiday tables: Add crushed peppermint on top for a winter version!
You’ll be the MVP of any dessert spread with this fudge on display.
You may also like :
Deep Fried Marshmallows Recipe: The Ultimate Gooey, Golden Treat
Marshmallow Whip Cheesecake: A Dreamy No-Bake Dessert That Feels Like Biting into a Cloud
Troubleshooting Common Issues
Fudge too soft?
- Check your chill time. It needs a full 2–3 hours to set.
- You may have added too much food coloring or not measured the milk properly.
Marshmallows melted into the mix?
- You probably added them too early or your mixture was too hot.
- Let it cool for 1–2 minutes before folding marshmallows in.
Color too light or too dark?
- Gel coloring is potent—start with 1–2 drops, then build.
- If it’s too dark, swirl in some unmixed white chocolate on top before chilling.
Conclusion
There you have it: Pink Cloud Marshmallow Fudge in all its dreamy, glossy, pastel-pink glory. It’s everything you love about sweet treats—easy, beautiful, indulgent—without any of the stress. The best part? It looks like you spent hours crafting it, but the whole thing comes together in about 10 minutes of actual work.
It’s a dessert you can make when you’re short on time but still want to impress. Whether you’re whipping it up for a party or just treating yourself (because hey, you deserve it), this fudge is like a hug in dessert form—soft, sweet, and absolutely irresistible.
Similar recipes : Sweet Potato Casserole with Marshmallows
FAQs
1. Can I freeze this fudge?
Yes! Wrap tightly in plastic wrap, then foil, and freeze for up to 1 month. Thaw in the fridge overnight before serving.
2. What can I use instead of bubblegum flavoring?
Vanilla, strawberry, cotton candy, or almond extract all work beautifully as substitutes.
3. Can I double the recipe?
Absolutely. Just use a 9×13-inch pan instead of 8×8 and double all ingredients.
4. Is it safe for kids to help make?
Totally! Just handle the melting step yourself—then let the kiddos stir in marshmallows and decorate the top.
5. Can I use regular-sized marshmallows?
You can, but chop them into smaller pieces first for better texture distribution.