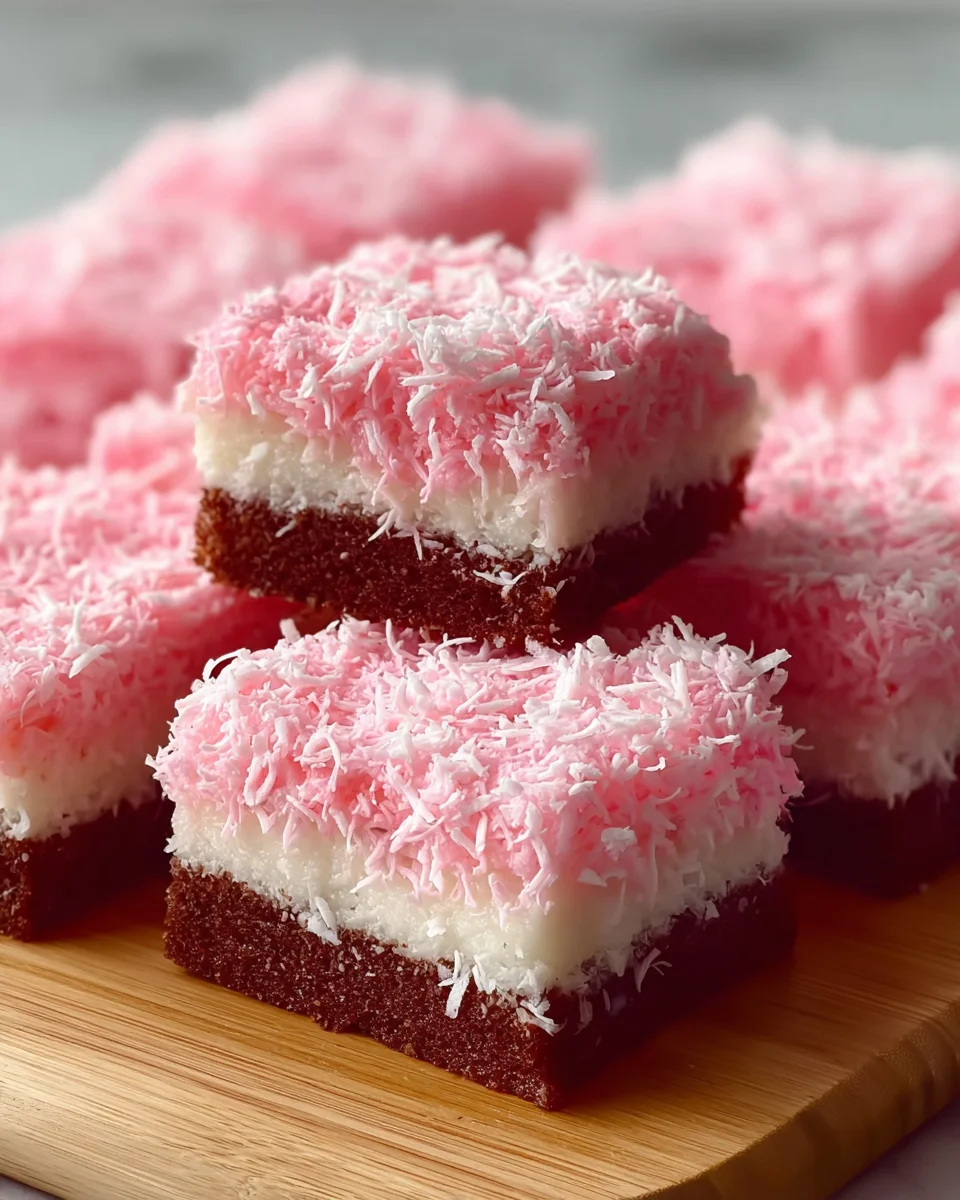
Introduction to Pink Coconut Snowball Cake Bars
Life can be a whirlwind, can’t it? Between juggling work, school, and everything in between, finding time to whip up a delightful treat can feel daunting. That’s where my Pink Coconut Snowball Cake Bars come in. These bars are not just visually stunning; they’re a quick and easy solution for satisfying those sweet cravings. Perfect for birthday parties or simply brightening up a lunchbox, they’ll surely impress your loved ones. So grab your mixing bowl and let’s embark on this delicious adventure together!
Why You’ll Love This Pink Coconut Snowball Cake Bars
These Pink Coconut Snowball Cake Bars are a delightful blend of ease and flavor, making them a go-to treat for busy moms like me. They come together quickly, saving you precious time without sacrificing taste. The vibrant pink color and fluffy coconut frosting elevate any occasion, all while being simple enough to enjoy on a cozy afternoon. Each bite whispers, “You deserve this!”
Ingredients for Pink Coconut Snowball Cake Bars
Let’s dive into the colorful world of flavors that make up these delightful bars! Here’s what you’ll need:
- All-purpose flour: This is the backbone of our cake, giving it structure and a tender crumb.
- Cocoa powder: It infuses a rich chocolate flavor that harmonizes beautifully with the coconut.
- Baking powder and baking soda: These leavening agents ensure the bars rise to perfection, keeping them light and airy.
- Salt: Just a pinch enhances the flavors, bringing balance to the sweetness.
- Unsalted butter: Softened butter creams excellently with sugar, ensuring your bars are rich and moist.
- Granulated sugar: The magic sweetener that makes our treats irresistible. You could substitute this with coconut sugar for a deeper, caramel-like flavor.
- Eggs: They act as a binding agent, helping the bars hold their shape while adding moisture.
- Vanilla extract: A splash elevates the flavor profile, adding warmth and depth.
- Buttermilk: This ingredient provides a slight tang and helps to keep the cake tender. You can create a substitute by mixing milk with a splash of vinegar or lemon juice.
- Hot water: It enhances the cocoa flavor and creates a smoother batter.
- Heavy whipping cream: This is the foundation for our luscious frosting. For a lighter version, you can use whipped topping.
- Powdered sugar: This sweetener will help achieve that perfect, spreadable frosting consistency.
- Cream cheese: Optional but recommended for velvety frosting stability and flavor. Go for a low-fat version if desired!
- Shredded coconut: You can choose between sweetened or unsweetened, depending on your taste preference. Toasting it lightly gives it an extra crunch and flavor.
- Pink food coloring: Just a few drops transform our coconut into a fun, vibrant topping that screams “festivity!”
- Milk: A little splash can help moisten the coconut if it seems dry or clumpy.
How to Make Pink Coconut Snowball Cake Bars
Creating these Pink Coconut Snowball Cake Bars is easier than you might think! Follow along as we break it down step by step. You’ll soon be rewarding yourself with a delicious treat that looks as good as it tastes. Let’s get started!
Step 1: Preheat and Prepare
First, whip out that oven! Preheat it to 350°F (175°C). While it’s warming up, grab a 9×13-inch baking pan. Grease it lightly and line it with parchment paper. This will help your cake come out easily when it’s baked, leaving no crumb behind. Trust me; this will save you from a sticky situation!
Step 2: Whisk the Dry Ingredients
Now, let’s mix the dry ingredients. In a large bowl, whisk together the all-purpose flour, cocoa powder, baking powder, baking soda, and salt. The key here is to blend them well. This way, all those leavening agents work together as the cake bakes, giving your bars that perfect rise!
Step 3: Cream Butter and Sugar
In another bowl, it’s time to get creamy! Beat the softened butter and granulated sugar together until the mixture becomes light and fluffy. This can take about 3-5 minutes with a hand mixer. When it’s fluffy, it means you’re capturing air to make those bars tender and delightful.
Step 4: Mix in Eggs and Vanilla
Add in the eggs one at a time, beating well after each addition. Then, pour in the vanilla extract, and mix until everything is well combined. This step infuses the batter with warmth, adding that comforting flavor we all love!
Step 5: Combine Wet and Dry Ingredients
Now it’s time to bring it all together! Alternately mix in the dry ingredients with the buttermilk and hot water. Start and end with the dry mix. Stir gently until your batter is smooth. Don’t worry if it’s a bit liquidy; that’s exactly what we want for a moist cake!
Step 6: Bake the Cake Base
Pour your delicious batter into the prepared baking pan. Spread it out evenly for uniform baking. Slide it into your preheated oven and bake for 25-30 minutes. A toothpick inserted in the middle should come out clean when it’s ready. Your kitchen will smell heavenly while it bakes!
Step 7: Prepare the Frosting
While the cake cools, let’s make that mouthwatering frosting. If you’re using cream cheese, beat it until nice and smooth. Then, add the heavy whipping cream, powdered sugar, and vanilla. Whip everything together until it’s fluffy and spreadable. It should have a light texture that you’ll want to dive into!
Step 8: Spread the Frosting
Once the cake has completely cooled, it’s frosting time. Spread the fluffy mixture evenly over the cake base. A spatula works wonders here. It should feel like you’re spreading clouds on a sunny day!
Step 9: Color the Coconut
Let’s add some flair to our frosting! Place the shredded coconut in a bowl and add a few drops of pink food coloring. Mix until you have a lovely pastel shade embraced by each flake. If it seems dry, a splash of milk can help distribute the color evenly. You’re turning up the fun factor!
Step 10: Assemble and Refrigerate
Sprinkle the tinted coconut evenly over the frosted cake, pressing it lightly so it sticks. Cover the cake and pop it in the fridge for an hour or so. This isn’t just to chill; it helps all the flavors meld beautifully. Then, slice into neat bars and get ready for that first heavenly bite!
Tips for Success
- Make sure your butter is softened to room temperature for easy creaming.
- Use a toothpick to check for doneness—if it comes out clean, your cake is ready!
- Allow the cake to cool completely before frosting; this prevents melting.
- Feel free to experiment with flavors like almond extract instead of vanilla.
- Store leftovers in an airtight container in the fridge for freshness.
Equipment Needed
- Baking pan: A 9×13-inch pan works best; you could use two smaller pans if needed.
- Mixing bowls: A couple of large ones for mixing ingredients.
- Whisk: Handy for incorporating dry ingredients; a fork can work in a pinch!
- Hand mixer or stand mixer: For beating the butter and cream; a whisk will do if you’re feeling strong!
- Spatula: Perfect for spreading frosting evenly; a butter knife also serves well.
Variations of Pink Coconut Snowball Cake Bars
- Chocolate Coconut Snowball Bars: Replace half of the flour with additional cocoa powder for a richer chocolate flavor.
- Gluten-Free Option: Use a 1:1 gluten-free all-purpose flour blend in place of regular flour to make this delightful treat gluten-free.
- Dairy-Free Adaptation: Substitute the butter with coconut oil and use coconut milk instead of buttermilk for a dairy-free version.
- Lower Sugar Variation: Swap half of the granulated sugar for a sugar substitute like stevia or erythritol to reduce the sweetness.
- Fruity Twist: Add in some finely chopped pineapple or mango into the frosting for a tropical kick.
- Layered Bars: Bake the chocolate base in two separate pans and create layers with the frosting and colored coconut in between for a fun look.
Serving Suggestions
- Pair these delightful bars with a scoop of vanilla ice cream for a decadent dessert.
- Serve alongside a steaming cup of coffee or a refreshing iced tea to elevate your afternoon snack.
- For a stunning presentation, garnish each plate with fresh berries or a drizzle of chocolate sauce.
- These bars are also fantastic for potlucks, ensuring you’re the star of the dessert table!
FAQs about Pink Coconut Snowball Cake Bars
Can I make these bars ahead of time?
Absolutely! You can prepare these Pink Coconut Snowball Cake Bars a day in advance. Just keep them covered in the fridge to maintain freshness. They often taste even better after chilling overnight as the flavors meld beautifully.
What if I don’t have heavy whipping cream?
No worries at all! If you don’t have heavy whipping cream, you can substitute it with whipped topping for a lighter frosting. Alternatively, you can make a simple buttercream frosting using softened butter and powdered sugar.
How long will these bars last?
These bars can last up to a week when stored in an airtight container in the refrigerator. However, I doubt they’ll stick around that long—they’re just too delicious!
Can I use fresh coconut instead of shredded?
Yes, fresh coconut can elevate the flavor, but you’ll need to finely chop it and make sure it’s properly dried. Otherwise, it may make the cake too moist. Just be aware that the texture and flavor will be slightly different!
Is there a way to make these bars less sweet?
Definitely! You can reduce the sugar in the cake batter or frosting. Using a sugar substitute like stevia or erythritol in the frosting can help maintain sweetness without all the extra calories. Adjust as per your taste for a perfect balance!
Final Thoughts
There’s something truly special about making Pink Coconut Snowball Cake Bars. Each time I whip up a batch, I’m reminded that baking is a delightful escape from the daily hustle. The vibrant colors and fluffy layers bring smiles and a touch of joy to my family’s faces. Whether it’s for a gathering or just a sweet treat after dinner, these bars don’t just satisfy cravings; they create moments worth savoring. So next time you’re feeling a bit creative in the kitchen, remember these bars—they’re more than a recipe; they’re an experience of love and happiness!
Print
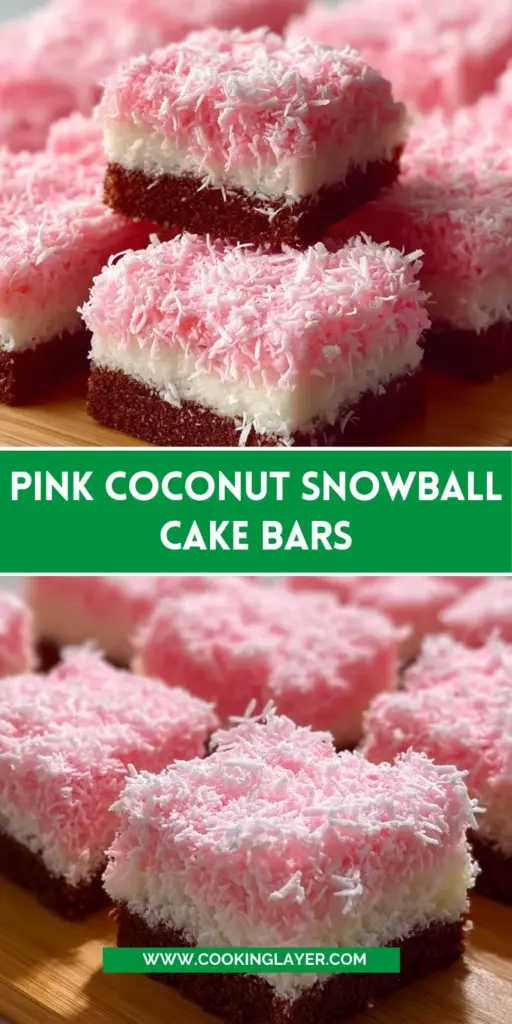
Pink Coconut Snowball Cake Bars
- Prep Time: 20 minutes
- Cook Time: 30 minutes
- Total Time: 1 hour 50 minutes
- Yield: 12 servings 1x
- Category: Dessert
- Method: Baking
- Cuisine: American
- Diet: Vegetarian
Description
Delicious and visually stunning Pink Coconut Snowball Cake Bars, perfect for sweet cravings.
Ingredients
- 1 cup all-purpose flour
- ½ cup cocoa powder
- 1 tsp baking powder
- ½ tsp baking soda
- ½ tsp salt
- ½ cup unsalted butter (softened)
- 1 cup granulated sugar
- 2 large eggs
- 1 tsp vanilla extract
- ½ cup buttermilk
- ½ cup hot water
- 1 ½ cups heavy whipping cream
- ½ cup powdered sugar
- 1 tsp vanilla extract
- 8 oz cream cheese (softened, optional for stability)
- 2 cups shredded coconut (sweetened or unsweetened)
- 2–3 drops pink food coloring
- 1 tbsp milk (to moisten coconut if needed)
Instructions
- Preheat oven to 175°C (350°F).
- Grease and line a 9×13-inch baking pan.
- In a bowl, whisk together flour, cocoa, baking powder, baking soda, and salt.
- In another bowl, cream butter and sugar until fluffy.
- Add eggs and vanilla, beating well.
- Mix in dry ingredients alternately with buttermilk.
- Stir in hot water last for a smooth batter.
- Pour into pan and bake for 25–30 minutes, until a toothpick comes out clean. Cool completely.
- Beat cream cheese (if using) until smooth.
- Add heavy cream, powdered sugar, and vanilla, and whip until fluffy and spreadable.
- Spread evenly over cooled cake base.
- Place shredded coconut in a bowl.
- Add a few drops of pink food coloring and mix until evenly tinted.
- Add a splash of milk if needed to help color distribute.
- Sprinkle pink coconut evenly over the frosted cake.
- Press lightly to stick.
- Refrigerate for at least 1 hour before slicing into squares.
- Cut into neat bars and enjoy chilled.
Notes
- Optional: Add cream cheese for enhanced stability of the frosting.
- Ensure that the cake is completely cool before frosting.
- Adjust the amount of pink food coloring to achieve desired hue.
Nutrition
- Serving Size: 1 bar
- Calories: 320
- Sugar: 22g
- Sodium: 180mg
- Fat: 20g
- Saturated Fat: 12g
- Unsaturated Fat: 6g
- Trans Fat: 0g
- Carbohydrates: 35g
- Fiber: 1g
- Protein: 3g
- Cholesterol: 70mg


