
Introduction to Raspberry Vanilla Tarts
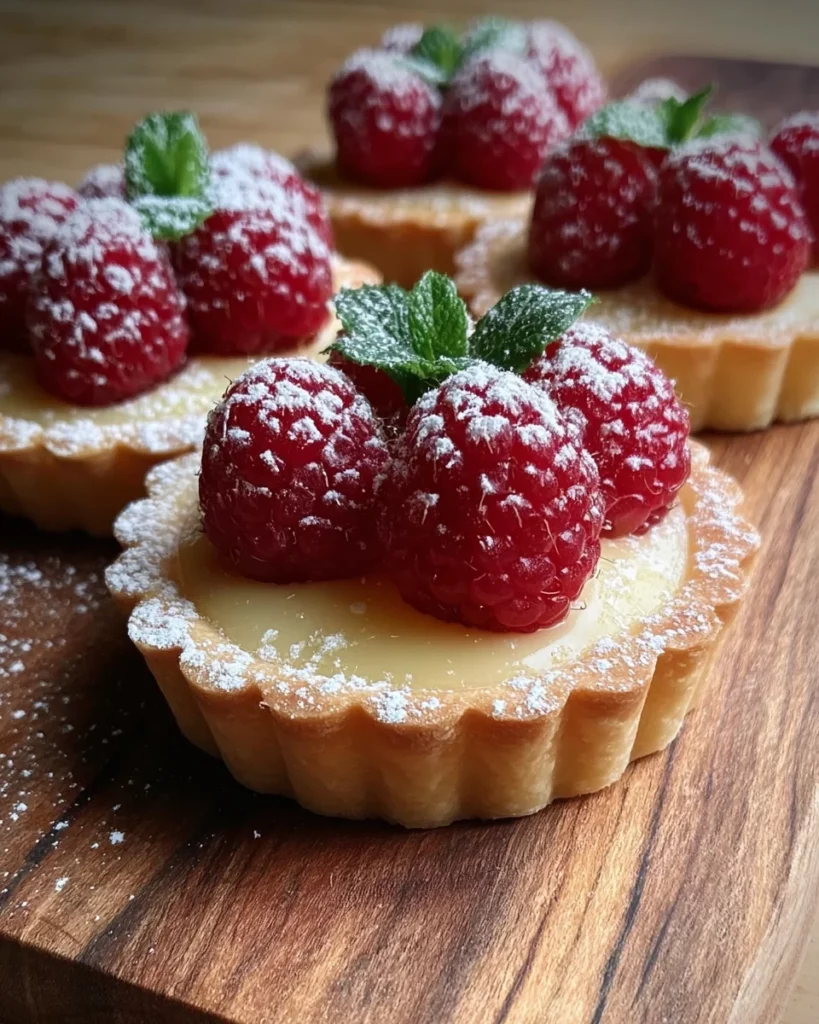
As I stood in my kitchen, the aroma of fresh vanilla wafting through the air, I couldn’t help but smile at the thought of Raspberry Vanilla Tarts. These delightful little treats are perfect for those busy days when you want something sweet to impress loved ones. With fresh raspberries and a creamy vanilla filling, they feel special but are surprisingly simple to make. They’re not just desserts; they’re an experience, a moment that says, “You deserve this.” Let’s dive into creating these tarts that will surely tickle your taste buds and warm your heart!
Why You’ll Love This Raspberry Vanilla Tarts
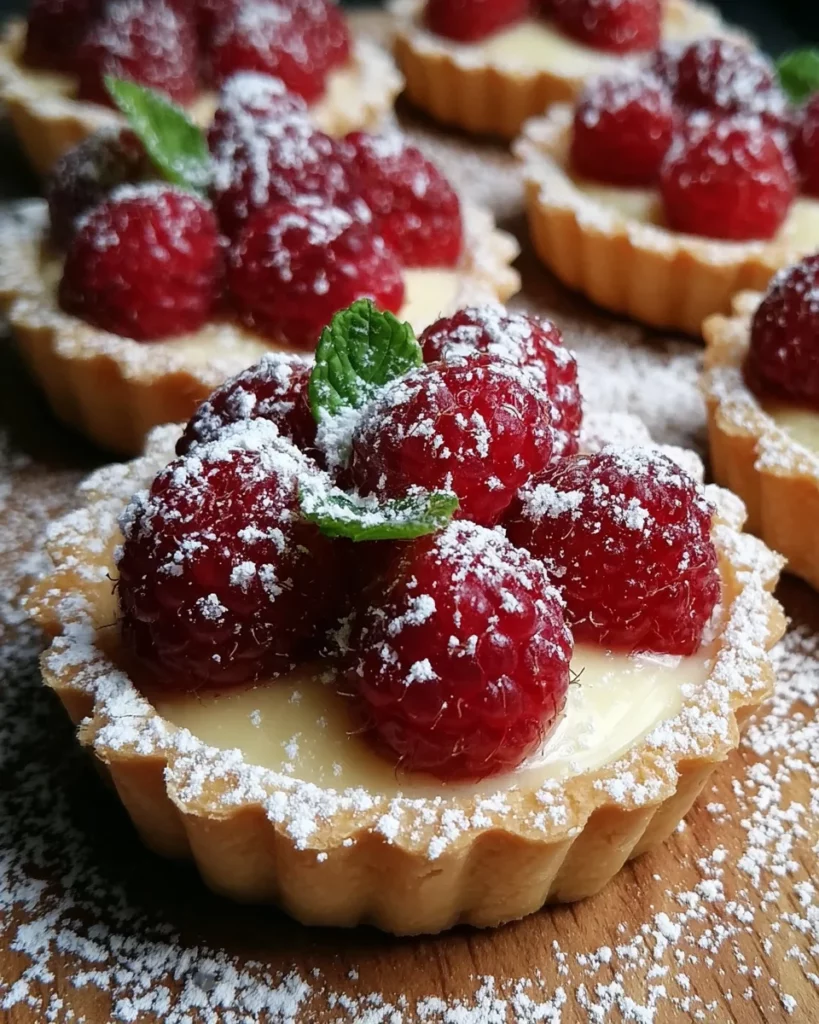
These Raspberry Vanilla Tarts are truly a dream come true for busy moms and professionals like us. Not only are they easy to whip up, but they also deliver a burst of flavor that elevates any meal. The combination of a buttery tart shell and luscious vanilla filling topped with fresh raspberries creates a dessert that’s not just delicious but visually stunning too. It’s a sweet escape amidst our hectic lives!
Ingredients for Raspberry Vanilla Tarts
Let’s gather all the delicious components for our Raspberry Vanilla Tarts. Each ingredient plays a vital role, and I love sharing my thoughts on them!
- All-purpose flour: A versatile staple that forms the tart shell, giving it a buttery structure.
- Powdered sugar: This adds a sweet touch to the tart crust, making it tender and delightful.
- Unsalted butter: The key to a rich, flaky tart shell. Be sure to let it soften so it mixes easily.
- Egg yolk: It enriches the dough, providing a lovely color and smooth texture for the crust.
- Vanilla extract: A hint of warmth that flavors both the crust and the filling, infusing everything with sweetness.
- Heavy cream: This creates the luxurious vanilla filling that will have everyone coming back for more.
- Milk: Balances out the cream for just the right consistency — creamy but not too heavy.
- Granulated sugar: Sweetens the filling, enhancing the flavors of both the vanilla and raspberries.
- Egg yolks: Added again here! They contribute to thickening the vanilla filling perfectly.
- Cornstarch: A thickener that ensures our filling has the right, silky smooth consistency. Essential for the final touch.
- Fresh raspberries: The star of the show! Their tartness complements the sweetness of the filling delightful.
- Optional: Mint leaves: A fresh garnish that adds a pop of color and a refreshing element to the presentation.
Remember, if you need to, you can substitute fresh raspberries with your favorite berries, such as blueberries or strawberries. The exact measurements are waiting at the bottom of the article for easy printing!
How to Make Raspberry Vanilla Tarts
Now, let’s roll up our sleeves and get into the heart of the matter: making these heavenly Raspberry Vanilla Tarts! With just a bit of patience, you’ll create a dessert that’s bound to impress. Follow these steps, and you’ll see just how simple it can be.
Step 1: Preheat the Oven
Start by preheating your oven to 350°F (175°C). This is crucial for achieving that perfect golden crust. While you mix your ingredients, the oven warms up, saving you precious time. A warm oven welcomes your tart shells to the baking party — they’ll love it!
Step 2: Make the Tart Shell
In a mixing bowl, combine the all-purpose flour and powdered sugar. Then, add the softened unsalted butter. Mix it all together until it resembles a crumbly texture. Next, stir in the egg yolk and vanilla extract until the dough holds together nicely. Trust me, it will feel like magic!
Now, take your tartlet pans and gently press this beautiful dough into the bottom and up the sides. Don’t forget to prick the base with a fork! This little step helps prevent bubbles while baking, ensuring a smooth surface for your filling.
Step 3: Bake the Shells
Bake your prepared tart shells in the preheated oven for 15 to 20 minutes. You want them to be golden brown, not too dark! When they’re done, let them cool on a wire rack. They should feel firm yet tender—like a cozy hug for your delicious filling!
Step 4: Prepare the Vanilla Filling
In a saucepan, combine the heavy cream and milk. Heat it on medium, but don’t let it boil. Meanwhile, take a separate bowl and whisk together the granulated sugar, egg yolks, and cornstarch. This creates a perfect blend that’ll thicken beautifully.
Slowly pour the warm cream mixture into the egg mixture, whisking continuously. This is essential to keep those eggs from scrambling—a little culinary dance here makes all the difference!
Step 5: Thicken the Filling
Return the mixture to the saucepan and cook over low heat. Stir constantly to avoid sticking. You’re looking for a custard-like consistency, which will take about 5-7 minutes. Once thickened, remove from heat and add in that comforting splash of vanilla extract.
Step 6: Fill the Tarts
Now, pour that velvety filling into your cooled tart shells. Fill them just below the top to avoid any overflow. Patience pays off here! Allow the tarts to refrigerate for at least 2 hours. This is when the magic happens, and they set beautifully!
Step 7: Top with Raspberries
When you’re ready to serve, it’s time to crown your tarts with fresh raspberries. Arrange them on top of the vanilla filling in a stylish manner. Feel free to go wild with creativity; a bit of artistry makes it all the more irresistible!
Step 8: Garnish and Serve
Finally, consider adding a sprig of mint for that extra touch of elegance. It looks stunning and adds a refreshing note that complements the sweet-tart harmony of the tarts. Your guests will be enthralled, and you’ll be the star of the dessert table!
Tips for Success
- Always use softened butter for easy mixing — it helps create a tender crust.
- Let your tart shells cool completely before adding the filling to avoid sogginess.
- For cleaner slices, use a warm knife to cut through the tart.
- Experiment with different berries for unique flavors; blackberries or strawberries work beautifully.
- Serve the tarts chilled, so the filling remains firm and fresh!
Equipment Needed
- Tartlet pans (or use a muffin tin for a different shape!)
- Mixing bowls in various sizes to handle different ingredients
- Whisk for smooth mixing of the fillings
- Rubber spatula for scraping every last bit of deliciousness
- Wire rack for cooling the tart shells perfectly
Variations of Raspberry Vanilla Tarts
- Chocolate Ganache Tarts: Replace half the vanilla filling with rich chocolate ganache for a decadent twist.
- Fruit Medley: Use a mixture of berries like strawberries, blueberries, and blackberries to create a colorful topping.
- Dairy-Free Option: Substitute heavy cream and milk with coconut cream and almond milk for a dairy-free alternative.
- Gluten-Free Tarts: Use a gluten-free flour blend in place of all-purpose flour for a gluten-free option.
- Nutty Crust: Add ground almonds or hazelnuts to the tart shell for a delightful crunch and nutty flavor.
Serving Suggestions
- Pair your Raspberry Vanilla Tarts with a scoop of vanilla ice cream for a delightful contrast.
- Serve alongside a light, bubbly Prosecco or a refreshing iced tea.
- For elegant presentation, dust with powdered sugar and add fresh mint leaves on plates.
- Consider a side of whipped cream to enhance the creamy filling experience.
FAQs about Raspberry Vanilla Tarts
Can I make Raspberry Vanilla Tarts in advance?
Absolutely! These tarts can be made a day ahead of time. Just bake the shells and prepare the filling, then let them chill in the fridge. Top with fresh raspberries just before serving for the best presentation!
What can I substitute for fresh raspberries?
If fresh raspberries aren’t available, feel free to swap them for other berries, like blueberries or strawberries. You could even mix different berries for a beautiful, colorful topping!
How can I ensure my tart shells don’t get soggy?
Let the tart shells cool completely before adding the filling. Pricking the base with a fork also allows steam to escape, helping maintain their delightful crunch. A fully baked, cooled shell is key!
What should I do if the filling is too runny?
If your vanilla filling doesn’t thicken properly, you might want to cook it a little longer while stirring. Aim for that custard-like thickness to achieve the perfect texture in every bite.
Can I freeze Raspberry Vanilla Tarts?
I’d recommend freezing the tart shells only. Once they’re baked and fully cooled, wrap them well and store them in the freezer. Just fill them fresh when you’re ready to serve — it’s totally worth it!
Final Thoughts
Creating these Raspberry Vanilla Tarts brings a sprinkle of joy to my busy life as a home cook. Each bite is a celebration, with the sweet-tart raspberries dancing on your palate and the creamy filling melting away like a warm hug. These tarts aren’t just desserts; they are little love letters to my family, shared with laughter and conversation. Whether it’s a gathering or a quiet evening at home, they bring smiles all around. So, grab your ingredients and dive into this delightful baking adventure — you’ll be so glad you did!
Print
Raspberry Vanilla Tarts
- Prep Time: 30 minutes
- Cook Time: 20 minutes
- Total Time: 2 hours 50 minutes
- Yield: 12 tarts 1x
- Category: Dessert
- Method: Baking
- Cuisine: American
- Diet: Vegetarian
Description
Delightful Raspberry Vanilla Tarts perfect for any dessert occasion.
Ingredients
- 1 ½ cups all-purpose flour
- ½ cup powdered sugar
- ½ cup unsalted butter, softened
- 1 egg yolk
- 1 teaspoon vanilla extract
- 1 cup heavy cream
- 1 cup milk
- ½ cup granulated sugar
- 1 teaspoon vanilla extract
- 3 egg yolks
- 1 tablespoon cornstarch
- 2 cups fresh raspberries
- Optional: Mint leaves for garnish
Instructions
- Preheat the Oven: Set your oven to 350°F (175°C).
- Make the Tart Shell: In a mixing bowl, combine the flour and powdered sugar. Add softened butter and mix until crumbly. Stir in egg yolk and vanilla extract until the dough holds together. Press the dough into tartlet pans and prick with a fork.
- Bake the Shells: Bake for 15-20 minutes until golden. Remove from the oven and let them cool.
- Prepare the Vanilla Filling: In a saucepan, combine milk and cream. Heat, but don’t boil. In a separate bowl, whisk together sugar, egg yolks, and cornstarch. Slowly add the heated cream mixture into the egg mixture, whisking constantly.
- Thicken the Filling: Return the mixture to the saucepan and cook over low heat until thickened, stirring constantly. Remove from heat and stir in vanilla extract.
- Fill the Tarts: Pour the vanilla filling into the cooled tart shells. Refrigerate for at least 2 hours until set.
- Top with Raspberries: Once the filling is set, arrange fresh raspberries on top just before serving.
- Garnish and Serve: Optional: Garnish with mint leaves for a touch of elegance. Enjoy!
Notes
- Ensure the tart shells are completely cooled before filling them.
- You can make the tart shells a day in advance.
- Fresh raspberries can be replaced with other berries of your choice.
Nutrition
- Serving Size: 1 tart
- Calories: 280
- Sugar: 15g
- Sodium: 120mg
- Fat: 16g
- Saturated Fat: 10g
- Unsaturated Fat: 4g
- Trans Fat: 0g
- Carbohydrates: 30g
- Fiber: 2g
- Protein: 4g
- Cholesterol: 80mg


