A Playful Twist on Classic Cheesecake
If you’re looking for a dessert that’s as fun to make as it is to eat, look no further than the Rice Krispy Treat No-Bake Cheesecake. It’s a mashup of two childhood favorites — gooey marshmallow cereal treats and rich, creamy cheesecake — all layered together in one irresistible no-bake masterpiece.
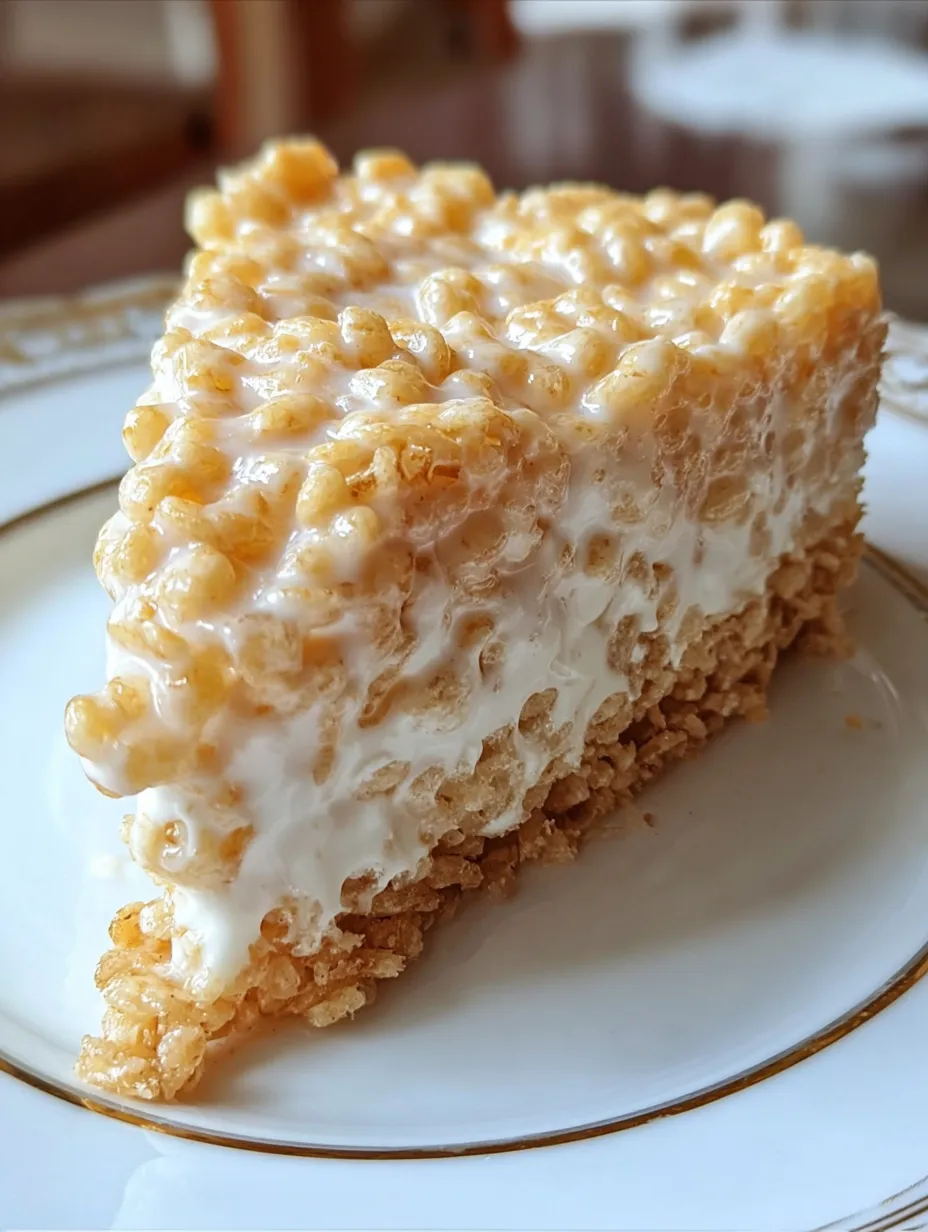
With a buttery, marshmallow-coated Rice Krispy crust and a fluffy cheesecake filling made with cream cheese, vanilla, and marshmallow crème, this dessert is pure joy from start to finish. It’s light, sweet, and perfectly nostalgic — like a bite of your favorite childhood snack reinvented for grown-up dessert lovers.
Whether it’s for a birthday party, family gathering, or just a fun weekend treat, this cheesecake is guaranteed to make everyone smile (and ask for seconds).
Why You’ll Love This Rice Krispy Treat No-Bake Cheesecake
This recipe is everything a dessert should be — easy, delicious, and impressive. Here’s why you’ll absolutely adore it:
- No Oven Needed: Perfect for hot days or when you just don’t feel like baking.
- Fun and Nostalgic: Combines the flavors of Rice Krispy Treats with creamy cheesecake filling.
- Light and Fluffy Texture: Thanks to Cool Whip and marshmallow crème, the filling is dreamy and cloud-like.
- Customizable: Add toppings, drizzle chocolate, or mix in candy for your own creative spin.
- Kid-Approved: It’s a treat that makes everyone — from toddlers to grandparents — light up with delight.
Plus, it looks as good as it tastes! With a crunchy golden crust and pillowy white filling, it’s a show-stopping dessert that’s surprisingly easy to make.
The Perfect No-Bake Dessert for Every Occasion
This no-bake cheesecake fits just about any celebration. It’s quick to prepare, requires no fancy baking skills, and holds beautifully when chilled. You can whip it up for:
- Birthday parties 🍰
- Baby showers 👶
- Holiday gatherings 🎄
- Summer barbecues ☀️
- Lazy weekend desserts 🥄
It’s sweet without being too heavy, making it ideal for after-dinner indulgence or mid-afternoon snacking. And because it’s a no-bake dessert, it’s nearly foolproof — just mix, chill, and enjoy!
Ingredients You’ll Need for This Fun and Creamy Dessert
Let’s get everything ready before diving in. You’ll be surprised how simple this list is!
For the Crust:
- 6 cups Rice Krispies cereal: The star ingredient that adds crunch and nostalgia.
- ¼ cup salted butter: Balances sweetness and binds the crust.
- 1 (10 oz) bag miniature marshmallows: Melty, gooey goodness that holds everything together.
For the Filling:
- 1 (8 oz) block cream cheese, softened: The creamy base of your cheesecake.
- ½ cup granulated sugar: Adds just the right sweetness.
- 1 tsp pure vanilla extract: Gives warmth and depth of flavor.
- 1 (7 oz) jar marshmallow crème: Adds fluffiness and a hint of nostalgic sweetness.
- 1 (8 oz) tub Cool Whip, thawed: Creates that light, airy texture.
For the Garnish (Optional but Highly Recommended):
- Whipped cream: Adds elegance and creaminess.
- Cubed Rice Krispy Treats: For an adorable, crunchy topping.
Essential Kitchen Tools and Equipment
Here’s what you’ll need for smooth, mess-free preparation:
- 9- or 10-inch springform pan
- Mixing bowls (large and medium)
- Saucepan (for melting butter and marshmallows)
- Rubber spatula or wooden spoon
- Electric mixer or stand mixer
- Measuring cups and spoons
- Nonstick cooking spray
Once you’ve got these ready, you’re just steps away from dessert bliss!
Step-by-Step Directions for the Perfect Rice Krispy Treat Cheesecake
1. Preparing the Pan
Start by generously greasing your 9- or 10-inch springform pan with nonstick spray. This step ensures your crust won’t stick when it’s time to serve your masterpiece.
2. Making the Crust
In a medium saucepan over low heat, melt the butter and mini marshmallows, stirring constantly until the mixture is smooth and glossy. The key here is low and slow — you want the marshmallows to melt evenly without burning.
Once melted, immediately pour this marshmallow mixture over your Rice Krispies cereal in a large bowl. Quickly stir to coat every piece before it sets.
3. Shaping and Setting the Base
Transfer the sticky cereal mixture into your prepared pan. Using a greased spatula or the bottom of a glass, press it firmly into the bottom and slightly up the sides to form a thick, sturdy crust.
Let it cool and set for about 15–20 minutes at room temperature before adding the filling.
4. Whipping Up the Cheesecake Filling
In a large mixing bowl or stand mixer, beat together the cream cheese, sugar, and vanilla extract until smooth and creamy — about 1 minute.
Add in the marshmallow crème and continue mixing until fully combined. Finally, gently fold in the Cool Whip using a spatula. This step is important — folding instead of mixing preserves the airy texture that makes this cheesecake so light and fluffy.
5. Assembling the Layers
Pour your cheesecake filling over the Rice Krispy crust and spread it evenly using an offset spatula or the back of a spoon. Smooth the top for that perfect finish.
6. Chilling to Set
Refrigerate your cheesecake for at least 2 hours (overnight is even better) until the filling firms up and holds its shape when sliced.
7. Decorating and Serving
Before serving, add a decorative touch! Pipe or dollop whipped cream around the edge and sprinkle cubed Rice Krispy Treats on top for extra fun and crunch.
To slice cleanly, dip your knife in warm water and wipe it between each cut. The result? Perfect, picture-worthy slices every time.
The Secret to a Stable No-Bake Cheesecake
The magic of a no-bake cheesecake lies in its creamy-yet-firm texture—it should be rich enough to hold its shape but soft enough to melt in your mouth. The trick? Balance and chill time.
In this recipe, marshmallow crème and Cool Whip play a vital role. They act as natural stabilizers, helping the filling set without gelatin or baking. The cream cheese provides structure, while the sugar and vanilla create that signature cheesecake flavor.
Make sure your cream cheese is at room temperature before mixing—it prevents lumps and ensures a silky-smooth consistency. After assembling, the cheesecake needs at least 2 hours in the fridge, but overnight chilling delivers the best texture and flavor. The longer it chills, the firmer and creamier it becomes.
Pro tip: If your kitchen is warm, pop the crust into the fridge for 10–15 minutes before adding the filling. This helps the crust hold its crisp texture and prevents sogginess.
How to Keep the Rice Krispy Crust Perfectly Crunchy
A common issue with no-bake desserts is a soggy crust. But don’t worry—this recipe has you covered. Here are a few pro tips for keeping your Rice Krispy crust crunchy and firm:
- Work Quickly: Once the marshmallow mixture is melted, combine it with the cereal and press it into the pan immediately before it hardens.
- Cool the Crust Before Filling: Give the crust at least 15–20 minutes to set and cool before adding the cheesecake filling.
- Avoid Overfilling: Spread the filling evenly without pressing it down too hard—gentle layering prevents the crust from compacting.
- Keep It Cold: Store the cheesecake in the refrigerator until ready to serve. Chilling maintains both texture and crunch.
That perfect bite—crispy, marshmallowy base with cool, creamy filling—is what makes this dessert unforgettable.
Creative Flavor Variations
Feeling inspired? Once you master the base recipe, there are endless ways to customize your Rice Krispy Treat No-Bake Cheesecake. Here are a few irresistible variations:
1. Chocolate Peanut Butter Rice Krispy Cheesecake
Add 2 tablespoons of peanut butter to the marshmallow mixture before mixing with the Rice Krispies, and swirl in melted chocolate into the cheesecake filling. Top with peanut butter cups or chocolate drizzle for the ultimate indulgence.
2. Strawberry Shortcake Rice Krispy Cheesecake
Mix in diced strawberries or strawberry puree with the cheesecake filling. Add crushed freeze-dried strawberries to the crust for a fruity crunch. Top with whipped cream and strawberry slices for a fresh finish.
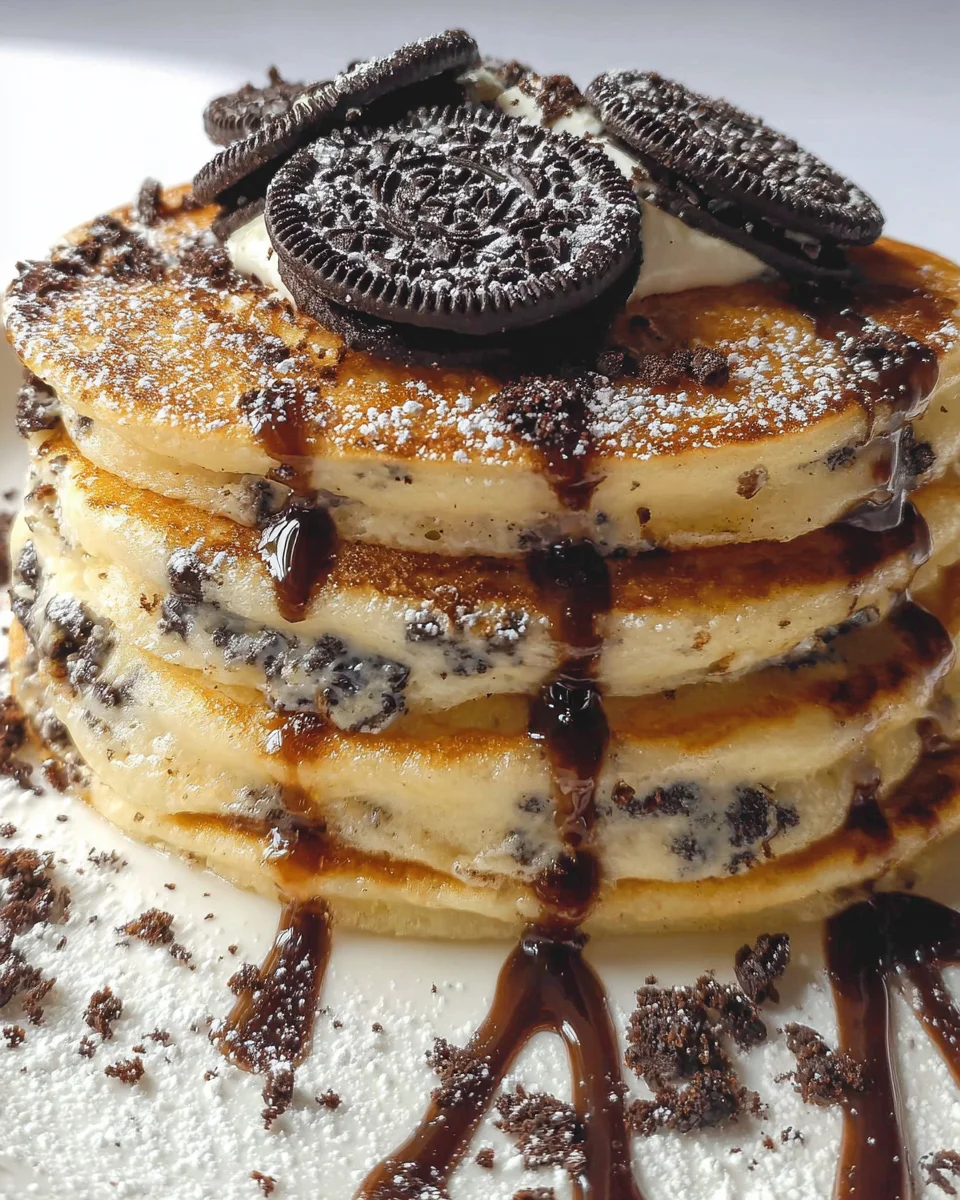
3. Cookies and Cream Krispy Cheesecake
Stir in crushed chocolate sandwich cookies into both the Rice Krispy crust and the filling. The combination of cookies, cream cheese, and crispy texture makes this version taste like a dream!
Tips and Tricks for No-Bake Dessert Success
Want to make sure your cheesecake turns out flawless every time? Here’s how to nail this recipe like a pro:
- Use fresh Rice Krispies: Old cereal loses crunch, which affects the texture of your crust.
- Don’t skip the chill time: It’s tempting to dig in early, but patience pays off with firm, creamy slices.
- Soften your cream cheese: Cold cream cheese can cause lumps—take it out 30–45 minutes before mixing.
- Fold, don’t whip: When adding Cool Whip, gently fold to keep the filling airy and light.
- Cut with a warm knife: Dip your knife in warm water before slicing for smooth, clean cuts every time.
With these small but mighty tips, your cheesecake will look bakery-perfect and taste even better.
Print
Rice Krispy Treat No-Bake Cheesecake
- Prep Time: 25 minutes
- Cook Time: 10 minutes
- Total Time: 2 hours 35 minutes
- Category: Dessert
Description
🍭 A fun, no-bake dessert that combines the gooey delight of Rice Krispy treats with creamy cheesecake! Perfect for kids, parties, or whenever you want a playful treat. 😋🎉
Ingredients
For the Crust:
6 cups Rice Krispies cereal
¼ cup salted butter
1 (10 oz) bag miniature marshmallows
For the Filling:
1 (8 oz) block cream cheese, softened
½ cup granulated sugar
1 tsp pure vanilla extract
1 (7 oz) jar marshmallow crème (e.g., Fluff)
1 (8 oz) tub Cool Whip, thawed
For Garnish (optional):
Whipped cream (homemade or canned)
Cubed store-bought or homemade Rice Krispy Treats
Instructions
Prep the Pan: Generously grease a 9- or 10-inch springform pan with nonstick spray. Set aside. ⏱️ 5 minutes
Make the Crust: In a large bowl, add the Rice Krispies cereal. In a medium saucepan over low heat, melt the butter and marshmallows together, stirring constantly until smooth and fully combined. Immediately pour this mixture over the cereal and stir until evenly coated. ⏱️ 10 minutes
Form the Crust: Transfer the sticky cereal mixture into the prepared springform pan. Using a greased glass or spatula, firmly press it into the bottom and slightly up the sides to create a sturdy crust. Let it set at room temperature. ⏱️ 15–20 minutes
Prepare the Filling: In a stand mixer or large bowl, beat the softened cream cheese, sugar, and vanilla until smooth and creamy (about 1 minute). Add the marshmallow crème and mix until fully incorporated. Gently fold in the Cool Whip by hand using a spatula to preserve its airy texture. ⏱️ 5–7 minutes
Assemble: Pour the filling into the set crust and smooth the top with an offset spatula or the back of a spoon. ⏱️ 5 minutes
Chill: Refrigerate for at least 2 hours, or until the filling is firm and holds its shape when sliced. ❄️⏱️ 2 hours
Garnish & Serve: Before serving, pipe or dollop whipped cream around the edge and top with cubed Rice Krispy Treats for a playful finish. Carefully release the springform collar and slice with a warm knife for clean cuts. ⏱️ 5–10 minutes
Notes
Room Temperature Ingredients 🧈: Make sure your cream cheese is fully softened before mixing. This ensures a smooth, lump-free filling.
Press the Crust Firmly 🍚: When forming the crust, press it firmly and evenly into the pan. This helps it hold together and support the creamy filling.
Cool Whip Folding 🍦: Gently fold in the Cool Whip by hand instead of using a mixer. This preserves its light, airy texture in the cheesecake.
Warm Knife for Slicing 🔪: Dip your knife in hot water and wipe it clean before each cut. This gives you smooth, clean slices without cracking the cheesecake.
Add Toppings Last Minute 🎉: For the freshest texture, add whipped cream and cubed Rice Krispy treats just before serving to keep them from becoming soggy.
Storage Tips ❄️: Store leftover cheesecake in the fridge, covered tightly, for up to 3–4 days. You can also freeze for up to a month, but garnish after thawing.
Nutrition
- Serving Size: 10 servings
- Calories: 420 kcal
How to Store and Freeze Your Cheesecake
Because this cheesecake is no-bake, it stores beautifully!
- In the refrigerator: Cover tightly with plastic wrap or place in an airtight container. It will stay fresh for up to 5 days.
- In the freezer: Wrap slices individually or freeze the whole cheesecake for up to 2 months. When ready to serve, thaw in the refrigerator overnight.
Avoid freezing with whipped cream topping — add that after thawing for best presentation.
You may read also :
Christmas Sugar Cookie Cheesecake Recipe
Cookie Butter Cheesecake Cups – The Ultimate No-Bake Dessert You’ll Crave Forever
Ultimate Strawberry Cheesecake Dump Cake Recipe
Serving Ideas for Parties and Holidays
This playful cheesecake is perfect for any event, but here are a few fun ideas to elevate your dessert table:
- Birthday Parties: Top with colorful sprinkles or drizzle with melted white chocolate for a festive touch.
- Summer Gatherings: Add a tropical twist by mixing in shredded coconut and pineapple bits.
- Holiday Dessert Bars: Cut into mini squares for bite-sized cheesecake bars—ideal for guests to grab and enjoy.
- Family Movie Night: Serve with chocolate sauce or caramel drizzle for a cozy, indulgent treat.
Presentation tip: Garnish with mini Rice Krispy Treat cubes on top of whipped cream swirls—it looks stunning and adds that playful crunch.
Common Mistakes to Avoid
Even though this recipe is easy, a few common slip-ups can affect your results. Avoid these pitfalls:
- Overmixing the filling: It can deflate the Cool Whip and make the texture too dense.
- Not greasing the pan: The crust may stick and break apart when removing the cheesecake.
- Skipping chill time: The cheesecake won’t firm up properly, leading to a runny center.
- Pressing the crust too hard: Compacting it too tightly can make it overly hard when set.
- Adding filling to a warm crust: Always let the crust cool completely before layering.
A few mindful steps make the difference between a decent dessert and a show-stopping centerpiece.
Why This Dessert Is a Crowd Favorite (Especially for Kids!)
This Rice Krispy Treat No-Bake Cheesecake is the ultimate crowd-pleaser because it hits every nostalgic note while offering creamy sophistication. Kids love the sweet, crunchy crust and marshmallow flavor, while adults appreciate the creamy cheesecake layer and light, mousse-like texture.
It’s also perfect for getting little helpers involved. Let kids press the crust, stir the marshmallows, or decorate the top—it’s fun, messy, and absolutely rewarding.
Plus, since it doesn’t require baking or sharp tools, it’s a safe and simple dessert for family cooking sessions. The end result? Smiles all around and an empty dessert plate in record time.
Similar recipes people read also :
Sweet Potato Cheesecake
Mini Pineapple Upside Down Cheesecakes
No-Bake Pumpkin Cheesecake Balls
Frequently Asked Questions
Q1: Can I use homemade whipped cream instead of Cool Whip?
Yes! Whip 1 cup of heavy cream with 2 tablespoons of powdered sugar until soft peaks form, then fold it into the filling.
Q2: Can I make this recipe ahead of time?
Absolutely. It’s best made a day before serving—this allows the flavors to blend and the texture to set perfectly.
Q3: What can I use instead of marshmallow crème?
If you can’t find Fluff, you can melt 1 cup of mini marshmallows with 1 tablespoon of corn syrup as a substitute.
Q4: How do I make it gluten-free?
Use gluten-free crispy rice cereal and double-check that your marshmallows are gluten-free.
Q5: Can I add chocolate to the filling?
Definitely! Fold in mini chocolate chips or swirl in melted chocolate for a decadent twist.